CP-E TowPlate, BumperPlugs, and Wolo BadBoy air horn
Last Saturday I finally got up the guts to take off the front bumper and install the CP-E TowPlate (birthday present from April) and Wolo BadBoy dual-tone air horn (last-minute (as in "go ahead and get something from your upgrades wish list that's less than $50", and, while I didn't have any that were, I'd been thinking of adding it to the list) Father's day present).
I think I picked about the worst day to be outside in a hot garage working around and under a car -- sunny and nearly 90˚F with a dew point in the mid-70's. It was what I imagine it would be like walking around inside someone's mouth. I had to pause about every 5 minutes to wipe the sweat off my face and I had to take quite a few breaks to stay hydrated.
Started at ~2:30pm. Wasn't finished until 1:00am Sunday. Yeah. (ughdance)
The two steps that took the most time were taking off the bumper (after discovering that neither the instructions for the TowPlate nor the official Mazda Service Manual were complete in their descriptions of what to unscrew, unclip, unplug or remove and that the least complete was in fact the Service Manual) and figuring out how the hell I was going to fit that ginormous horn where the stock one fits, being that it's about 2.5x the size.
It turns out that (as I'm sure some of you know) there are no less than 19 screws, 6 fasteners (of two different types), 3 clips (5 if you count the two hook-style built-in clips that basically hang the bumper from the reinforcement bar) and 4 plugs that need to be disconnected before the bumper will be freed. And some of them (especially the clips holding the wiring harnesses) aren't as easy to remove as the instructions suggest. In fact, I instead had to use a small flat-head screwdriver to release the wiring harnesses from them rather than removing them from their moorings.
I ended up drilling out the hole in the stock horn mounting bracket to accommodate the 3/8" bolt for the Wolo. I also ended up mounting it with the bottom facing forward with the trumpets on the bottom instead of vertically as the instructions suggested ("mount vertically when possible" (emphasis mine)). And I ended up making two wires; one to connect to the factory positive wire and the other to ground under the factory mounting bolt for the bracket.
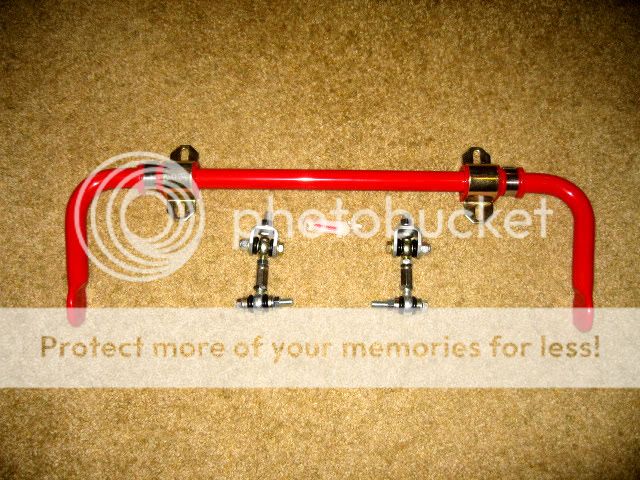
For the TowPlate, I followed the suggestion in the instructions and added a dab of red "permanent" (as in "parts must be heated to at least 500˚F in order to decouple") thread-locker to the base shaft's threads and a dab of blue thread-locker to the Allen bolt's threads. T'ain't goin' anywhere! I'm glad I installed it with the bumper off, too, because the base shaft was a tight fit into the tow-hook mounting hole (some of the powder coating got scraped off of the shaft by the top edge of the hole in the front of the reinforcement bar) so I had to use a box-end wrench to tighten it in as I don't have a deep-socket the right size for the nut and it would've been impossible to tighten with the bumper in place.
After I got everything back together, I put the TowPlate itself on. At first I was going to make it level with the ground, but that looked a bit odd with the curves of the bumper, so I matched it with them instead and that looks awesome (or at least much better; the bottom edge is parallel with the top of the fog lamp surround instead of partially blocking it).
Then I removed the plastic license plate holder and transferred the license plate to the TowPlate, drilled out the holes in the bumper a bit and popped in the BumperPlugs.
I thought about taking pictures, but it was already taking me forever to make progress (I'm a bit too meticulous sometimes), so I'll post some "after" shots later this week.