
You are using an out of date browser. It may not display this or other websites correctly.
You should upgrade or use an alternative browser.
You should upgrade or use an alternative browser.
What have you done to your CX-5 today?
- Thread starter Kayger12
- Start date
- :
- San Antonio, Texas
- :
- '15 CX-5 Miata AWD
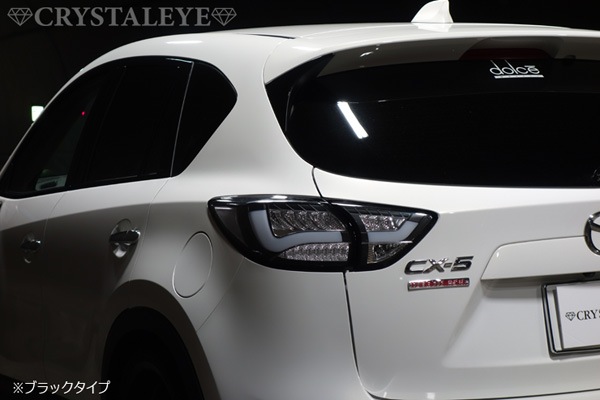
Noticed there are some crystal eye jp look alike son ebay now, https://www.ebay.com (commissions earned) (search "cx-5" In that store). They are about half the price of the crystal eye + shipping lights. They look a lot alike, but they are slightly different. Originally I wanted the clear from crystal eye but that's about $600 after shipping, pretty steep. It's probably just a variation sold by the OEM because some of the styles seem to be "exclusive" to crystal eye (and thus command a higher price). wouldn't touch the "smoked" styles because of ticket risk.
crystal eye
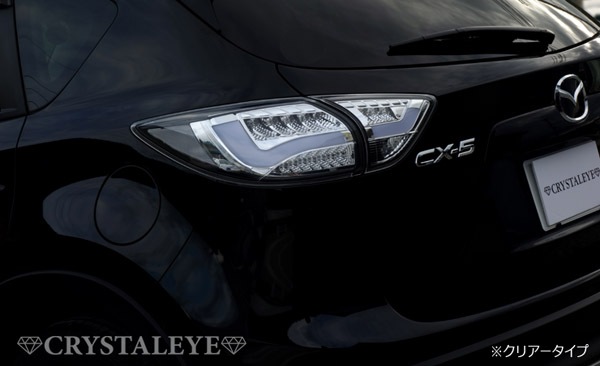
crystal eye, clear top, black bottom

comparable to the crystal eye black. this one is half price but red on the side, also the reverse light seems to be yellow instead of white.

crystal eye
crystal eye, clear top, black bottom
comparable to the crystal eye black. this one is half price but red on the side, also the reverse light seems to be yellow instead of white.
Last edited:
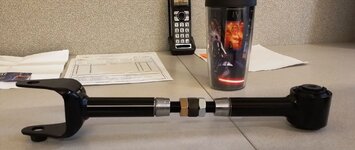
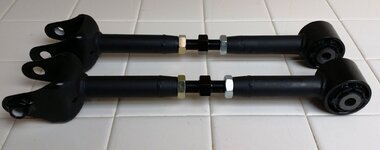
I have cut to the right length(same as original) and put together all the parts for the lateral link.
I will have to drill some holes through the pipe, where the "nut" are, to be able to weld it through those holes as well, for more strength.
Need to grind some chamfers, for the welding and they are off to the welder.
I'm leaving 2 x 1/2" threaded area for adjustment. Hopefully, it will be good enough. Anything less than 2 degrees, it should be better.
Attachments
- :
- San Antonio, Texas
- :
- '15 CX-5 Miata AWD
I have cut to the right length(same as original) and put together all the parts for the lateral link.
I will have to drill some holes through the pipe, where the "nut" are, to be able to weld it through those holes as well, for more strength.
Need to grind some chamfers, for the welding and they are off to the welder.
I'm leaving 2 x 1/2" threaded area for adjustment. Hopefully, it will be good enough. Anything less than 2 degrees, it should be better.
lol I should have waited and just bought from you

I have to see how it works first. IT's very easy to make.
I have listed the parts, that I have used.
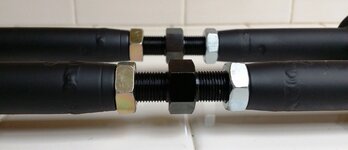
I have cut out 1.85" from each end, after cutting in half the lateral link(7" from the bushing's top).
Ground a 45 degree end for welding and drilled through a 1/4" hole at each end of the tubes.
So, it will be welded around, where the nut will meet the tube and where I have drilled the hole also will be welded, almost as a spot weld, for added strength.
I have dropped them off today. Tomorrow, they should be done for $20(!).
I will paint them and they are done.
Need to fix, a deep scratch on one of the wheels and I'm thinking of painting the edge machined part red.
Then, I will drop the car and get some tires.
I have listed the parts, that I have used.
I have cut out 1.85" from each end, after cutting in half the lateral link(7" from the bushing's top).
Ground a 45 degree end for welding and drilled through a 1/4" hole at each end of the tubes.
So, it will be welded around, where the nut will meet the tube and where I have drilled the hole also will be welded, almost as a spot weld, for added strength.
I have dropped them off today. Tomorrow, they should be done for $20(!).
I will paint them and they are done.
Need to fix, a deep scratch on one of the wheels and I'm thinking of painting the edge machined part red.
Then, I will drop the car and get some tires.
Looks good tibimakai [emoji106]. Some questions- where is the parts list? What is the inner silver area, a machined part of the arm? What's the purpose of it? The threaded inner bolt- each side of the thread are going the opposite way, yes? It will need to be to lengthen or shorten the arm.
- :
- San Antonio, Texas
- :
- '15 CX-5 Miata AWD
I ordered my mount on Saturday. I got the 70 because the vibes from the 80 would be too much for the wife when she drives the car.
How did you go about installing this? I'm a little pissed because with the awd you cant just slide the mount out because the rear diff is right above it. I'm thinking I may need to lower the subframe, which I really don't want to do. The instructions didn't mention this and ofc it showed the fwd version. Fwiw, I had the car on a ramp lift, but it seems that even on a 4 point with the suspension down it wont matter. I could be wrong but I had to leave for a flight so I didn't try it.
I sent you a message on Facebook. I'm away from the house right now but will follow up shortly.How did you go about installing this? I'm a little pissed because with the awd you cant just slide the mount out because the rear diff is right above it. I'm thinking I may need to lower the subframe, which I really don't want to do. The instructions didn't mention this and ofc it showed the fwd version. Fwiw, I had the car on a ramp lift, but it seems that even on a 4 point with the suspension down it wont matter. I could be wrong but I had to leave for a flight so I didn't try it.
- :
- San Antonio, Texas
- :
- '15 CX-5 Miata AWD
I'm guessing you are "N.B."? Thanks.I sent you a message on Facebook. I'm away from the house right now but will follow up shortly.
Finally picked my 2014 cx-5 after being at the dealer for almost a month because of the car randomly shutting down after accelerating from full throttle. They ended up replacing the crank pulley, bolt and belts to solve the problem. We'll see how this week goes. Hated the 2015 malibu eco they gave as a loaner,,,,,,
One side is left thread and the other is right thread, so by adjusting the center hex, the arm will shorten or extend.Looks good tibimakai [emoji106]. Some questions- where is the parts list? What is the inner silver area, a machined part of the arm? What's the purpose of it? The threaded inner bolt- each side of the thread are going the opposite way, yes? It will need to be to lengthen or shorten the arm.
In my case, I have to shorten it, since this arm is at the bottom.
https://www.ebay.com (commissions earned)
https://www.ebay.com (commissions earned)
https://www.ebay.com (commissions earned)
I'm painting them as we speak.
The welder, worked for JPL in the past.
The welding, looks great and the price it was even better. $20 cash.
I'm guessing you are "N.B."? Thanks.
Did you get a chance to try again on the mount? I didn't have any issue getting the old one out, but it took us a while to get the new one in because of how much the motor shifted without that rear mount in. Because I used ramps in my driveway, I ended up having to use a piece of wood placed vertically on the jack to lift the engine back up far enough to slide the bolt back in. I did not have to remove any other parts though. The only thing I took off the car for this was the plastic cladding underneath.
Nate
- :
- San Antonio, Texas
- :
- '15 CX-5 Miata AWD
I'm going to try again tomorrowDid you get a chance to try again on the mount? I didn't have any issue getting the old one out, but it took us a while to get the new one in because of how much the motor shifted without that rear mount in. Because I used ramps in my driveway, I ended up having to use a piece of wood placed vertically on the jack to lift the engine back up far enough to slide the bolt back in. I did not have to remove any other parts though. The only thing I took off the car for this was the plastic cladding underneath.
Nate
One side is left thread and the other is right thread, so by adjusting the center hex, the arm will shorten or extend.
In my case, I have to shorten it, since this arm is at the bottom.
https://www.ebay.com (commissions earned)
https://www.ebay.com (commissions earned)
https://www.ebay.com (commissions earned)
I'm painting them as we speak.
The welder, worked for JPL in the past.
The welding, looks great and the price it was even better. $20 cash.
This answers my questions and your finished product looks good. Not sure how durable the paint will be being under the vehicle. Powder coating would be more suitable. Seems like you and your welder did a great job, though. Cant wait to see the results when you install it and get it aligned. [emoji106]
- :
- San Antonio, Texas
- :
- '15 CX-5 Miata AWD
Couldn't get it on again. When I feel like messing around with it again, I'm going to lower the rear a bit (and thus the rear diff). Hopefully this will give me the clearance since I'm lowered and the suspension is closer to the body. If that doesn't give the clearance to remove the mm, there must have been a ninja design change in the way the shim is welded on.
- :
- San Antonio, Texas
- :
- '15 CX-5 Miata AWD
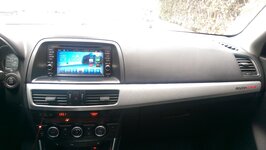
Installed aftermarket head unit (Android)
Is that from Ali Express? Also, are you able to access vehicle settings with it(light timers, auto headlight settings etc)?