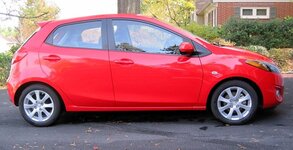
Sorry for the long delay, finally getting around to posting the front strut replacement. (so I've forgotten most of the fine details)
1) Jack up the front end, place on stands, remove front wheels.
Unbolt 2 lower bolts securing wheel/brake assy. to strut, wheel assy. will drop away so I supported it on some wooden blocks, remove brake line and upper tie rod (?) connector per pic:

2) Upper strut bolts - mark a strut bolt so you reinstall it in the same location. 14MM socket to remove the 3 strut nuts (I unbolted the brake fluid reservoir and moved it out of the way)

3) Remove the strut assembly. Secure the strut assembly in a vise or suitable device and completely compress the struts using "approved strut spring compressor device"
After the strut springs are compressed completely, you have to remove the upper strut nut off the rod......in lieu of special tool, I used a 17mm deep air socket with vise grip and 8mm allen wrench. (I first used a chromed socket and couldn't get enough grip on the socket so switched to the "iron" socket.) Hold rod with the allen wrench and loosen the upper rod nut, remove nut, remove hat and spring.

4)Eibach spring shown with stock strut spring. Eibach spring has thin plastic cover/bumper ...I removed the heavy grey OEM spring cover from stock spring and placed it in same top location on the Eibach (I assume it acts as a bumper when the strut bottoms out)

5)Reinstall spring on strut, install top "hat" and reinstall rod nut (I obviously could only hand tighten and used Blue Loctite...no problems) Make sure the lower spring fits into the notch on the strut assembly as shown in pic:

6)Release strut spring compressors (slowly) and make sure lower spring end stays in the strut notch. Re-install on car/ make sure upper strut bolts/hat go back to the original location using the paint alignment markings you put on prior to removing.
Install top strut nuts but don't tighten them completely until job is finished and car is back on the ground. Reinstall brake line, tie rod(?) connector and brake assy. and wheel.
SLOWLY lower the car to the ground and keep an eye on the strut spring as it compresses....you may have to turn the spring slightly to keep it in the lower strut notch. Tighten upper strut nuts when car is on the ground and settled. I forgot a few details like all the metric nut sizes and torques (used the Protege5 shop manual online for wheel to strut torques) Only hassle I had was removing the strut rod with make-shift socket and vise-grip and the spring wanting to rotate during reinstallation.
The End
1) Jack up the front end, place on stands, remove front wheels.
Unbolt 2 lower bolts securing wheel/brake assy. to strut, wheel assy. will drop away so I supported it on some wooden blocks, remove brake line and upper tie rod (?) connector per pic:
2) Upper strut bolts - mark a strut bolt so you reinstall it in the same location. 14MM socket to remove the 3 strut nuts (I unbolted the brake fluid reservoir and moved it out of the way)
3) Remove the strut assembly. Secure the strut assembly in a vise or suitable device and completely compress the struts using "approved strut spring compressor device"
After the strut springs are compressed completely, you have to remove the upper strut nut off the rod......in lieu of special tool, I used a 17mm deep air socket with vise grip and 8mm allen wrench. (I first used a chromed socket and couldn't get enough grip on the socket so switched to the "iron" socket.) Hold rod with the allen wrench and loosen the upper rod nut, remove nut, remove hat and spring.
4)Eibach spring shown with stock strut spring. Eibach spring has thin plastic cover/bumper ...I removed the heavy grey OEM spring cover from stock spring and placed it in same top location on the Eibach (I assume it acts as a bumper when the strut bottoms out)
5)Reinstall spring on strut, install top "hat" and reinstall rod nut (I obviously could only hand tighten and used Blue Loctite...no problems) Make sure the lower spring fits into the notch on the strut assembly as shown in pic:
6)Release strut spring compressors (slowly) and make sure lower spring end stays in the strut notch. Re-install on car/ make sure upper strut bolts/hat go back to the original location using the paint alignment markings you put on prior to removing.
Install top strut nuts but don't tighten them completely until job is finished and car is back on the ground. Reinstall brake line, tie rod(?) connector and brake assy. and wheel.
SLOWLY lower the car to the ground and keep an eye on the strut spring as it compresses....you may have to turn the spring slightly to keep it in the lower strut notch. Tighten upper strut nuts when car is on the ground and settled. I forgot a few details like all the metric nut sizes and torques (used the Protege5 shop manual online for wheel to strut torques) Only hassle I had was removing the strut rod with make-shift socket and vise-grip and the spring wanting to rotate during reinstallation.
The End


