Professor MSP
Member
- :
- 2003 Black Mica Mazdaspeed Protege
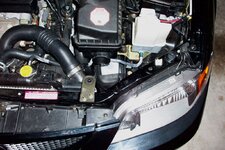
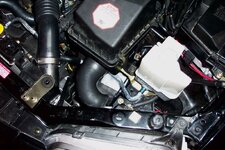
I installed a homemade H2O intercooler sprayer two weekends ago, and thought that many of you might be interested in my experience with the installation and my seat-of-the-pants take on the performance hike it provides. I should add that II-Savy was of great assistance via the private message system. Sorry, but I do not have pictures at present. They would not be that interesting anyway, seeing as I have the kit installed to be invisible as possible.
(1) Purchase a universal windshield washer kit from Napa for about $41. It includes most of what is required to do the job properly. I also saw the same kit for sale at Autozone. Also purchase 10 feet of wire from Lowes ($1.20), as it is required to mount the momentary switch in the cockpit (10 feet is more than enough, but it is inexpensive and leaves room for mistakes). In addition, go to Radio Shack and purchase a range of fuses (5 amp to 20 amp) and a waterproof in-line automotive plug-type fuse holder ($5.50 for both). This is required for correct installation. Finally, I suggest that you buy two mist sprayers designed for a drip irrigation system (I already had some, as I am an avid gardener) and two quarter-inch by eight-inch extension rods designed to mount the sprayers (this will only cost $5 or so). I would not use the sprayers that come with the windshield washer kit, for they pump out a stream of water rather than a fine mist. Finally, purchase 30 feet of insulating foam tape for about $9 at Lowes (optional, but more on this in a moment).
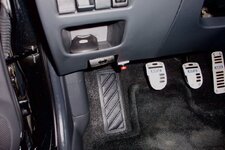
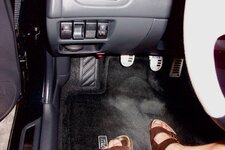
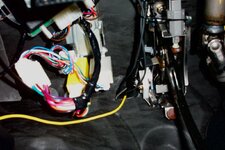
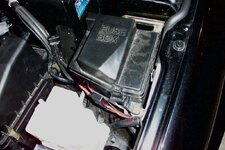
(2) Mount the bracket for the momentary switch in the cockpit just to the right of the hood release handle (this is where I did, and it is hidden nicely), or in one of the knock-out areas to the left of the steering wheel. Pass two wires through the grommet located on the drivers-side firewall. To locate the grommet, lay in the driver's footwell and look up to locate a yellow wire. This wire exits into the engine bay via the grommet. Puch a hole in the grommet with any sharp object (I used a nail countersink) and pass the two wires through. Connect the two wires to the switch and then mount the switch to the bracket. Place the in-line automotive fuse holder in one of the lines located in the engine bay, and place a 5 amp fuse in the fuse holder.
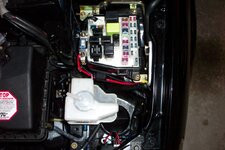
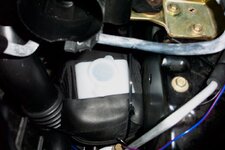
(3) Unbolt the stock air box and radiator overflow tank, and move them out of the way. Wrap the windshield washer reservoir with the aforementioned 30 feet of insulating foam tape (if so purchased) and connect the hoses per the instructions. I placed the reservoir down low in the engine bay below the air box, and used zip ties to hold it in place, using the frame and lower intercooler pipe for support.
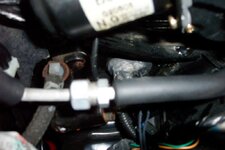
(4) Follow the wiring instructions that come with the kit. For the 12 volt source, I used the southwest bolt that appears once the fuse cover in the engine bay is removed. I ran the wires so they are nearly "invisible" and used zip ties to keep things nice and tidy.
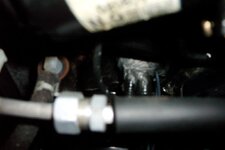
(5) Attach one end of the tee to the hose coming off of the reservoir, add hose to each section of the tee, attach the extension rods to the hose that comes off of the tee hoses, and then attach the mist sprayers to the extension rods. Position the mist sprayers in front of the intercooler. You will have to play around some with the positioning of the sprayers to get maximum coverage of the intercooler. Ask a friend to push the momentary button while you observe and adjust the position of the sprayers, which are best viewed from below the intercooler. I used a hot glue gun to secure the pieces together and fix the position of the sprayers. Reattach the radiator overflow tank and airbox.
I use a funnel and long-neck water can to fill the reservoir with (filtered) water, and find that I have to take off the Calloway elbow on the air box for proper access to the reservoir.
One time I filled the reservoir with ice cubes and water. I sprayed while approching a red light and again while stopped. I received a nontrivial additional kick-in-the-pants when I got on it while merging on the toll road. Moreover, three hours after adding the ice, and in 90 degree Florida heat and humidity, the water in the reservoir was still cold. My conclusion is that the 30 feet of insulating wrap apeears to work well!
I hope my notes prove to be beneficial to at least some of you.
(1) Purchase a universal windshield washer kit from Napa for about $41. It includes most of what is required to do the job properly. I also saw the same kit for sale at Autozone. Also purchase 10 feet of wire from Lowes ($1.20), as it is required to mount the momentary switch in the cockpit (10 feet is more than enough, but it is inexpensive and leaves room for mistakes). In addition, go to Radio Shack and purchase a range of fuses (5 amp to 20 amp) and a waterproof in-line automotive plug-type fuse holder ($5.50 for both). This is required for correct installation. Finally, I suggest that you buy two mist sprayers designed for a drip irrigation system (I already had some, as I am an avid gardener) and two quarter-inch by eight-inch extension rods designed to mount the sprayers (this will only cost $5 or so). I would not use the sprayers that come with the windshield washer kit, for they pump out a stream of water rather than a fine mist. Finally, purchase 30 feet of insulating foam tape for about $9 at Lowes (optional, but more on this in a moment).
(2) Mount the bracket for the momentary switch in the cockpit just to the right of the hood release handle (this is where I did, and it is hidden nicely), or in one of the knock-out areas to the left of the steering wheel. Pass two wires through the grommet located on the drivers-side firewall. To locate the grommet, lay in the driver's footwell and look up to locate a yellow wire. This wire exits into the engine bay via the grommet. Puch a hole in the grommet with any sharp object (I used a nail countersink) and pass the two wires through. Connect the two wires to the switch and then mount the switch to the bracket. Place the in-line automotive fuse holder in one of the lines located in the engine bay, and place a 5 amp fuse in the fuse holder.
(3) Unbolt the stock air box and radiator overflow tank, and move them out of the way. Wrap the windshield washer reservoir with the aforementioned 30 feet of insulating foam tape (if so purchased) and connect the hoses per the instructions. I placed the reservoir down low in the engine bay below the air box, and used zip ties to hold it in place, using the frame and lower intercooler pipe for support.
(4) Follow the wiring instructions that come with the kit. For the 12 volt source, I used the southwest bolt that appears once the fuse cover in the engine bay is removed. I ran the wires so they are nearly "invisible" and used zip ties to keep things nice and tidy.
(5) Attach one end of the tee to the hose coming off of the reservoir, add hose to each section of the tee, attach the extension rods to the hose that comes off of the tee hoses, and then attach the mist sprayers to the extension rods. Position the mist sprayers in front of the intercooler. You will have to play around some with the positioning of the sprayers to get maximum coverage of the intercooler. Ask a friend to push the momentary button while you observe and adjust the position of the sprayers, which are best viewed from below the intercooler. I used a hot glue gun to secure the pieces together and fix the position of the sprayers. Reattach the radiator overflow tank and airbox.
I use a funnel and long-neck water can to fill the reservoir with (filtered) water, and find that I have to take off the Calloway elbow on the air box for proper access to the reservoir.
One time I filled the reservoir with ice cubes and water. I sprayed while approching a red light and again while stopped. I received a nontrivial additional kick-in-the-pants when I got on it while merging on the toll road. Moreover, three hours after adding the ice, and in 90 degree Florida heat and humidity, the water in the reservoir was still cold. My conclusion is that the 30 feet of insulating wrap apeears to work well!
I hope my notes prove to be beneficial to at least some of you.
") now someone needs to do water injection
now someone needs to do water injection