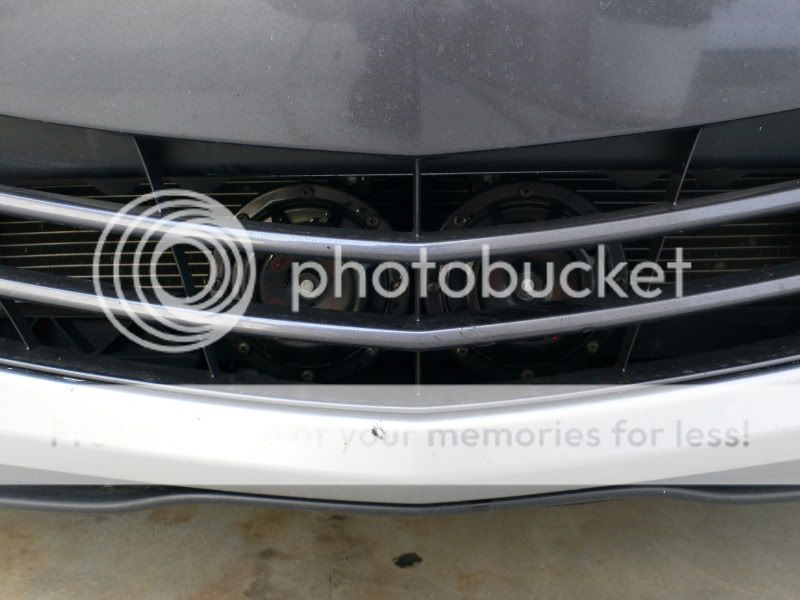
I was tried of my clown face having a clown voice, therefore I decided to up the volume. Below are the steps to replace your existing clown horn.
Parts that I used:
Five feet black wire for ground
Ten feet red wire for hot
One Tap/Ground Kit
One Wire Splitting Kit (hot to horns)
One In-line Fuse Kit with 20A glass fuse
Seven 90 degree Female Spade Connectors
Three Ring Terminals (grounding)
Miscellaneous mounting hardware, I used the following:
Two angle brackets Use the brackets only
Four 7 mm x 20 mm bolts (horn mounting)
Four 7 mm nuts with lock washers (horn mounting)
One 6mm nut with lock washer (relay ground)
All parts can be found at auto parts or hardware store, pick your favorite.

1. Disconnect negative cable from battery.
2. Remove Front Bumper
3. Locate and remove existing horn. We will use the hot wire to the horn to pull the coil on the relay.

4. Mount the SPST relay supplied with kit. I drilled out mounting hole on relay just slightly. I also used the old horn mounting screw for this item. If your new horn does not come with a cube relay, I would suggest purchasing ($6).
5. Run hot wire from positive battery terminal (Tap/Ground Kit) to the relay (common side of open set of contacts). This can also be done thru the fuse block. I added an inline fuse (20A) to protect the relay (rated at 30A), this was probably not needed as my horns will pull about 12A. I choose to run a new line in lieu of using the fuse box to avoid giving the dealership another reason to void my warranty.
Terminal Modification

Mounted View

With Hot Wire

6. Plug the existing horn signal to the relay coil input
7. Add ground wire to the relay and ground locally. There are a number of options for grounding in the area.

8. Run a hot wire from the relay to the area in which you will mount the new horn system. This wire will come off the back side of the relay contacts. I had two horns therefore I needed to split the hot wire. I added a splitting device inline, so I had independent hot to each horn.
Final Wiring of Relay

Area I ran hot wire to and mounted horns

9. Add mounting hardware to the new horn(s) and pre-wire the ground on the horn. Many horns are grounded through the mounting hardware, I choose to add an extra one.

10. Mount the new horn(s), terminate, reconnect battery negative and test (in my case, upset the neighbors).
Top View

Front View

If you have any questions about any of the parts/materials I used feel free to PM me with your question.
Parts that I used:
Five feet black wire for ground
Ten feet red wire for hot
One Tap/Ground Kit
One Wire Splitting Kit (hot to horns)
One In-line Fuse Kit with 20A glass fuse
Seven 90 degree Female Spade Connectors
Three Ring Terminals (grounding)
Miscellaneous mounting hardware, I used the following:
Two angle brackets Use the brackets only
Four 7 mm x 20 mm bolts (horn mounting)
Four 7 mm nuts with lock washers (horn mounting)
One 6mm nut with lock washer (relay ground)
All parts can be found at auto parts or hardware store, pick your favorite.

1. Disconnect negative cable from battery.
2. Remove Front Bumper
3. Locate and remove existing horn. We will use the hot wire to the horn to pull the coil on the relay.

4. Mount the SPST relay supplied with kit. I drilled out mounting hole on relay just slightly. I also used the old horn mounting screw for this item. If your new horn does not come with a cube relay, I would suggest purchasing ($6).
5. Run hot wire from positive battery terminal (Tap/Ground Kit) to the relay (common side of open set of contacts). This can also be done thru the fuse block. I added an inline fuse (20A) to protect the relay (rated at 30A), this was probably not needed as my horns will pull about 12A. I choose to run a new line in lieu of using the fuse box to avoid giving the dealership another reason to void my warranty.
Terminal Modification

Mounted View

With Hot Wire

6. Plug the existing horn signal to the relay coil input
7. Add ground wire to the relay and ground locally. There are a number of options for grounding in the area.

8. Run a hot wire from the relay to the area in which you will mount the new horn system. This wire will come off the back side of the relay contacts. I had two horns therefore I needed to split the hot wire. I added a splitting device inline, so I had independent hot to each horn.
Final Wiring of Relay

Area I ran hot wire to and mounted horns

9. Add mounting hardware to the new horn(s) and pre-wire the ground on the horn. Many horns are grounded through the mounting hardware, I choose to add an extra one.

10. Mount the new horn(s), terminate, reconnect battery negative and test (in my case, upset the neighbors).
Top View

Front View

If you have any questions about any of the parts/materials I used feel free to PM me with your question.


