What have you done to your MSP today?

And then there was 2...
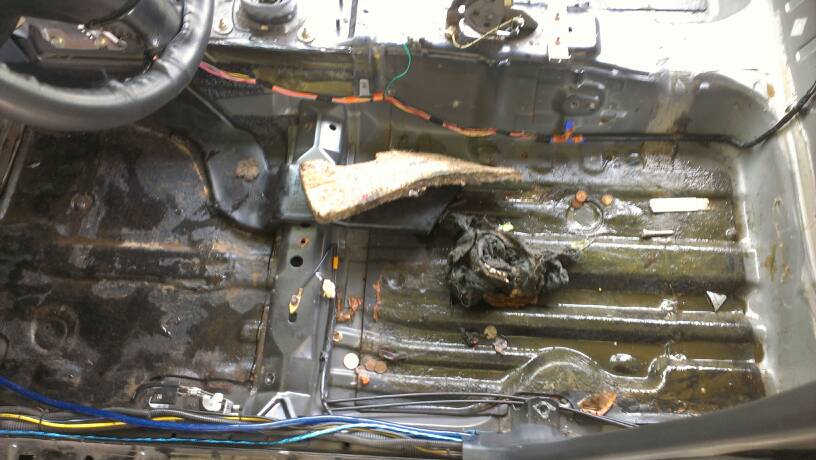
Was super sad to see her go, but with the rust on the unibody being as bad as it was, it wasn't in any form to be on the track or even the road. R.I.P MSP#1 you'll never be forgotten.
8c2b3292377a51caa48b43a37150da37.jpg

Sad day! Sorry man!
 
Exhaust manifold had hairline crack, patched. Started overboosting.. dealership failed to threadlock new Wastegate actuator, (rolleyes), got that fixed. Assumed it was heat soak, but is now failing to spool/boost unless its cold. (Wastegate or turbine seizing?(shrug)) Thankfully they are still treating it as their problem and not mine. Quite pleased with their willingness to work on these issues and not just telling me lol 'as is'.
 
So I'm back from my trip to New Jersey, and I am NOT a MS3 owner. Dealership is shady as F. Everything on the car looks fine, except for the giant scrapes on the rear bumper, three bolt marks from a license plate, scrape on the back left fender (no indents, just paint transfer), and cracked clear coat on the fender lip. None of that damage shows up in the pictures, which were likely taken before the damage occurred. They wouldn't budge on price and said "cosmetically it is being sold as is". Nice waste of 11 hours of my time and money renting the car, the gas to get down there, etc. SO PISSED.

Also the dash leather, on the upper right side of the center console plastic, had a fringe sticking out. Not sure if that means anything. Still, I AM SO PISSED.
 
Decided to work off some steam and refinish my two pairs of headlights. One pair will be going back on the car in OEM form. The other pair will be used to transfer my current HID kit into and sell on this forum.

Begin HL1/HL2
DSC_0192.jpg
DSC_0196.jpg


Finish HL1/HL2
DSC_0202.jpg
DSC_0201.jpg


Second pair before clear coat
DSC_0203.jpg


Finish HL3/HL4
DSC_0207.jpg
DSC_0208.jpg
 
just got back from an open track day practice at a local track, got more laps than I can count in tonite. Quick question though...does anyone who tracks their car ever experience problems with the back end getting loose? Felt as if the back end wanted to keep stepping out, not sure if I've already asked but I guess I will again. I played around with dampening on the rear and it helped a little but I have no experience in setting up a car so I dunno lol. it was fun either way.
(quick cell shots)
celly1 by korbancorbett, on Flickr
celly by korbancorbett, on Flickr
 
Last edited:
I don't know what setup you have, but if you don't want so much rotation start with the little things first then move up. Start with tire pressure and then work your way through rear suspension adjustments if possible sway bar adjustments. My car rotates a lot at lower speed for autoX and not so much for track. Also your spring rates and tire size are a huge factor. I run a 255 front and 225 rear to help rotate more. The more square of a setup the less it will slide around. With springs I run a higher spring rate in the rear than front to stiffen the rear for more rotation. Lastly it is FWD lol A lot of rotation from the rear of a fwd car is due because of the driver. Corner entrance and exit speed along with throttle control are huge especially if you even slightly lift the transfer of weight shifts dramatically.
 
thanks I appreciate the help. As far as tires go I run a square 245/40 setup, no sway bar adjustments available right now, and spring rates are like 8k/6k(mayb 8k/8k lol) I believe. Some of the drivers yesterday were real helpful with driving tips but I'm just getting acquainted with the cars characteristics on a track. Usually I'm just fooling around in the canyons but yesterday was my first time I had substantial track time to try out different lines and so on. Definitely a good experience
 
Decided to work off some steam and refinish my two pairs of headlights. One pair will be going back on the car in OEM form. The other pair will be used to transfer my current HID kit into and sell on this forum.

Begin HL1/HL2
DSC_0192.jpg
DSC_0196.jpg


Finish HL1/HL2
DSC_0202.jpg
DSC_0201.jpg


Second pair before clear coat
DSC_0203.jpg


Finish HL3/HL4
DSC_0207.jpg
DSC_0208.jpg

What are you using to restore them?
 
ya, driving is easy...driving fast, now that's another story haha
im also a noob. been meaning to make a thread for my own questions as i went to an open track once and while it was fun, i feel i did horrible. i think a good starting point for you is to lower your rear tire pressure. less pressure, more grip. then try decreasing rear damper settings a few clicks at a time. less stiff, more grip.

rally2003, does that sound about right?
 
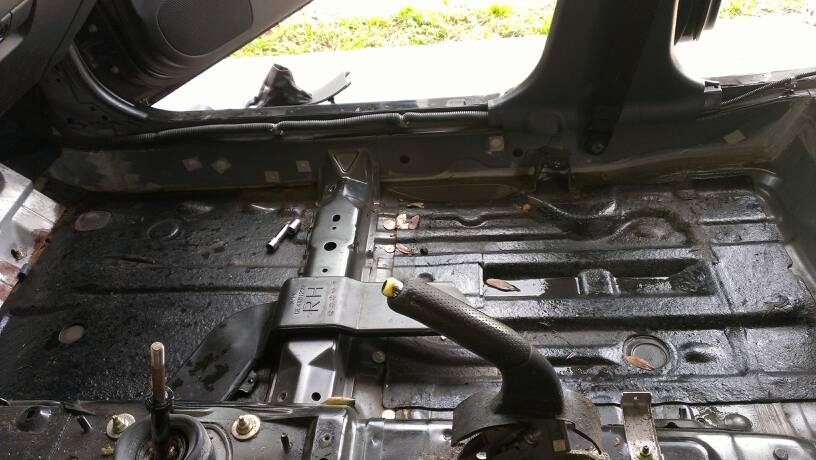
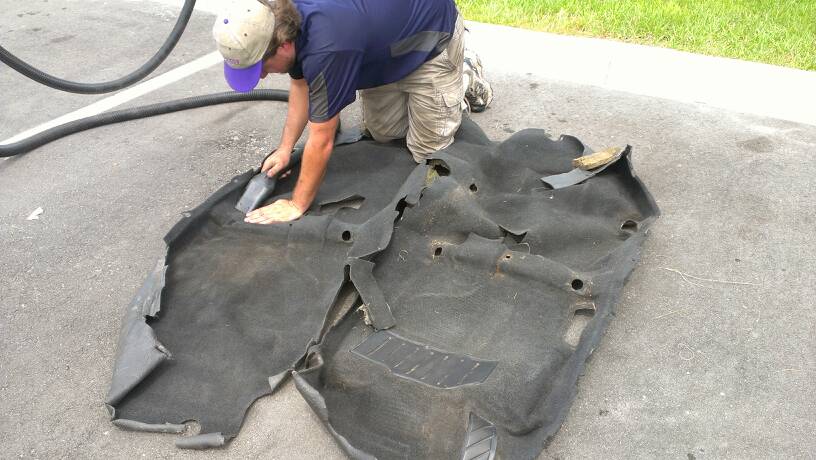
So Zealous and I removed the carpet and sealed up the leaks from which it was leaking water every time it rained. So im praying that its fixed now. I still have the idle issue where it Idles very low, there's loss of power, and stalls every time its just idling and not moving until engine is warm. Once its warm, runs fine, no problems. Egr was replaced, maf was replaced, smoke tested and did a boost leak test and no vacuum leaks or boost leaks, iac valve replaced, spark plugs are good and coil packs are good. I'm getting the code p0090 which I think its a bad fuel pressure control solenoid. Well see on Monday. Gonna get it checked
30ef6f490a2b0dfd8dd0dec5e8679199.jpg
217669b315e19189fe13db5acdc66bf2.jpg
6a71c8d53aa6e68bb43729d6b335231f.jpg
 
Last edited:
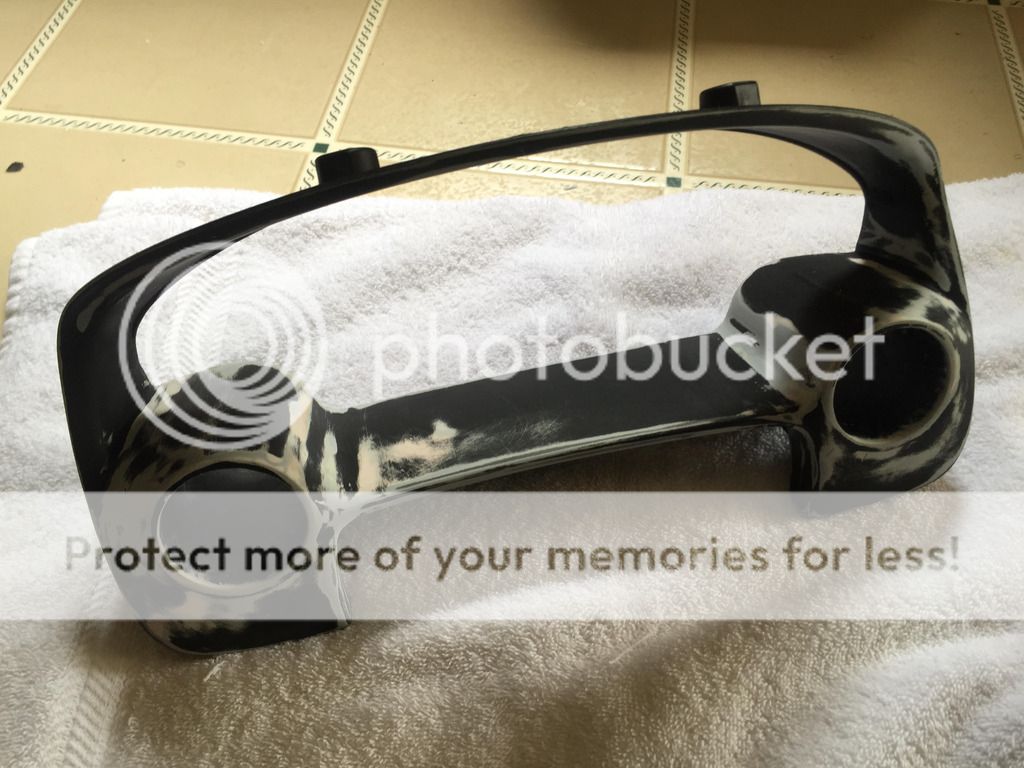
Kinda quiet around here... well im getting this dual gauge cluster ready for install. When I got it it was in decent shape but I wanted it to look nicer so I decided I was going to sand it smooth and refinish it. Here it is prepped and sanded:

[URL=http://s280.photobucket.com/user/googoo1oo/media/11_zpsmxouhuqd.jpg.html][/URL]

Here it is after refinishing with a badass paint that when it dries looks identical to the factory molded plastic:

[URL=http://s280.photobucket.com/user/googoo1oo/media/after%201_zpsghql73eo.jpg.html][/URL]

And a close-up:

[URL=http://s280.photobucket.com/user/googoo1oo/media/after%202_zpsyeha7alw.jpg.html][/URL]
 
What are you using to restore them?
I used the Sylvania restore kit that you can get off of Amazon. It's a glorified pack of sand paper, but it comes with some activating spray and clear coat. Not sure what the activating spray is, but it takes out the yellowing from the plastic. The it's 400, 1000, 2000 grit paper and then a rubbing compound. I added 600 and 800 grit after the 400 just because I had it laying around. The clear coat is the key though and really makes them look brand new again.
 
Kinda quiet around here... well im getting this dual gauge cluster ready for install. When I got it it was in decent shape but I wanted it to look nicer so I decided I was going to sand it smooth and refinish it. Here it is prepped and sanded:
How do you get the body filler to blend nicely with the plastic? I started mine, but the body filler has an abrupt cut off with the plastic.
 
here's a video of one of my runs from my last track day.
<iframe width="560" height="315" src="https://www.youtube.com/embed/oec9Hy1OEIY" frameborder="0" allowfullscreen></iframe>
 
the whole process took me about 7 or 8 days to do. when I got it there was some chips here and there and a bubble in the plastic that needed to be gone. lucky for me the maker did a good job there wasn't any sharp or abrupt edges to deal with but I did do a lot of sanding and painting waiting for the paint to dry and re-sanding and re-painting until it was where I wanted it in the end i'm really happy with the results. it looks like it was molded in the factory.
 
Back