Alright, sounds good, thanks guys. Just saw someone else P5 with a two-toned front lip; I'll probably do the same even though I don't have the CF lip. I'm just not sure I want to get the lower part painted because if I bump or scrape anything it's already messed up. I have half a mind to cut up my current wind splitter and put it on the lip to protect it a little. If I do that then I'd probably paint the whole lip. Still debating here...

You are using an out of date browser. It may not display this or other websites correctly.
You should upgrade or use an alternative browser.
You should upgrade or use an alternative browser.
What have you done to your P5 today?
- Thread starter Tg5
- Start date
Have any pics of this? I'm just having a hard time thinking of where you are describing.some regular screws will work... no need to drill holes in the lip... i used some screws that had a point in them... with a little bit of pressure they should go right in. screw the lip directly to the bumper... two on the sides above the plastic hole thingy (the thing that's going into the big hole). the two underneath can go right in the middle of the vent thingys from underneath.
- :
- 92 & 16 Meyatas
Just bought a DG lip today! Who knows how long it's going to be before I get it painted and installed but just figured I'd share. How do these things attach anyway? Mine didn't come with any hardware and there aren't any pre-drilled holes in the lip. It can't all be double-sided tape, right?
dgftw!
Attachments
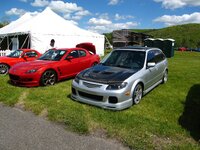
^^^ Very nice although I have to admit it's hard not to stare at altspace's RX8. I plan on getting some bronze wheels and red lugnuts in the future so my P5 will have that same theme going on. Man, I should really try to make it up there for some of your meets. If only it weren't so far...
fishdonotbounce
Registered Zombie
- :
- 08.5 CWP Speed3
Just took a picture of the result of the General Trim Adhesive and seat covers. Who needs 1200 dollar leather installed for a bunch more. 50 dollar pleather covers with a 10 dollar rattlecan works just fine! lol

Washed mine, added fuel stabilizer and parked it for the next three months or so. I'm going up to work in Nunavut and will be missing it. Of course, now that I have my own house I will be missing the house a lot more, but the missing of the protege will still hurt.
- :
- 2016 GT ST 47A
Dropped off the snow tires and steelies this morning for a mount and balance and then ran some errands. Picked them up and before/after dinner I mounted them up for a test fit/drive.
They are 185/70/14 Blizzaks on 14x5.5 wheels donated from a '93 Eclipse.
Isn't she purdy?


Clearance in the rear wheel well

Mmmmmmmmm

They are 185/70/14 Blizzaks on 14x5.5 wheels donated from a '93 Eclipse.
Isn't she purdy?
Clearance in the rear wheel well
Mmmmmmmmm
fishdonotbounce
Registered Zombie
- :
- 08.5 CWP Speed3
JDM-P5 I did a how to write up and I will have more pictures for you tomorrow. Hope you guys like it since its my first write up 
http://www.mazdas247.com/forum/showthread.php?p=3924590#post3924590
http://www.mazdas247.com/forum/showthread.php?p=3924590#post3924590
- :
- 2016 GT ST 47A
A little early for winter testing Jeff??
Ya, I guess so. haha But I need to buy tires due to a bad alignment job from last winter. Since the snows are taller than what is recommended I wanted to make sure I had no fitment issues before purchasing a set of performance tires.
I swapped my P5 Front Sway bar for an MSP unit today....
......and Let me tell you..I would almost rather pull the engine than to do this job right here again.
EVERYTHING must come loose from the front suspension to get it In/Out.
Lower Frame Crossmember, Lateral Engine Crossmember, Rack..you name it..it needs to come off or be loosened.
I cant see how you could possibbly change one of these with the engine in.
EvAR!
On a Scale of 1-10....(1 the easiest) I would rank this as the following.
Engine Removed...7 out of 10
Engine Installed...High Teens out of 10
Comparison of the two bars...Not much to the eye..but they are different.
Threw in New OEM bushings while I was at it and Hit them with a spot of grease on the inside to keep them quiet for a while.

This is what happens when End links don't cooperate.

All of this must come loose and move to allowthe sway to be removed.
How you could do this with the engine still in the car is beyond me.

While I was in there...I got rid of a Problematic Stud For every Protege owner on the planet who has EVER tried to change a rear motor mount.
This thing attaches the Main Harness to the Firewall in two places...ant the lower stud is Nearly IMPOSSIBLE to get off with any combination of tools available on earth.


I just saved myself the trouble and got rid of it while I was in here.

Bye -Bye.


......and Let me tell you..I would almost rather pull the engine than to do this job right here again.
EVERYTHING must come loose from the front suspension to get it In/Out.
Lower Frame Crossmember, Lateral Engine Crossmember, Rack..you name it..it needs to come off or be loosened.
I cant see how you could possibbly change one of these with the engine in.
EvAR!
On a Scale of 1-10....(1 the easiest) I would rank this as the following.
Engine Removed...7 out of 10
Engine Installed...High Teens out of 10
Comparison of the two bars...Not much to the eye..but they are different.
Threw in New OEM bushings while I was at it and Hit them with a spot of grease on the inside to keep them quiet for a while.
This is what happens when End links don't cooperate.
All of this must come loose and move to allowthe sway to be removed.
How you could do this with the engine still in the car is beyond me.
While I was in there...I got rid of a Problematic Stud For every Protege owner on the planet who has EVER tried to change a rear motor mount.
This thing attaches the Main Harness to the Firewall in two places...ant the lower stud is Nearly IMPOSSIBLE to get off with any combination of tools available on earth.
I just saved myself the trouble and got rid of it while I was in here.
Bye -Bye.
RaiderH8r89
Member
- :
- Mazda Protege5
Finally got decent pics... or rather, loaded them on the computer finally...

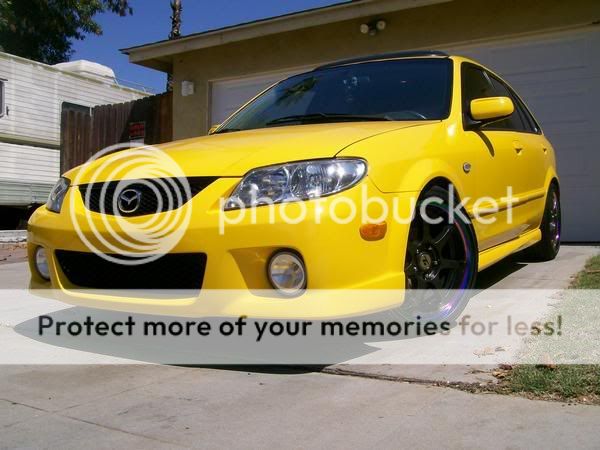
Nice pics! Your drivers door's not shut properly, though...
Finally got decent pics... or rather, loaded them on the computer finally...
RaiderH8r89
Member
- :
- Mazda Protege5
Nice pics! Your drivers door's not shut properly, though...Finally got decent pics... or rather, loaded them on the computer finally...
yeah, operator error... lol. i didn't shut the door all the way(crazy)
- :
- '13 CWP MS3 & '16 Mazda6 GT
anybody run 205/45s on their stock rims on here?
anybody run 205/45s on their stock rims on here?
don't see why that wouldn't work...
- :
- '13 CWP MS3 & '16 Mazda6 GT
the thing has 205/50s on it now lol they've been on there since we've had it...they just look so damn chunky lol
Similar threads
- Replies
- 28
- Views
- 8K