- :
- 92 & 16 Meyatas

You are using an out of date browser. It may not display this or other websites correctly.
You should upgrade or use an alternative browser.
You should upgrade or use an alternative browser.
What have you done to your Miata today?
- Thread starter Antoine
- Start date
- :
- 2016 GT ST 47A
Nice! So is the company done?
Thanks! Yes and no. Globally we are doing good but my site is dwindling. Lease on that building is up in two years and the thought is they will relocate any employees left to other office space nearby. The company owns the building where my office and records center is located so think we will be good for awhile.
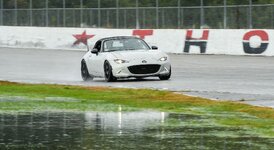
@CTt3P5 @bazooka joe Compliments on the super sweet looking Miatas (and great pics), Gentlemen...How is the ride and handling before vs after the Progress springs?
Thank you! Yes, much improved handling but ride is a little more harsh. I knew that going in and it doesn't bother me. Like Mark said, less body roll and confidence inspiring.
Nice.
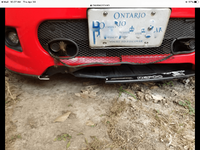
Pulled the front end apart this morning to see what other damage was done by the raccoon. Only bad thing I found was the ac condenser got smacked and will need to be replaced.
Also planning on replacing the rad with either a Koyo or CSP. Not looking forward to tearing out the old one but it's something to do while I wait for parts. Might replace the water pump as well.
- :
- 92 & 16 Meyatas
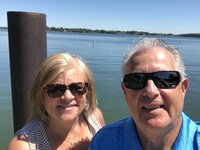
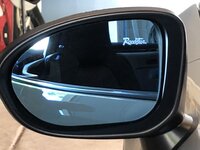
Had planned so many Miata events while in NC this winter/spring.....bites...oh well, went for a nice cruise yesterday to Lake Norman with Robin. Day was perfect, mid 70’s plenty of sunshine and the roads not so busy. Did fix my plexi wind blocker that had become a bit loose in the high speeds. Added some padding between the hoops and glass attachment point. All good now. Also added SUMA blue and drives side wide angle mirrors, just awe! Took some getting used to, but it really helps with that blind spot?
Attachments
- :
- 2016 GT ST 47A
What a cute couple!
I need to invest in a new wind blocker, the stock one on the NC is garbage. My original broke at the tabs from bending it up/down so I bought a used one. Yep, same thing happened. Those blue mirrors are great! I have the Moddiction ones but they are hard to come by anymore. Glad to see another company stepped up to make them readily available.
I need to invest in a new wind blocker, the stock one on the NC is garbage. My original broke at the tabs from bending it up/down so I bought a used one. Yep, same thing happened. Those blue mirrors are great! I have the Moddiction ones but they are hard to come by anymore. Glad to see another company stepped up to make them readily available.
- :
- Canada
Had planned so many Miata events while in NC this winter/spring.....bites...oh well, went for a nice cruise yesterday to Lake Norman with Robin. Day was perfect, mid 70’s plenty of sunshine and the roads not so busy. Did fix my plexi wind blocker that had become a bit loose in the high speeds. Added some padding between the hoops and glass attachment point. All good now. Also added SUMA blue and drives side wide angle mirrors, just awe! Took some getting used to, but it really helps with that blind spot?
Happy couple! Cool shot of the mirror with the Roadster decal on the wind blocker
")
- :
- 92 & 16 Meyatas
Nice catch!Happy couple! Cool shot of the mirror with the Roadster decal on the wind blocker

Yes so I've heard. Oh well, not much else to do
Bruce, any chance this is the MS front you are looking for: https://www.ebay.com (commissions earned)
Just came across it while preusing eBay. I've bought from that seller before, he gets a lot of Mazda stuff cheaply.
Antoine
Administrator
Yeah what a great combo, happy couple and a MiataHappy couple! Cool shot of the mirror with the Roadster decal on the wind blocker

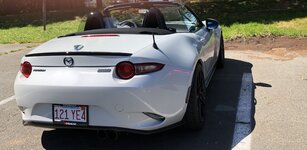
 The decal is a nice touch @bazooka joe, also noticed you're rockin' a VersaTune license plate frame...
- :
- 2016 GT ST 47A
Bruce, any chance this is the MS front you are looking for: https://www.ebay.com (commissions earned)
Just came across it while preusing eBay. I've bought from that seller before, he gets a lot of Mazda stuff cheaply.
Nice find Mike. While that isn't the MS bumper that Bruce is in need of, maybe the seller has or can find one? It would be worth reaching out to them.
- :
- 92 & 16 Meyatas
Thanks! That is a “MX5 Things” wind blocker that lights up the Roadster at night. Yes, got the Fab9/VersaTune going.....loving the few extra ponies!Yeah what a great combo, happy couple and a Miata
- :
- 92 & 16 Meyatas
Hey, has anyone heard from Andrew, aka Amaff? His last post here was oct last yr
Last edited:
- :
- 92 & 16 Meyatas
Hey, has anyone heard from Andrew, aka Amaff? His last post here was oct last yr
I'm friends with him on FB, he hasn't been doing much of anything to his car. Still alive and kicking though.
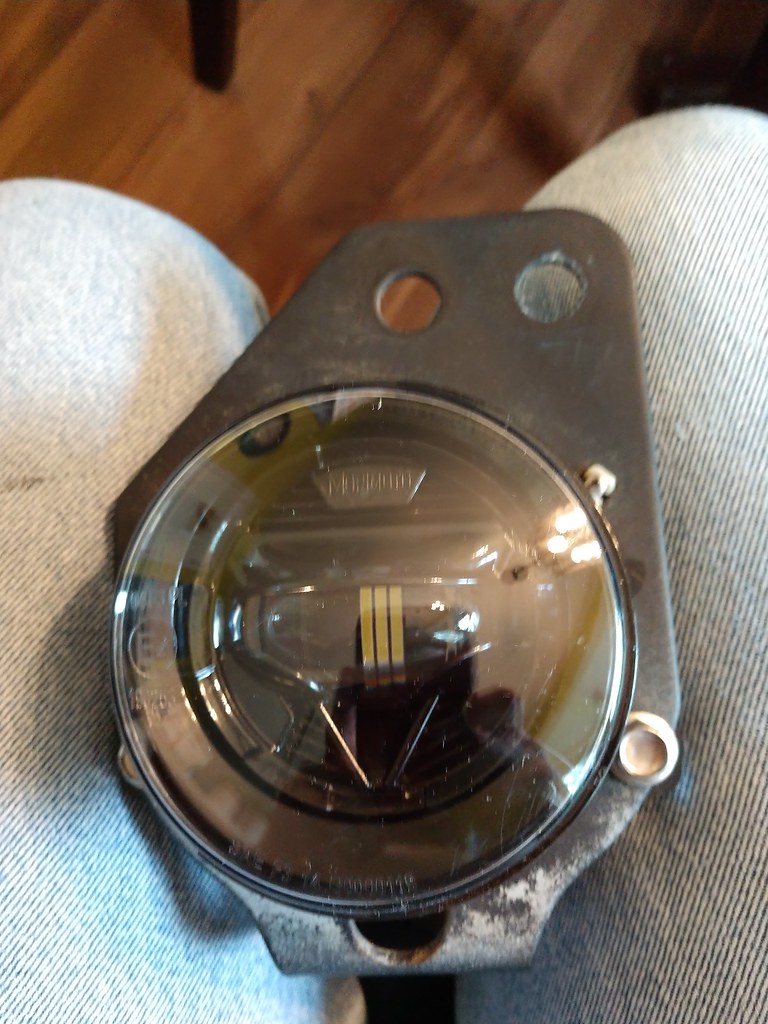
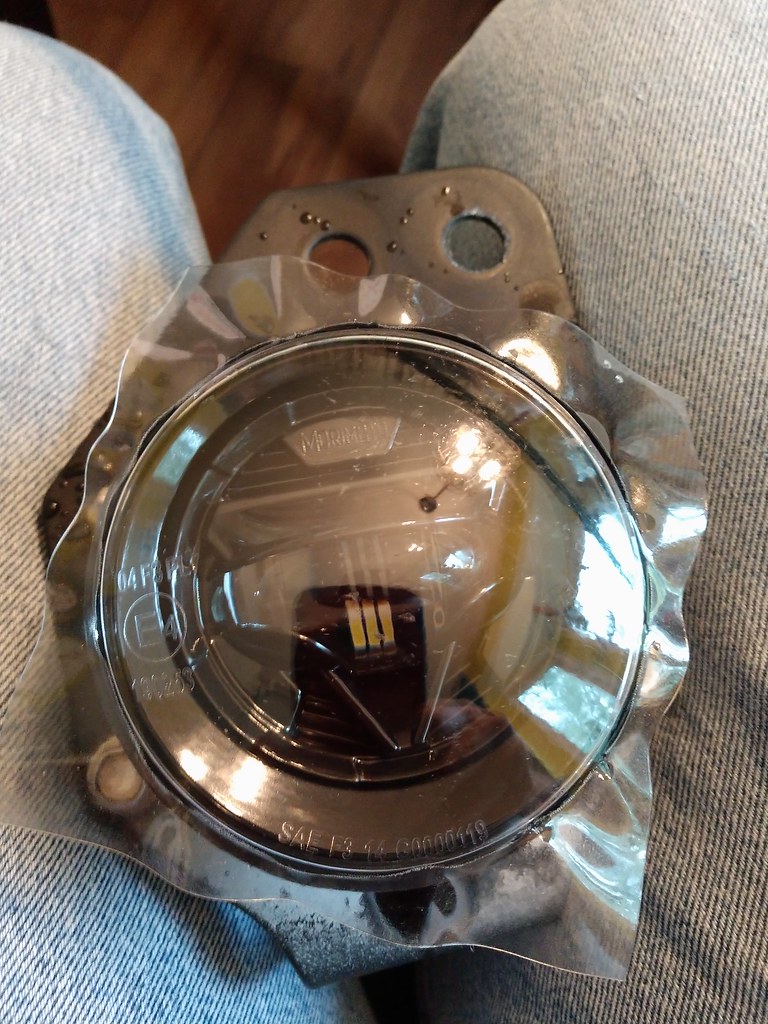
I’ve been working on getting what I needed to install the LED foglights I bought during MATG. They are the 90mm Morimoto units sold by TRS. The guy I bought them from had already mounted them on the factory brackets so I just needed the wire connectors and some film for protection. Got all that a few days ago so started in. Here is a picture of the foglight:
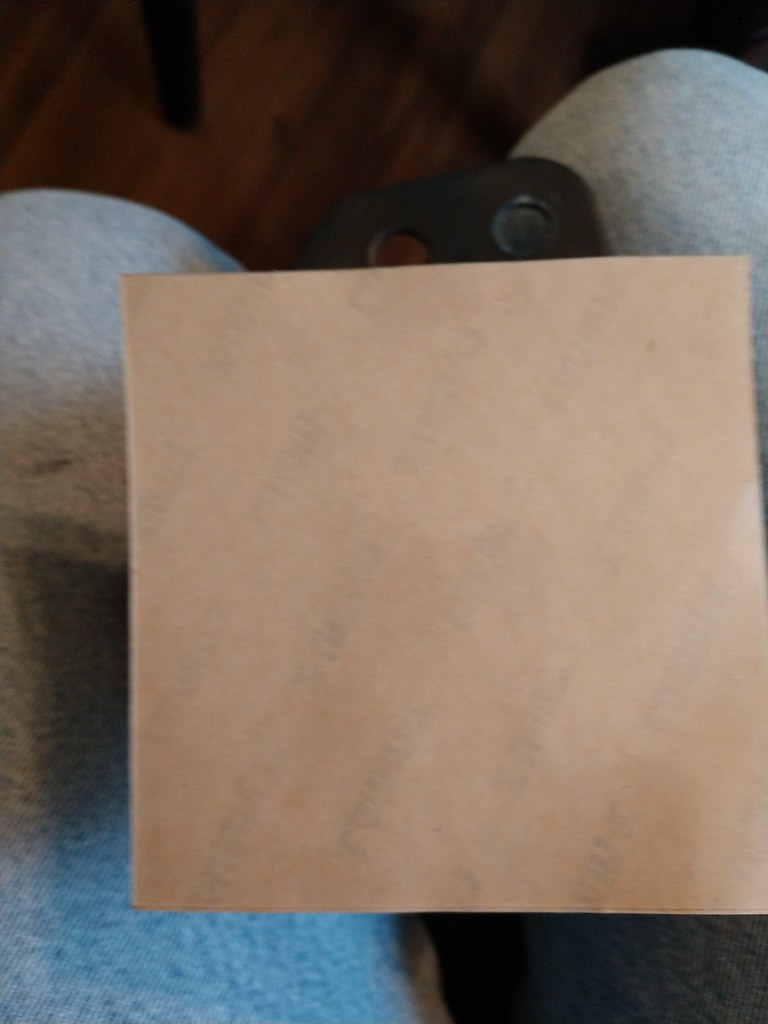
Here is the film I bought from Lamin-X. Since these are not a factory arrangement I had to get bulk pieces. I bought two 4 X 8” pieces for around $15.
Their instructions say to wet the glass with water, I’m not sure how much good it did as the water ran right off. One sheet is enough for two so I had extra in case I screwed it up. After cutting one piece in half I laid it on the glass starting in the center:
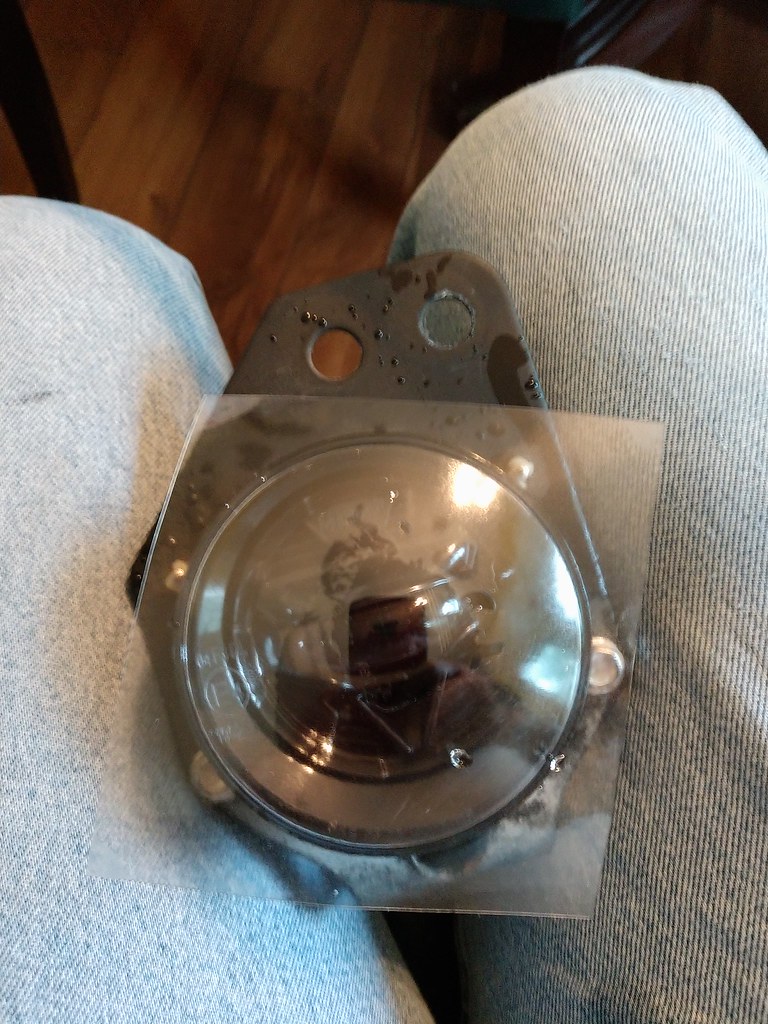
I worked my way around the film in a spiral pattern using a squeegee I had to work it. After a little bit of work it came to this:
A little X-Acto knife trim later and we have a finished product:
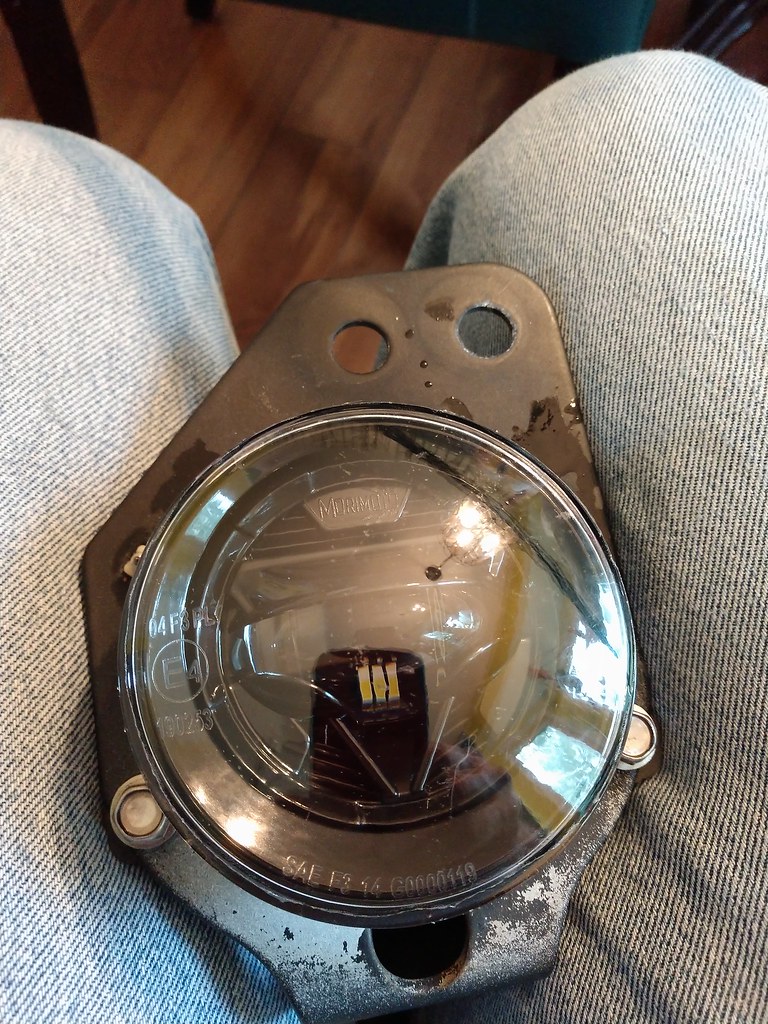
Today I started in with the installation of the lights. There was some white or silver paint on one of the brackets so I cleaned that off, and put some shims under the two extra fasteners the LED lights use vice the stockers so that the lights were square to the brackets. After all the prep work I mounted the lights and ended up with this:
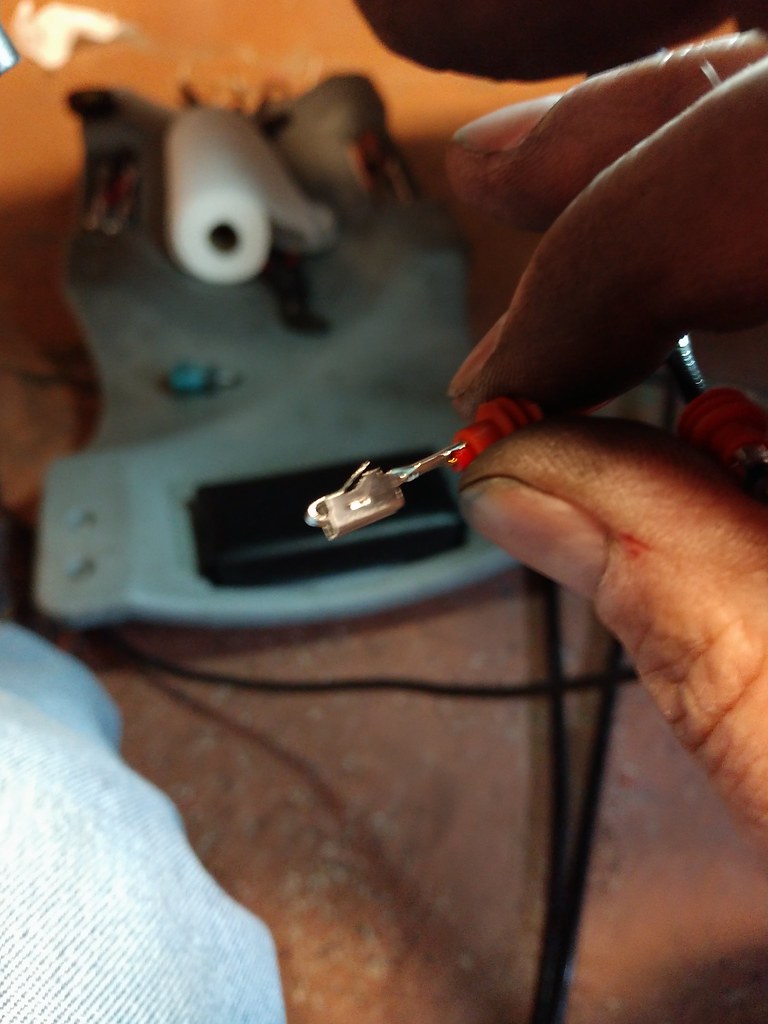
Next I cut back the stock wires to solder on the new connectors (H11) needed for the LED fogs. I double-checked the polarity just to back up what I had read online, the factory green wire was positive and the black wire was negative. Connectors had a red and a black wire so I connected the red to the green. Got that all done and plugged in, but when I powered up the lights I had nada. I thought maybe it was because I had the headlights removed so went ahead and installed the second connector. While doing that I noticed after plugging in the light that the red input wire was going to the black wire on the light. Either the wires on those connectors are standardized or the Chinese worker who made mine was having an off day. Considered undoing the wires and resoldering but that would have made the wires incorrect. Looking at the connectors I figured I could get the individual wires out of the connector and swap them. I did this by inserting a small jeweler’s screwdriver to release the tab like so:
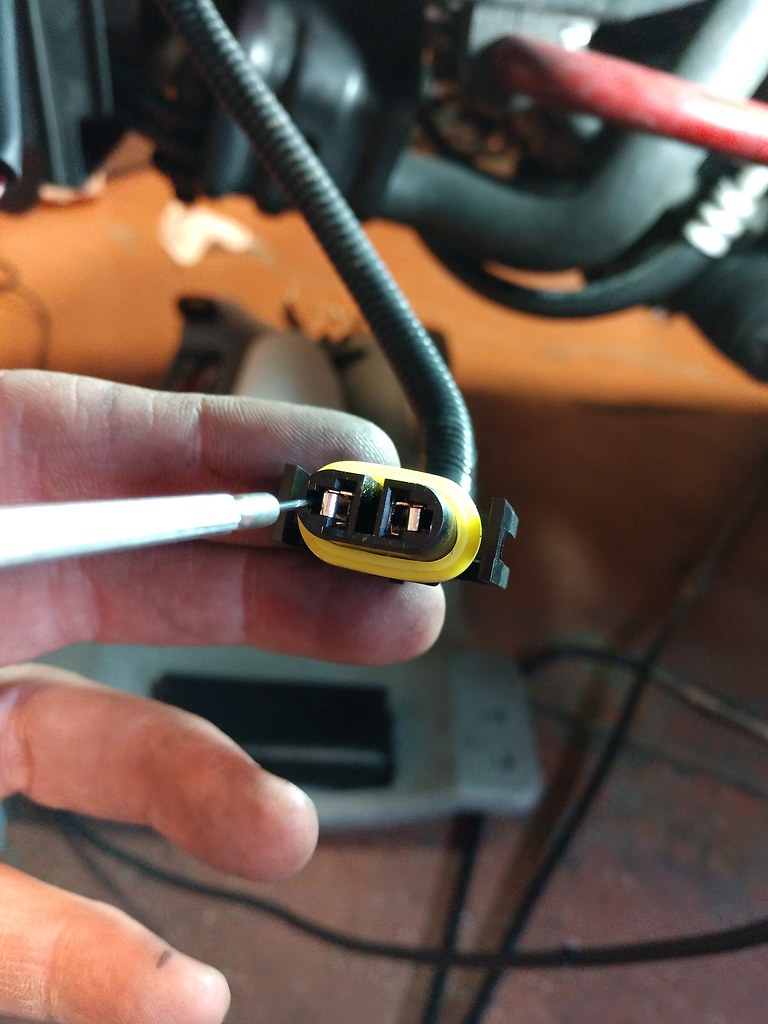
The tab holding things in place was weak so I had to bend it up a little so it would hold once I inserted it back into the connector. It’s kind of hard to see but it’s the little piece sticking up by itself from the top:
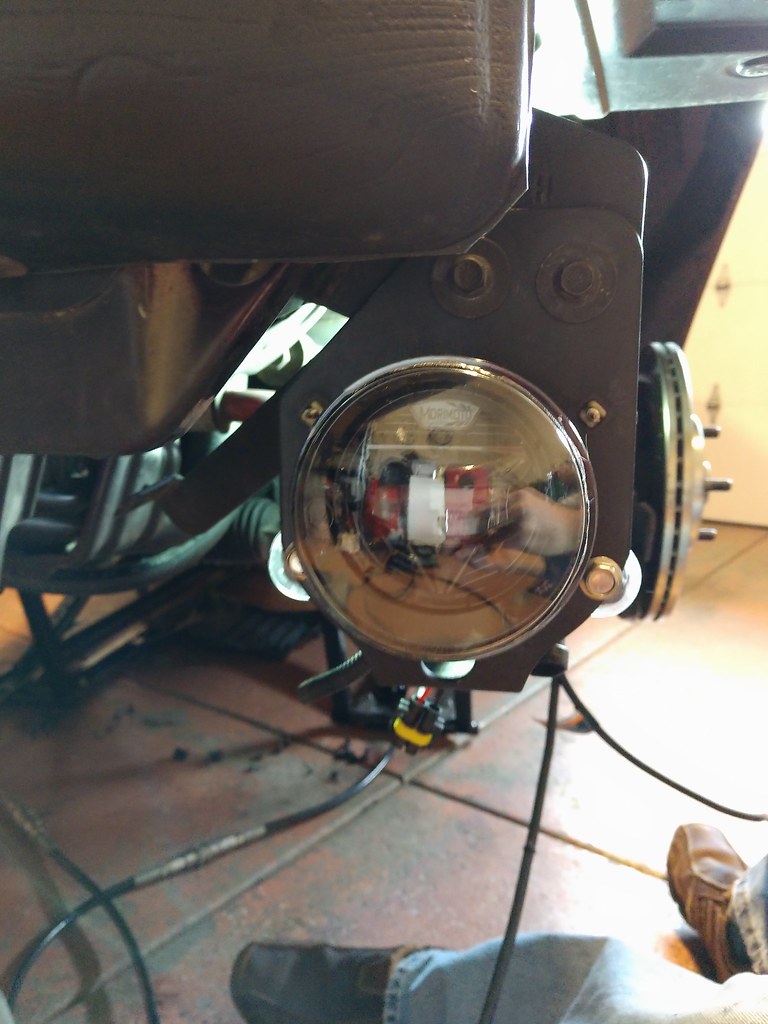
Put everything together, powered the lights up and voila! All was good. I zip-tied the wires to the factory bracket to keep things from flopping around:
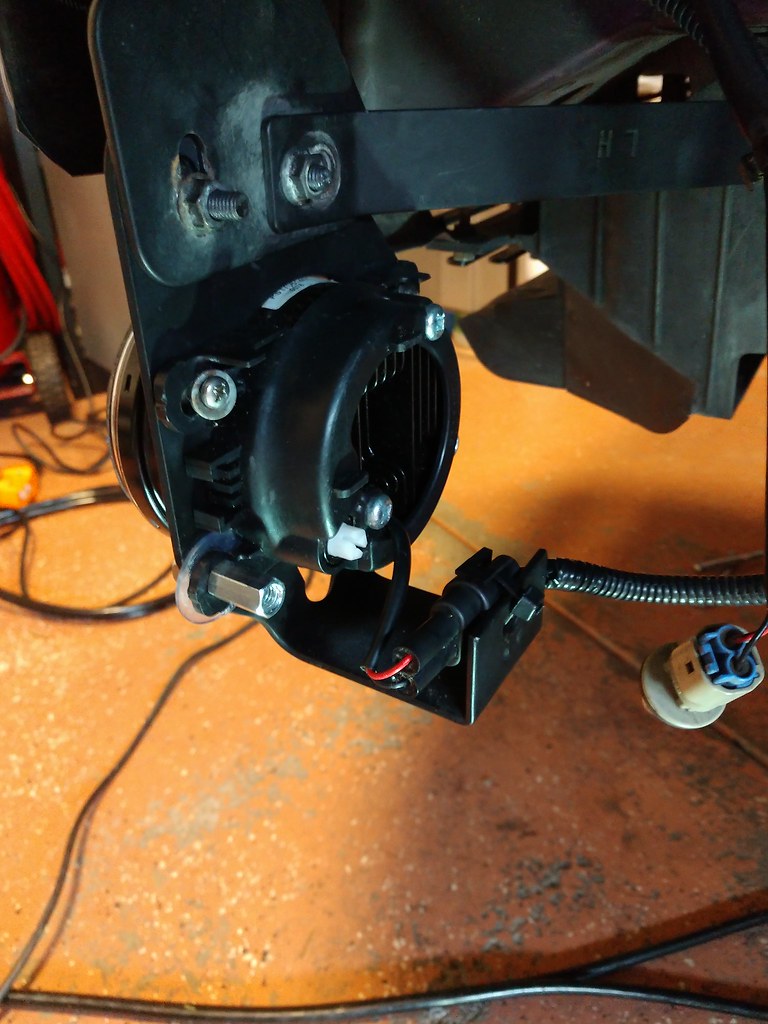
For the NB1 at least, you don’t have to cut anything for these to fit the bumper cutouts. The stock lights are somewhat deep and slide into the openings. These are much slimmer and end up just behind the back of the openings. The 90mm size is perfect to fill the hole in the bumper.
While I had the front bumper off I decided I would finally install the X-Pel film I’ve had sitting around for the headlights. Had to sand/polish them to get a smooth surface because they looked like this:
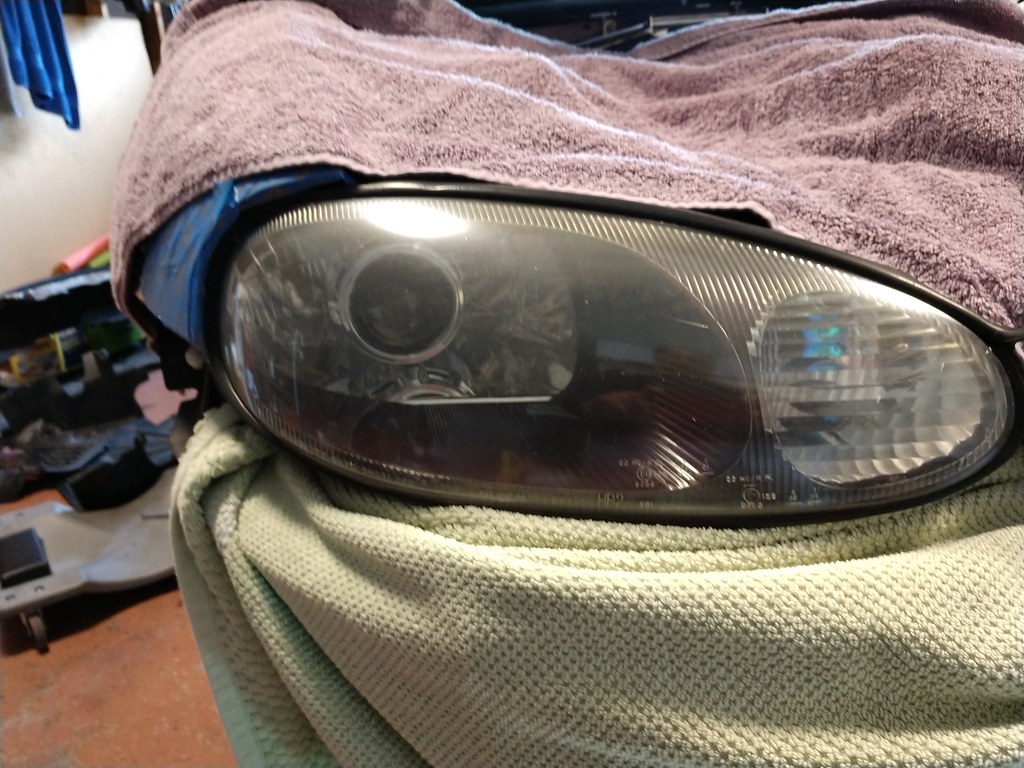
Pulled them off the car first because I have a film on the inside of the lens from gassing of the paint I used on the inner bezels. Swished some alcohol around to take care of that (didn’t quite do it all), while doing that noticed the driver’s side projector was moving around. Found the nut holding it in place had loosened so tightened that up and put some high temp silicone on top of the nut to act as a keeper of sorts. Did the polishing then installed the film it was only slightly a PITA. Passenger side was done second and ended up a a little better than the driver’s side but overall good:
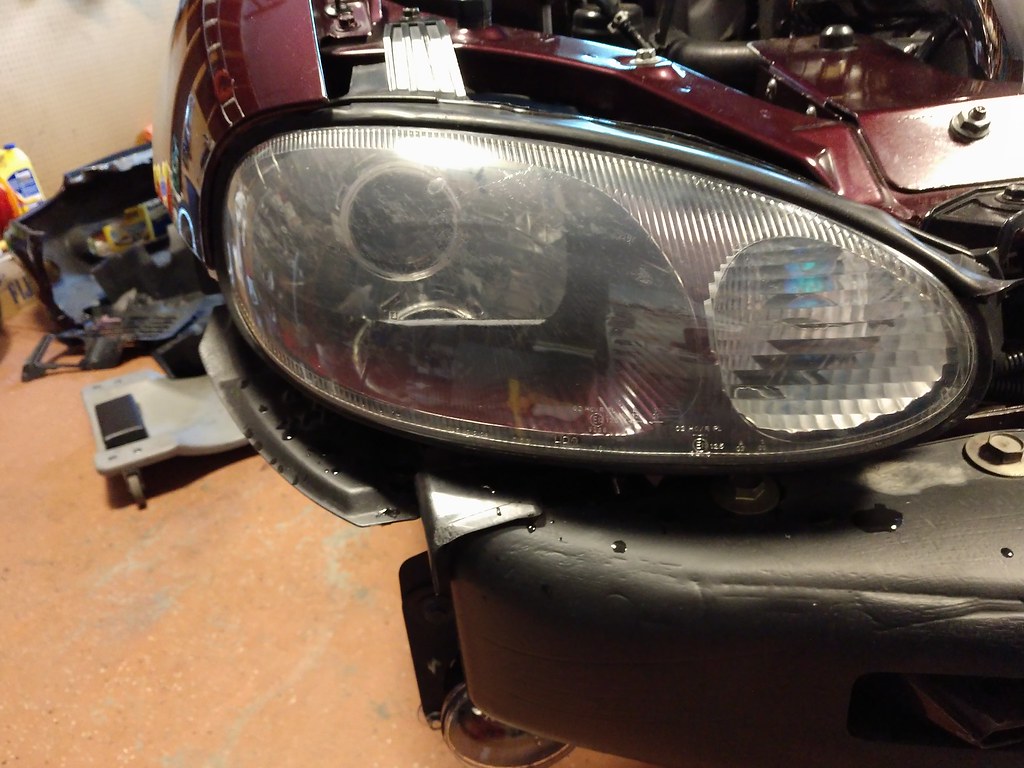
I should note this job is very difficult due to the compound curves of the lens. I took my time and worked around the film using my heat gun on the low setting. The slight cloudiness is normal and should work itself out over the next two weeks.
I was hearing a chirping from the clutch slave so knew it was time for some lube. I have been thinking about a better mousetrap for this and decided to try a plastic washer to see how that worked out. I have some leftover material from a cone of shame so cut a piece out from that. Punched a hole in the middle using the arch punch set I got from Harbor Freight (hey, didn’t have a set before but I do now), shaped it with a little heat as much as I could and then installed it. Here is how it looked before installation:
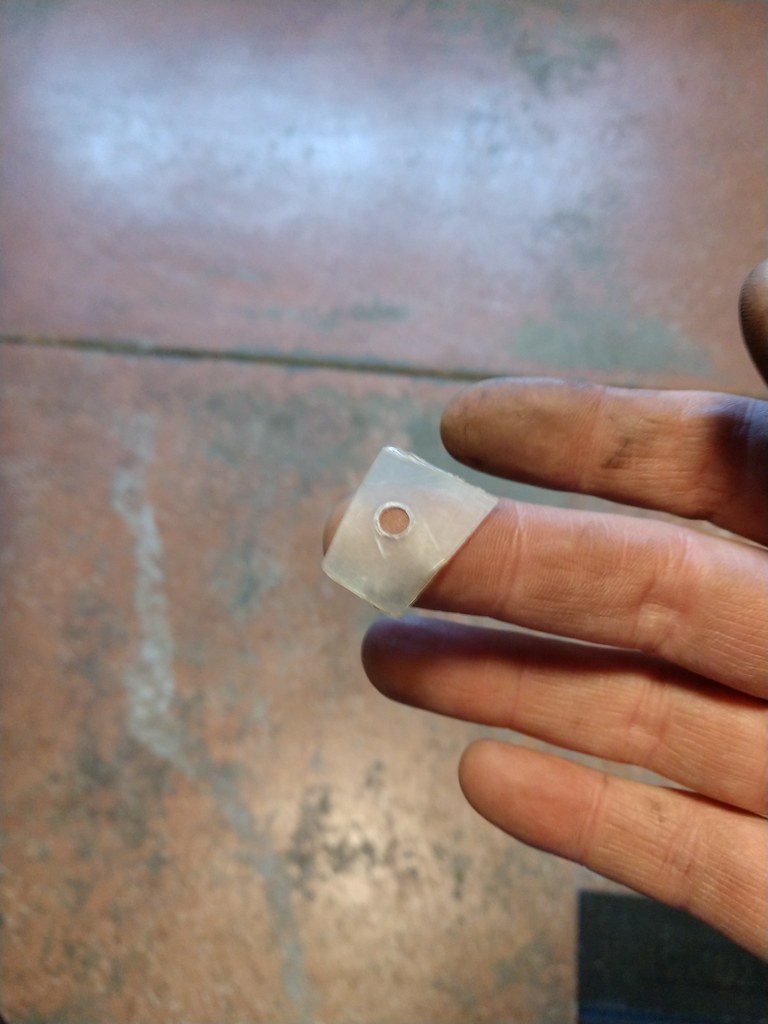
Ain’t the prettiest but should do the job. I am going to keep my eye out for some kind of cup that I can use, Teflon would be nice and I might be able to make one when I get back to work. I’ll keep everyone updated on how this works out.
To end up I adjusted the rear brake calipers. Nice day’s work.
Next I cut back the stock wires to solder on the new connectors (H11) needed for the LED fogs. I double-checked the polarity just to back up what I had read online, the factory green wire was positive and the black wire was negative. Connectors had a red and a black wire so I connected the red to the green. Got that all done and plugged in, but when I powered up the lights I had nada. I thought maybe it was because I had the headlights removed so went ahead and installed the second connector. While doing that I noticed after plugging in the light that the red input wire was going to the black wire on the light. Either the wires on those connectors are standardized or the Chinese worker who made mine was having an off day. Considered undoing the wires and resoldering but that would have made the wires incorrect. Looking at the connectors I figured I could get the individual wires out of the connector and swap them. I did this by inserting a small jeweler’s screwdriver to release the tab like so:
The tab holding things in place was weak so I had to bend it up a little so it would hold once I inserted it back into the connector. It’s kind of hard to see but it’s the little piece sticking up by itself from the top:
Put everything together, powered the lights up and voila! All was good. I zip-tied the wires to the factory bracket to keep things from flopping around:
For the NB1 at least, you don’t have to cut anything for these to fit the bumper cutouts. The stock lights are somewhat deep and slide into the openings. These are much slimmer and end up just behind the back of the openings. The 90mm size is perfect to fill the hole in the bumper.
While I had the front bumper off I decided I would finally install the X-Pel film I’ve had sitting around for the headlights. Had to sand/polish them to get a smooth surface because they looked like this:
Pulled them off the car first because I have a film on the inside of the lens from gassing of the paint I used on the inner bezels. Swished some alcohol around to take care of that (didn’t quite do it all), while doing that noticed the driver’s side projector was moving around. Found the nut holding it in place had loosened so tightened that up and put some high temp silicone on top of the nut to act as a keeper of sorts. Did the polishing then installed the film it was only slightly a PITA. Passenger side was done second and ended up a a little better than the driver’s side but overall good:
I should note this job is very difficult due to the compound curves of the lens. I took my time and worked around the film using my heat gun on the low setting. The slight cloudiness is normal and should work itself out over the next two weeks.
I was hearing a chirping from the clutch slave so knew it was time for some lube. I have been thinking about a better mousetrap for this and decided to try a plastic washer to see how that worked out. I have some leftover material from a cone of shame so cut a piece out from that. Punched a hole in the middle using the arch punch set I got from Harbor Freight (hey, didn’t have a set before but I do now), shaped it with a little heat as much as I could and then installed it. Here is how it looked before installation:
Ain’t the prettiest but should do the job. I am going to keep my eye out for some kind of cup that I can use, Teflon would be nice and I might be able to make one when I get back to work. I’ll keep everyone updated on how this works out.
To end up I adjusted the rear brake calipers. Nice day’s work.
- :
- Canada
Nice day’s work.
I'll say!!
Would you mind if I took your foglight install instructions and created a resource for them?
I'll say!!
Would you mind if I took your foglight install instructions and created a resource for them?
Be my guest. For a complete set of instructions you can use this link: https://m.facebook.com/notes/donald...-miata-with-factory-fogligh/1570775872961534/
Since mine were already mounted to the '99-00 brackets I didn't have to modify mine.
- :
- 92 & 16 Meyatas
Great work on those lights Mike!
Packing up the car today. Heading back to MA Saturday morning. Should be home Sunday afternoon.
Packing up the car today. Heading back to MA Saturday morning. Should be home Sunday afternoon.
Last edited:
Similar threads
- Replies
- 5
- Views
- 819