What have you done to your Miata today?

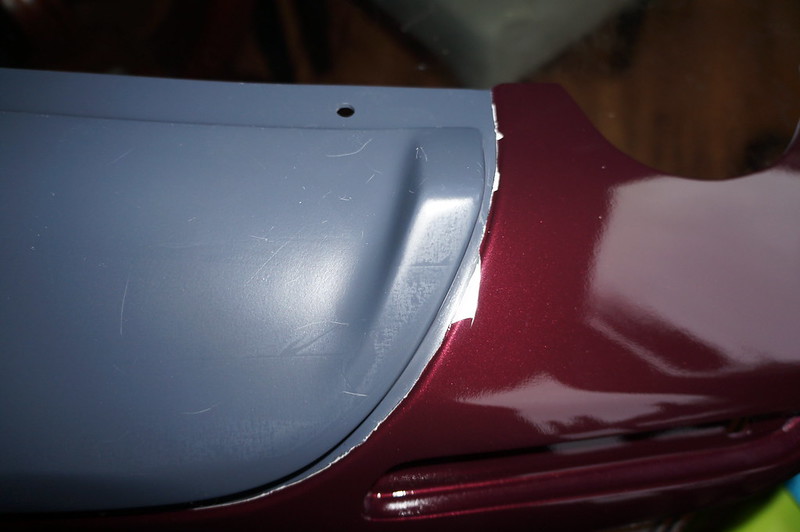
Once that had dried overnight it was on to the next step. I removed the tape on the upper piece and then taped over the charcoal. That ended up pretty much the reverse of what it had been.

36800581706_a8c6e53319_c.jpg


I cleaned the exposed area again with alcohol and then applied primer:

36179539483_b37b035229_c.jpg


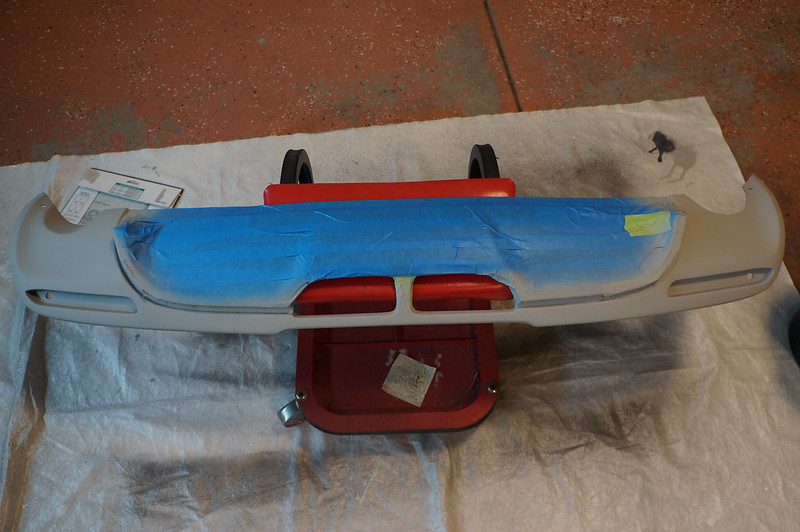
Four coats of primer applied following the can instructions, after which I lightly sanded it with some 600 grit wet paper. This time I simply wiped it down with a wet rag. Then after a wait of 30 minutes it was time to apply the color:

36179534963_be0076d46e_c.jpg


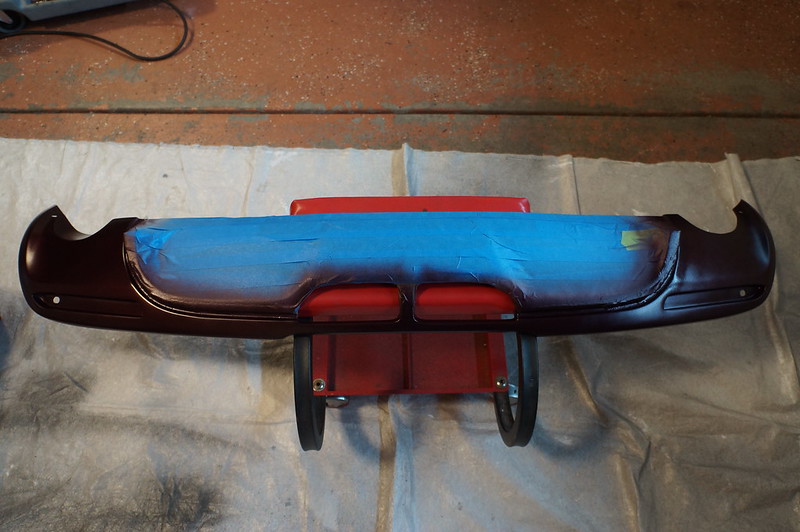
I applied three coats again following the instructions. After another 30 minute wait the clearcoat went on. I applied four coats of clear. I let that set up for a few hours and then removed the tape. Unfortunately when pulling it off I had a couple of small chips come out:

36800575706_8b89243402_c.jpg


Since I didn't want to redo the whole thing I simply used the bottle of touch-up paint with a brush I already had, it filled in nicely.

I should also note I painted all the fasteners the same color as where they are used to blend it all in and minimize jarring contrasts.

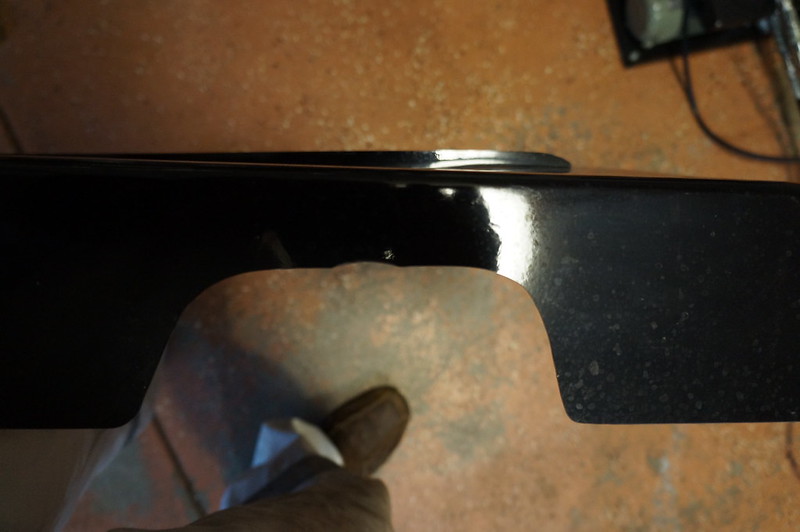
Before installing everything I wanted to replace the rubber muffler hangers. I heard some banging over bumps, when I checked the lower diffuser showed signs on contact on the driver's side:

36572477480_34be9a5605_c.jpg


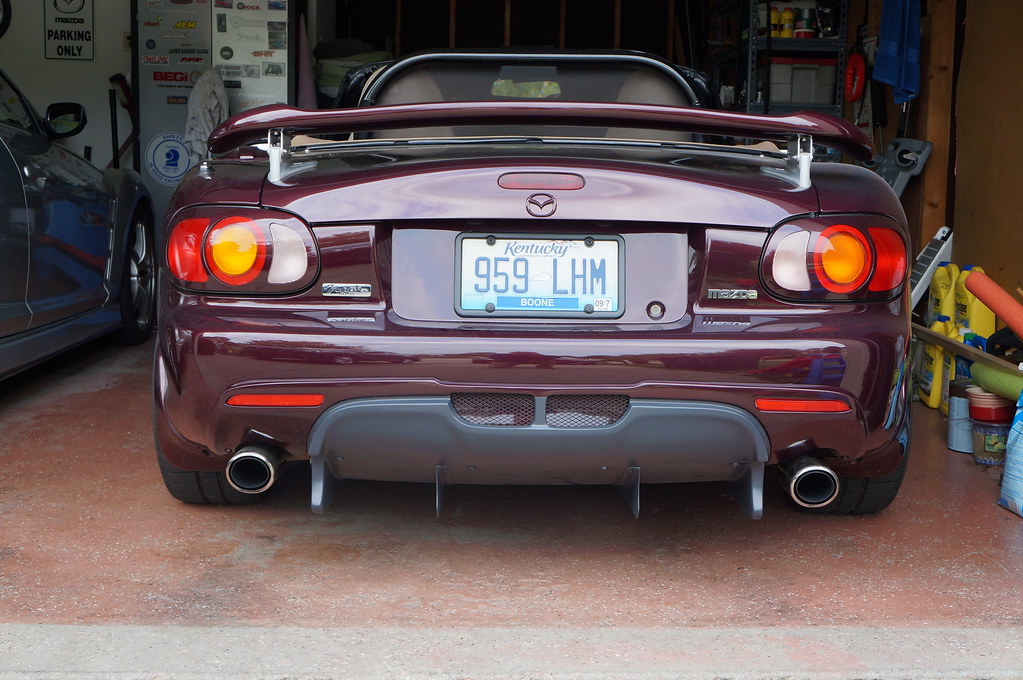
I had to juggle some hangers around from my son's Protege and Minnie but it got done. The muffler is nice and tight now. Reflectors went into their slots on the upper piece and then both upper and lower were installed.

I already posted the end result.
 
I always thought the drive motor was in the engine bay, not under the dash. Cool about the tilt feature.

I'm trying to get some work done around the house before leaving for a meeting tomorrow so I will post my work later on. For now, here's how it all turned out:

36610067040_23336433a6_b.jpg

Came out great!
 
Started de-powering the nasty, NASTY power steering rack that I've had sitting on the shelf for a few months.

Yes, I'm de-powering a rack so I can add power steering. Makes sense right? (rlaugh)
Should be nice having the faster ratio, plus the assist, because the steering wheel in my car is kinda brutal. Manual steering + 9" slicks and aero is a lot of load through the wheel.

Precision pipe wrench and sledge hammer to get the tie rod ends disconnected, and knock the retaining washer off of the inner tie rod.


This thing is FILTHY. I've gotten all the hoses out of the fittings, and will need to get the tube on that banjo fitting cut down and clean all of those up in the parts washer to prep them to be welded shut. They're not super critical, but it's good practice to keep dirt and moisture out of the steering rack.


After that, I'll finish disassembling the rack to pull the valve body off of the input pinion, and cut the seal off of the rack.
 
Last edited:
That came out great Mike, looks OEM! I like that you painted the bottom portion grey vs black.

Hmmmmm, another 'mod' Mark....[emoji6] Nice and clean.

Maff, Im starting to wonder if you like working on the car or if you just look for any reason to break out the sledge. Haha Good luck with the new project.

Simple wash and wax for Emilia.
 
Took the steering rack down to the proverbial pins & screws, and gave everything a bath in the parts washer, then the ultrasonic bath.

All the tutorials I'd read made this look like something of a pain in the *** but apparently the NA process is super straight forward. Or at least, my version, since there's apparently several different iterations, internally, of these racks.

Pull the adjusting spring & collar:


Then undo the nut at the bottom of the pinion shaft, the spring clip at the top of the pinion, then the pinion pulls straight out. Also, the hydraulic valve body is only held on with another spring clip. Remove that, then the valve body slips straight off the pinion. Further, the NA's (or at least, this version) pinion is solid, and doesn't incorporate the torsion spring that the NBs had, so it won't need to be welded solid.


Pop the retaining ring off the passenger side of the rack housing and the rack slides straight off. The seal that remains on the rack is going to be cut off as it's not needed.


(note that the rack is in soft-jaws, not straight in the vise, as that would destroy the machined surface and likely cause issues with strength and durability down the line.
 
Don't forget to weld up the PS valving bits. Otherwise you'll wind up with a really sloppy steering feel at the end. I TIG-brazed mine shut.

FXqlgjc.jpg
 
The NA's pinion (or at least the one in this rack, as there's different types it's hard say for sure they're all like that) is solid.
 
Every write-up I read on de-powering mentioned welding the pinon (FM, MotoIQ, etc) and none mentioned any versions of the rack being 'solid,' so I am confused at the moment.

You might try moving things around with a vise/wrench to make sure it is indeed solid. In your shoes I'd hate to reassemble only to realize that there is steering slop!

Edit: I think there's a torsion spring in the assembly that might make it feel solid by hand. See: https://vimeo.com/15245486
 
Last edited:
See, this is why I like posting this stuff and getting feedback.

It appears the NA pinion just has way LESS movement than the NBs. The NB pinion seems to be able to be very easily moved by hand. Since mine didn't move at all, I assumed it was solid.

But with a bit more forceful testing, turns out...

 
Yep. I'm going to have it TIGed by the guy who did my cage, along with the output shaft extension once I get the parts in for that..

I don't mind gluing stuff together but this is a bit too important / sensitive for my hack self to MIG up.
 
After its welded the splines are still there, so if the weld fails the splines will catch it. Also, it only has to resist about as much force as a person can exert (for those without a different PS retrofit) so it doesn't need to be all that strong to begin with.

Still, I'd worry about MIG spatter. I think TIG is the right call. I used silicon bronze wire because it doesn't melt the base steel, is nice and ductile, and was plenty strong enough for this operation. I didn't want to use a steel wire (although other have done it in the past) because I have no idea what the base steel has in it.
 
Yep, spatter is the biggest thing I'm worried about. And the PS should be able to exert a good deal more torque on the input than I can, so getting it done by someone who's not a hack is the right call. Also spatter, obviously. There are ways to mitigate that, but still, I'm going to be more comfortable getting it done properly.
 
I'm not gonna lie, I'm friggin stoked about this. I was looking up some info on the column this morning and stumbled over this video of an offroad race truck.

 
Do you need an alternator upgrade to drive the new power assist unit? In the MR2 world the electric power steering cars get an alternator rated for 10-20A more than manual steering cars.
 
TBD. I haven't read about anyone needing that for this system. The car has no other accessories so it *should* be fine (especially since it probably isn't going to be cranked all the way up). This is apparently a fairly common upgrade in the side-by-side (RZR / etc) world as well. If their electrics can hold up, mine should as well given that they were meant to power a street car's worth of electronics.

And if is an issue, it's not a huge deal, and I should find out pretty quickly. That's not a huge mod to make. I'm more worried about the battery, but it's a 360 CCA LiFePo, so it *should* be able to keep up. Hopefully lol
 
Last edited:
Back