How To: Stainless Steel Brake Lines

Hi everybody...I'll be installing my brakelines this weekend and I just wanted to make sure of a few of the steps.

on step 3...you turned the bleeding screw CLOCKWISE to drain the fluid from the line? Is this the same method for the final bleeding? and did you completely drain the resevoir?

I ask this because in past brakeline installs...I didn't drain the line, I just changed the brakelines (fluid would spill), complete the install in all 4 corners, then bleed (note: w/o emptying the master cylinder).

Any clarification would be greatly appreciated.

Thanks
 
Do not let the master cylinder go dry!!! Suck out as much as you can with a turkey baster and then top it off with new fluid. Bleed each brake until you see the air stop and the new, clean fluid start coming out. Top off the MC each time you finish bleeding a brake. A real handy item to make this task easier is about 2 feet of IV tubing (medical supply store). You can put that on the bleeder and put the other end in a cup of brake fluid -- just enough fluid so that the end of the tube is submerged in fluid. Air will get pushed out and bubble out of the tube, but only fluid will get pulled back in when you let off on the brake pedal. This also allows you to bleed the brakes solo without another person. Using a brake fluid that is a different color than the one you are replacing makes it easier to see when the old fluid stops and the new starts.

Bleeders are the same as screws, lefty loosey, righty tighty.

Do not let fluid get on anything! It will eat right through asphalt and take paint off. Clean everything down with brake cleaner before you put the wheel back on.

Edit: The How To in the first post suggests that you should put the tube into your new bottle of brake fluid. Do not do this! You will contaminate the fluid when you bleed the old fluid out and it goes into the bottle. Just use a cup that won't tip with about an inch of new fluid in it.
 
Last edited:
Excellent "How to" - Thank you as always. I had a pressure loss issue with my brakes and could not figure it out. I rebuild the master cylinder, redid the seals on the calibers, and checked all the connections. All the hoses looked fine, but I eventually broke down and bought braided hoses to replace the rubber ones, and completely solved the issues! Evidently, there was a bulge in the rubber hoses that I could not see. This is where the stainless steel break lines come in handy.
 
Did this over the weekend on my PR5 and took some pics along the way. Since this thread is oddly absent of pics, I figured I'd include them here:

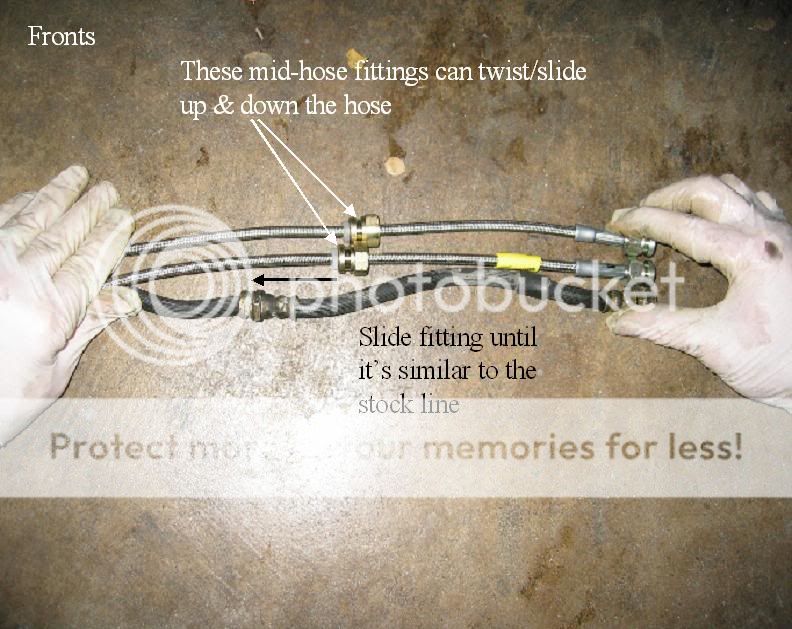
First, this is how my fronts appeared out of the box. Notice how different they are compared to stock. I didn't realize the first time around that you can simply move the mid-hose fittings. No special tools required, just a simple twisting or pulling by hand will do (Thanks, Ken of PG). Let me also add that even after I got the lines installed, I adjusted the position of the mid-hose fitting to strike a good balance between bend-radius and tension:
IMG_6930_edit.jpg


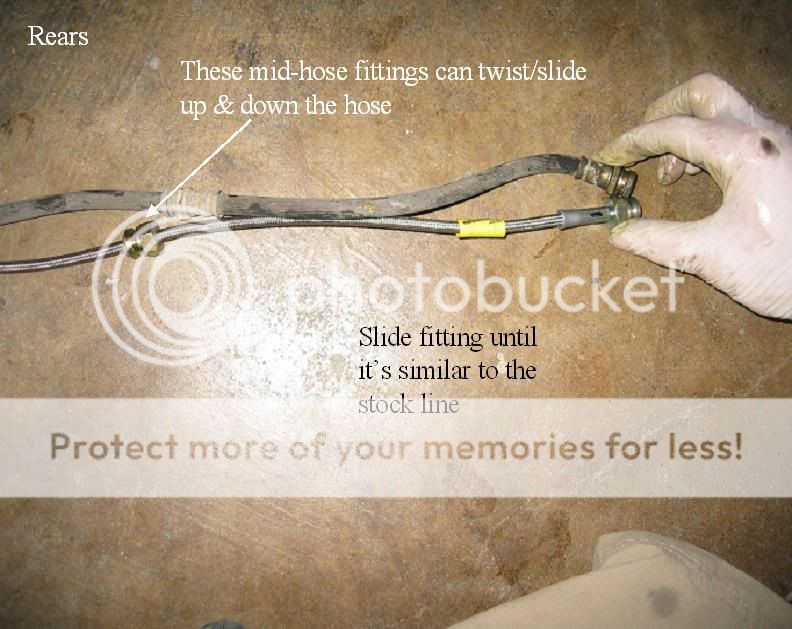
Here are the rears out of the box:
IMG_6928_edit.jpg


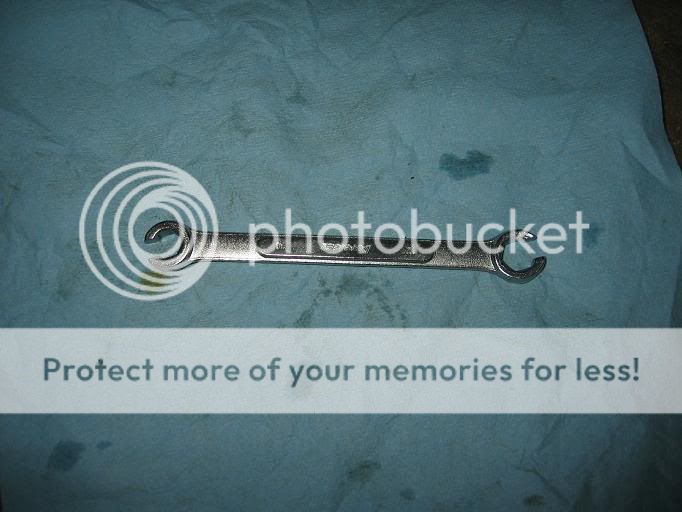
As has been stated, a 10mm flare nut wrench is useful for the hard line:
IMG_7031.jpg


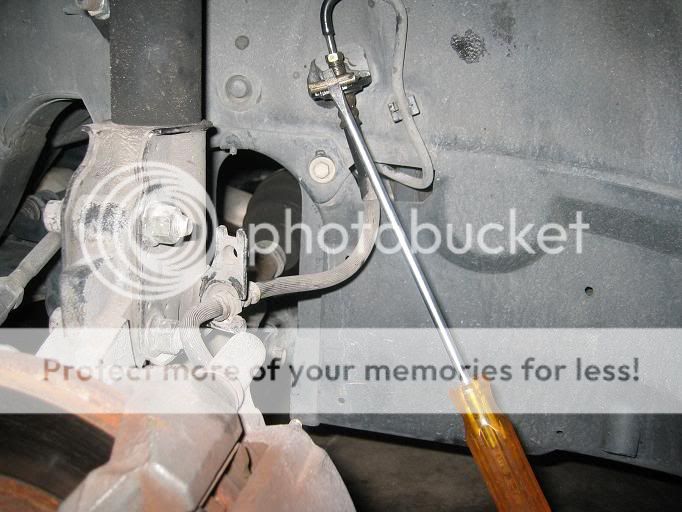
I found that a long flat-head screwdriver was the perfect tool for removing the clips. A little twisting, pulling, and leverage and they pop right out w/little effort
IMG_7028.jpg


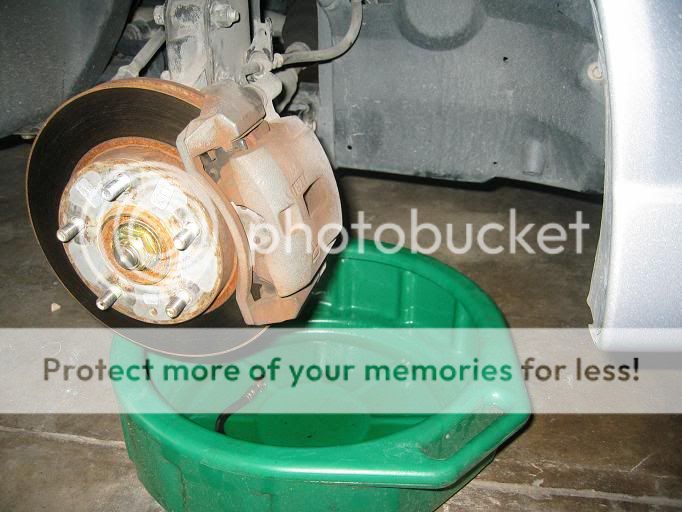
One of the open topped fluid containers works well here:
IMG_7029.jpg


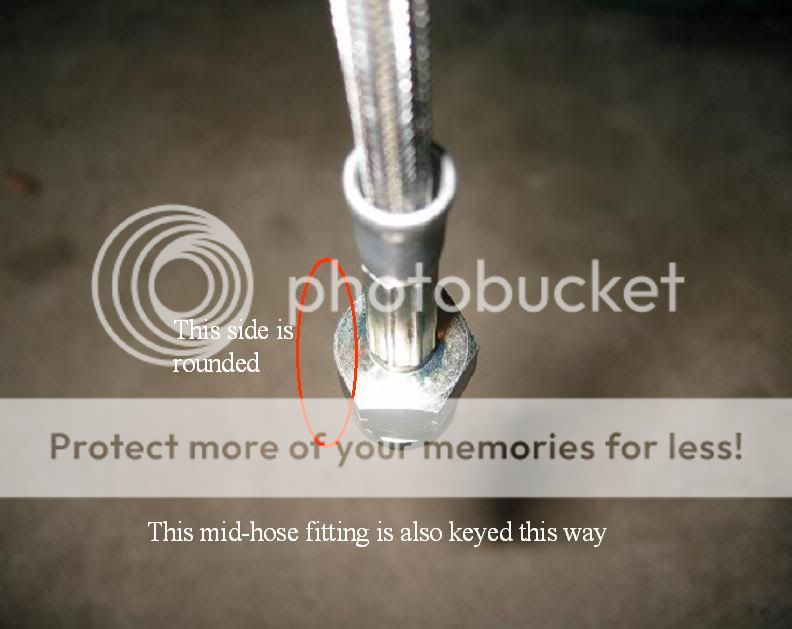
When installing the new lines, notice how the fittings are keyed (they are also keyed on the stock lines). I think people have had problems with re-installing the clips in the past because they didn't realize the parts were keyed. When the keyed portion is not lined up, it won't sit flush, and you'll have a very tough time inserting the clips and will likely deform it. When you have the keyed portion in correctly, it does not rotate, it's in the hole completely flush, and the clips slide in relatively easily. Use the stock lines as a guide to tell you how the keyed portion should be oriented:
IMG_7032.jpg


For the fronts, I started at the hard line so that I knew the keying of the fitting would be correct w/o any twisting. For the rears, I started at the caliper since the fitting is angled, and it should only be installed angled upward.

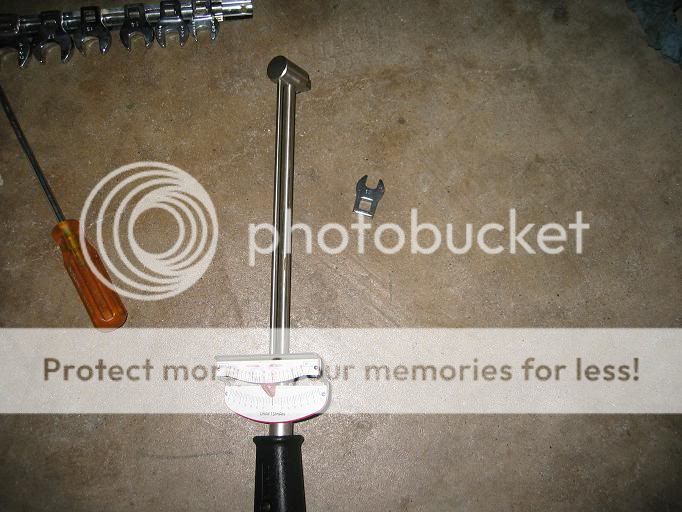
For torquing the hardline, you can use a crowfoot attachment on a torque wrench. Reduce the torque appropriately for the crowfoot extension. Google 'crowfoot torque' or similar:
IMG_7035.jpg


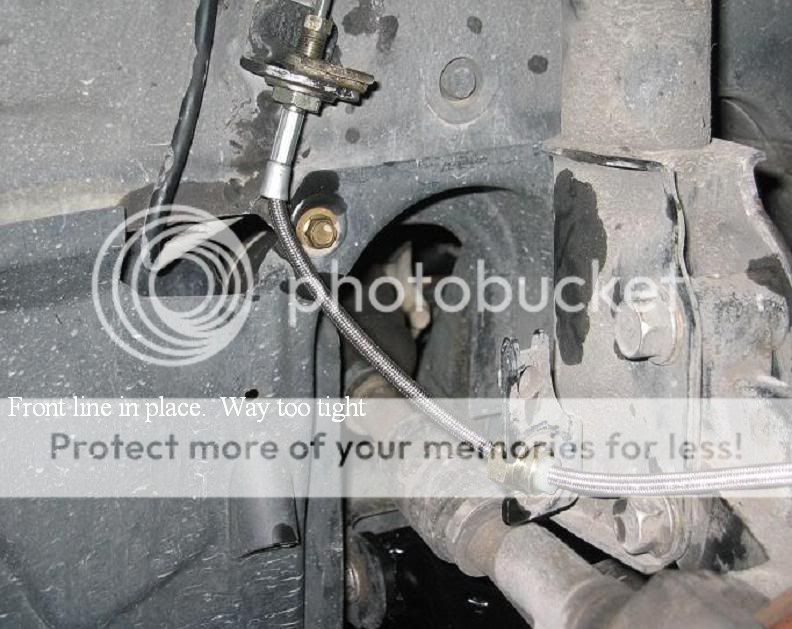
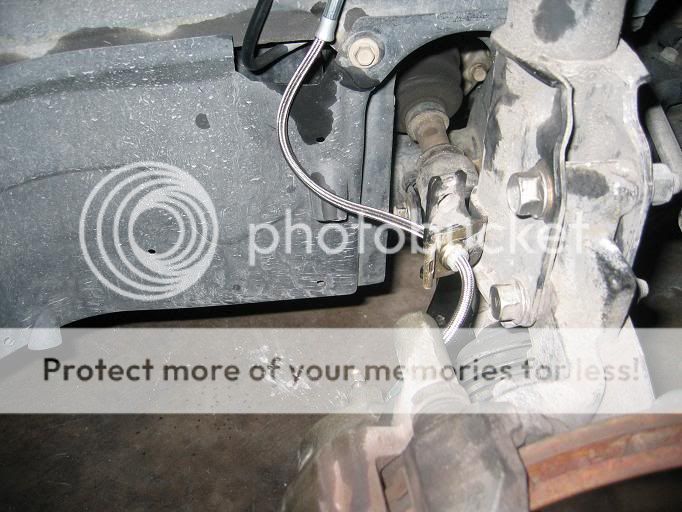
If yours looks like the following, it's wrong (and downright dangerous). You need much more slack between the hardline and the strut. My lines out of the box were like this before I realized that the mid-hose fitting could move:
IMG_6932.jpg


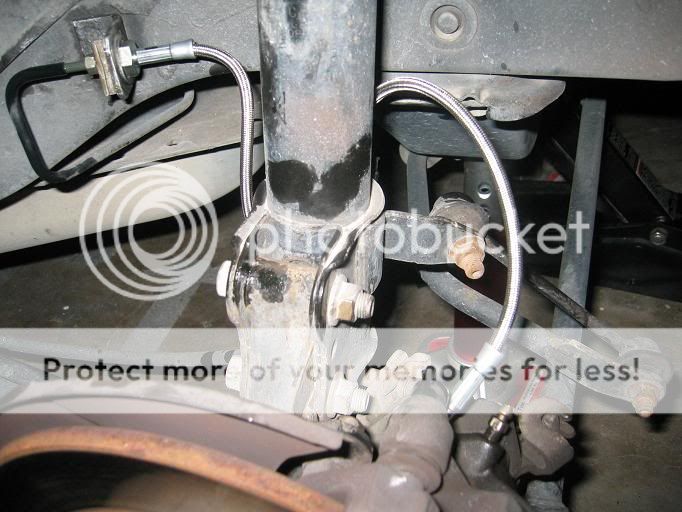
Here is the final routing I ended up with:
Fronts:
IMG_7036.jpg


Rears:
IMG_7037.jpg


The first one took me about 45 min. The remaining three took me about 10-15 min ea.
 
Great writeup and thanks for the follow up pics. Question I have is when you replace the brake lines, do you have to drain the reservoir and hard lines as stated in step three? I thought it was always bad to let the reservoir drain completely? Also, would it be possible to just unhook old brake lines without draining at all from the bleeder valve or will brake fluid start spewing out all over the place? Thank you!
 
You're correct, it's best not to let the reservoir run dry. It's not the end of the world if it does run dry, it just makes the bleeding process take a bit longer to remove all the air, and if you have ABS, then really try not to allow air to get in there.

You can unhook the hard lines without draining anything beforehand, just keep a small bucket/bowl or two handy. Brake fluid is not pressurized when the brake pedal isn't being pressed, so it's not like it will spray uncontrollably...it just dribbles out. If your floor is painted, then try to keep the fluid off it. If fluid does find its way onto painted surfaces, spray it w/some water (spray bottles are handy for this).
 
thanks for the pictures!
and if you have ABS, then really try not to allow air to get in there.
what happens? i replaced 2 rear calipers and the reservoir went dry from the fluid dripping from the lines. i bled them and clean fluid with no bubbles were coming out of the new calipers. anything i need to do extra?
-meGrimlock
 
Back