
This How To was a joint effort between Super Car Tastes on Skoda Budget and myself. Super Car was responsible for the bulk of the written instructions and torque specs, while I contributed the pics along with additional details and tips based on my experience with the install with the RPM Sport Springs (but should be applicable to any spring for this car).
The level of detail may be overkill for more experienced members but I figure those people probably won't use this How To anyway. This was written from my perspective as someone with some familiarity/comfort with wrenching and experience with easy bolt on mods BUT little/no experience installing suspension mods. My local shops quoted $300 or more to do this job so DIY definitely paid off. Another benefit of DIY springs that I found, is that I am no longer intimidated by the shock install (when the time comes for Koni Yellows, I'll be doing it myself).
As a first timer with the spring install, I can say that the task is not difficult but was rather tedious (especially compressing the springs). I've read posts of people doing this in 3 hours but it probably took me twice that (budget your time as see fit).
The front springs are much more involved than the rear. The instructions list the rear springs first but not for any particular reason. I’m one of those tackle the hard stuff first so I did the fronts and was glad I did because the rears were a breeze (relatively).
Aside from the basic tools (ratchet and wrenches), a spring compressor and impact wrench were the only things I didn't already have. I "rented" the spring compressor for free from Autozone with their Loan a Tool program and picked up a cheapie electric impact wrench from Harbor Freight for less than $40 (SO glad that I did).
Hope that some of you find this helpful and of course, if you find any errors or important omissions let me know.
=============Tool List================
1. Floor Jack
2. Jack Stands
3. Torque Wrench(es) – capable of 14ft-lbs to 94 ft-lbs
4. Ratchet Set or Wrenches (ratchet recommended) – 12mm, 14mm & 17mm
5. Ratchet Extensions (various)
6. Impact Wrench or Breaker Bar (impact wrench recommended) – 14mm deep socket, 17mm deep socket
7. Small/medium crescent wrench or needle nose vise grips (crescent recommended)
8. Open End Wrench (14 mm)
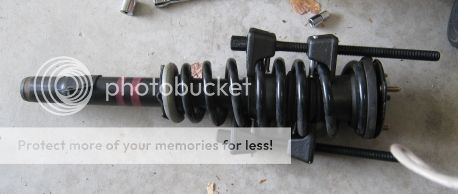
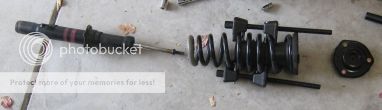
9. Spring Compressors (Macpherson strut type)
===========Torque Specs==============
----------Front------------
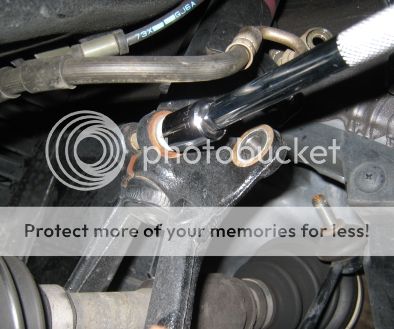
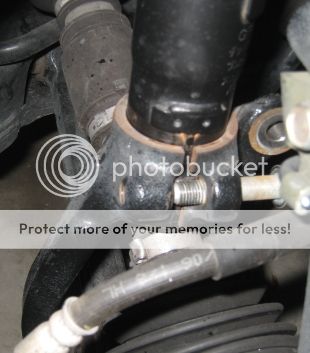
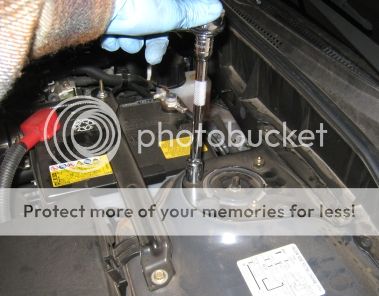
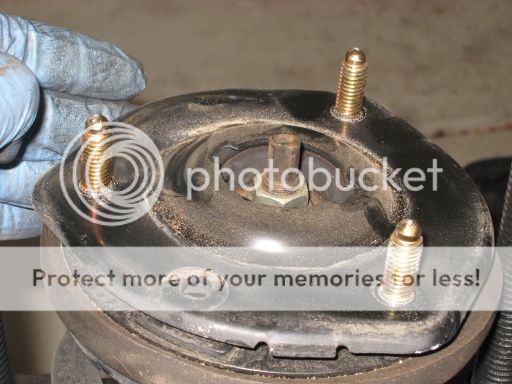
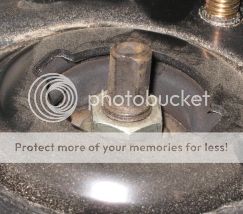
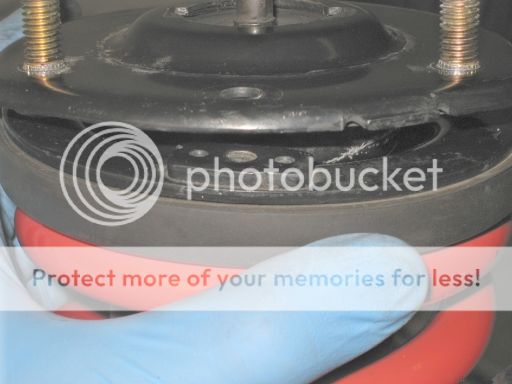
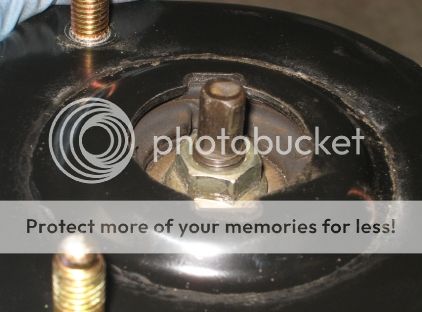
1. Upper 3 nuts (14mm) in engine compartment: 22 - 30 lb ft
2. Bolt (14mm) pinching cup holding shock body: 32 - 39 lb ft
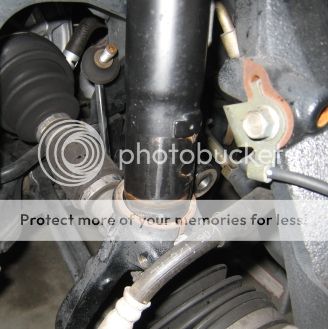
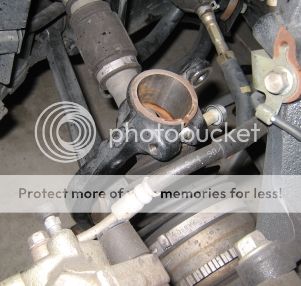
3. Bolt (and possibly nut) (17mm) holding fork to lower control arm: 69 - 94 lb ft
4. Nut (14mm) securing sway bar end link: 32 - 40 lb ft
5. Bolt (12mm) securing brake hose bracket : 14 - 19 lb ft
----------Rear------------
1. Control Arm bolt (17mm): 64 - 86 lb-ft
2. Sway bar end link (14mm): 32 - 45 lb-ft
==========Prep & Disclaimers============
Note: In all cases jack up the respective end of the car, rest it on jackstands, and remove wheel/tire assemblies. Do NOT work perform this installation without securing the car on jackstands and properly preventing the car from being able to move (e.g. wheel chocks).
Disclaimer:
This How To assumes you have basic knowledge of working on cars and the appropriate safety precautions involved. Also, this How To was based on our recollection of performing this installation ourselves plus whatever the manual says (very little actually, as in "Remove in the order indicated in the table").
Errors or omissions are possible so use at your own risk.
============Rear Suspension============
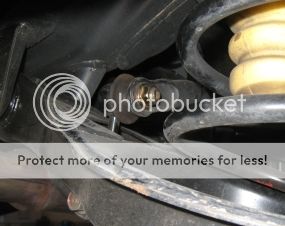
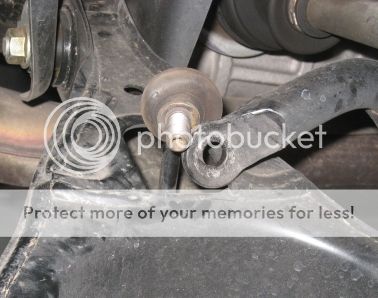
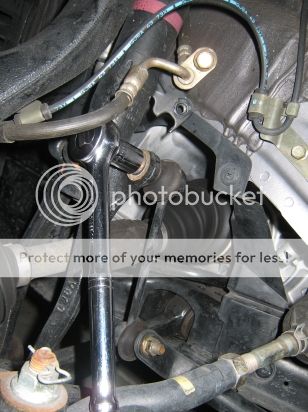
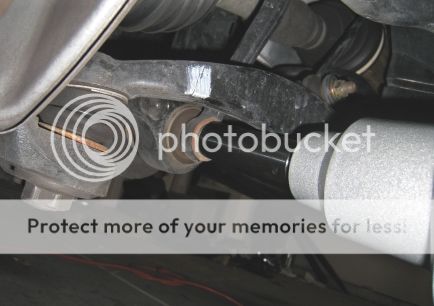
1. Unbolt the rear sway bar link from the lower control arm. The rear sway bar link protrudes through the lower control arm approx midway on the arm. Do this to both sides. This detaches the sway bar from the lower control arms. Look for pics of this in sway bar threads.
Tool: 14mm
Note: Earlier version of this How To showed photos below show the end link unbolted from the swaybar. This is not recommended because the endlinks can cause problems. It's better to unbolt the lower bolt (attached to the control arm).
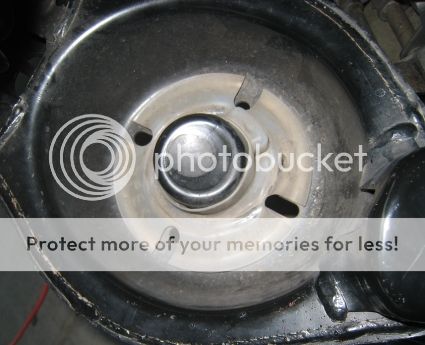
2. Place a floor jack under the large cup (actually the lower spring seat) in the lower control arm.
Tip: I found that positioning the jack perpendicular to the car (90 degrees to the driveshaft) seemed to make it easier to remove and reinstall the bolt in step 4.
3. Jack up the lower control arm a bit. This will compress the spring and takes some of the loading off the bolt holding the lower control arm to the hub carrier. The amount it should be compressed is somewhat subjective. See further below.
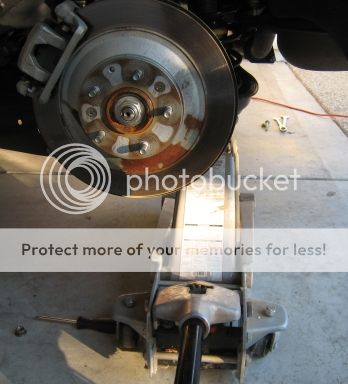
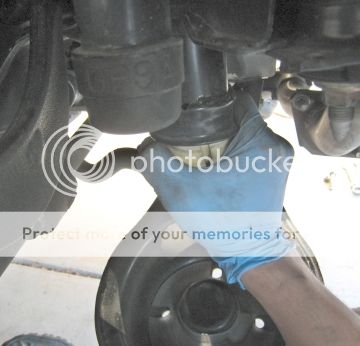
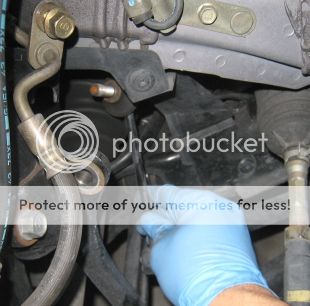
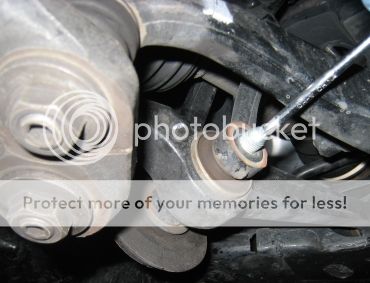
4. Remove the lower bolt connecting the lower control arm to the hub (and brake disc) carrier. This is a very long bolt (3" - 4"?) that only has threads on the end and runs longitudinally, going from back to front IIRC. This is a major suspension bolt and is torqued down with some force. It may also be frozen somewhat in place by corrosion so don't be surprised if it takes a lot of effort to get loosened off.
Tool: 17mm (impact wrench recommended)
Tip: This is very tight bolt and is much easier to break loose using an impact wrench.
5. If the bolt seems seized and won't come out after the threads have released try repositioning the lower control arm up and down using the jack. Since the bolt has to pass through a long bore any binding of the parts will cause it to seize somewhat. If necessary help it out with a hammer and thin rod or screwdriver from the other end. Take the bolt out completely.
Tip: Applying pressure on the brake disk assembly (push at top, inwards and slightly upwards helps to relieve some of the binding - do this while pulling or tapping the bolt).
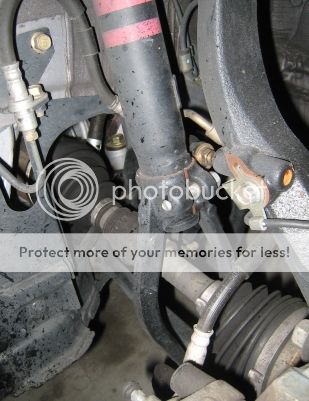
6. Lower the jack so that the lower control arm drops free of the hub carrier (the hub carrier is still held on by the upper control arm).
7. The spring will probably catch in it's lower perch (spring seat) so give the free end of the control arm a good kick down and inwards to force it to swing lower and release the spring. Also, twisting the spring back and forth (about it's long axis) seemed to work well for loosening things up at the top and bottom.
Tip: Make sure the endlink bolts are completely clear of the sway bar before trying to force to the lower control arm. I forgot to do this and damaged the threads on one of my endlinks.
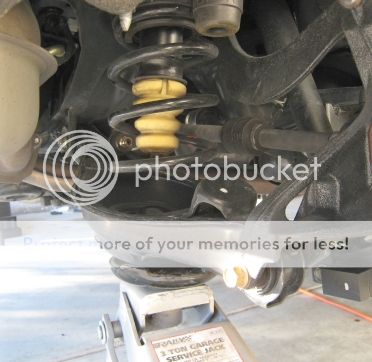
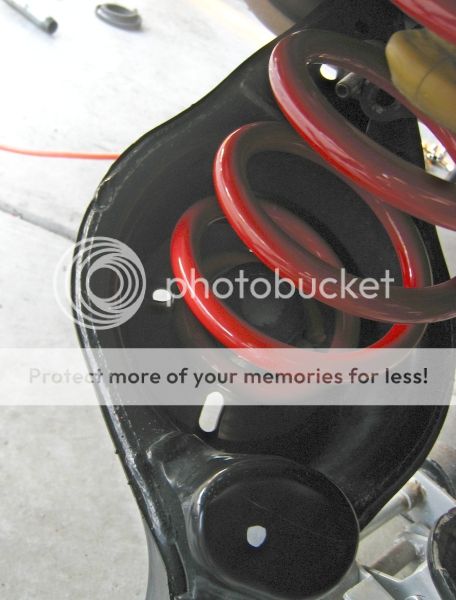
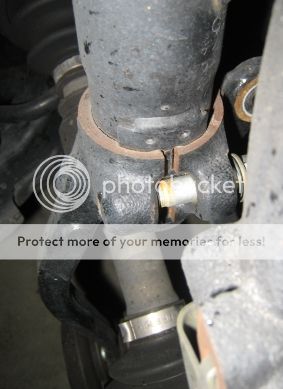
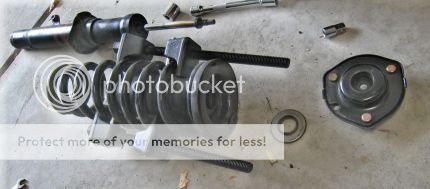
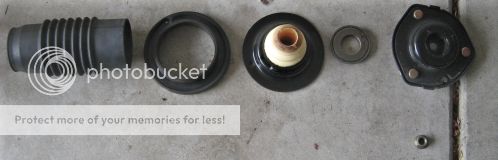
Note: The rubber piece in the spring cup and helical groove with stop for the last coil of the spring. During re-installation, you will need align the spring to this stop.
8. Remove the stock spring by pulling down on it (the upper spring seat tends to grab it a bit). Again, twisting seems to help here a lot.
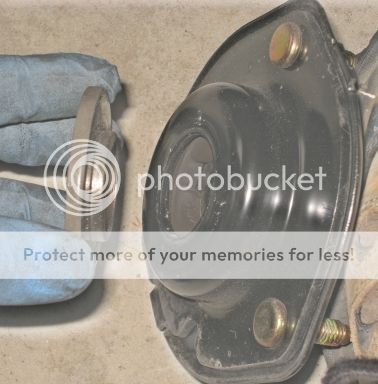
Note: Upper spring seat may come out with the spring (black rubber piece with helical surface on one side).
9. Remove and cut the bump stops at this point if you want to reduce their length. The bump stop is obvious, and becomes accessible once you remove the spring.
Note: This can be done with bump stop on the car or removed. Removing the bump stop requires a sort of bending/twisting motion to pop it out and can be a slight PITA. It "snaps" into it's mounting bracket (note the ridge on the bump stop that will fit into a groove in the bracket).
-----------------Reassembly-----------------------
Installation is reverse but things to watch out for:
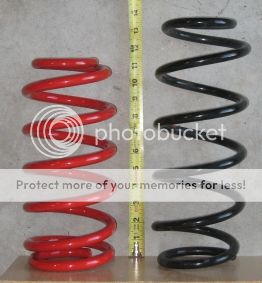
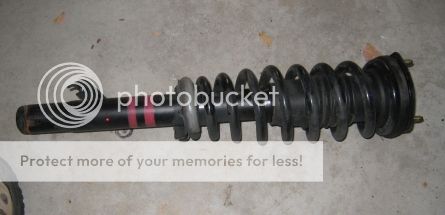
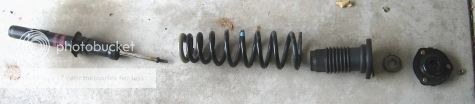
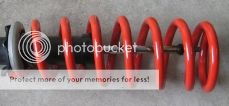
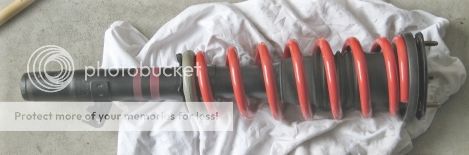
1. Spring has small and large end. Small end goes up (top as shown in photo).
2. Attach the upper spring seat (if it came out) to the new spring. It's obvious how it should go together. Be sure end of last coil is against the stop on the seat.
3. Rotate the new spring so that the lower free end (large end) sits properly in the lower spring seat. You can't judge this too well until you swing the control arm back up, jiggle the spring to get it over the cup and then start compressing it with the floor jack. Lower the jack and reposition the spring if necessary. You want to be sure the spring is properly seated. This is what people refer to as "clocking".

4. Eyeball the holes to try to best align them for the long bolt holding the lower control arm to the hub carrier. Jack the arm up and down as required, using the floor jack, to get the best alignment. You may have to help the bolt in with a few blows from a hammer.
5. Do both springs for both sides before reattaching sway bar end links.
Note: Earlier version of this How To showed the end link detached from swaybar (this is not recommended). If you did this, see tip below:
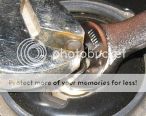
Tip: If endlink nut will not torque down, then you can use an allen wrench and box wrench. Notice the end link bolt is keyed for an allen wrench. This happened to me on one side and I found the nut was finger loose after a couple of months (not good at all). I had all sorts of strange creaking noises a low speeds (parking lots, stoplights etc) which sounded like they were coming from the front end. After tightening the offending nut, the creaking went away.
WRONG WAY to Detach End Link
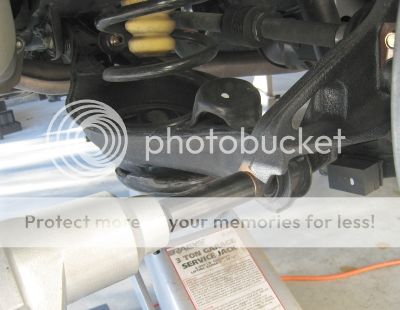
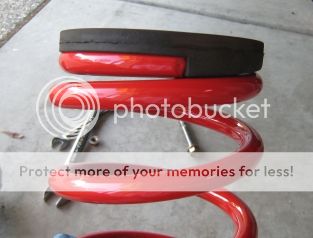
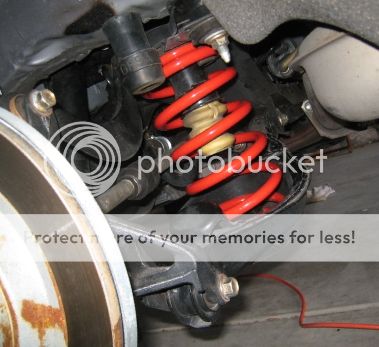
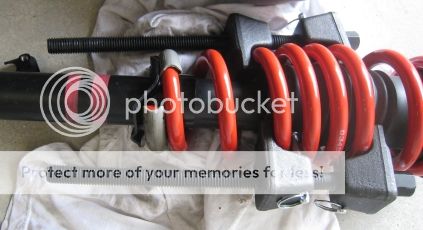
6. Photo shows spring after installation.
The level of detail may be overkill for more experienced members but I figure those people probably won't use this How To anyway. This was written from my perspective as someone with some familiarity/comfort with wrenching and experience with easy bolt on mods BUT little/no experience installing suspension mods. My local shops quoted $300 or more to do this job so DIY definitely paid off. Another benefit of DIY springs that I found, is that I am no longer intimidated by the shock install (when the time comes for Koni Yellows, I'll be doing it myself).
As a first timer with the spring install, I can say that the task is not difficult but was rather tedious (especially compressing the springs). I've read posts of people doing this in 3 hours but it probably took me twice that (budget your time as see fit).
The front springs are much more involved than the rear. The instructions list the rear springs first but not for any particular reason. I’m one of those tackle the hard stuff first so I did the fronts and was glad I did because the rears were a breeze (relatively).
Aside from the basic tools (ratchet and wrenches), a spring compressor and impact wrench were the only things I didn't already have. I "rented" the spring compressor for free from Autozone with their Loan a Tool program and picked up a cheapie electric impact wrench from Harbor Freight for less than $40 (SO glad that I did).
Hope that some of you find this helpful and of course, if you find any errors or important omissions let me know.
=============Tool List================
1. Floor Jack
2. Jack Stands
3. Torque Wrench(es) – capable of 14ft-lbs to 94 ft-lbs
4. Ratchet Set or Wrenches (ratchet recommended) – 12mm, 14mm & 17mm
5. Ratchet Extensions (various)
6. Impact Wrench or Breaker Bar (impact wrench recommended) – 14mm deep socket, 17mm deep socket
7. Small/medium crescent wrench or needle nose vise grips (crescent recommended)
8. Open End Wrench (14 mm)
9. Spring Compressors (Macpherson strut type)
===========Torque Specs==============
----------Front------------
1. Upper 3 nuts (14mm) in engine compartment: 22 - 30 lb ft
2. Bolt (14mm) pinching cup holding shock body: 32 - 39 lb ft
3. Bolt (and possibly nut) (17mm) holding fork to lower control arm: 69 - 94 lb ft
4. Nut (14mm) securing sway bar end link: 32 - 40 lb ft
5. Bolt (12mm) securing brake hose bracket : 14 - 19 lb ft
----------Rear------------
1. Control Arm bolt (17mm): 64 - 86 lb-ft
2. Sway bar end link (14mm): 32 - 45 lb-ft
==========Prep & Disclaimers============
Note: In all cases jack up the respective end of the car, rest it on jackstands, and remove wheel/tire assemblies. Do NOT work perform this installation without securing the car on jackstands and properly preventing the car from being able to move (e.g. wheel chocks).
Disclaimer:
This How To assumes you have basic knowledge of working on cars and the appropriate safety precautions involved. Also, this How To was based on our recollection of performing this installation ourselves plus whatever the manual says (very little actually, as in "Remove in the order indicated in the table").
Errors or omissions are possible so use at your own risk.
============Rear Suspension============
1. Unbolt the rear sway bar link from the lower control arm. The rear sway bar link protrudes through the lower control arm approx midway on the arm. Do this to both sides. This detaches the sway bar from the lower control arms. Look for pics of this in sway bar threads.
Tool: 14mm
Note: Earlier version of this How To showed photos below show the end link unbolted from the swaybar. This is not recommended because the endlinks can cause problems. It's better to unbolt the lower bolt (attached to the control arm).
2. Place a floor jack under the large cup (actually the lower spring seat) in the lower control arm.
Tip: I found that positioning the jack perpendicular to the car (90 degrees to the driveshaft) seemed to make it easier to remove and reinstall the bolt in step 4.
3. Jack up the lower control arm a bit. This will compress the spring and takes some of the loading off the bolt holding the lower control arm to the hub carrier. The amount it should be compressed is somewhat subjective. See further below.
4. Remove the lower bolt connecting the lower control arm to the hub (and brake disc) carrier. This is a very long bolt (3" - 4"?) that only has threads on the end and runs longitudinally, going from back to front IIRC. This is a major suspension bolt and is torqued down with some force. It may also be frozen somewhat in place by corrosion so don't be surprised if it takes a lot of effort to get loosened off.
Tool: 17mm (impact wrench recommended)
Tip: This is very tight bolt and is much easier to break loose using an impact wrench.
5. If the bolt seems seized and won't come out after the threads have released try repositioning the lower control arm up and down using the jack. Since the bolt has to pass through a long bore any binding of the parts will cause it to seize somewhat. If necessary help it out with a hammer and thin rod or screwdriver from the other end. Take the bolt out completely.
Tip: Applying pressure on the brake disk assembly (push at top, inwards and slightly upwards helps to relieve some of the binding - do this while pulling or tapping the bolt).
6. Lower the jack so that the lower control arm drops free of the hub carrier (the hub carrier is still held on by the upper control arm).
7. The spring will probably catch in it's lower perch (spring seat) so give the free end of the control arm a good kick down and inwards to force it to swing lower and release the spring. Also, twisting the spring back and forth (about it's long axis) seemed to work well for loosening things up at the top and bottom.
Tip: Make sure the endlink bolts are completely clear of the sway bar before trying to force to the lower control arm. I forgot to do this and damaged the threads on one of my endlinks.
Note: The rubber piece in the spring cup and helical groove with stop for the last coil of the spring. During re-installation, you will need align the spring to this stop.
8. Remove the stock spring by pulling down on it (the upper spring seat tends to grab it a bit). Again, twisting seems to help here a lot.
Note: Upper spring seat may come out with the spring (black rubber piece with helical surface on one side).
9. Remove and cut the bump stops at this point if you want to reduce their length. The bump stop is obvious, and becomes accessible once you remove the spring.
Note: This can be done with bump stop on the car or removed. Removing the bump stop requires a sort of bending/twisting motion to pop it out and can be a slight PITA. It "snaps" into it's mounting bracket (note the ridge on the bump stop that will fit into a groove in the bracket).
-----------------Reassembly-----------------------
Installation is reverse but things to watch out for:
1. Spring has small and large end. Small end goes up (top as shown in photo).
2. Attach the upper spring seat (if it came out) to the new spring. It's obvious how it should go together. Be sure end of last coil is against the stop on the seat.
3. Rotate the new spring so that the lower free end (large end) sits properly in the lower spring seat. You can't judge this too well until you swing the control arm back up, jiggle the spring to get it over the cup and then start compressing it with the floor jack. Lower the jack and reposition the spring if necessary. You want to be sure the spring is properly seated. This is what people refer to as "clocking".
4. Eyeball the holes to try to best align them for the long bolt holding the lower control arm to the hub carrier. Jack the arm up and down as required, using the floor jack, to get the best alignment. You may have to help the bolt in with a few blows from a hammer.
5. Do both springs for both sides before reattaching sway bar end links.
Note: Earlier version of this How To showed the end link detached from swaybar (this is not recommended). If you did this, see tip below:
Tip: If endlink nut will not torque down, then you can use an allen wrench and box wrench. Notice the end link bolt is keyed for an allen wrench. This happened to me on one side and I found the nut was finger loose after a couple of months (not good at all). I had all sorts of strange creaking noises a low speeds (parking lots, stoplights etc) which sounded like they were coming from the front end. After tightening the offending nut, the creaking went away.
WRONG WAY to Detach End Link
6. Photo shows spring after installation.
Last edited:

")