
- :
- Protege
Well its pretty easy to do so heres the low down
Scale of difficulty: Novice
Time: 30-45 Depending if you have help or not
Tools youll need are
Allen wrench
Ratchet w/14mm socket or wrench
Socket extension
Tools you may also need
PB or WD40
Breaker bar
Cut off wheel (maybe)
***If you are upgrading your sway bar then i highly recommend upgrading your endlinks also. The stress of a stiffer sway bar will end up snapping or bending your oem endlinks. So having said that if you dont have upgraded endlinks then its best to buy and swap them at this time.***
First: Make sure vehicle is on a flat surface and put on jack stands (dont just use a jack ive seen what can happen, so safety first)
Once vehicle is safely secured on stands then hop on under there and locate the endlinks which are behind the rear wheels they are connected to the strut and the rear sway bar.
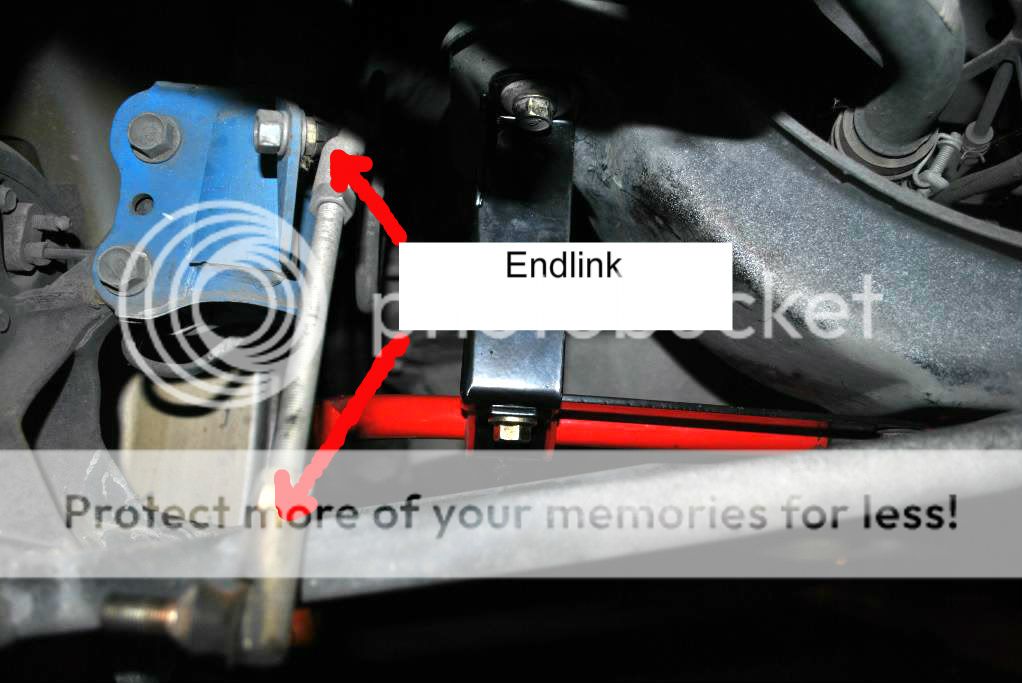
Next: Unbolt endlinks from swaybar if you have stock endlinks you will need the allen wrench and the wrench to loosen them. If you have aftermarket endlinks then you should know how to remove them. If you have trouble removing endlinks then a cut off wheel may be needed.
**Most cases the endlinks are rusted on so cutting and replacing them may be needed**
If you are replacing your endlinks at this time then you would need to remove the endlink from the strut also and install upgraded links.
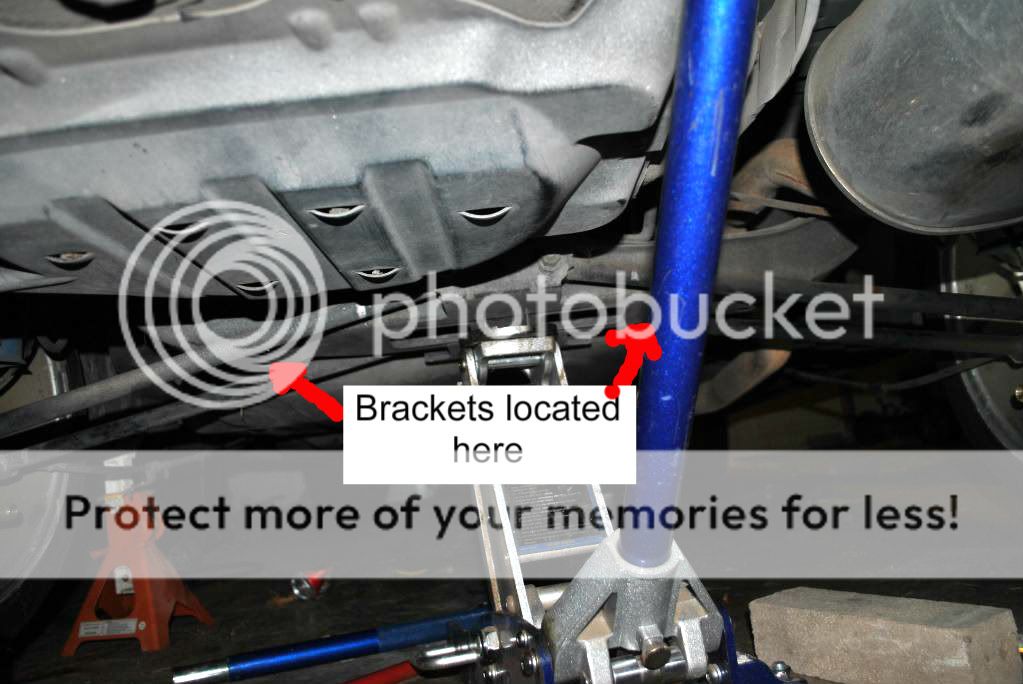
Next: Once links are unbolted move toward the center of the vehicle. There is the rear subframe, and you will see 2 brackets holding the rear sway bar each bracket has 2 bolts. Use the ratchet w/extension and (breaker bar if needed) remove all 4 bolts. Once they are removed sway bar will come down.
IF you are installing the Clunk Fix skip the next step and continue to the Clunk Fix Install If not then continue to next step
Next: To install replacement sway bar do process in reverse.
Clunk Fix Intstall:
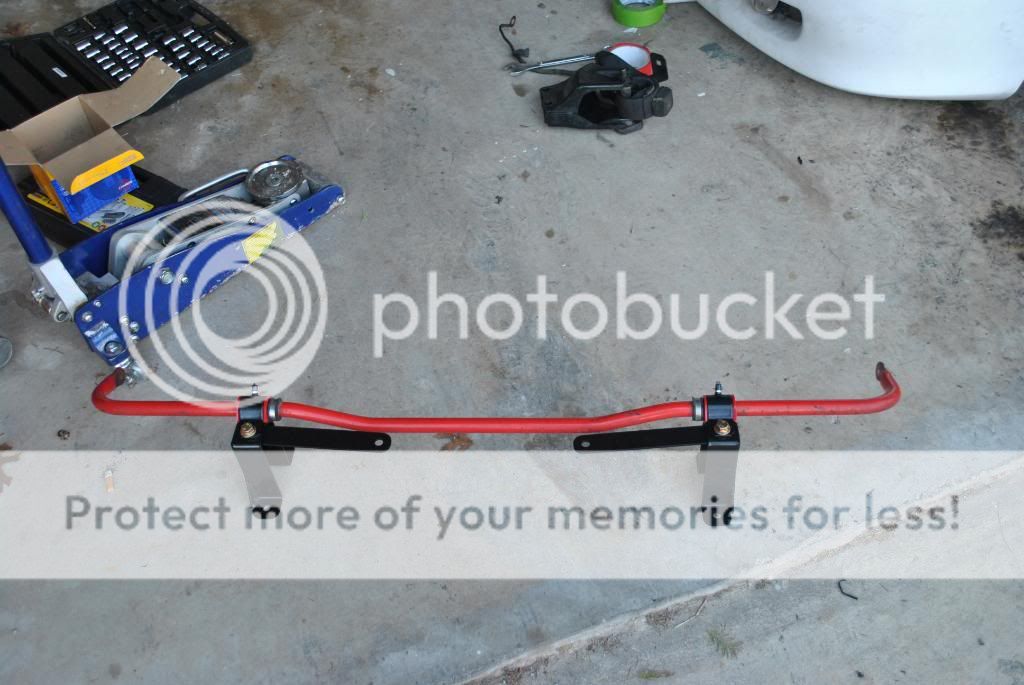
**If you are installing the Clunk Fix its easier to assemble the clunk fix off the vehicle and install that way**
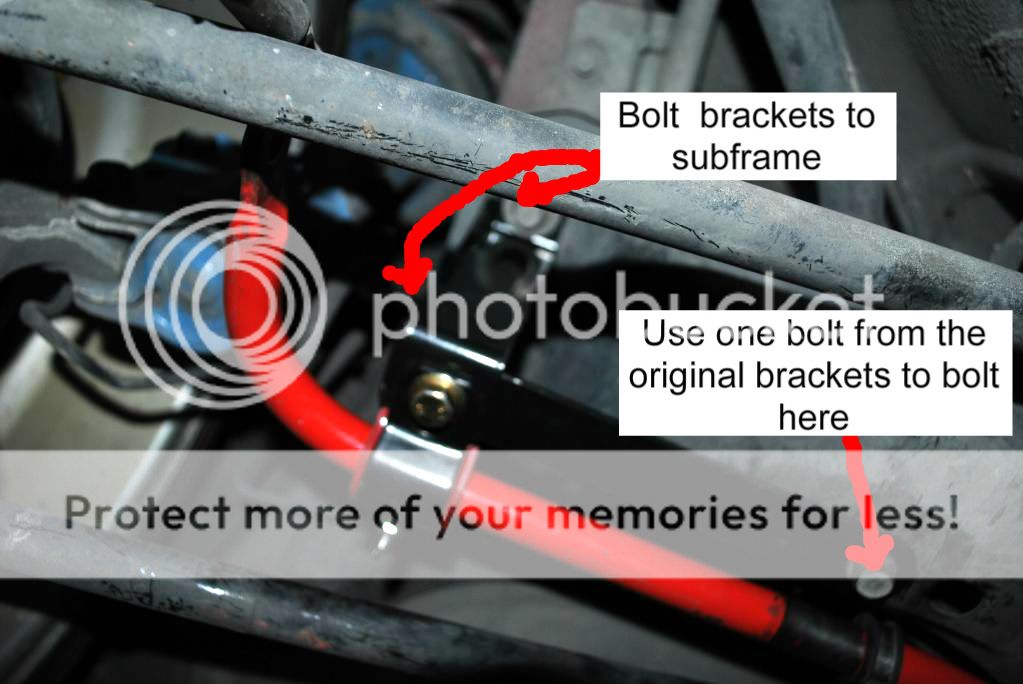
**Also having another set of hands to help with the install is best but not nessecary, using the jack like the picture showing where the brackets are will work just fine to hold the subframe in place.**
Next: Once the sway bar is removed then at the end of the rear subframe there are 2 bolts on each side remove those 4 bolts. Once you remove all 4 bolts the subframe will hang down and make it difficult to install clunk fix so this is where you use the jack to hold it up in place.
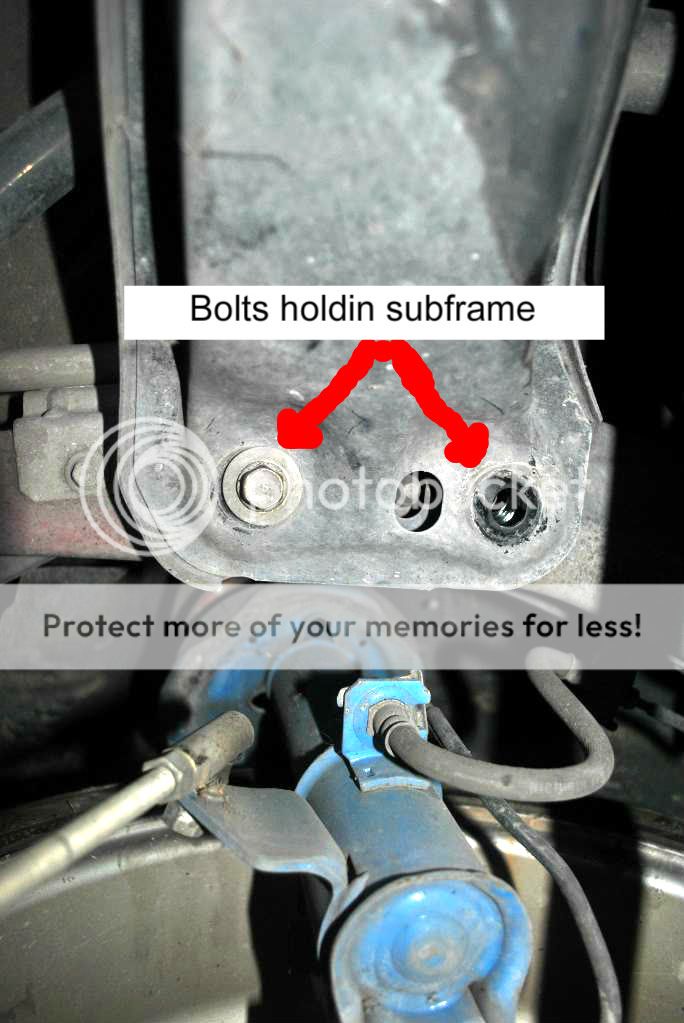
Next: Use the bolts you just removed to bolt the clunk fix brackets. Tighten but dont over torque.
Next: Bolt up endlinks to sway bar and call it a day....Your done.
Last: Clean up your mess, drop your car, and take it for a ride.[/QUOTE]
Dont forget to grease your bushings if they are greaseable
Scale of difficulty: Novice
Time: 30-45 Depending if you have help or not
Tools youll need are
Allen wrench
Ratchet w/14mm socket or wrench
Socket extension
Tools you may also need
PB or WD40
Breaker bar
Cut off wheel (maybe)
***If you are upgrading your sway bar then i highly recommend upgrading your endlinks also. The stress of a stiffer sway bar will end up snapping or bending your oem endlinks. So having said that if you dont have upgraded endlinks then its best to buy and swap them at this time.***
First: Make sure vehicle is on a flat surface and put on jack stands (dont just use a jack ive seen what can happen, so safety first)
Once vehicle is safely secured on stands then hop on under there and locate the endlinks which are behind the rear wheels they are connected to the strut and the rear sway bar.
Next: Unbolt endlinks from swaybar if you have stock endlinks you will need the allen wrench and the wrench to loosen them. If you have aftermarket endlinks then you should know how to remove them. If you have trouble removing endlinks then a cut off wheel may be needed.
**Most cases the endlinks are rusted on so cutting and replacing them may be needed**
If you are replacing your endlinks at this time then you would need to remove the endlink from the strut also and install upgraded links.
Next: Once links are unbolted move toward the center of the vehicle. There is the rear subframe, and you will see 2 brackets holding the rear sway bar each bracket has 2 bolts. Use the ratchet w/extension and (breaker bar if needed) remove all 4 bolts. Once they are removed sway bar will come down.
IF you are installing the Clunk Fix skip the next step and continue to the Clunk Fix Install If not then continue to next step
Next: To install replacement sway bar do process in reverse.
Clunk Fix Intstall:
**If you are installing the Clunk Fix its easier to assemble the clunk fix off the vehicle and install that way**
**Also having another set of hands to help with the install is best but not nessecary, using the jack like the picture showing where the brackets are will work just fine to hold the subframe in place.**
Next: Once the sway bar is removed then at the end of the rear subframe there are 2 bolts on each side remove those 4 bolts. Once you remove all 4 bolts the subframe will hang down and make it difficult to install clunk fix so this is where you use the jack to hold it up in place.
Next: Use the bolts you just removed to bolt the clunk fix brackets. Tighten but dont over torque.
Next: Bolt up endlinks to sway bar and call it a day....Your done.
Last: Clean up your mess, drop your car, and take it for a ride.[/QUOTE]
Dont forget to grease your bushings if they are greaseable
