NB MX-5 Hey, it's Minnie!

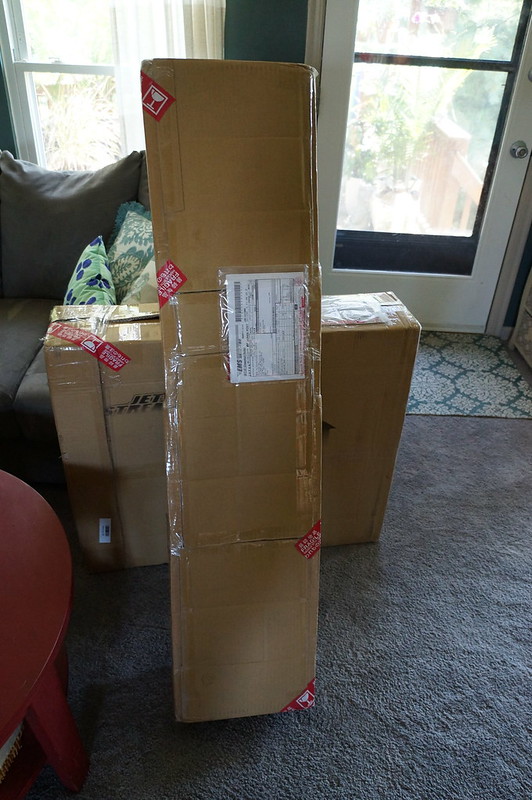
The mail lady knocked on the door. I had several packages from overseas that I had to sign for. Here were the big ones:

36357327802_7090590266_c.jpg


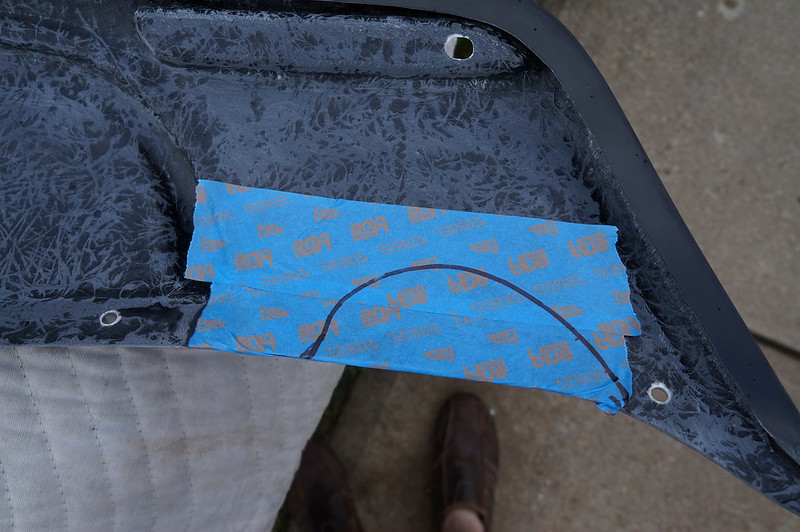
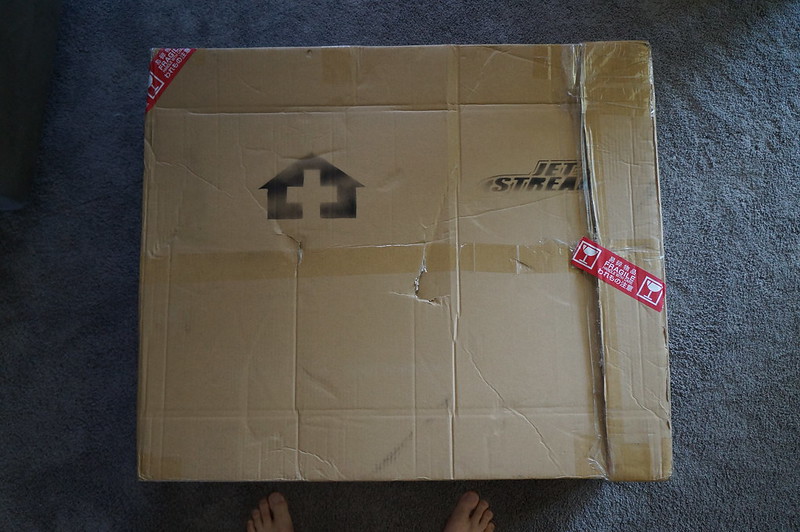
One of the boxes had some dings, I documented same just in case:

36357326892_6b8a50bfac_c.jpg


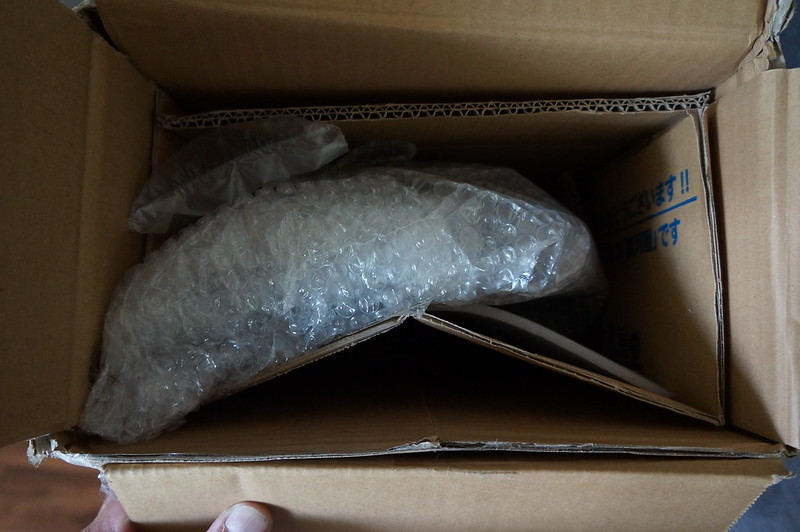
The parts were well packed so I felt a little better about things (note, Japanese cardboard is pretty flimsy compared to ours):

36357325652_655c75e127_c.jpg


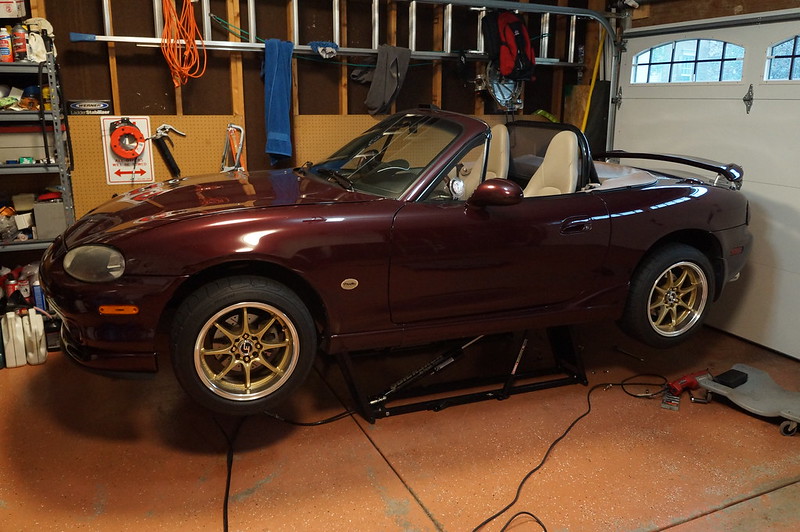
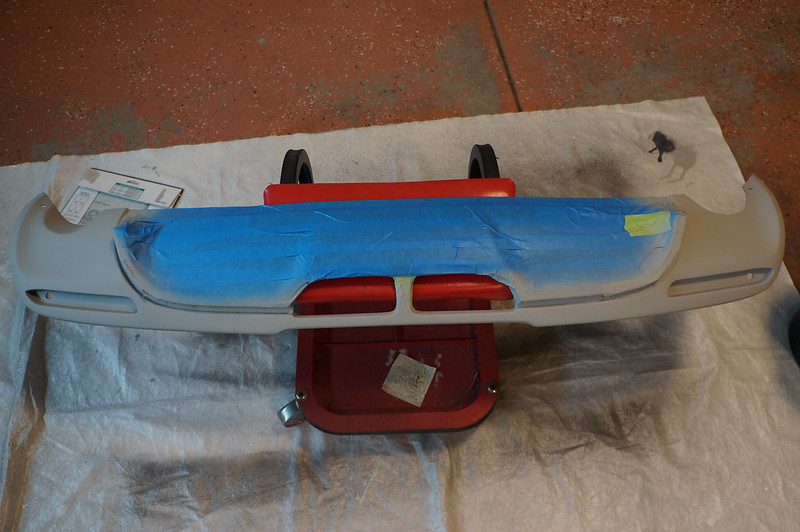
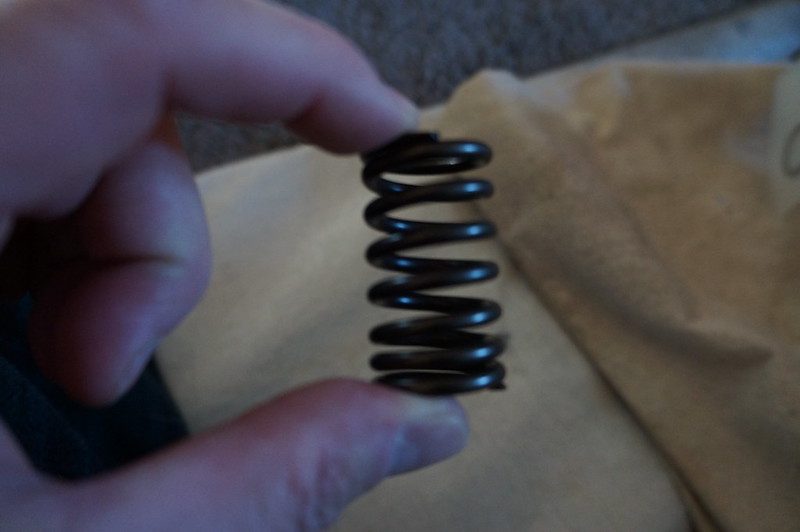
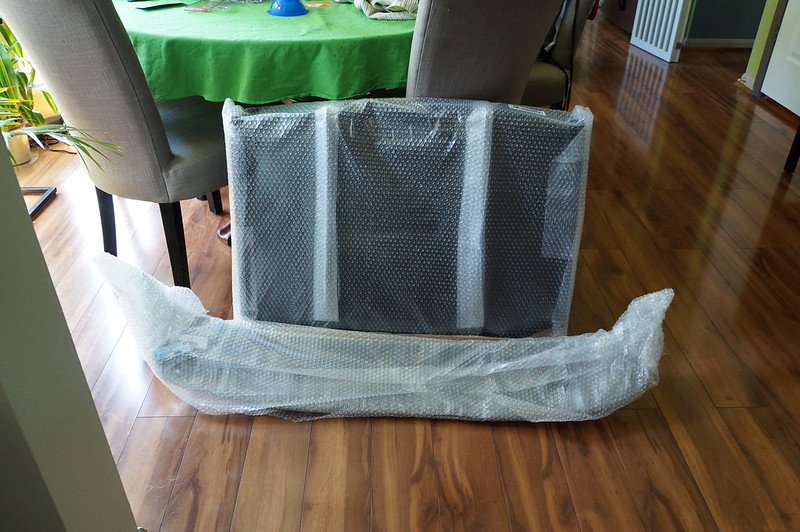
Liberated from the boxes, but not yet fully unpacked:

35690596944_3d91cf37b6_c.jpg


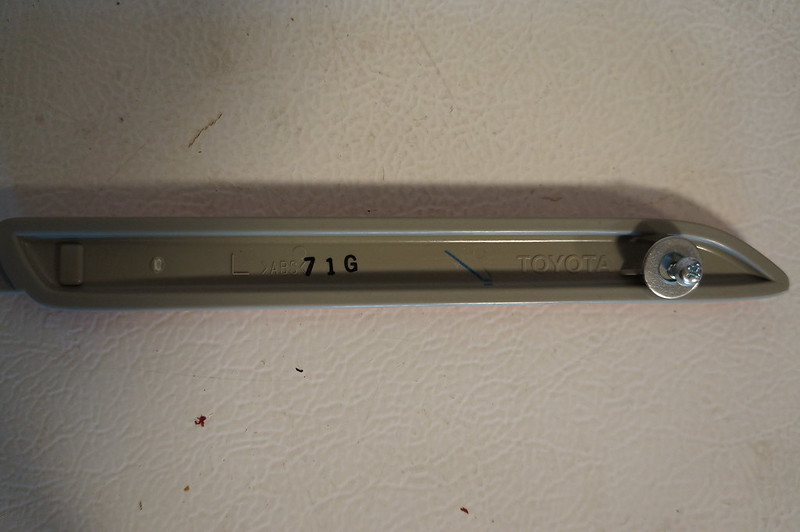
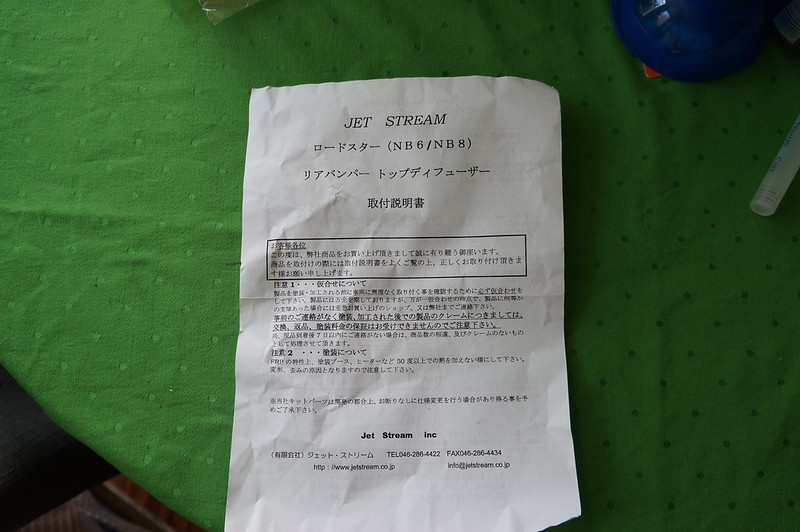
JDM yo. Any translators in the house?

35690596004_64ae4ac99a_c.jpg


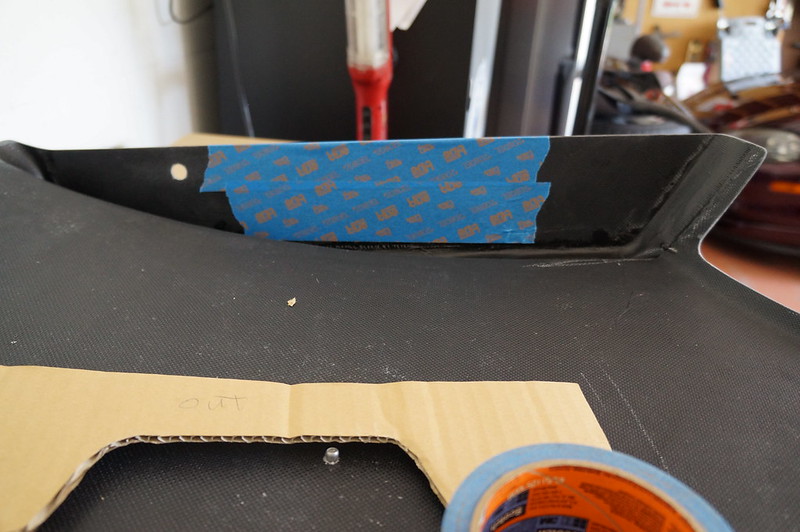
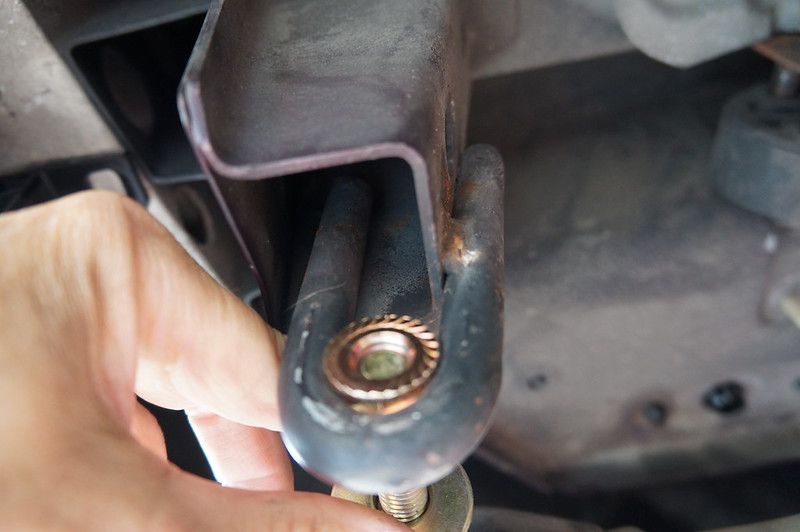
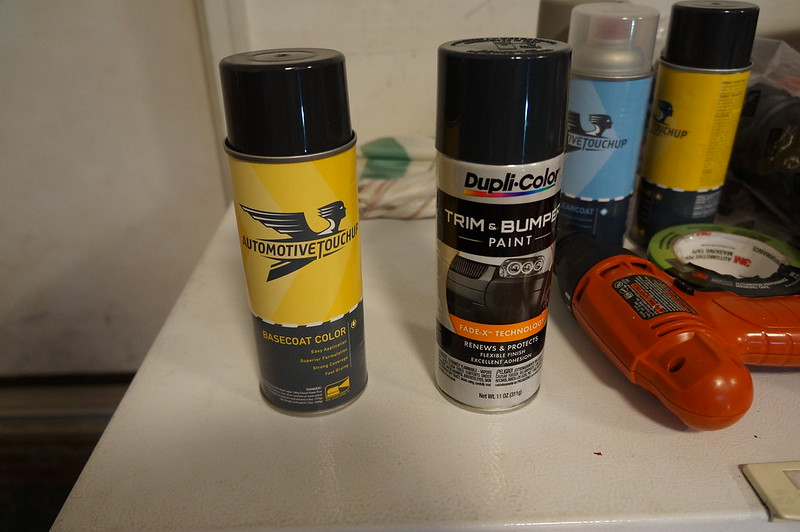
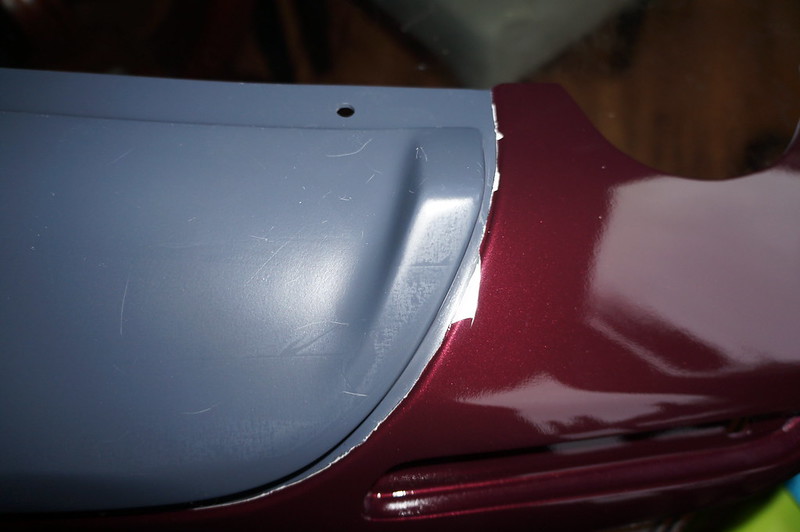
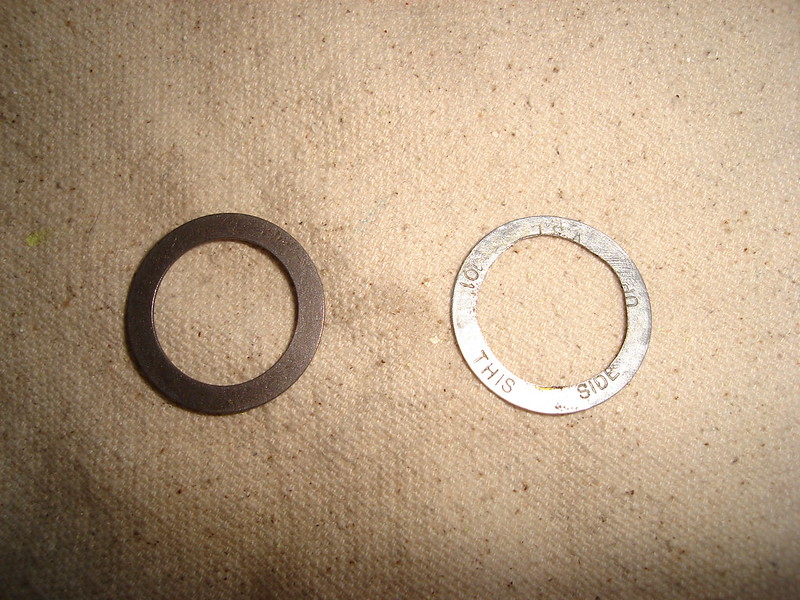
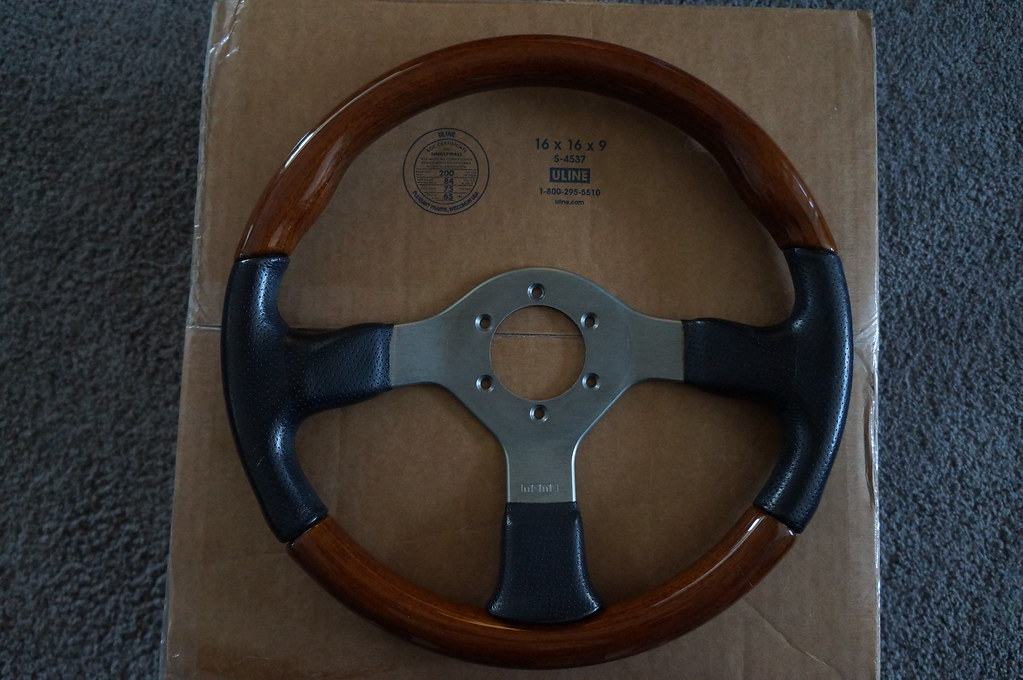
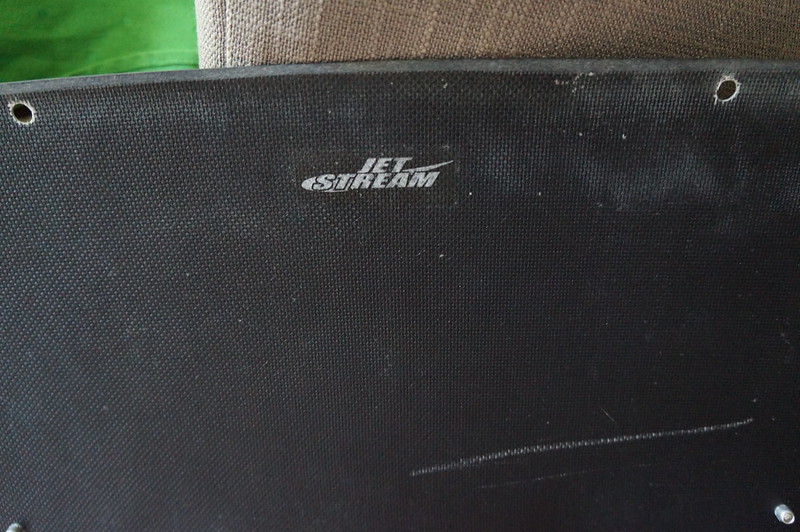
If you want to know if you have an actual real-deal product, look for the manufacturer's mark:

35690594914_4227eb4d7d_c.jpg


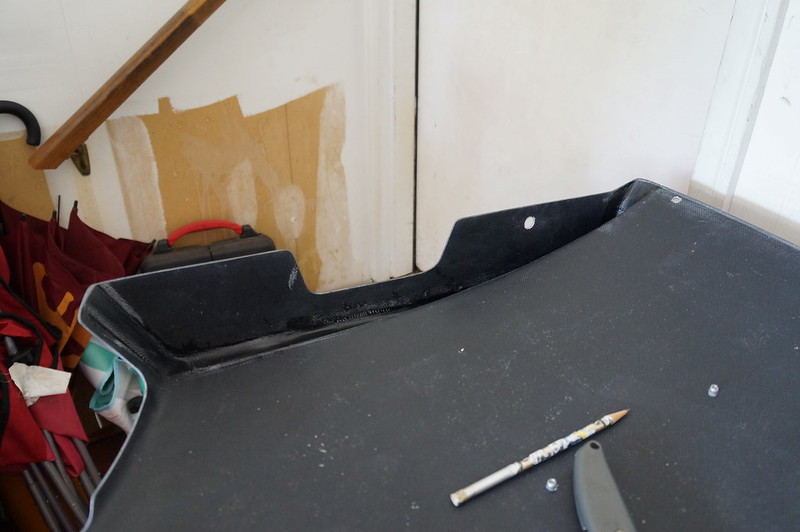
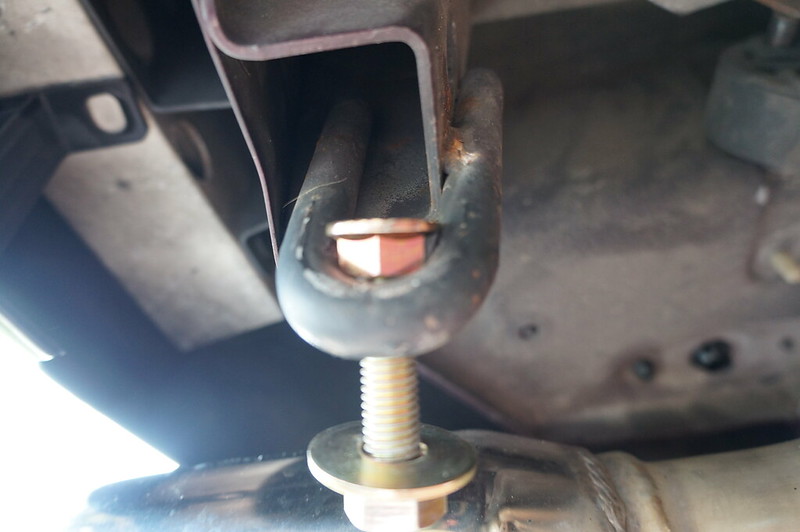
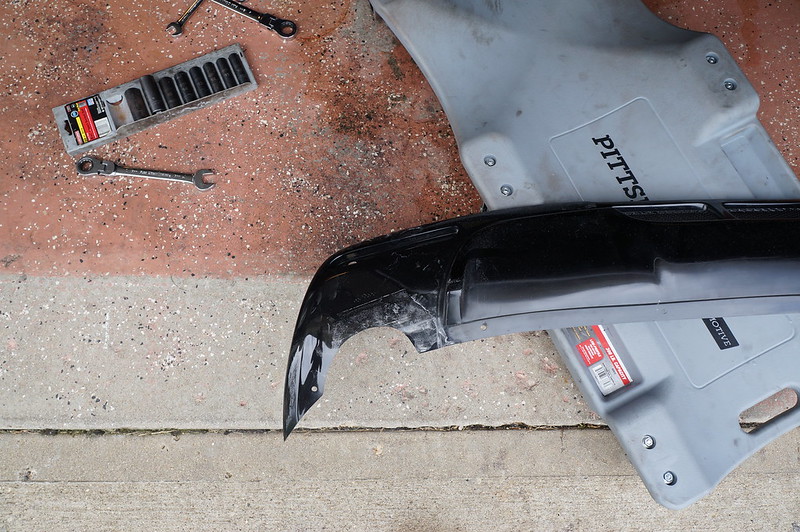
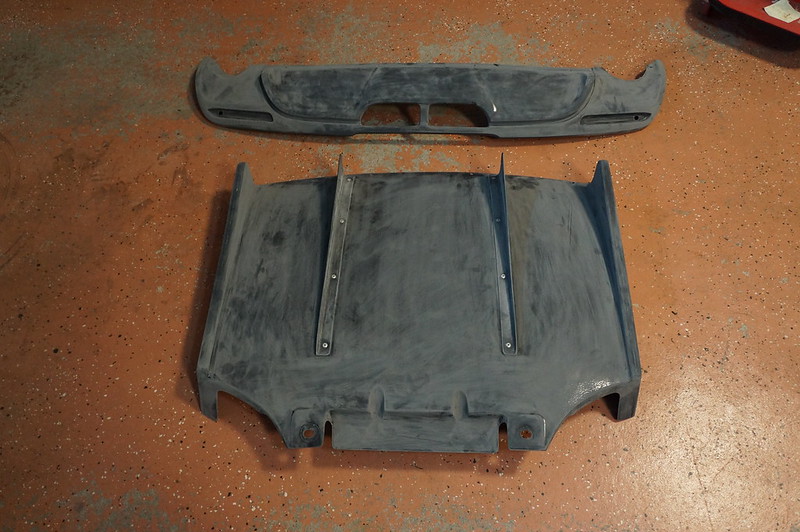
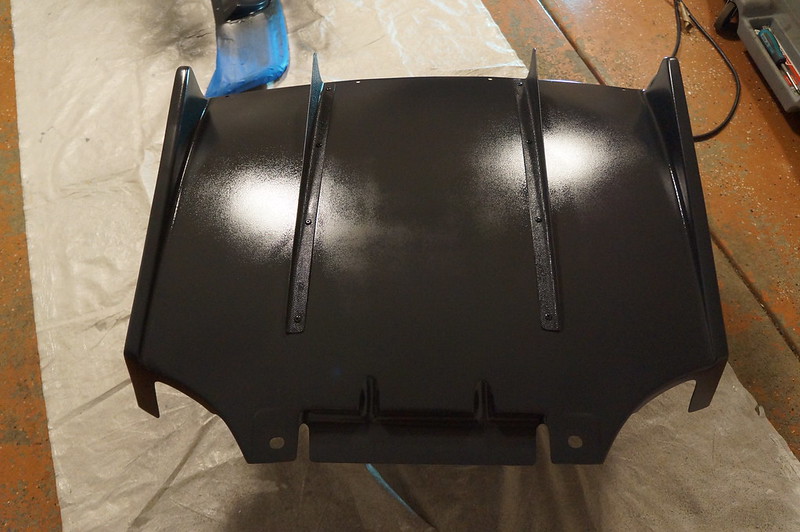
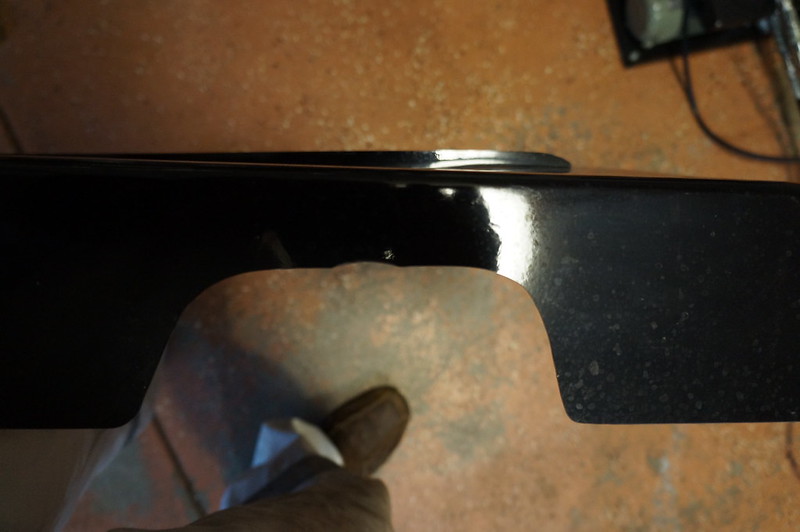
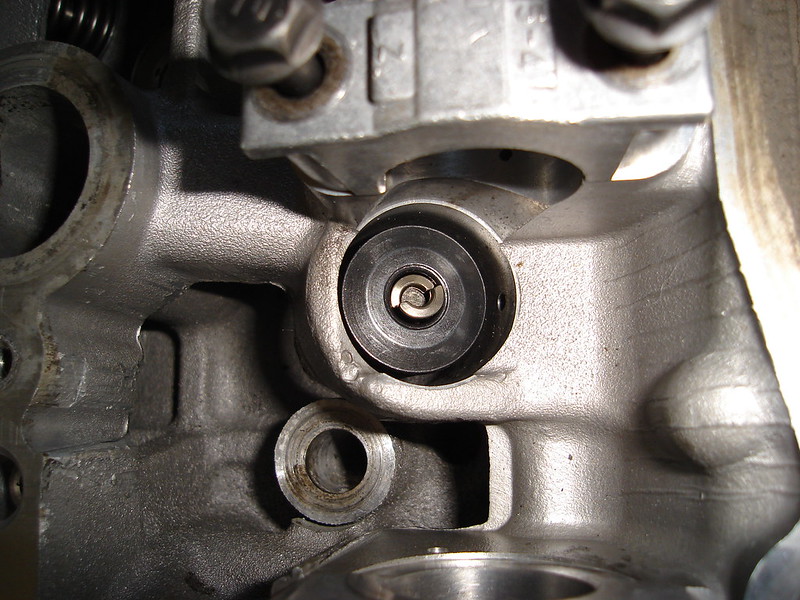
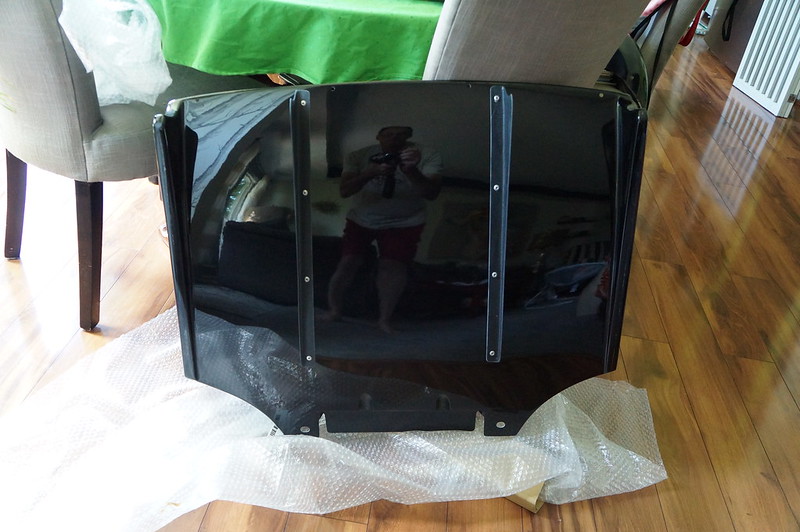
Here's the top of the lower piece, can you tell what it is?
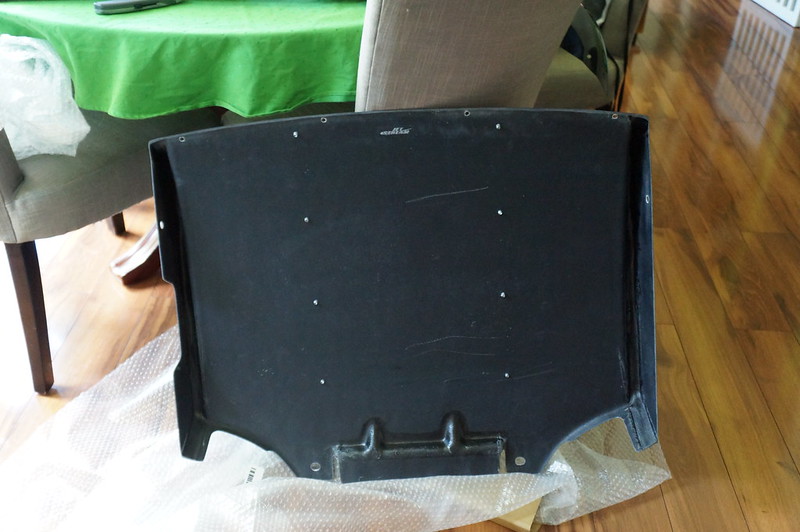
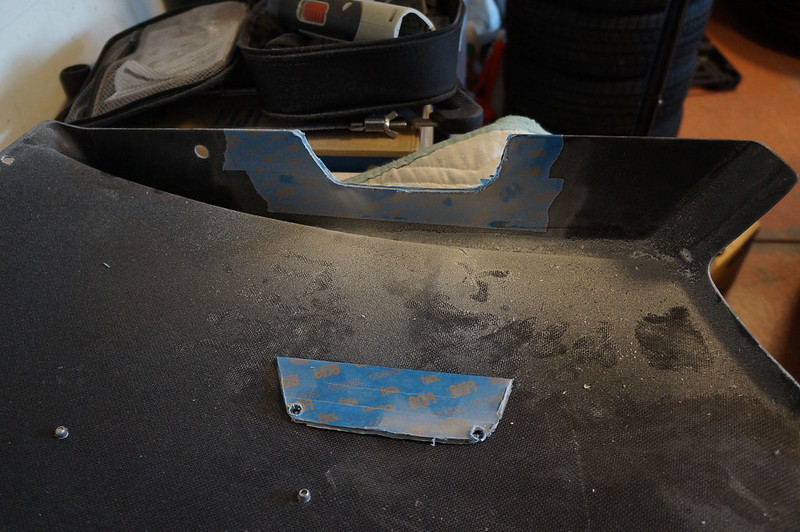
35690593014_86bc4bb141_c.jpg


The bottom:

35690592074_56b977468d_c.jpg


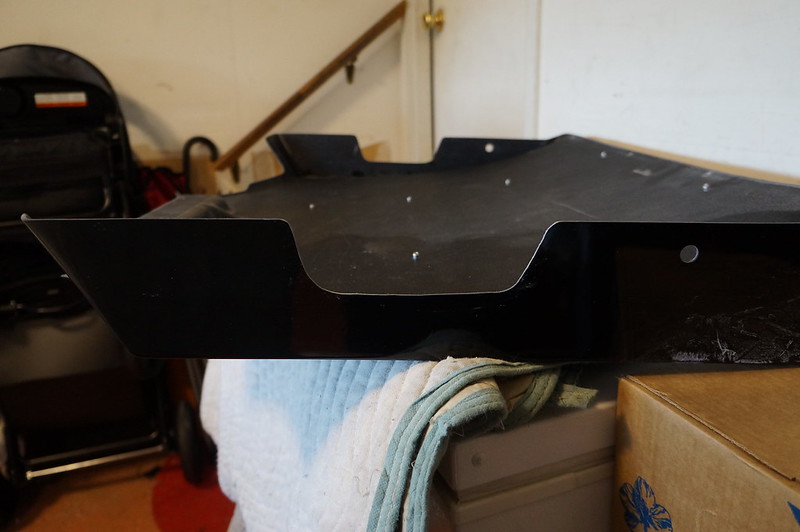
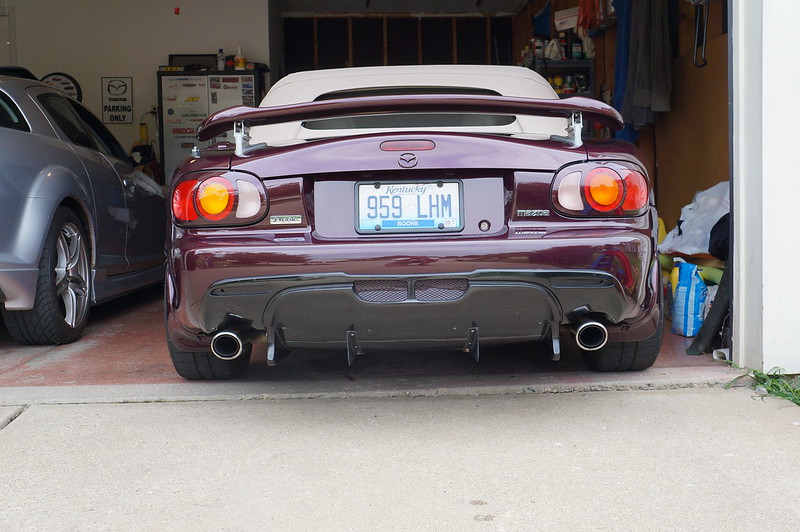
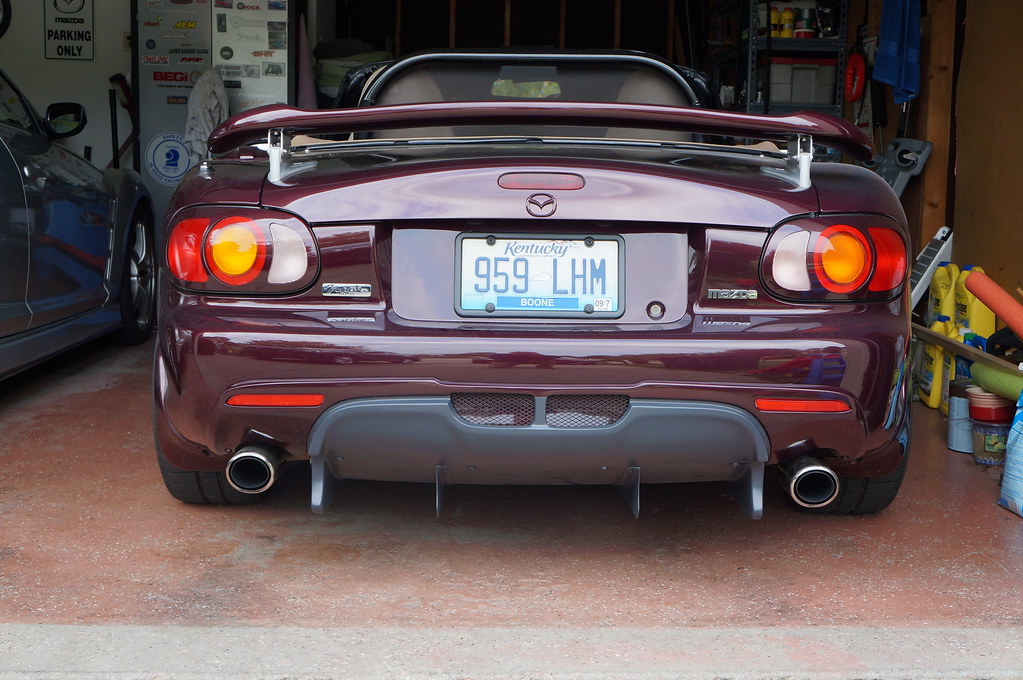
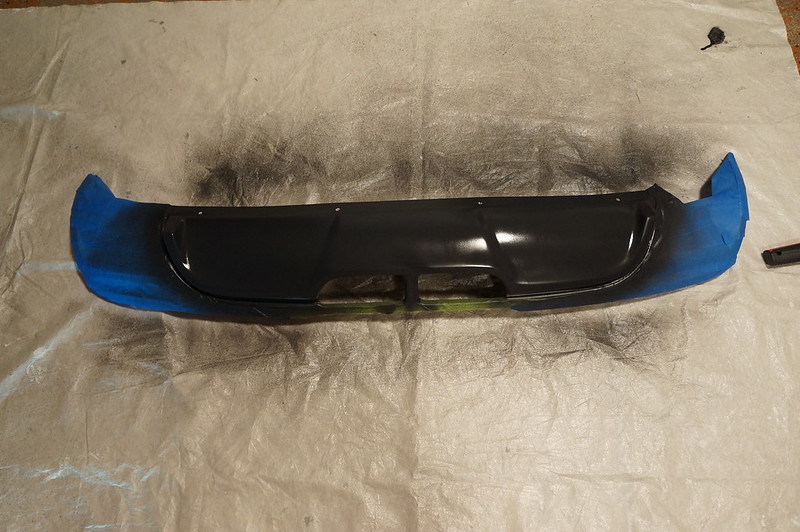
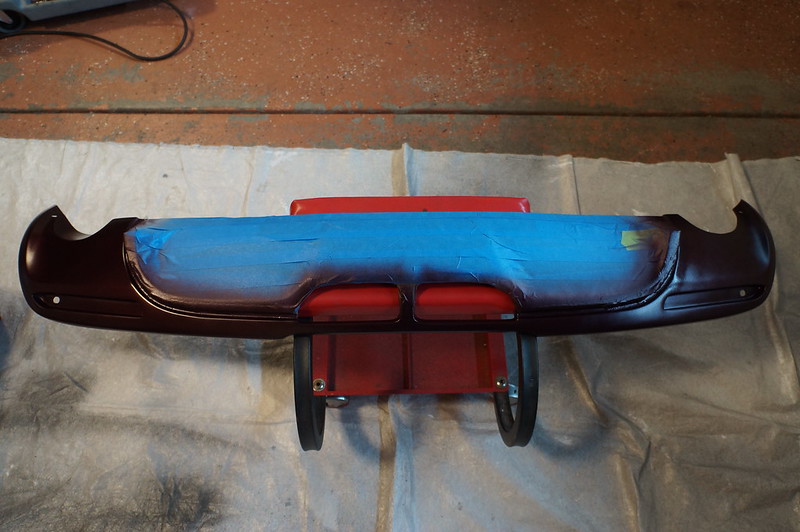
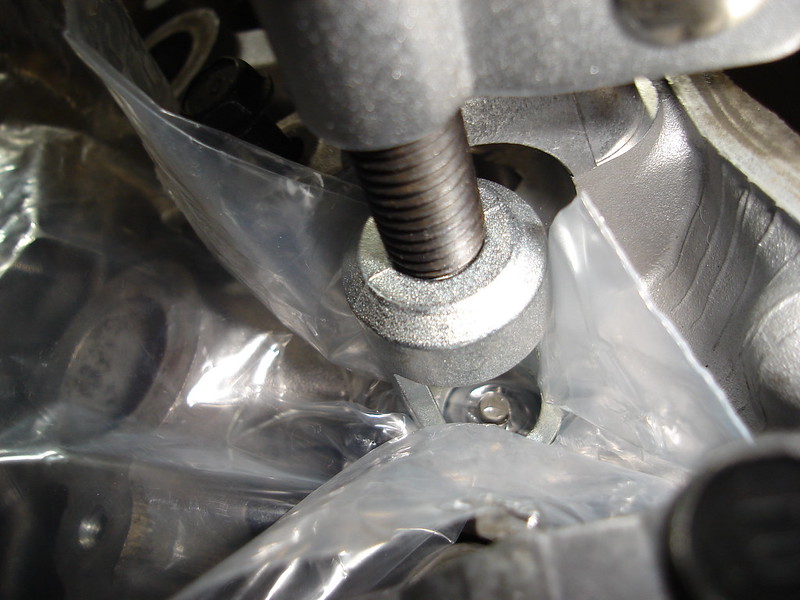
And for the grand finale...

35690593754_f5b9a6e29c_c.jpg


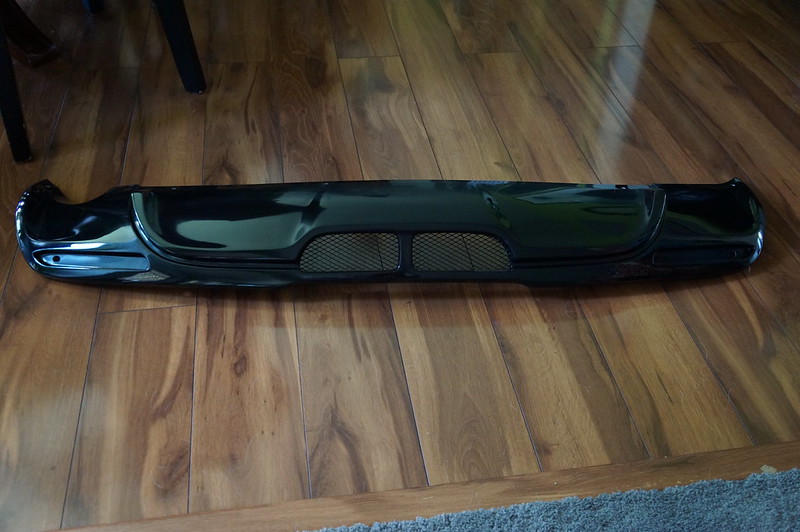
That shot has the piece upside-down, just stand on your head to see how it will look. I'll wait while the blood rushes to your head and you pass out.
 
So my inner ricer was screaming to be let out. The upper diffuser piece is going to require quite a bit of cutting, but I figure I could get the lower one on without too much work. I was partly right.

Since I have a double-exit muffler I had to cut an opening on the driver's side of the vertical rib on the diffuser. Here's the opening on the passenger side, and the layout for the other one:

36132028130_cd0b29eca1_c.jpg


36482085826_611f0c4299_c.jpg


I made a template from the passenger side opening and transferred that over, the tape was used to prevent chipping of the fiberglass as I was cutting it. As I did with the cuts to my radiator fan shroud, I drilled two holes in the lower corners of the cut to provide for stress relief. I tried a couple of different methods of cutting the fiberglass, ended up using my Dremel with a cut-off disc. Here is the result:

35719543963_3edde14b00_c.jpg


A little smoothing with a sanding disc and here's the end result:

35719542323_707da016c3_c.jpg


Note that after I took this picture I had to do some more removal of material along the bottom of the opening to provide for clearance for the muffler tip pipe.

Installation is pretty easy, there are two holes at the front that use the rearmost bolts holding the subframe bracing on and two holes at the rear that use bolts going through the tow hooks. I put the included fender washer underneath the diffuser at the front holes instead of on top, I figured that would work better with my Beatrush PPF brace (and it did). With the bolts at the rear, you put the nuts on the reverse of what you normally would. This allows the hex to fit inside the tow hook and act as a captive nut. I was very happy to see that my 949 subframe brace cleared the diffuser. A little wiggling and moving things around, torquing of the PPF bolts and this is the final result:

35719541673_f80643b5b9_c.jpg


One thing to note, I will have to remove this any time I get an alignment as it renders a couple of the adjustment bolts inaccessible.
 
Since I had to remove things for further installation, I took some pictures showing how the two bolts that hold the rear of the lower diffuser to the tow hooks are done:

36430084891_e7d5609cf8_c.jpg


36430083631_47ba075138_c.jpg


As you can see, the nut fits right inside when reversed. Nice simple solution for that. I went to Ace and got a couple of fender washers to use between the lower diffuser and the tow hook to spread the force of the bolts out a little more on the fiberglass. No real way to show that with a picture.

In order to mark the left side of the upper diffuser for my dual outlet tip I had to remove the muffler. Once that was out I taped the diffuser in place and then marked it for the cut:

35758780083_d25abb26a0_c.jpg


35758779013_aef242f7a7_c.jpg


Once I had the mark I used my Dremel to cut it out and then sand it down:

35758773583_17347b0aa7_c.jpg


PSA, fiberglass is sharp. I managed to cut myself while brushing dust off after cutting it. Imagine slicing yourself with an Exacto knife, it's like that.

Cleaned everything up after making sure my cut was good (looked like it at the time, but once I had it fitted in place I found it was a little off). The top of the upper diffuser is held on the bumper cover with double-sided tape, so I cleaned the mounting surface with denatured alcohol and then put the tape on. Here is where it gets a little tricky. If I were doing it over again I would have put painter's tape on the bumper where the bottom corners of the diffuser would touch. As I was trying to get the piece in place (the bottom edge fits inside the lower diffuser) the tape on the passenger side stuck to the bumper where I had pulled the backing away a little to give me something to grab for mounting. While getting that off and moving the diffuser to where it needed to be, I got some small scrapes on the bumper cover. Not a big deal, they rubbed out, but something to be aware of. Managed to get things in place and then I had to drill 6 holes in the bumper cover. The four screws in the middle go through both upper and lower diffusers and the bumper cover. The two in the middle are really hard to reach to put the nuts in place, even with my long arms I was hard-pressed to get them in there. Once I had a couple started I went ahead and stuck the top edge down with the tape. Once the upper diffuser was mounted I tightened the lower diffuser and that was that. Here was the final result:

36568427285_a0600763cc_c.jpg


Two things that I was undecided on. The first is if I wanted to paint any part of the upper diffuser body color, and the second is if I wanted to cut the bumper cover behind the screen in the middle. I may be missing a couple of red reflectors, there are recesses on the upper diffuser made for this (all the pictures I've seen have them in place) but I did not receive any. I sent Rev9 an e-mail asking about this.
 
Finally heard back from Rev9 about the reflectors. I was supposed to get them, Jet Stream neglected to package them with the parts. Considering it only took two days for me to get the big pieces from Japan once they were made, I was interested in seeing how long the reflectors would take.
 
Was hearing crickets so lubed the clutch actuating fork.

The more I looked at the diffuser setup, the more I likeed it. I used to dislike how far the exhaust tips stuck out past the bumper, with the diffusers in place it masks that and makes it look more of a piece.
 
Received the reflectors, it took 6 days from the time they were sent from Japan. They install with a tab on one end and a screw/washer on the other. No pictures as yet, I had something planned...
 
Test fit the diffuser reflectors, there was some rubbing on the passenger side at the outboard tip. I used my Dremel to sand some down to let it fit nicely. Close inspection of the reflectors showed their origin:

36179537013_e709dbe461_c.jpg


Hopefully having a Toyota part on her won't transform her into a snoozemobile.
 
I was trying to get some work done around the house before leaving for a meeting so I posted my work later on. For now, here's how it all turned out:

36610067040_23336433a6_b.jpg
 
I had ordered some Mahogany Mica spray paint from Automotive Touchup, received that on a Wednesday. I ran some errands on Thursday, stopped in to Pep Boys to peruse their spray paint selection. I was looking for something other than black to use for the majority of the diffuser. I saw some DupliColor Trim and Bumper paint in charcoal with a matte finish that looked like it might do the trick so I bought that.

36572469320_7e6b52ff0d_c.jpg


Since I had never done any painting on fiberglass before I did some 'net research to find out how to prep things. Basically with a gel coat you need to degrease it first, even before sanding. There were several different methods I found, I tried some acetone but didn't like how it was reacting with the gel coat. In the end I used denatured alcohol to wipe it down several times. Next up was sanding with some 220 grit to scuff the surface. I wiped it down again with the alcohol to remove all the dust and ended up with this:

36572476080_3df16af1ff_c.jpg


Next step was to tape the upper diffuser where I was going to paint it body color. I bought some 3M tape that was touted to be flexible, but it wasn't very for my application. This caused me to use shorter strips in order to get the tape around the curves. I then painted the charcoal. Here is how that ended up:

36572474510_f6990f368f_c.jpg


Being one piece the lower diffuser was easier to paint:

36133733194_9b5044095c_c.jpg


Each piece got four coats, I didn't use any primer for this stuff.
 
Once that had dried overnight it was on to the next step. I removed the tape on the upper piece and then taped over the charcoal. That ended up pretty much the reverse of what it had been.

36800581706_a8c6e53319_c.jpg


I cleaned the exposed area again with alcohol and then applied primer:

36179539483_b37b035229_c.jpg


Four coats of primer applied following the can instructions, after which I lightly sanded it with some 600 grit wet paper. This time I simply wiped it down with a wet rag. Then after a wait of 30 minutes it was time to apply the color:

36179534963_be0076d46e_c.jpg


I applied three coats again following the instructions. After another 30 minute wait the clearcoat went on. I applied four coats of clear. I let that set up for a few hours and then removed the tape. Unfortunately when pulling it off I had a couple of small chips come out:

36800575706_8b89243402_c.jpg


Since I didn't want to redo the whole thing I simply used the bottle of touch-up paint with a brush I already had, it filled in nicely.

I should also note I painted all the fasteners the same color as where they are used to blend it all in and minimize jarring contrasts.

Before installing everything I wanted to replace the rubber muffler hangers. I heard some banging over bumps, when I checked the lower diffuser showed signs on contact on the driver's side:

36572477480_34be9a5605_c.jpg


I had to juggle some hangers around from my son's Protege and Minnie but it got done. The muffler is nice and tight now. Reflectors went into their slots on the upper piece and then both upper and lower were installed.

I already posted the end result.
 
Time had come for me to head back to work. While out at the local cars & coffee, when I left I had some stuttering. It cleared up though. Then the exhaust was really loud. When I got home crawled underneath to find one of the bolts connecting the header outlet to the rest of the system had backed off. Tightened that up and it was fine. Then later the next day when I went to run an errand, I again had stuttering when she was cold. First thing this morning I pulled the spark plugs and found coolant in cylinder 4 (again). Looked like the wife wouldn't be driving her while I was gone that time.
 
Back home (finally about three months later). I made a few small purchases before I came home. A set of 949 valve stem seals (since I don't know what was used in the P&P head I bought) along with a couple of tools to make the job easier. That day when I bought my wife her daily Starbucks tea I also picked up a straw. This will become clear once I start the job and post some pictures. What, you didn't think I would post pictures?
 
Finally got started on the cylinder head. Here are the main tools I used:

38430753114_137050eba8_c.jpg


27362162659_5c970c5f1b_c.jpg


38430751544_a75e8d828d_c.jpg


The seals:

38430752184_215d462b0a_c.jpg


949 uses the same exact seal for both intake and exhaust valves. I removed the keepers, retainers and springs on the intake side first, here is what that looked like:

27362161449_ff52df0181_c.jpg


Compress the spring with the first tool until the keepers are clear of the groove they fit in, then remove them (I used a small magnet to grab them). I used the same magnet to pull out the retainer and spring. I then grabbed the seal with the removal tool, rocking it slightly side to side until the seal popped out. It was good I did this as the very first seal was completely torn. Not sure when this happened but I would have had a massive leak for sure.

After cleaning everything up I proceeded to install the new seals. First I used some engine oil to lubricate the seals so they would go into place with no damage. Then I unwrapped the straw and put it to use, here is how:

27362160259_a944c1bc72_c.jpg


Had to fold it a little to get it started in the seal. You then push the straw down over the valve stem and use a 10mm socket to seat the seal, like so:

38430750784_21457ca34d_c.jpg


This keeps the groove at the top of the valve stem from tearing the seal. I was able to push the seals in place with my thumbs, but I did take the precaution of tapping on the socket with a dead-blow hammer. A couple of them weren't quite all the way home so it was good I did this step. All that has to be done then is to put the spring, retainer and keepers back into place. There should be a thin metal washer below the spring, this is the lower spring seat (it gives protection for the aluminum of the head from the spring). I found one missing so ordered a complete set. One thing to note, the springs go into the head with the coils that are the tightest down (you will know when you see this). I found four of mine installed wrong. I tried putting the keepers in by hand but it's very difficult. Instead I used a little trick I read about which is to use some plastic (I used a storage bag). You place the plastic over the top of the retainer once the keepers are in place. Then use the spring compressor and compress the spring until the keepers fall into the groove on the stem. Works great. For now I had everything assembled except for the one valve that was missing the lower seat. Once I get the parts in I would redo all of them as several looked as though someone had taken a Dremel to them and hogged them out. Maybe that is how they are, but I seriously doubted it.

Apologies for the picture quality, all of our good cameras had no battery so I was forced to use my phone.

I also managed to locate my old shift and e-brake boots so put those back on, along with the console lid that had leather on it.
 
Got back from our Christmas trip. Went to the dealer to pick up the lower valve spring seats I bought but one was missing. They ordered me another overnight (that is what I call service) and I picked them up. The next day I had a little time in between granddaughters being born so went ahead, brought the head back inside and commenced work.

Here was one of the seats:

39350424192_8dcac25744_c.jpg


They are the same for both intake and exhaust, so you will need 16. Here is one of the old ones next to the new factory ones (new one is on the left):

39350418412_47fa004dae_c.jpg


As you can see they are completely different, and the one I removed had been hacked up. All of them were like this. Since the factory one does not have the markings I have to wonder where the ones I removed came from.

Here is a picture of a valve spring, the tight coils are shown on the bottom which is installed down nearest the valve:

39350423222_671ca28d78_c.jpg


I followed same procedure I documented before. I did try something a little different on a couple of the valves where I placed the keepers inside the retainer before setting it in place on the valve stem. This worked ok, although I had to be a little more careful when putting the valve compressor in place.

27603170729_4e5aa0ed56_c.jpg


Finally, here is how I used the plastic to hold the keepers in place while compressing the spring:

24514993097_eebd72206b_c.jpg


I would recommend using clear plastic so you can see when you have the spring compressed enough for the keepers to fall into place. And that is all there is to the job. Easy-peasy.
 
It had been too freakin' cold here for me to want to get out in the garage, also there was something (cold or flu) going around the house and it's been kicking my ass. I did get up to the dealer and ordered a new plug for the cylinder head where the CAS is on other models. Figured while I was getting everything else new on the head I might as well take care of that to prevent any surprises. I also picked up a soft top insulation piece off eBay, it says it won't work on a factory top but I am banking on my ability to make it do so.
 
I was ailing so hadn't gotten anything done for a bit. I was finally recovering, I took the plunge and bought a Momo Fighter steering wheel along with a MS hub to mount it on. Hoping by the time it showed up I would be fully fit and could get on with work.
 
Steering wheel and hub showed up:

39040785204_051d22c991_b.jpg


The wood is slightly lighter than the stock parts, but I didn't think it wouldn’t be too bad since the wheel is a distance away from the shift knob and e-brake handle. My resistors showed up too, so once it warmed some more I would be able to get this installed.

I thought I had bought a new horn trim ring from eBay, but the seller wrote me the following day to say their inventory was wrong and they had none left. They also checked with Momo but it was NLA. I'd have to find another source if I wanted one.
 
Spent a little more money. Bought a trim ring off eBay for the wheel, a horn button from revlimiter and some screws for the wheel as is (got these from Ace Hardware). For Internet info, the screw size is M5 X 0.8 X 12mm. Note this is what fits the Mazdaspeed hub I have. I didn’t have the horn ring yet but it shouldn't be too thick so the 12mm length should do the trick. I would have to buy some different screws for the trim ring once it is in hand, I'll post their length once I had all the pieces in hand.
 

Latest posts

Back