Another P5 on a College Budget....Meet Ozzie

At least now our car has plastic fuel lines (for the most part) and plastic coated brake lines. (as compared to my 1985 Mazda 626). But I noticed that the plastic coating stops about 1/4" from the connection point on the struts. That is definitely the weak spot,... keep an eye on those spots in particular,... clean them up and put some heavy grease on them like anti-seize.

EDIT: The connection point isn't on the strut,... it's on the frame:

20130724_202643_zps314393ac.jpg


20130724_202902_zps05d28e4e.jpg


20130724_203014_zps0151ae03.jpg
 
Last edited:
I'm really glad we don't have all metal lines then. With all the problems with rust, I would've started to be pretty scared about stuff like that.

Got a couple things done yesterday! I restored my headlights (had to redo some fine sanding today on one of them), and they almost look like new! I ended up using the 3M Headlight Restoration kit, and it works really well! This sadly shows off the scratches on the inside of the driver's side headlight, and I have no clue about how those came about or what to do about them. But they look a lot better now, and it only takes about 20 minutes each light, if that.

Here's before:


And after:

I haven't had a chance to use my lights since then, but I also adjusted them so that they are aiming at the same spot, instead of having my driver's side light way higher (sorry if I blinded anyone with my lights). So hopefully tonight when I'm delivering they prove themselves.

I also did the mod for the foglights to be on with the parking lights, and I have to say it looks pretty sweet! Never realized how bright my fogs were until this mod.


And here are some other random pics I snapped:

What I've done with my valve cover so far. I still need to touch-up the lettering though:


I got bored at my roommate's house while I was dogsitting, and started thinking about snow tires (as much as my parents are against the idea). I found a set on craigslist that used to be on a Mazda 3 (Firestone Winterforce 205/60/16 for $200), and was really thinking about getting them. The tires are on steelies, though, and in all honesty I don't think I want my car looking like white trash (no offense to anyone who has rims like that), so I was thinkin about these wheel covers: https://www.amazon.com/dp/ (commissions earned)
Does anyone have better photoshop skills than I do and wanna edit one of my pics to show me what those would look like? I know it won't be perfect since they're just covers, but mostly just looking for a better idea. Or if anyone has any better ideas, I could be open to it.
 
I also did the mod for the foglights to be on with the parking lights, and I have to say it looks pretty sweet! Never realized how bright my fogs were until this mod.


Looks good! In fact, those fog lights are pretty bright... brighter than mine. For one thing, I noticed that all of your foglight housing illuminates, whereas only the bottom half of my fogs light up due to the "hood" that partially cover the bulb. Are those aftermarket fogs?
 
Talk to Bastian about steelies on the P5. (He ran them in the winter IIRC) I'm thinking of getting a set for the winter and plastidipping them a vibrant color. Just cause. I'll try and get a set of snow treads too obviously. But at the end of the day, its up to you about what you do with your car! :) I'm going to give the 3M restoration kit a shot though, after seeing yours and many other peoples results, the lights look really good!

If you have a factory alarm and leave the switch on for the fogs, they'll flash at ya. I like it cause its unique. In the dark its pretty cool.
 
Those are the stock fogs I'm pretty sure, but I noticed tonight that there's a sliver on top that doesn't light up due to the housing. It never seems that bright though, because they get overpowered by the low beams, as they should I guess. Even though I kinda doubt it, do you know if that was a difference in the 02.5 to 03 model, or did you have to replace your bulbs?
KingOfSpades007 do you know if the factory alarm was an option? I have the keyless entry and it doesn't flash the fogs. I've heard some people goin back and forth on other threads and never really heard a definite answer on what the difference was. It would be cool for them to flash in the dark though! And I remember seeing Bastian's steelies, and they didn't look too bad! I feel like since my car is black and I might not have my rust repaired before winter that it might be better to go that route. Plus, it's only $35, which isn't that bad for me being a delivery guy. haha
But I defs recommend the 3M kit! I need to spend a little more time on my driver's side light, since I kinda rushed it. But it really does help! Delivering last night in the pitch black (despite the full moon) I could really see a difference in distance of my lights. Not so much in brightness though, which could be good for oncoming traffic.
 
If you have the blinking red light on the center of your steering column, your fogs may flash with your lights. If they're tied into the parking lights with the fog light mod, there will be power going to them theoretically. If they didnt tap into the right socket for the alarm system, I guess the fogs wouldn't flash.


If you have keyless entry but not an alarm, the fogs shouldn't flash. IDK how to explain. I know that before I plugged in the alarm system, they wouldn't flash. Now its in, they do. :)

I was going to wet sand the lights but didn't and my drivers light looks iffy at best. I need to get a grommet for it too since the HID projector bobbles up and down and it probably bugs the heck out of oncoming traffic (if it bugs me, its bound to irritate the heck out of them)
 
Okay I defs don't have the alarm then. But I guess I'm okay with that, cuz 90% of America doesn't know how to drive a stick shift, so I'm not worried about my car being stolen. haha
I know what you're talkin about with the bobblin lights, but it's more amusing that annoying.
I found out after the first of my 3 shifts today (talk about a busy day) that one of my fogs burned out in the middle of it. Which sucks, cuz I've heard they're a royal pain to replace. Just another thing to add to my list of things to do tomorrow on my day off. They don't even have the instructions in the manual other than to take it to a Mazda dealer, which I sadly don't have near to me (even though I'd never dream of going there other than to dream about buying a brand new Mazda). So hopefully that doesn't take too long for me to figure out, cuz it would suck for me to have done this mod only to enjoy it for a day or two. :/
 
Those are the stock fogs I'm pretty sure, but I noticed tonight that there's a sliver on top that doesn't light up due to the housing. It never seems that bright though, because they get overpowered by the low beams, as they should I guess. Even though I kinda doubt it, do you know if that was a difference in the 02.5 to 03 model, or did you have to replace your bulbs?

I have a 2003 like you. When I read that yours were stock fogs I went outside and took a few snapshots of mine in the dark and they seem "full circle" like yours in the pic. So I guess it just has to do with shutter speeds and other camera parameters. Still looks great though! I haven't been using my fogs because one bulb burnt out. Seeing yours made me want to get some bulbs for those guys again. Forgot how cool they looked.
 
Yeah, I guess that could be it. I know my camera on my phone is pretty basic (a.k.a. piece of s***), so I don't really have to worry about stuff being off unless it's dark out. But I defs agree with you about how cool they look! I was sad to find out that one of mine burned out today. Oh well, another project for the weekend.

Also, does anyone know if me doing the mod (possibly poorly as far as wiring connections) would cause both a) one of my fogs and b) one of my low beams to burn out (both coincidentally on the passenger side) within days of the mod? Or would that just be dumb luck?
 
Also, does anyone know if me doing the mod (possibly poorly as far as wiring connections) would cause both a) one of my fogs and b) one of my low beams to burn out (both coincidentally on the passenger side) within days of the mod? Or would that just be dumb luck?

If you removed, bumped, jarred or handled your bulbs, it can lead to failure. Not that handling your bulbs can't be done but if the bulbs are older the movement can be the "last straw" for the thinning and brittle filaments.
 
There's a massive nut on the back of the fog housing you can undo to get the fog light out. Then it's three Phillips head screws THAT ARE VERY VERY FRAGILE that you unscrew to get to the lights. I broke one on each light...

I did mine the hard/easy for me way and too the three nuts off the bumper. Mind you, I had the bumper off already so it wasn't too far out of my way. Do the sensible thing and try and take the massive nut off. Easier to do for the normal folk :)
 
Okay it doesn't sound too hard, just possibly a little tedious. How would it be to get at if the car is already jacked up in front? I gotta do an oil change after I seafoam my engine, so hopefully it's not too much harder past that. I guess I have to get past that giant plastic thing under the car though...... great.
 
Its plenty easy. Jack it up (or don't, still enough clearance) and then you look straight up and you'll see a 17mm nut. Take that off and the lights come on out. Disconnect the wires before you pop it out, they tend to stick though, so try and get them apart while you have leverage. (In my case it was just the dirt and dust that sat in the connector and created a boatload of friction) IIRC (I just looked but not very in depth) there's a spring washer in there to keep it from coming undone?? Be careful of that. I ended up shearing one of the nuts. I luckily had a spare at my house :)
 
Okay awesome! Doesn't sound too bad at all! Then again, if that washer is anything like the retaining springs for the headlights it'll be a royal pain. But if I break that washer then I'm screwed, cuz there aren't any spare parts or wrecked P5s to get parts from anywhere near here. :( Hopefully one pops up here soon so I can grab stuff from it as needed.
 
I used a bolt from the my dads box of bolts... (thats what I meant when I said spare) the underbody panels are the bane of my existence. The drivers side one shattered at some point, I have two screws holding that on. The passenger side panel has string and a bolt or two holding it on. I really need to get a drill and remove all the broken bolts to buy replacements...
 
New Idea!

Ah gotcha. I guess I'll probs be in the same boat, cuz they don't have the bulb available at the Walmart here, so I'm gonna try to find it somewhere else, but probs won't until I get home this weekend. Then I'll have my dad's endless tool and bolts supply available.

I'm trying to decide on something. I'm not going to get the snow tires like I was thinking, but decided to paint the rims I have now. I'm debating between two styles. One is what I have pictured below (very rough sketch): All black except the red lip and accents. The other option (not sure if I'll be able to edit one) is having the entire outside of the rim chromed with the spokes black. It would be a glossy black too for both of them. Thoughts? I was gonna try and get it done before I go home, but my only free days would be today, tomorrow, and Wednesday.I'm gonna get the black going today, so hopefully that'll be dry and finished by the time I can get some replies.


I was thinkin the red accent lines would go from the lip all the way along the raised section on the spokes and then stop at the end of those. This one would look cooler, but I feel like the chrome one would be easier. I'd have to find some chrome/polished look spray paint tho, but I already have the red. Thoughts?
 
Figured I would try and update before I go into work for the night.

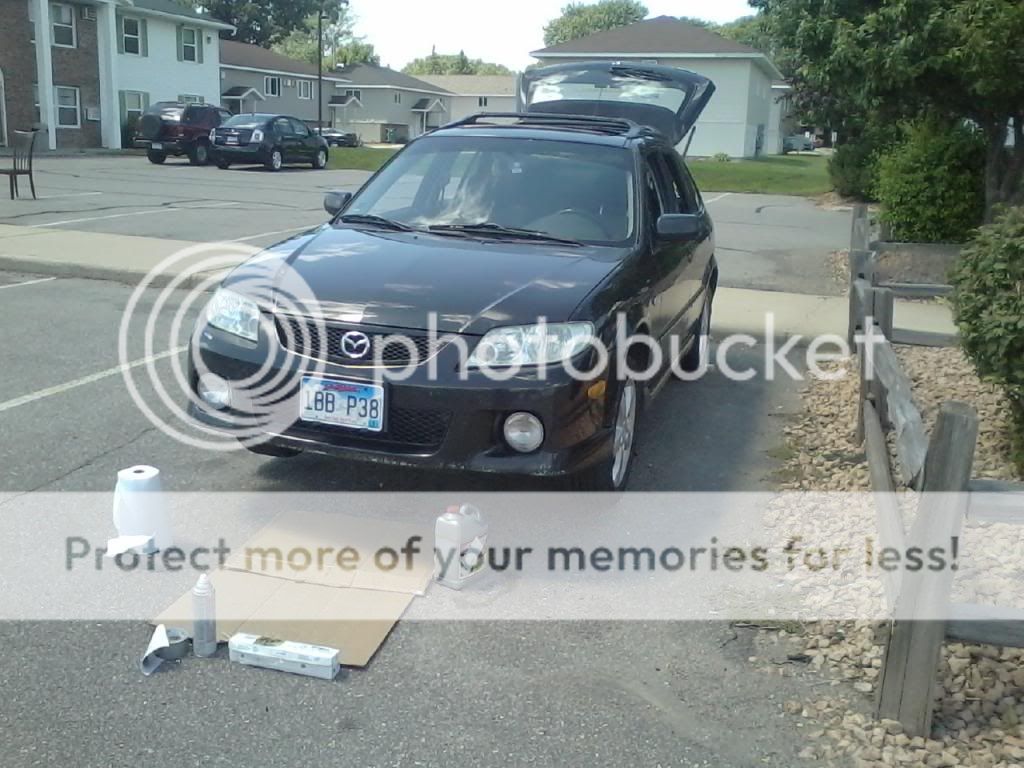
I'm still trying to fix my exhaust, but am struggling to remove the current pipe. I've been battling it for over a month and now I had three options left. I recently tried to use Evapo-Rust on it (and on my frame rails, which didn't really work) and I haven't had a chance to try and remove the pipe yet, but it doesn't look like anything has changed. You're supposed to soak paper towels in the fluid, wrap them around the rusted parts, and wrap it in "plastic sheeting", which I can only assume to mean saran wrap. So this is what it ended up looking like:


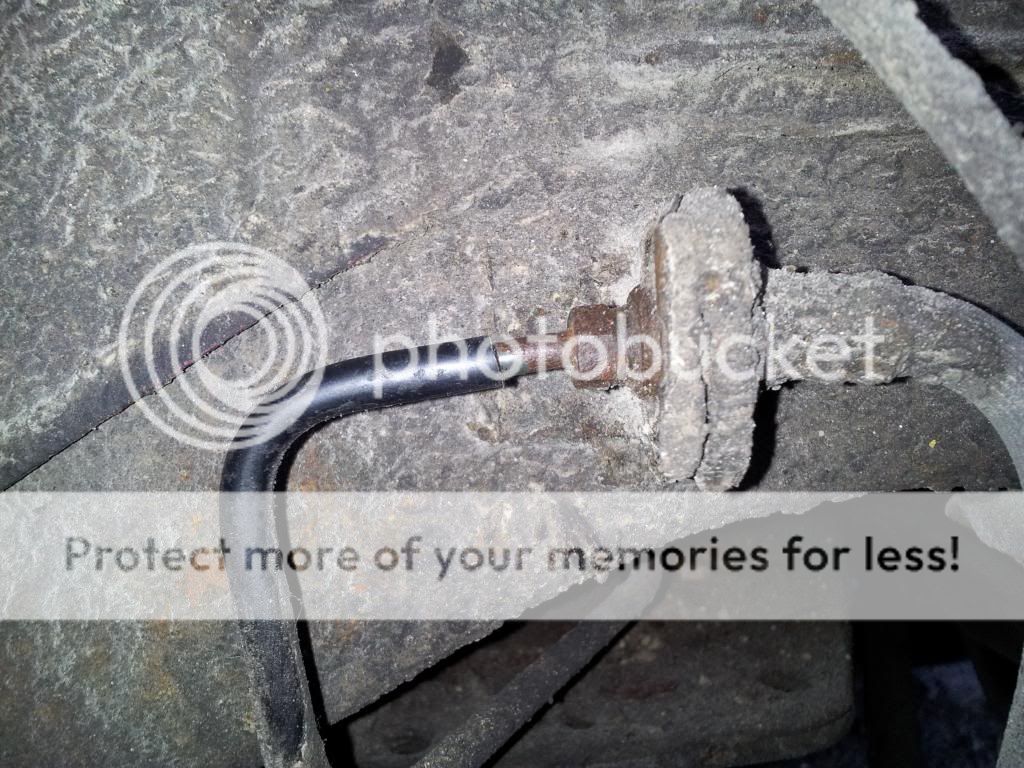
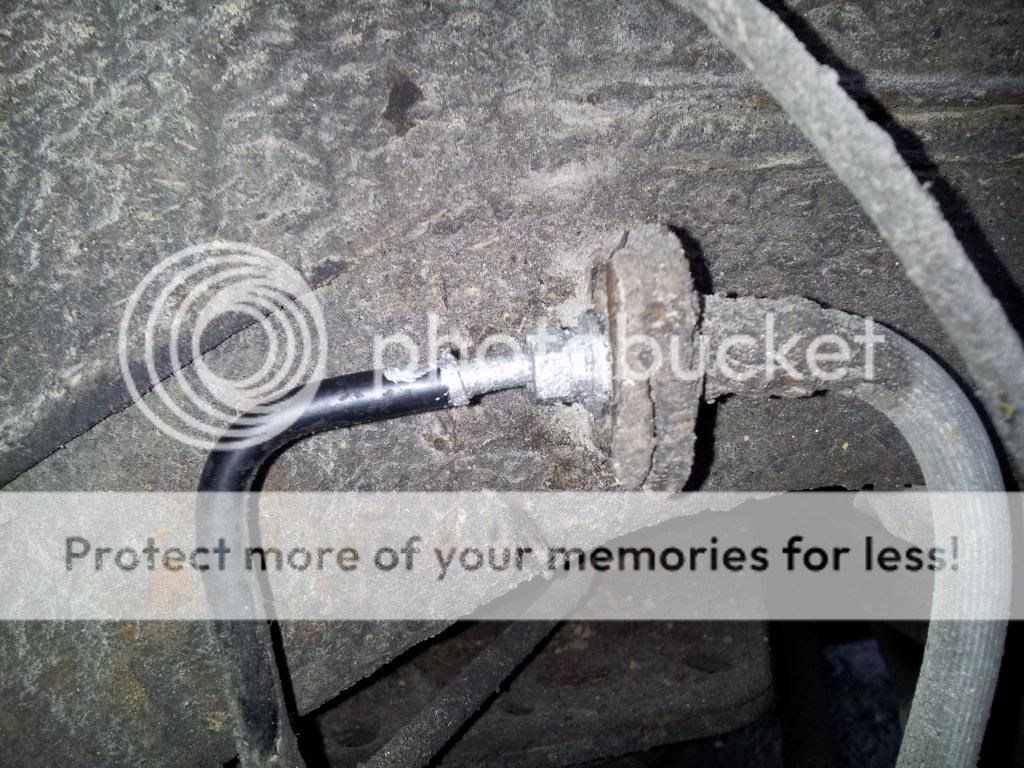
And while I was working on that, I noticed these little things:

Does anyone know what these are for? I only noticed them on the one side, so I don't think it'd be anything related to structural integrity, but then again I could be wrong.

I also Seafoamed the engine, but I may need to redo it again, because I couldn't get the Seafoam in through the brake booster tube (I was working by myself). I did get a little smoke show going from putting it into the oil and gas tank, so here it is, although you can see to the right all the smoke coming out my exhaust leak (that's what I'm checking halfway through). Hope you enjoy:


I also did an oil change and changed the plugs and he's runnin a lot smoother now! Now I only need to fix my exhaust and hopefully that gets rid of the vibrating shifter. I can definitely tell which plugs were affected when my coil pack failed a couple months ago:


Now I have another question. If I have rust on my suspension parts, will I be able to get the rusted bolts off with an air socket once the auto lab on campus opens up again? If so, I'm thinkin about replacing my struts, strut mounts, springs, and brakes myself (save myself over $1000 in labor alone) and then take it in for an alignment. I'm really hoping that this is the case, cuz both my brakes and struts need to be fixed ASAP, plus my tires are going bad really fast (planning on getting some General G-MAX AS-03's). All together, it would be about $900 plus shipping and alignment for the brakes, struts, springs, and tires (haven't had a chance to find strut mounts recently). Thoughts anyone?
 
Here's my experience with rusty bolts on our cars. They break and strip like crazy cows. So be EXTREMELY careful while using an air socket. The torque from those things can just strip those bolts as if they were paper. so be careful. What I've done is use a very nice and leveragy ratchet to loosen them. Crap ton of straining your balls but, saves your nuts/bolts. (attempted to make a pun)
P.S. WD-40 is NOT always the best solution to get them Un-stuck.
 
I don't think those tabs do anything. I wondered too but haven't found anything indicating I'm missing a panel underneath.

I think a 6 point socket and straining your balls will loosen those nuts up. DONT 12 POINT IT. I'm screwing around with my front motor mount bolt thanks to that. I need to just buy a new-used one and cut the bolt off at some point. I bought motor mount inserts and they're sitting in their wrapping still...
 
That is very true about stripping bolts. I just found that out replacing my foglight. Managed to strip one of the screws but not the other one on the back of the housing, so I cant do squat until I find a drill. And that one wasn't even rusty, just brittle. I've already used WD-40, PB Blaster, and Evapo-Rust on my exhaust, and it still hasn't budged, so time to torch the bolts. ha
Nice pun, btw. :p
I was defs gonna use a 6-point socket. I'm hoping that it will work. I gotta take a prospective look at the bolts and mounts still (disassembling the trunk, yay), but maybe my tools will be able to do it. I can hope, right? But that sucks about your motor mounts! Do you think motor mounts are gonna need to be replaced on most Protege's at some point in their lives? I really hope not......
 
Back