
You are using an out of date browser. It may not display this or other websites correctly.
You should upgrade or use an alternative browser.
You should upgrade or use an alternative browser.
Aftermarket Backup Camera with Mazda OEM Screen
- Thread starter cx5
- Start date
I was cruising down the freeway today and I took my right thumb and pushed and held in the power button and then I took my right pinky and hit the seek button on the top right corner of the HU. This opens the program screen. I punched in 92 and enter, and it turned on my rear backup camera so I could see a live feed of the cars behind me on the freeway. To get out I just pushed the power button and it reset the stereo as if I just started the car. COOL!!!!
I wish the factory installed camera had the ability to display a live feed while driving.
- :
- 2014 & 2019 CX-5 Touring(s)
I wish the factory installed camera had the ability to display a live feed while driving.
It does! With the factory radio you can enter a debug code to do it. With some aftermarket radios (Kenwoods for sure) there's a function to do it.
we just bought 2015 CX-5 Sport w/ Bluetooth ONLY and wondering if this back-up camera will work on the factory HU.
http://visiontechamerica.com/site/portfolio/vtl275-vtl375/
BOYO - VTL375

http://visiontechamerica.com/site/portfolio/vtl275-vtl375/
BOYO - VTL375

hello,
does the factory radio must have navigation to make the aftermarket camera work? coz ours doesnt have navigation just bluetooth and would love to add a camera below.
https://www.ebay.com (commissions earned)
does the factory radio must have navigation to make the aftermarket camera work? coz ours doesnt have navigation just bluetooth and would love to add a camera below.
https://www.ebay.com (commissions earned)
Just came back from my Mazda dealer...got this installed:
https://www.ebay.com (commissions earned)
Works fine. They charged me 2.3 hrs. Total cost of parts, labour, taxes was CAD$440.00
Could have saved some money on labour. But did not want to risk damaging the trim. They did a neat job. No wires in sight anywhere. All trim firmly in place.
I have a GX (base trim) with convenience package....
does your car have NAVIGATION? dont know the convenience package in Canada.
anybody?
contacted the seller on the below camera and he said that it doesn't need a NAVIGATION to make the camera work.. can someone confirm this?
https://www.ebay.com (commissions earned)
contacted the seller on the below camera and he said that it doesn't need a NAVIGATION to make the camera work.. can someone confirm this?
https://www.ebay.com (commissions earned)
I have the Touring without nav and I have the factory backup camera.
Which radio do you have, the touchscreen?
we have Sport WITHOUT NAVIGATION & CAMERA. But it has a BLUETOOTH FEATURE & it's touchscreen too.
You can verify it by remove your head unit and locate 4 pins connector - second one from the right side

im too scared to open it! lol
maybe someone can verify here...
Last edited:
Hello, this is not the system posted originally in this thread.
I am the seller of the listing originally referred too.
If anyone else has any other questions please contact me and I will work on getting them answered for you, thanks.
Retrac Toyota
Are you still selling this setup? Do you have details of where you have it advertised?
RetracToyota
Member
Hey guys, just wanted to update you all and let you know that we are still offering this backup camera system that this thread was originally created to discuss. It comes with a 3 year unlimited mile warranty, as well as support (if needed). We have a list of national installers, that will do quality work for a fair price.
You can reach me at 714 617 3655 (phone) or text me at 951 808 7438
Please let me know if you have any questions, would love to help you all out!
-RetracToyota
You can reach me at 714 617 3655 (phone) or text me at 951 808 7438
Please let me know if you have any questions, would love to help you all out!
-RetracToyota
prerunner7
Member
- :
- Mazda, 2015 CX-5
Hello RetracToyota,
Will your system work with a 2015 CX-5 with 5.8 in screen?
Your ebay page mentions it will only work with the 6.1.
Thanks.
Will your system work with a 2015 CX-5 with 5.8 in screen?
Your ebay page mentions it will only work with the 6.1.
Thanks.
Bought this camera https://www.ebay.com (commissions earned) for $10 shipped and spent yesterday afternoon and then..........

Made my own connectors and powered it by the rear power outlet. I'm happy with it(headbang). This is on a 2014 fwd sport with 5.8" screen, base radio w/Bluetooth, no navi.

Made my own connectors and powered it by the rear power outlet. I'm happy with it(headbang). This is on a 2014 fwd sport with 5.8" screen, base radio w/Bluetooth, no navi.
vondosburg
Member
- :
- 2015 Mazda CX-5, Sport
Hi all.
I would also be interested in learning if there are some options for the 2015 Sport with the bluetooth package. Our dealer assumed that the OEM radio/touchscreen was the same as the 2014s (besides the screen size that is) and we could install a camera, but it's not and so far any installs we tried haven't worked.
We tried two different cameras, including one that was supposed to be made for the CX-5, but so far none of them have worked. Either I have the worst installer in the world who can't figure it out...or there just isn't something for the 2015s yet? Although it defeats the purpose of getting the touchscreen to begin with, anyone have any good luck with a rearview mirror replacement with built-in camera, or could recommend one if I were to go that route?
Thanks in advance!
Hi guys
I'm from Iran and I own a Mazda 6 2014. There is no Mazda dealers in our town and nobody knows about new Mazda models.
My car has a standard 6.1" head unit, but no backup camera. I've been looking for a way to install a back up camera. So I researched in this forum and saw a lot of posts about CX-5 models and how people installed aftermarket cameras. I read many posts about Mazda factory harness for camera and needing a 6V camera instead of 12V cam.
But my problem is that my car's head unit surprisingly has it own factory harness plugged in. I looked at the back of the head unit and I was surprised by seeing a 4pin harness already plugged in the corresponding hole. I guess my car already has factory wiring for backup camera. So my question is that how can I make sure it has and how can I find the ending of wires in the back of my car? Where does the wire may be located and how should I connect camera wires to it? (suppose that I already have a 6V camera)
Thanks
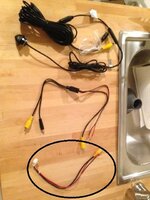
I just completed the camera install for my CX-5, and it came out great. When I was looking to do this, I didn't see one complete resource or "How-to" so I'm going to try to give you some pointers if you're thinking of doing this.
If you want to test if your CX-5 stereo will look for the camera once it's installed, try this test: With the car on, hold down the power button on the radio, while pressing the Seek Up button. You'll get to a programming screen. Type in 92 and enter. The radio should now show a blank image and say "Check surrounds for safety" - at this point, the radio is trying to find the connected camera, but since it's not attached yet, the image will be blank. I think all CX-5s with the Bluetooth radio have the ability to add a backup camera, but this is a good test to prove it to yourself.
Here is where I purchased the camera: https://www.ebay.com (commissions earned) (From RetracToyota who posts in this forum). The design and cabling was perfect (correct length cabling, no crimping or cable splicing needed, just direct plug and play). The instructions leave some to be desired, but with the help of this forum, all is do-able.
Project length: Leave yourself 2 hours, it took me about that, and I was REALLY careful about running the wires so the installation was invisible.
Tools you will need: Flat head & phillips head screw driver, a metric wrench set WITH an extended (extender is needed to reach the screw in the dash that holds the radio in, which is on the underside of the radio near the vents - you won't be able to get your hand in there), plus a wrench to disconnect the battery terminal (no sense in risking a blown fuse)
Lessons learned: When taking off the trunk panels, don't just pop off some of the fasteners that hold the plastic trunk panels to the body, they unscrew (hadn't seen that design before, but also haven't worked on many newer cars). Also, make sure you reconnect the cable to the trunk lid, I acccidentally buttoned everything up, but didn't reconnect the trunk release, so I had to crawl through the back of the car, use a screw driver to release the trunk, then pull everything apart again (oops)
Instructions:
1. These were the instructions I used to remove the radio: https://www.youtube.com/watch?v=aoncFAELsDQ
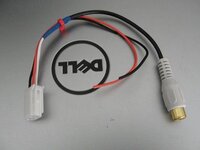
2. Then, connect the cable for the camera to the back of the head unit.
3. At this point, reconnect the car battery, and put the car in reverse. Even though the camera hasn't been hooked up to the back of the car, you should get the image from the camera on the screen. The stereo automatically searches for the camera, so if it's not coming up, something isn't connected correctly - nothing has to be configured (from what I saw with my installation).
4. You will want to mount the camera under the rear Mazda logo where the button for the trunk release is (this is the factory mount location). The exact location should be to the left of the trunk release button, but to the right of the left side license plate light.
5. Now, take apart the back hatch area to access this spot. Keep in mind, some people have drilled the hole and mounted the camera without taking the back hatch apart. I didn't go that route because I wanted a VERY factory look, no cables visible. In my opinion, that would take no less time than just removing the panels, drilling the hole in the plastic while OFF the vehicle, and then putting it all back together. Either way, you still need to remove the trunk lid trim panels. There is a post on here with photos of how to take apart the back hatch area, but it's pretty straight forward. There are a lot of snap clips that are not visible, so you'll need to just pull on the trim pieces to release, and push to snap them back in later.
6. When you drill the hole into the plastic, the hole is going to be SLIGHTLY smaller than the camera needs (likely by design, because you don't want the camera sliding or turning). For me, it would not go in immediately so I wrapped a piece of sandpaper around a dowel (or you could wrap it around a screw driver), and I ran the sandpaper through the hole to sand off more material and make the hole larger. Then I put some WD-40 on the camera itself to slip it through the hole - it was very snug (just as I wanted it), but it went in.
7. About 4 feet from the camera in the wiring, there is a black connector (it's small, and it doesn't look like it would come apart, but it does). Pull those two pieces apart, and this makes it MUCH easier to feed the camera cable through the trunk lid. I used a hole that was already drilled in the body of the car. There was a snap fastener there, about 4 inches up and to the left of the new camera location, so I removed the fastener to use the hole. There are plenty of other fasteners to hold the plastic logo piece to the body.
8. Run the camera wire to the top of the hatch (by the roof of the car). I chose to run the camera wire through the existing rubber and plastic wrapped conduit where the headlight wires attach into the body of the car. This was by far the hardest part of the job because it's tight and takes patience to get that wire fed through. You have to pop the plastic retainers that hold the rubber sleeve to the car. But once you get it fed through, the wire comes through into the ceiling in the rear hatch area.
9. Now reconnect the camera wire, and you'll need to run the wire from the rear of the car, to the connection you already made at the stereo. I elected to route it down from the ceiling, behind the rear quarter window, under the rear seat seat-belt assembly, then down by the front and rear door jam next to the floor mats (you can mostly just slip the wires between the carpet and the trim pieces.
10. Reconnect the battery, make sure the camera is still working.
11. If so, disconnect the battery again, and put everything back together (don't forget to reconnect the lights for the license plate, and the trunk release wire).
Enjoy! My camera has been working great, and has really good clarify even at night (factory quality).
If you want to test if your CX-5 stereo will look for the camera once it's installed, try this test: With the car on, hold down the power button on the radio, while pressing the Seek Up button. You'll get to a programming screen. Type in 92 and enter. The radio should now show a blank image and say "Check surrounds for safety" - at this point, the radio is trying to find the connected camera, but since it's not attached yet, the image will be blank. I think all CX-5s with the Bluetooth radio have the ability to add a backup camera, but this is a good test to prove it to yourself.
Here is where I purchased the camera: https://www.ebay.com (commissions earned) (From RetracToyota who posts in this forum). The design and cabling was perfect (correct length cabling, no crimping or cable splicing needed, just direct plug and play). The instructions leave some to be desired, but with the help of this forum, all is do-able.
Project length: Leave yourself 2 hours, it took me about that, and I was REALLY careful about running the wires so the installation was invisible.
Tools you will need: Flat head & phillips head screw driver, a metric wrench set WITH an extended (extender is needed to reach the screw in the dash that holds the radio in, which is on the underside of the radio near the vents - you won't be able to get your hand in there), plus a wrench to disconnect the battery terminal (no sense in risking a blown fuse)
Lessons learned: When taking off the trunk panels, don't just pop off some of the fasteners that hold the plastic trunk panels to the body, they unscrew (hadn't seen that design before, but also haven't worked on many newer cars). Also, make sure you reconnect the cable to the trunk lid, I acccidentally buttoned everything up, but didn't reconnect the trunk release, so I had to crawl through the back of the car, use a screw driver to release the trunk, then pull everything apart again (oops)
Instructions:
1. These were the instructions I used to remove the radio: https://www.youtube.com/watch?v=aoncFAELsDQ
2. Then, connect the cable for the camera to the back of the head unit.
3. At this point, reconnect the car battery, and put the car in reverse. Even though the camera hasn't been hooked up to the back of the car, you should get the image from the camera on the screen. The stereo automatically searches for the camera, so if it's not coming up, something isn't connected correctly - nothing has to be configured (from what I saw with my installation).
4. You will want to mount the camera under the rear Mazda logo where the button for the trunk release is (this is the factory mount location). The exact location should be to the left of the trunk release button, but to the right of the left side license plate light.
5. Now, take apart the back hatch area to access this spot. Keep in mind, some people have drilled the hole and mounted the camera without taking the back hatch apart. I didn't go that route because I wanted a VERY factory look, no cables visible. In my opinion, that would take no less time than just removing the panels, drilling the hole in the plastic while OFF the vehicle, and then putting it all back together. Either way, you still need to remove the trunk lid trim panels. There is a post on here with photos of how to take apart the back hatch area, but it's pretty straight forward. There are a lot of snap clips that are not visible, so you'll need to just pull on the trim pieces to release, and push to snap them back in later.
6. When you drill the hole into the plastic, the hole is going to be SLIGHTLY smaller than the camera needs (likely by design, because you don't want the camera sliding or turning). For me, it would not go in immediately so I wrapped a piece of sandpaper around a dowel (or you could wrap it around a screw driver), and I ran the sandpaper through the hole to sand off more material and make the hole larger. Then I put some WD-40 on the camera itself to slip it through the hole - it was very snug (just as I wanted it), but it went in.
7. About 4 feet from the camera in the wiring, there is a black connector (it's small, and it doesn't look like it would come apart, but it does). Pull those two pieces apart, and this makes it MUCH easier to feed the camera cable through the trunk lid. I used a hole that was already drilled in the body of the car. There was a snap fastener there, about 4 inches up and to the left of the new camera location, so I removed the fastener to use the hole. There are plenty of other fasteners to hold the plastic logo piece to the body.
8. Run the camera wire to the top of the hatch (by the roof of the car). I chose to run the camera wire through the existing rubber and plastic wrapped conduit where the headlight wires attach into the body of the car. This was by far the hardest part of the job because it's tight and takes patience to get that wire fed through. You have to pop the plastic retainers that hold the rubber sleeve to the car. But once you get it fed through, the wire comes through into the ceiling in the rear hatch area.
9. Now reconnect the camera wire, and you'll need to run the wire from the rear of the car, to the connection you already made at the stereo. I elected to route it down from the ceiling, behind the rear quarter window, under the rear seat seat-belt assembly, then down by the front and rear door jam next to the floor mats (you can mostly just slip the wires between the carpet and the trim pieces.
10. Reconnect the battery, make sure the camera is still working.
11. If so, disconnect the battery again, and put everything back together (don't forget to reconnect the lights for the license plate, and the trunk release wire).
Enjoy! My camera has been working great, and has really good clarify even at night (factory quality).
Similar threads
- Replies
- 3
- Views
- 3K
- Replies
- 4
- Views
- 2K