
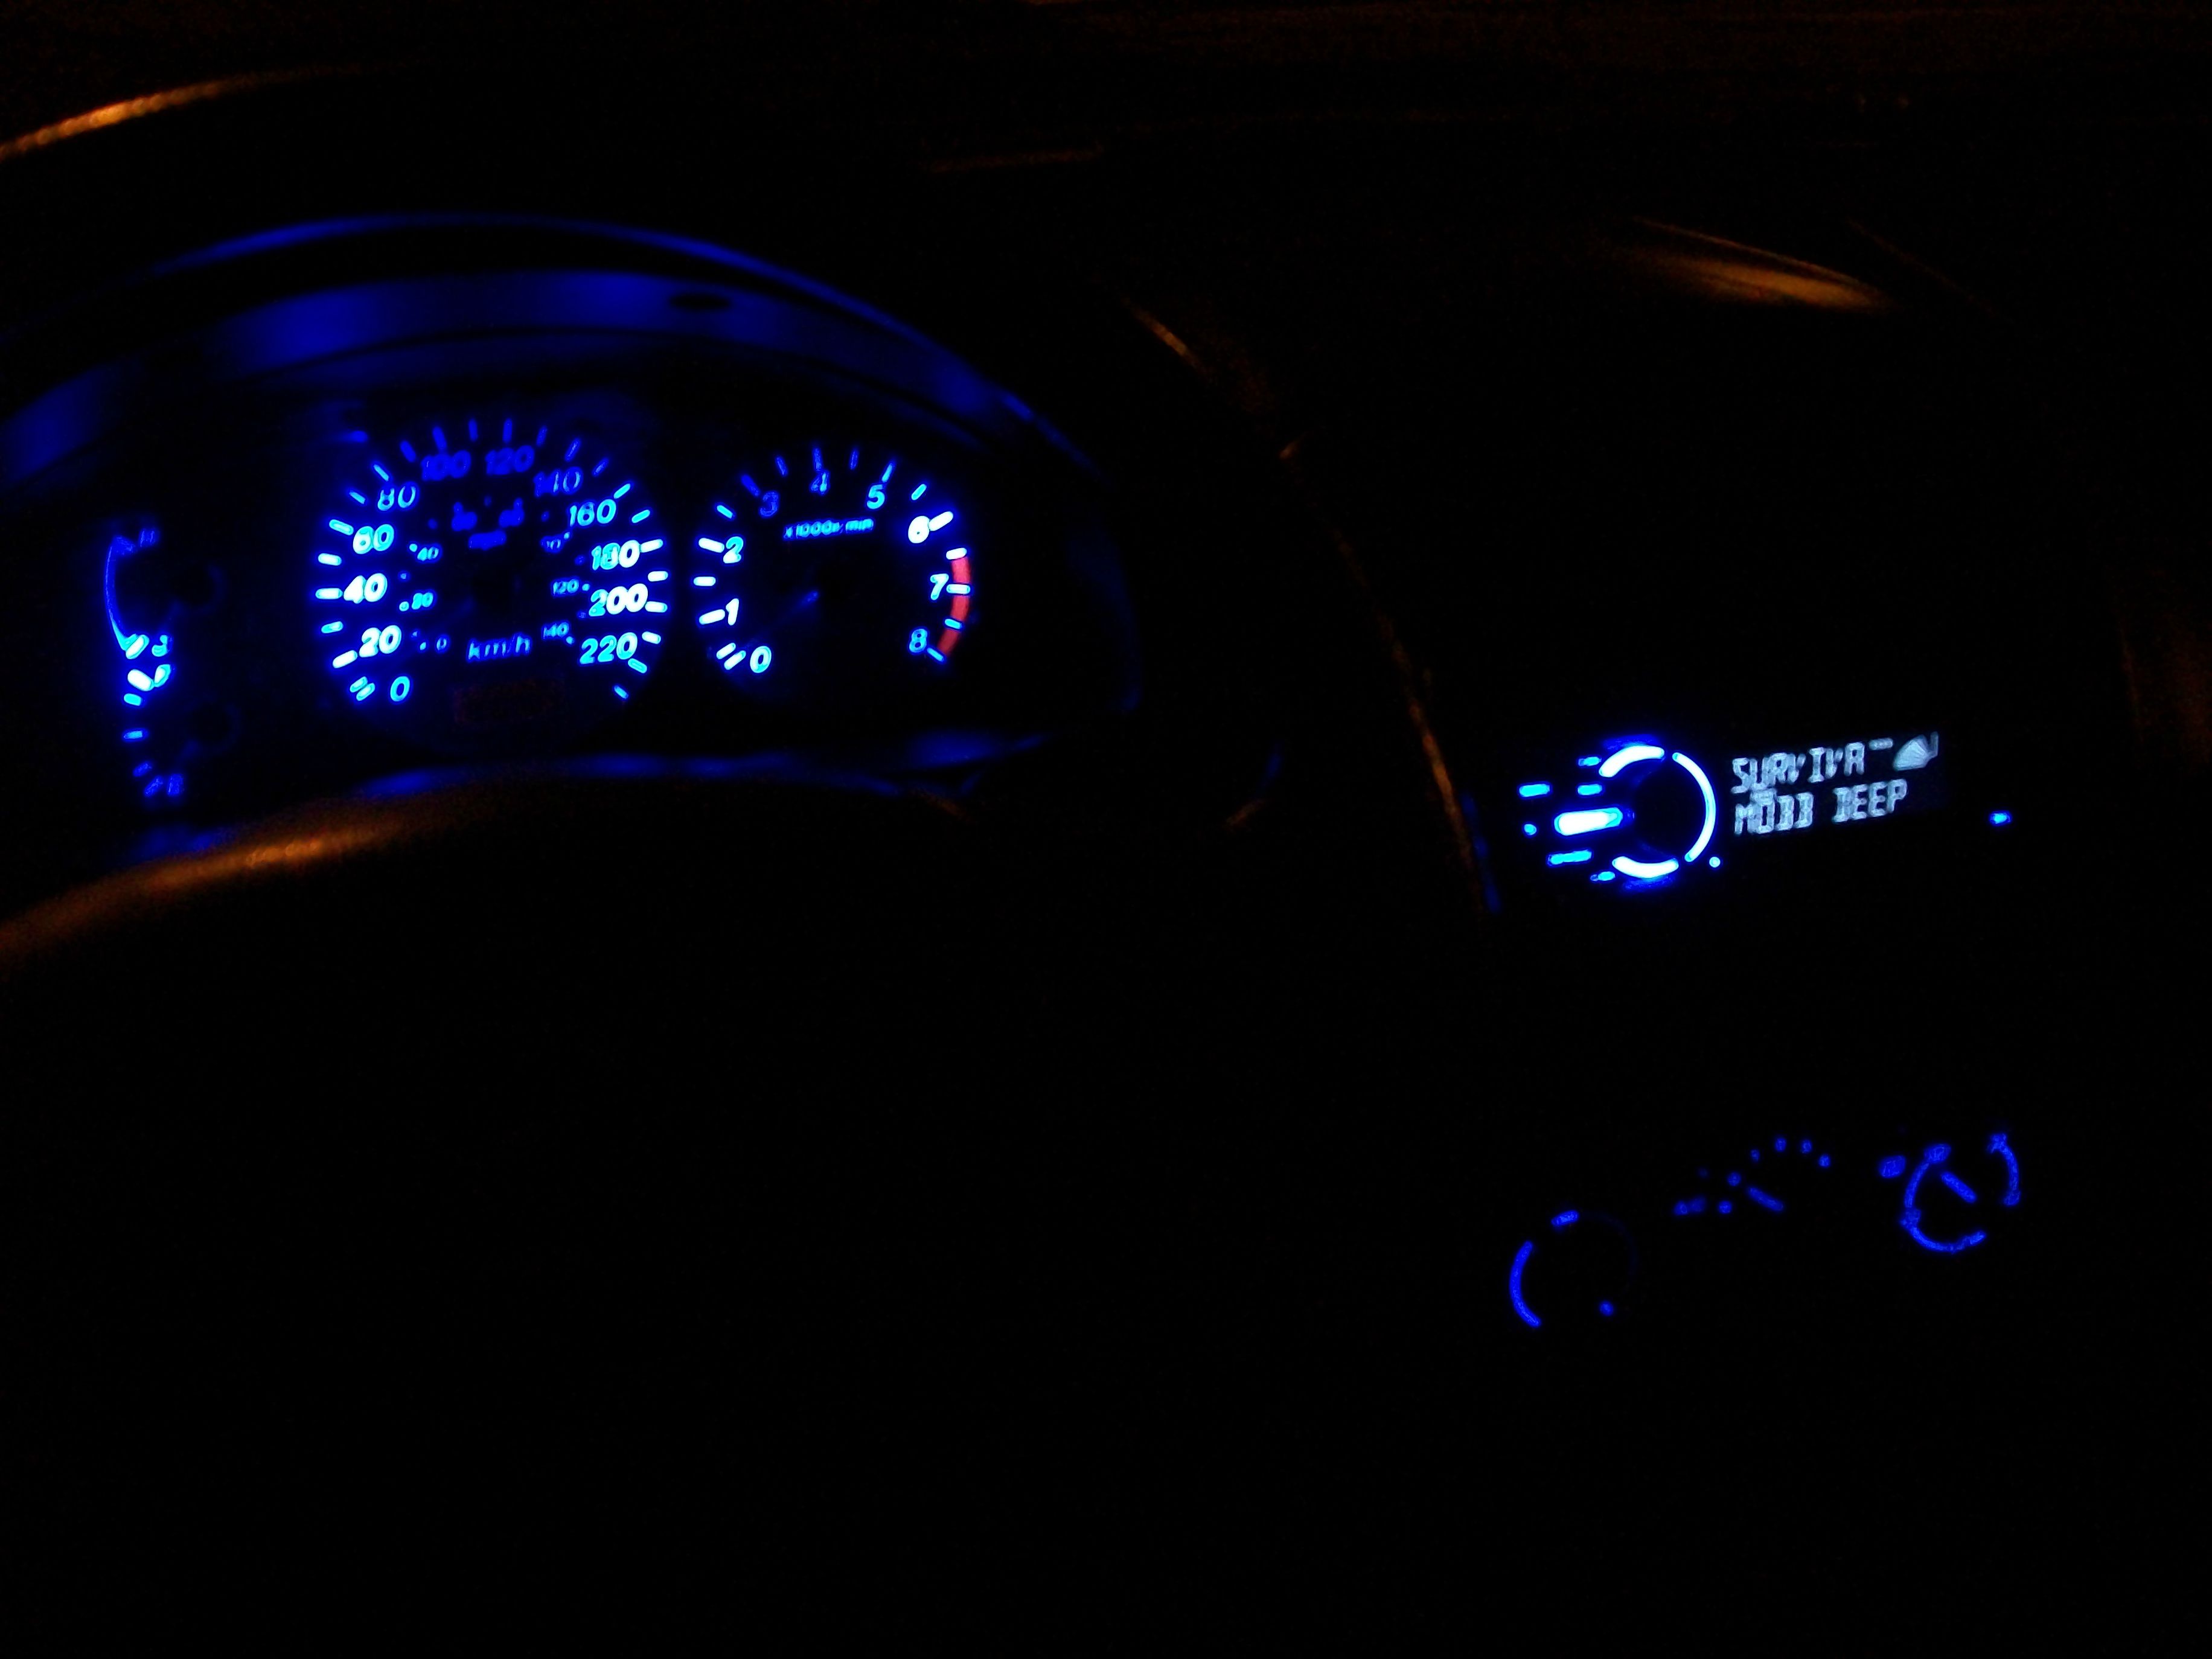
Hi guys, so Ive done this mod a long time ago but ive been getting lots of requests to make a DIY go-through post, so here it is. There will be 3 main parts to this.I must warn you though. First of all, my english isnt flawless. Second of all, im not responsible of anything malfunctionning after the install. This is how I did it and it is a pretty straight forward mod!
Difficulty : 7/10
1. HVAC LED lighting
2. Headunit lighting
3. Cluster LED lighting
You will need a variety of screwdrivers, mini screwdrivers, wrenches, variety of sanding paper (200 to 800 should do), steady/lady hands & an afternoon! i HIGHLY suggest you do disable the automatic A/C defrost while you have your pannels out. (http://www.mazdas247.com/forum/showthread.php?55382-How-To-Disabling-Automatic-A-C-Defrost-modes)
You will also need particular LEDs. I ordered mine from www.superbrightleds.com, So here are the products I used. You can alwais, ofcourse, use the color you want such as bright yellow instead of cool blue, the choice is yours!
http://www.superbrightleds.com/more...led-bulb-3-smd-led-wide-angle-wedge-base/228/ --> You will need 4 of those
http://www.superbrightleds.com/more...led-bulb-5-smd-led-wide-angle-wedge-base/206/ --> You will need 2 of those
1. HVAC LED lightning
First of all, heres a go-through of removing the HVAC if you never took out the pannel before.
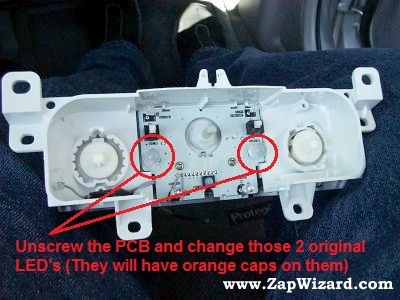
Simply replace the 2 LEDS with 2 of your 74-BHP3 LEDS.
Then reinstall the whole HVAC & centre console as you will be done with this part.
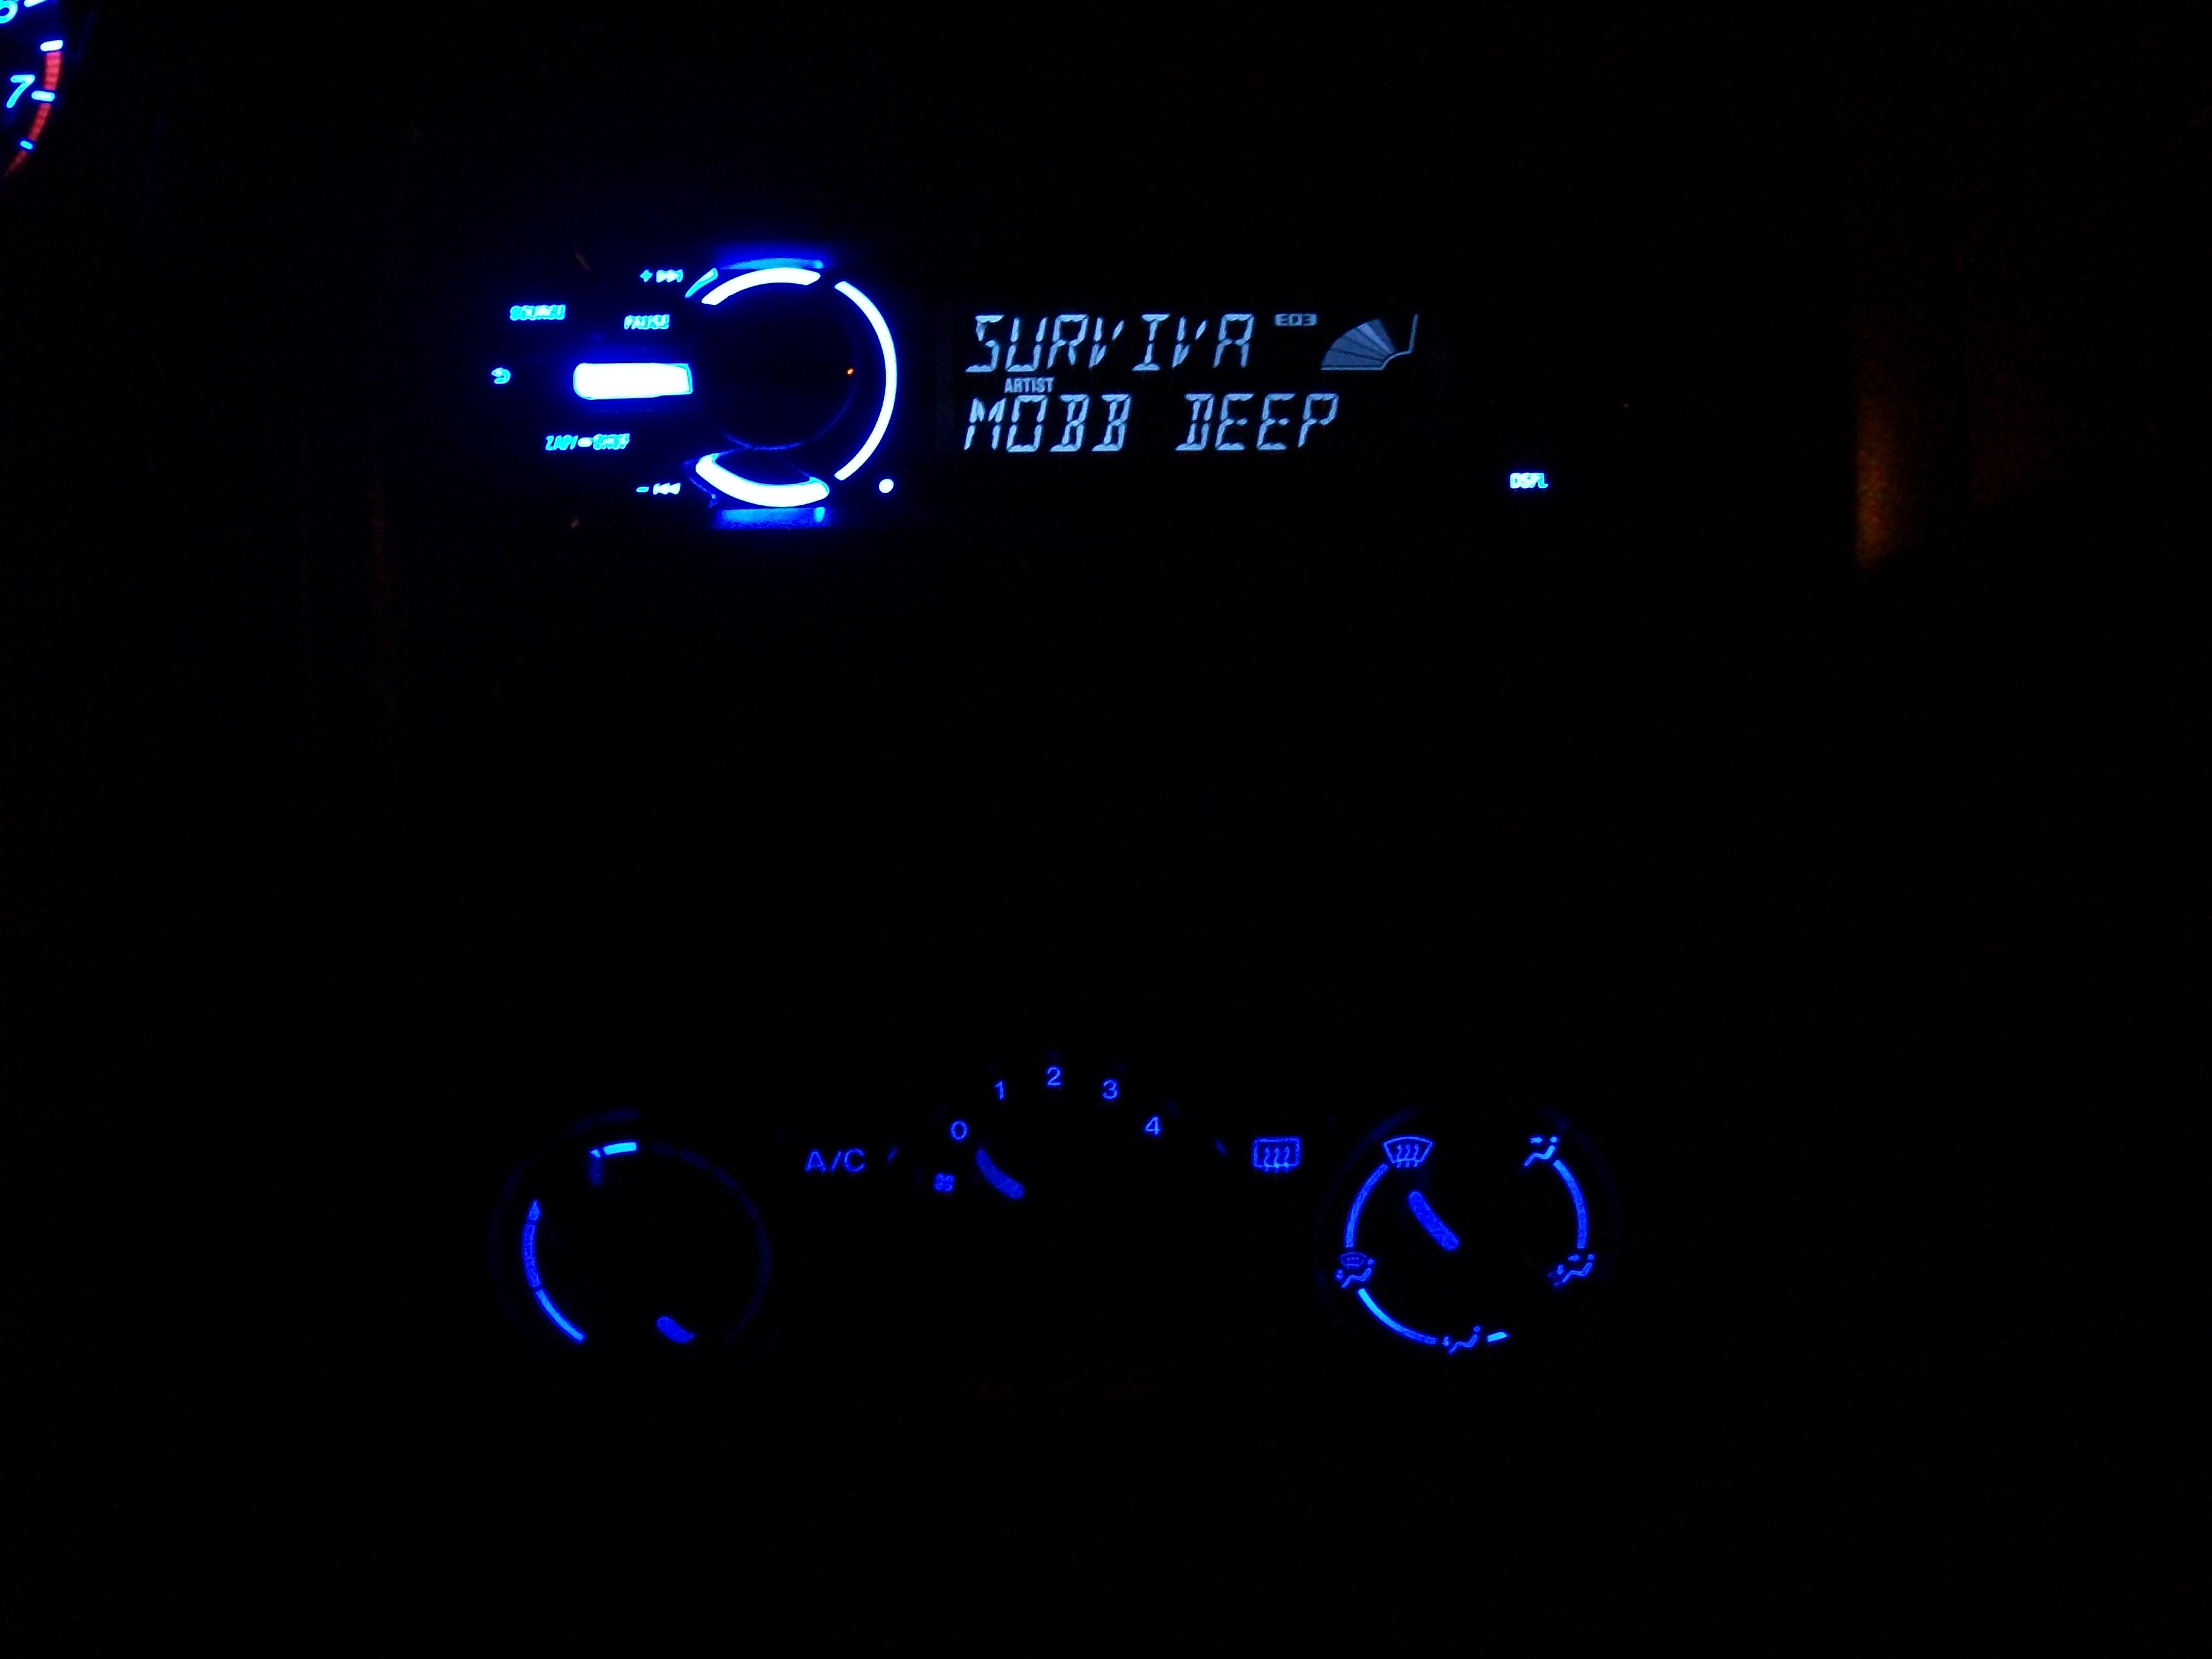
2. Headunit
No rocket-science here. If you want a whole new interior, I suggest you match your headunit to your interior with an aftermarket headunit which has blue lighting! (No gothrough for headunit install, I will make one if i have many people asking me for a tutorial!)
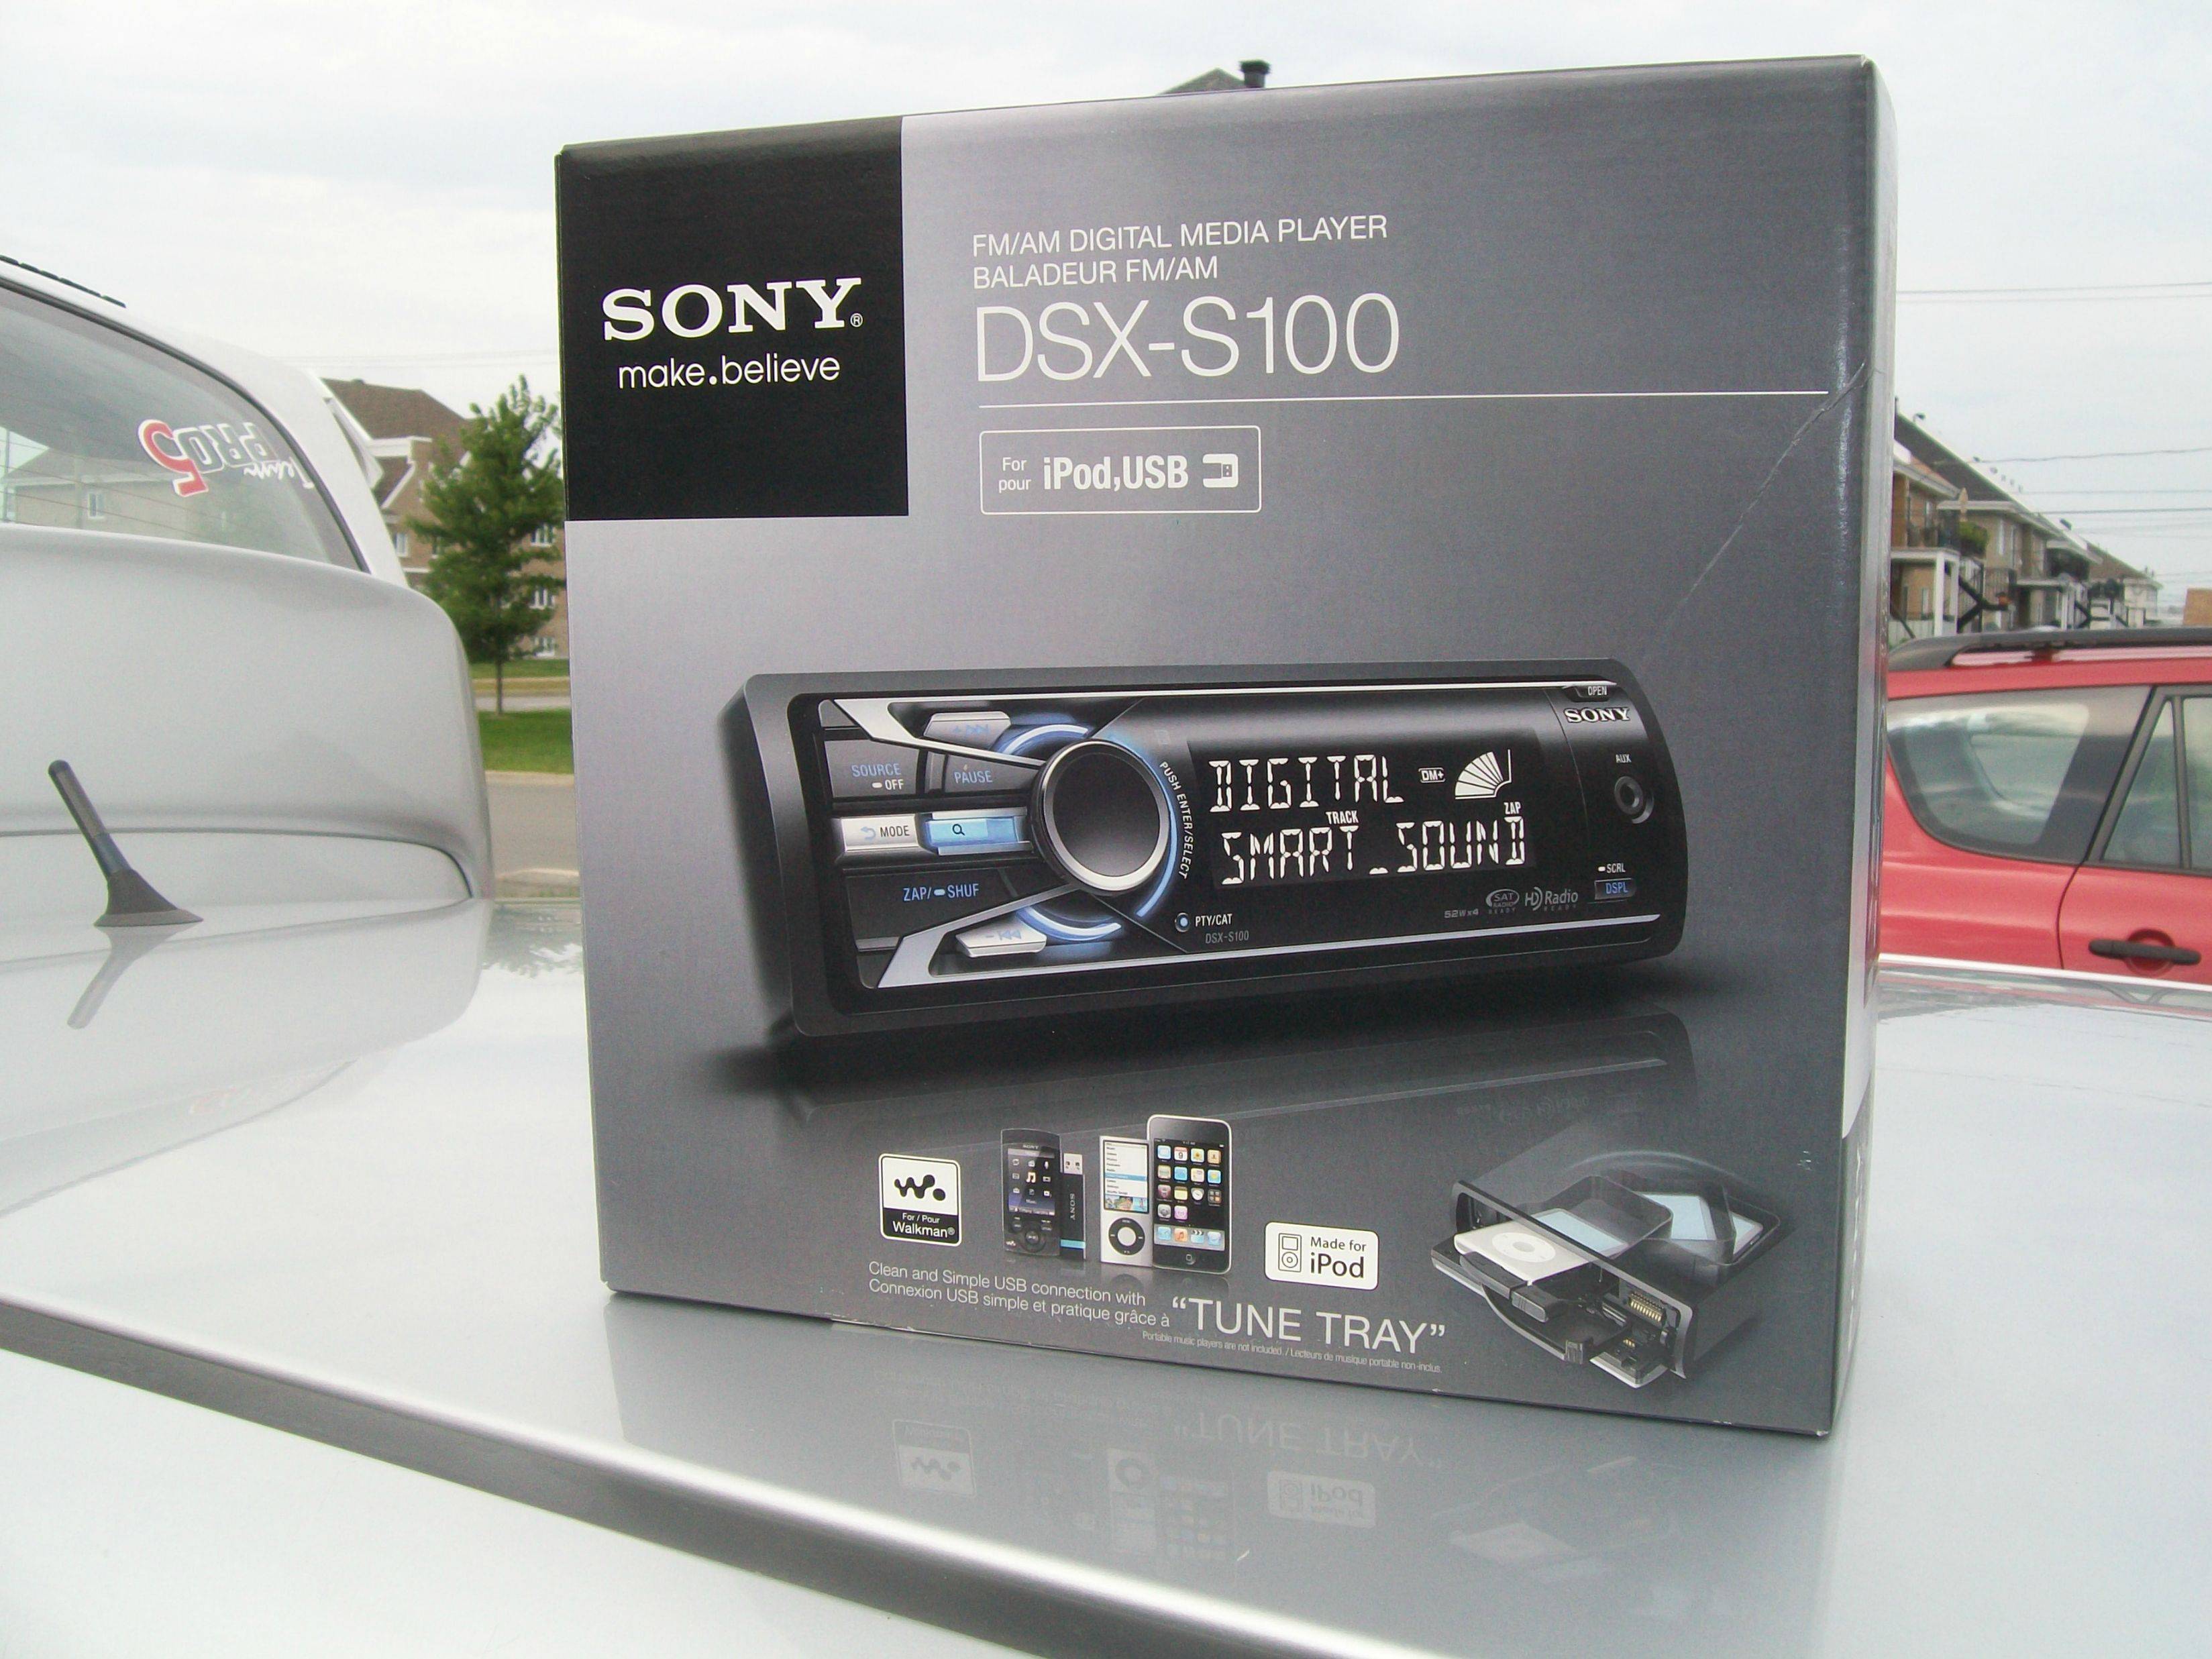
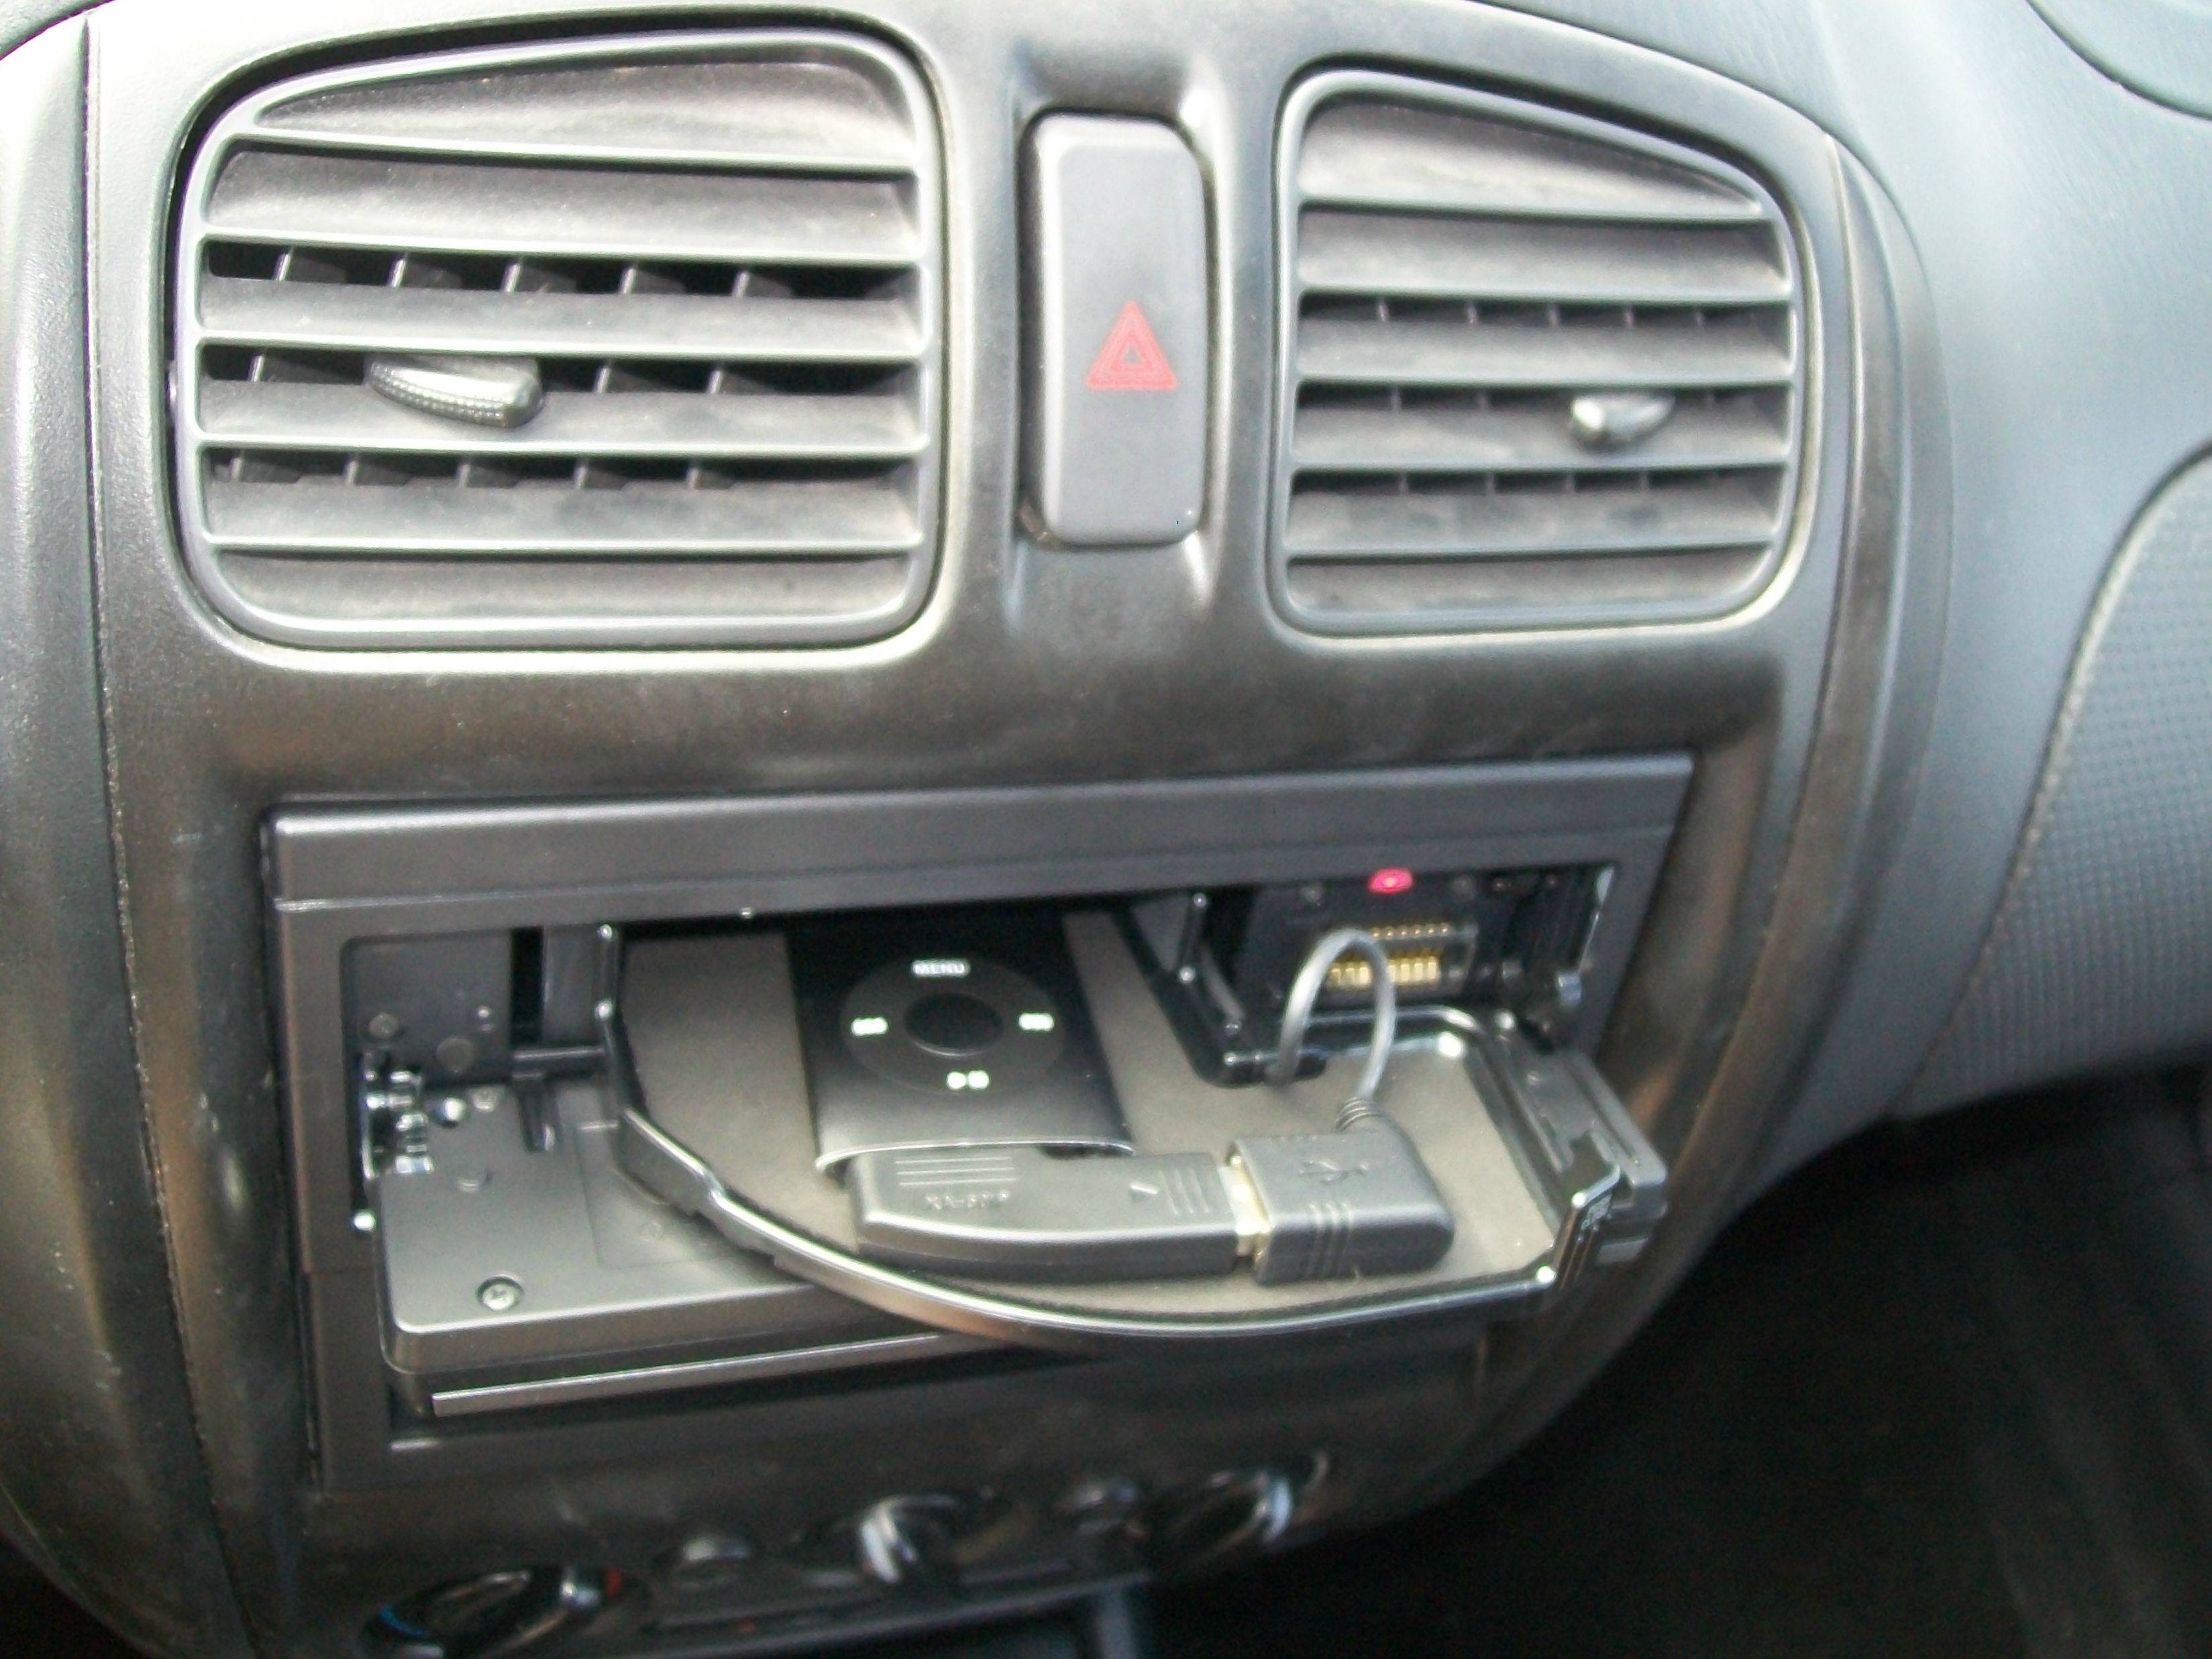
I personnally opted for a Sony DSX-S100 as I wanted to use my iPod and making the whole scheme stealthy!
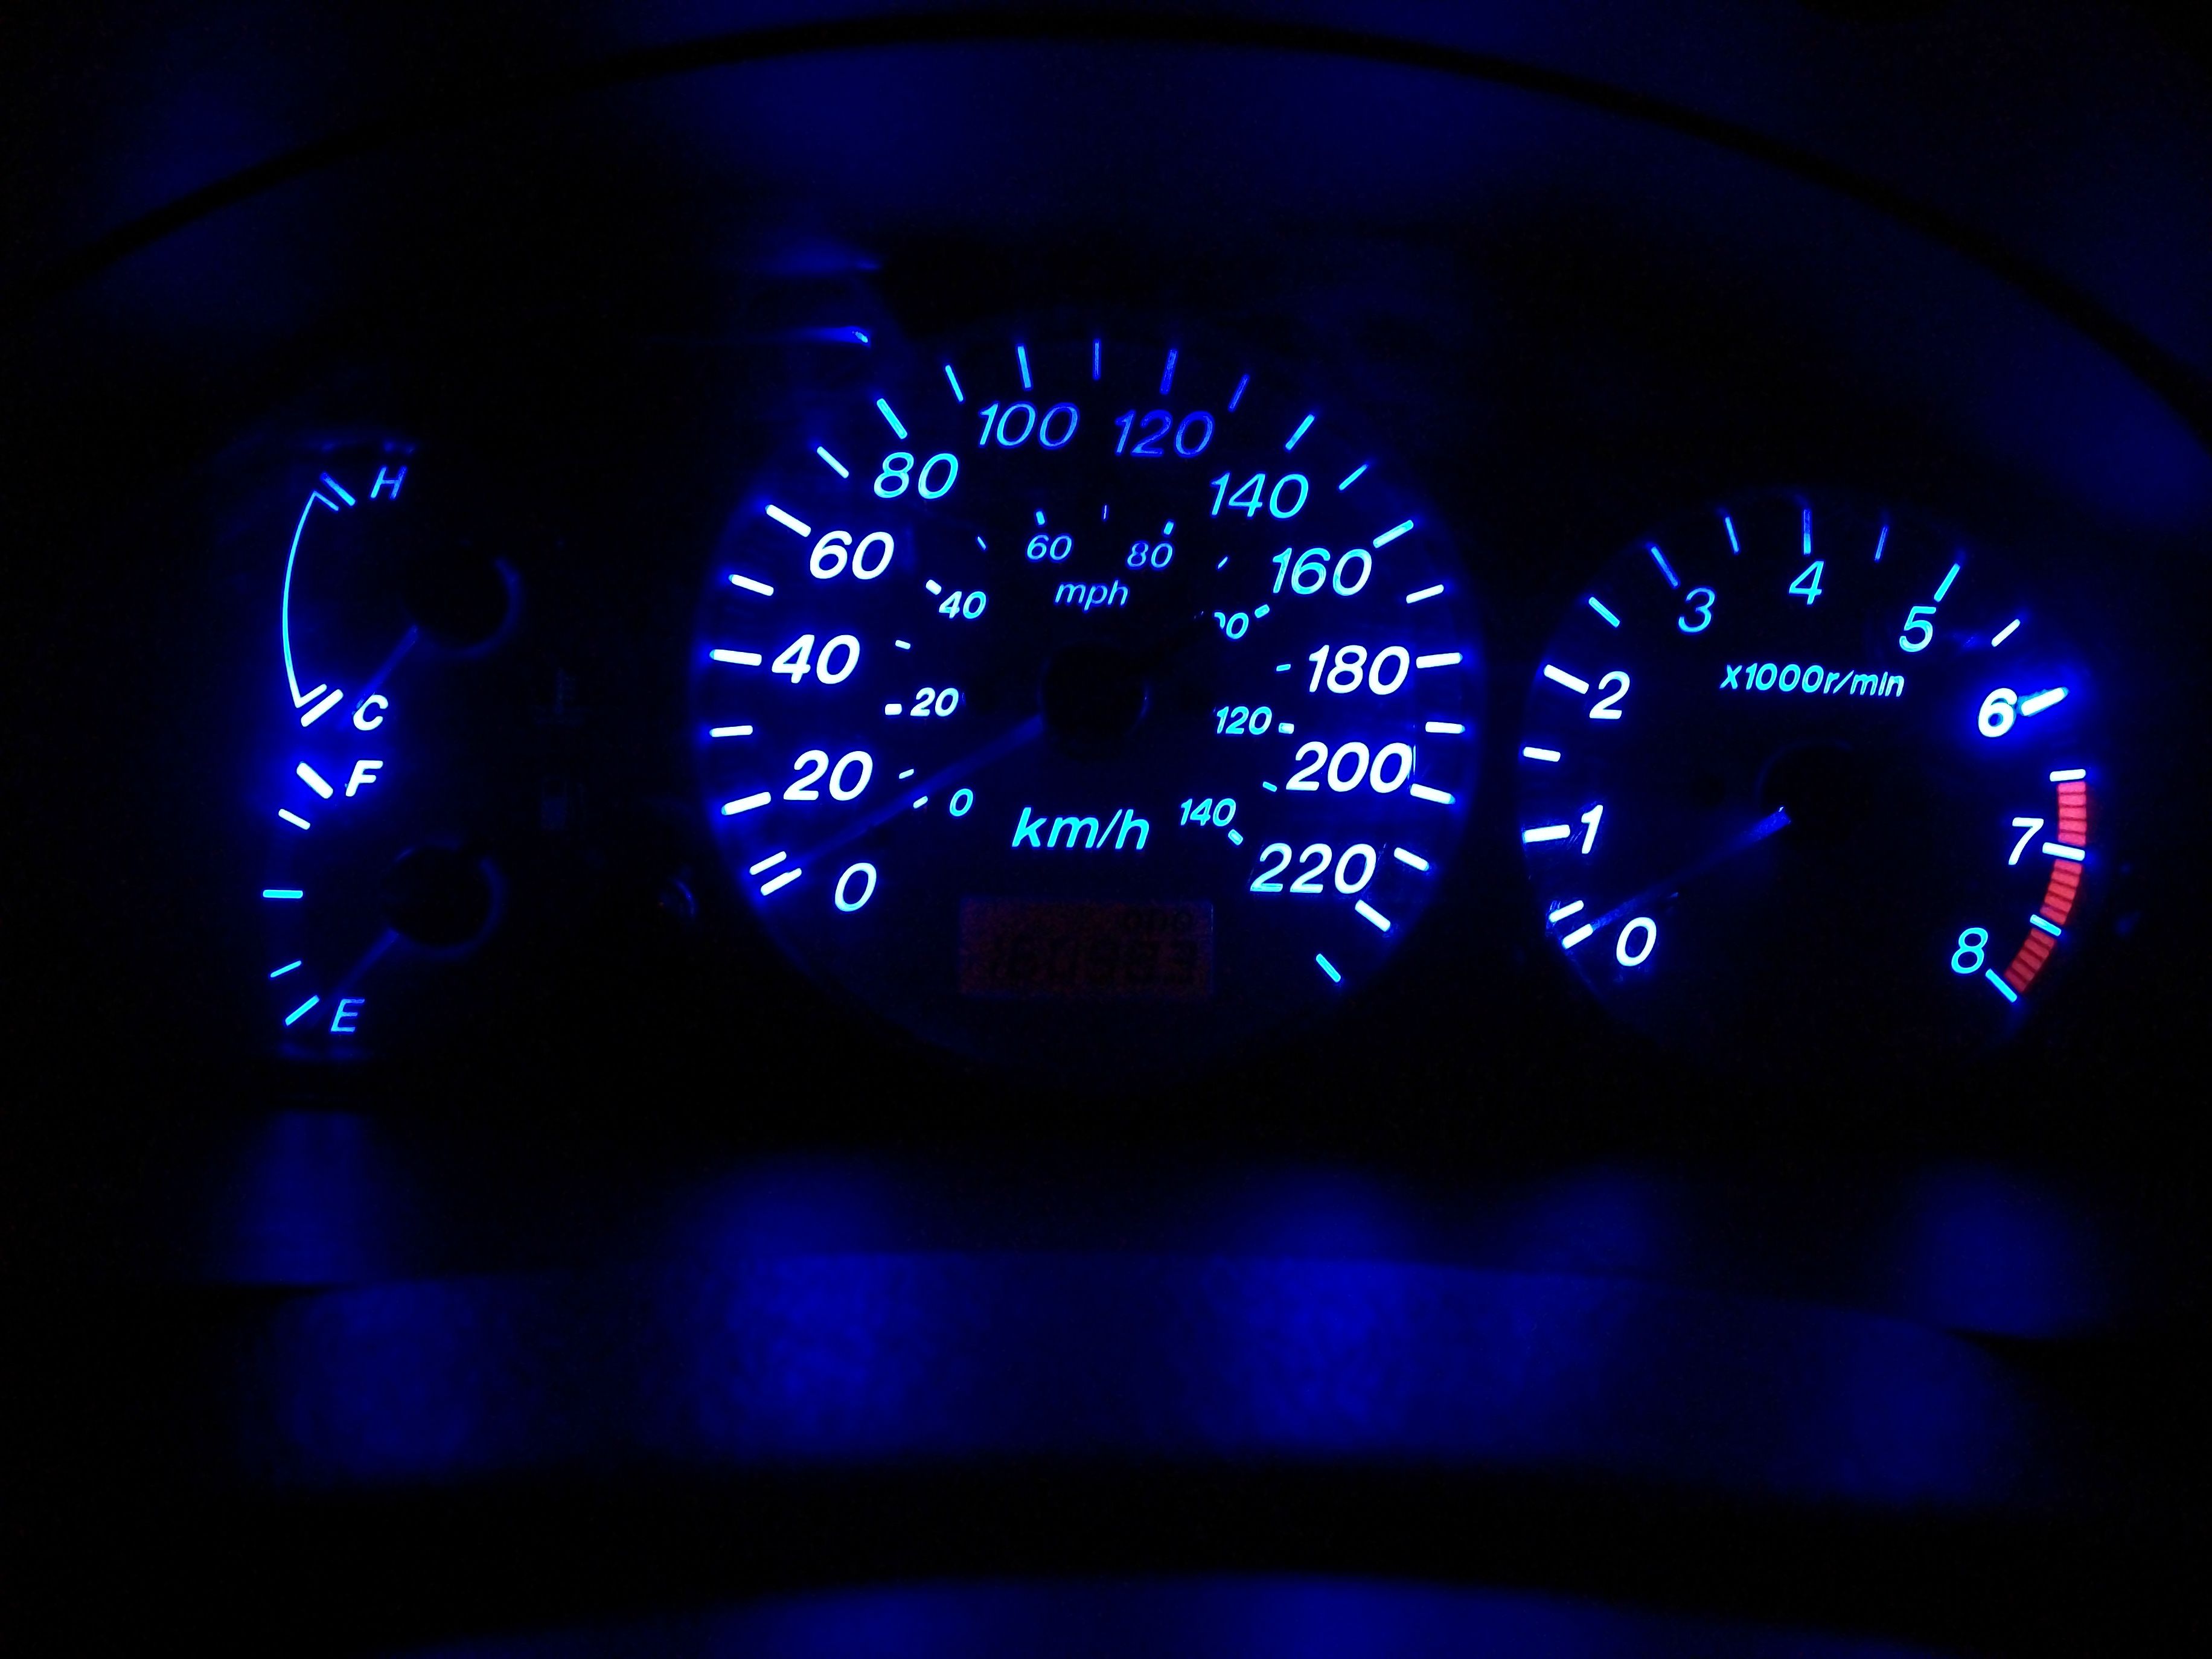
3. Cluster lighting (Trickiest part)
I hope I could help a few of you out there, and I hope this will make it into the mods "Bible" sticky as I call it hahah (How-to sticky thread : http://www.mazdas247.com/forum/showthread.php?123715657-How-To-Quick-Links-(sticky-version))
If you have any questions, post them here so I dont have to answer the same questions a few times
I will also try to make this a PDF & WORD document as alot of the mods in the sticky thread have expired images (2003 threads..)
Difficulty : 7/10
1. HVAC LED lighting
2. Headunit lighting
3. Cluster LED lighting
You will need a variety of screwdrivers, mini screwdrivers, wrenches, variety of sanding paper (200 to 800 should do), steady/lady hands & an afternoon! i HIGHLY suggest you do disable the automatic A/C defrost while you have your pannels out. (http://www.mazdas247.com/forum/showthread.php?55382-How-To-Disabling-Automatic-A-C-Defrost-modes)
You will also need particular LEDs. I ordered mine from www.superbrightleds.com, So here are the products I used. You can alwais, ofcourse, use the color you want such as bright yellow instead of cool blue, the choice is yours!
http://www.superbrightleds.com/more...led-bulb-3-smd-led-wide-angle-wedge-base/228/ --> You will need 4 of those
http://www.superbrightleds.com/more...led-bulb-5-smd-led-wide-angle-wedge-base/206/ --> You will need 2 of those
1. HVAC LED lightning
First of all, heres a go-through of removing the HVAC if you never took out the pannel before.
ZapWizard said:--------------------------------------------------------------------------------
First remove the glove box.
--------------------------------------------------------------------------------

Look inside and towards the drivers seat.
--------------------------------------------------------------------------------

Locate the temperature control cable and disconnect it.
Gently push the tab in and pull the cable off the white control arm.
The push down on the black metal holder, and pull the cable surround out.
--------------------------------------------------------------------------------

Next move the drivers side, and locate the vent control cable.
--------------------------------------------------------------------------------

Repeat the same steps to disconnect the vent control cable.
--------------------------------------------------------------------------------

Next you need to pull the center panel out.
This is done by pushing the vents down, and pulling with both hands.
--------------------------------------------------------------------------------

With the center panel hanging out, disconnect the hazard signal button,
and the two connectors at the rear of the A/C control assembly.
--------------------------------------------------------------------------------

You can now remove the entire center panel.
Be careful to note how the control cables come out, so that you can put back in the correct way.
Once removed unscrew the A/C control assembly from the front panel.
--------------------------------------------------------------------------------

With the panel removed, carefully pull the three control knobs off.
--------------------------------------------------------------------------------

You should now have no knobs on the front.
--------------------------------------------------------------------------------
Simply replace the 2 LEDS with 2 of your 74-BHP3 LEDS.
Then reinstall the whole HVAC & centre console as you will be done with this part.
2. Headunit
No rocket-science here. If you want a whole new interior, I suggest you match your headunit to your interior with an aftermarket headunit which has blue lighting! (No gothrough for headunit install, I will make one if i have many people asking me for a tutorial!)
I personnally opted for a Sony DSX-S100 as I wanted to use my iPod and making the whole scheme stealthy!
3. Cluster lighting (Trickiest part)
- You will need to remove the Cluster. Theres 2 screws facing upwards above the steering column. Undo those 2 then pull on the plastic trim.
- Unscrew the metal clip holding the Cluster to the dash along with 2 screws below the cluster.
- Unclip the 3 connections out of the Cluster.
By now, you should have the instrument cluster in your hands. Take it somewhere steady as the next steps will require precise work.
- Unclip the 3 layers of plastic surrounding the PCB board of the instrument cluster (Transparent, then black, then transparent)
What you have now is a naked cluster. Take precious care when handling the cluster, it is extremely fragile.
Oh, by the way, heres a trick ive got to tell you.. I learned the hard way
NEVER IN ANY WAY TRY TO PRY THE NEEDLES OFF THE NEEDLE MOTOR. YOU WILL **** UP YOUR CLUSTER. (and then have to buy another one like I did lol)
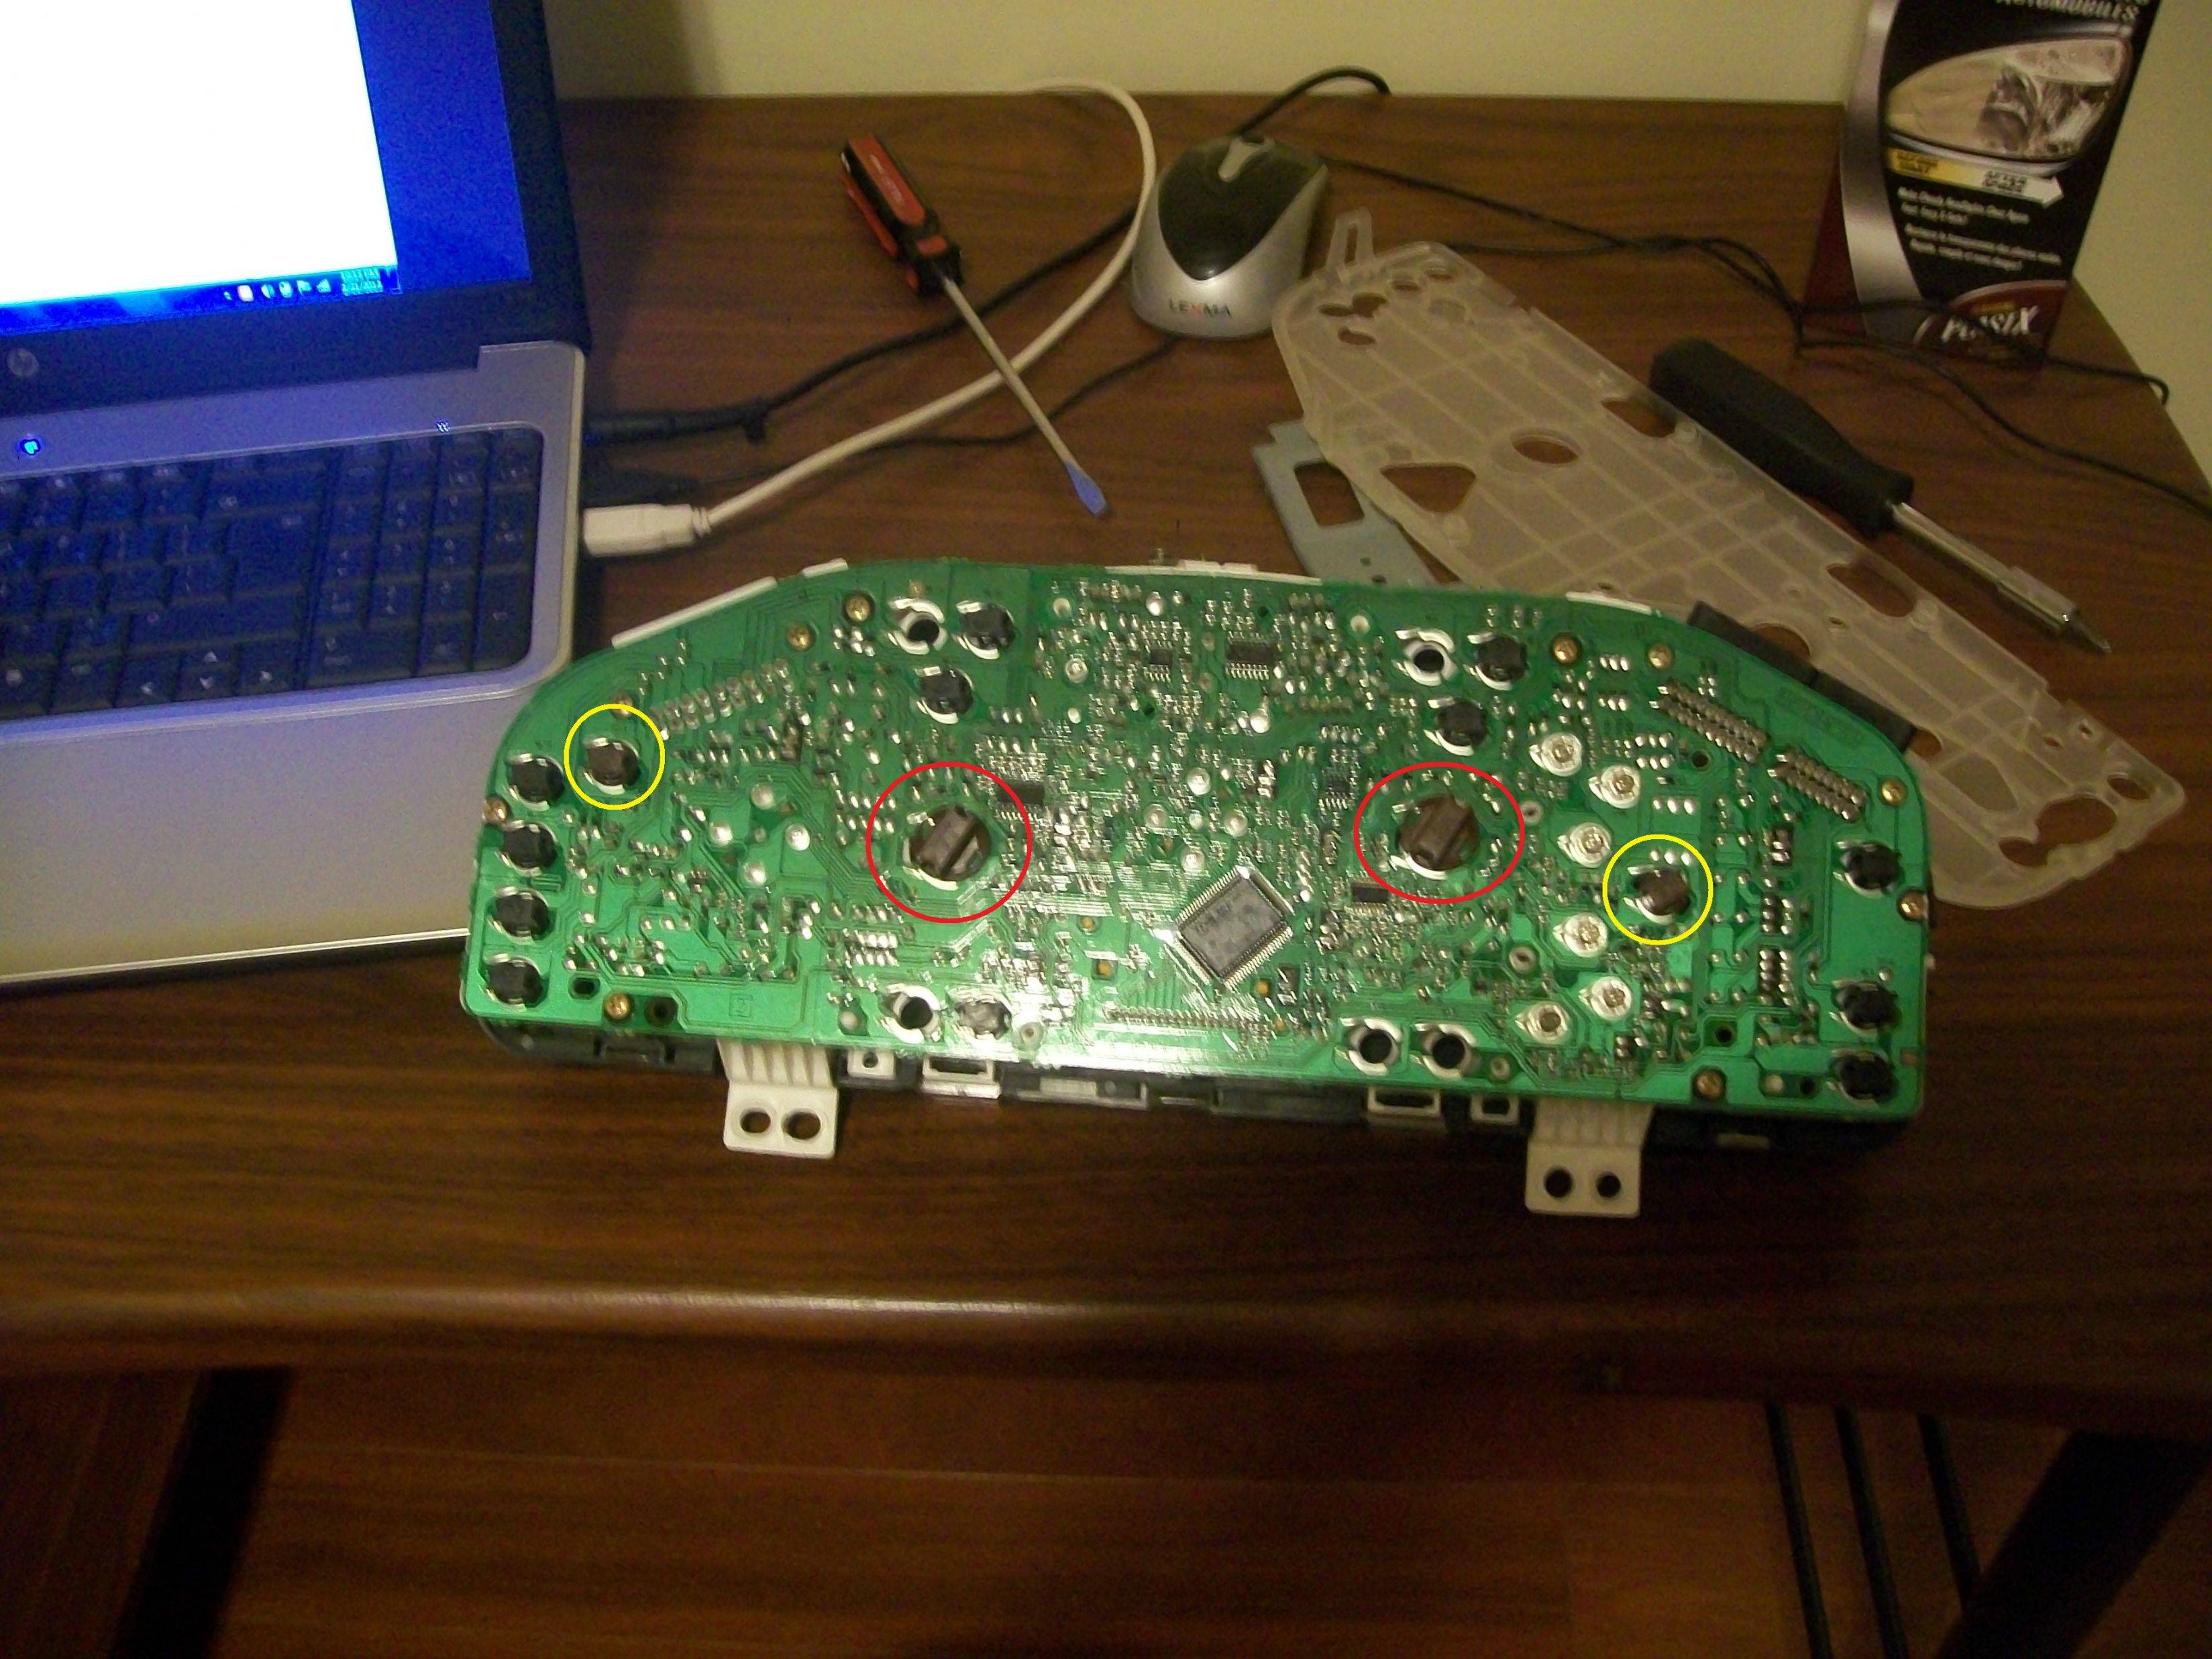
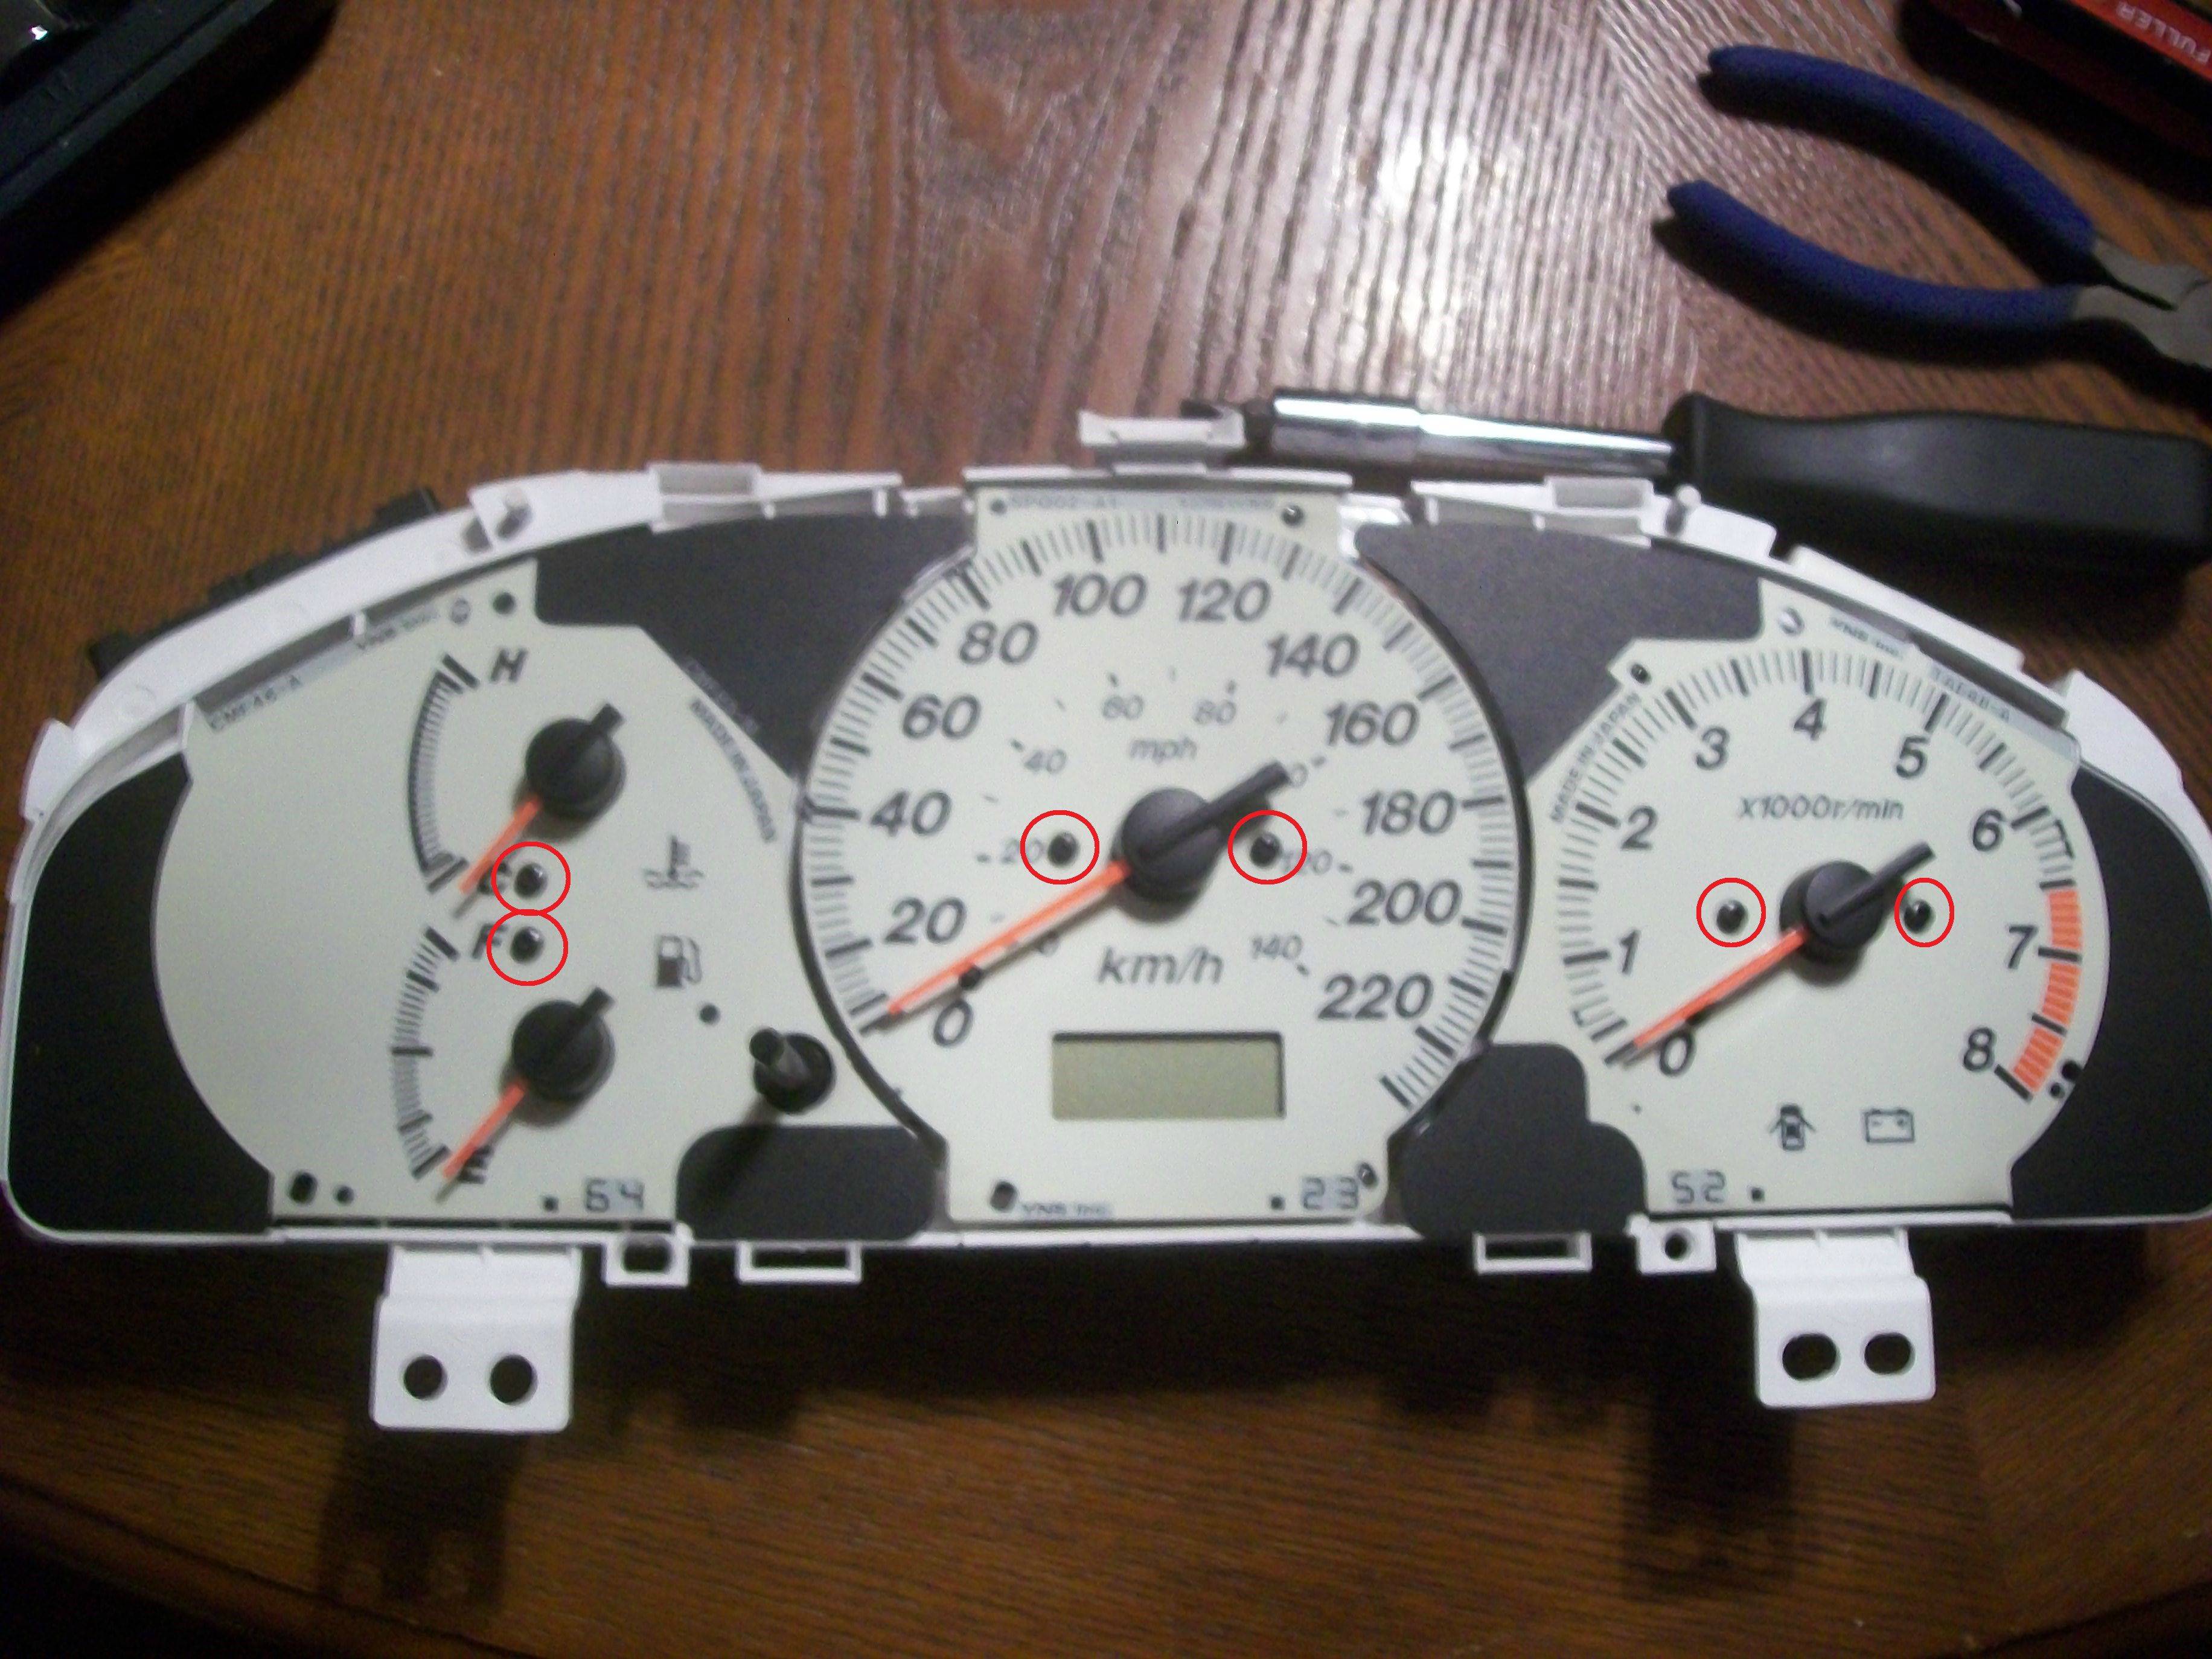
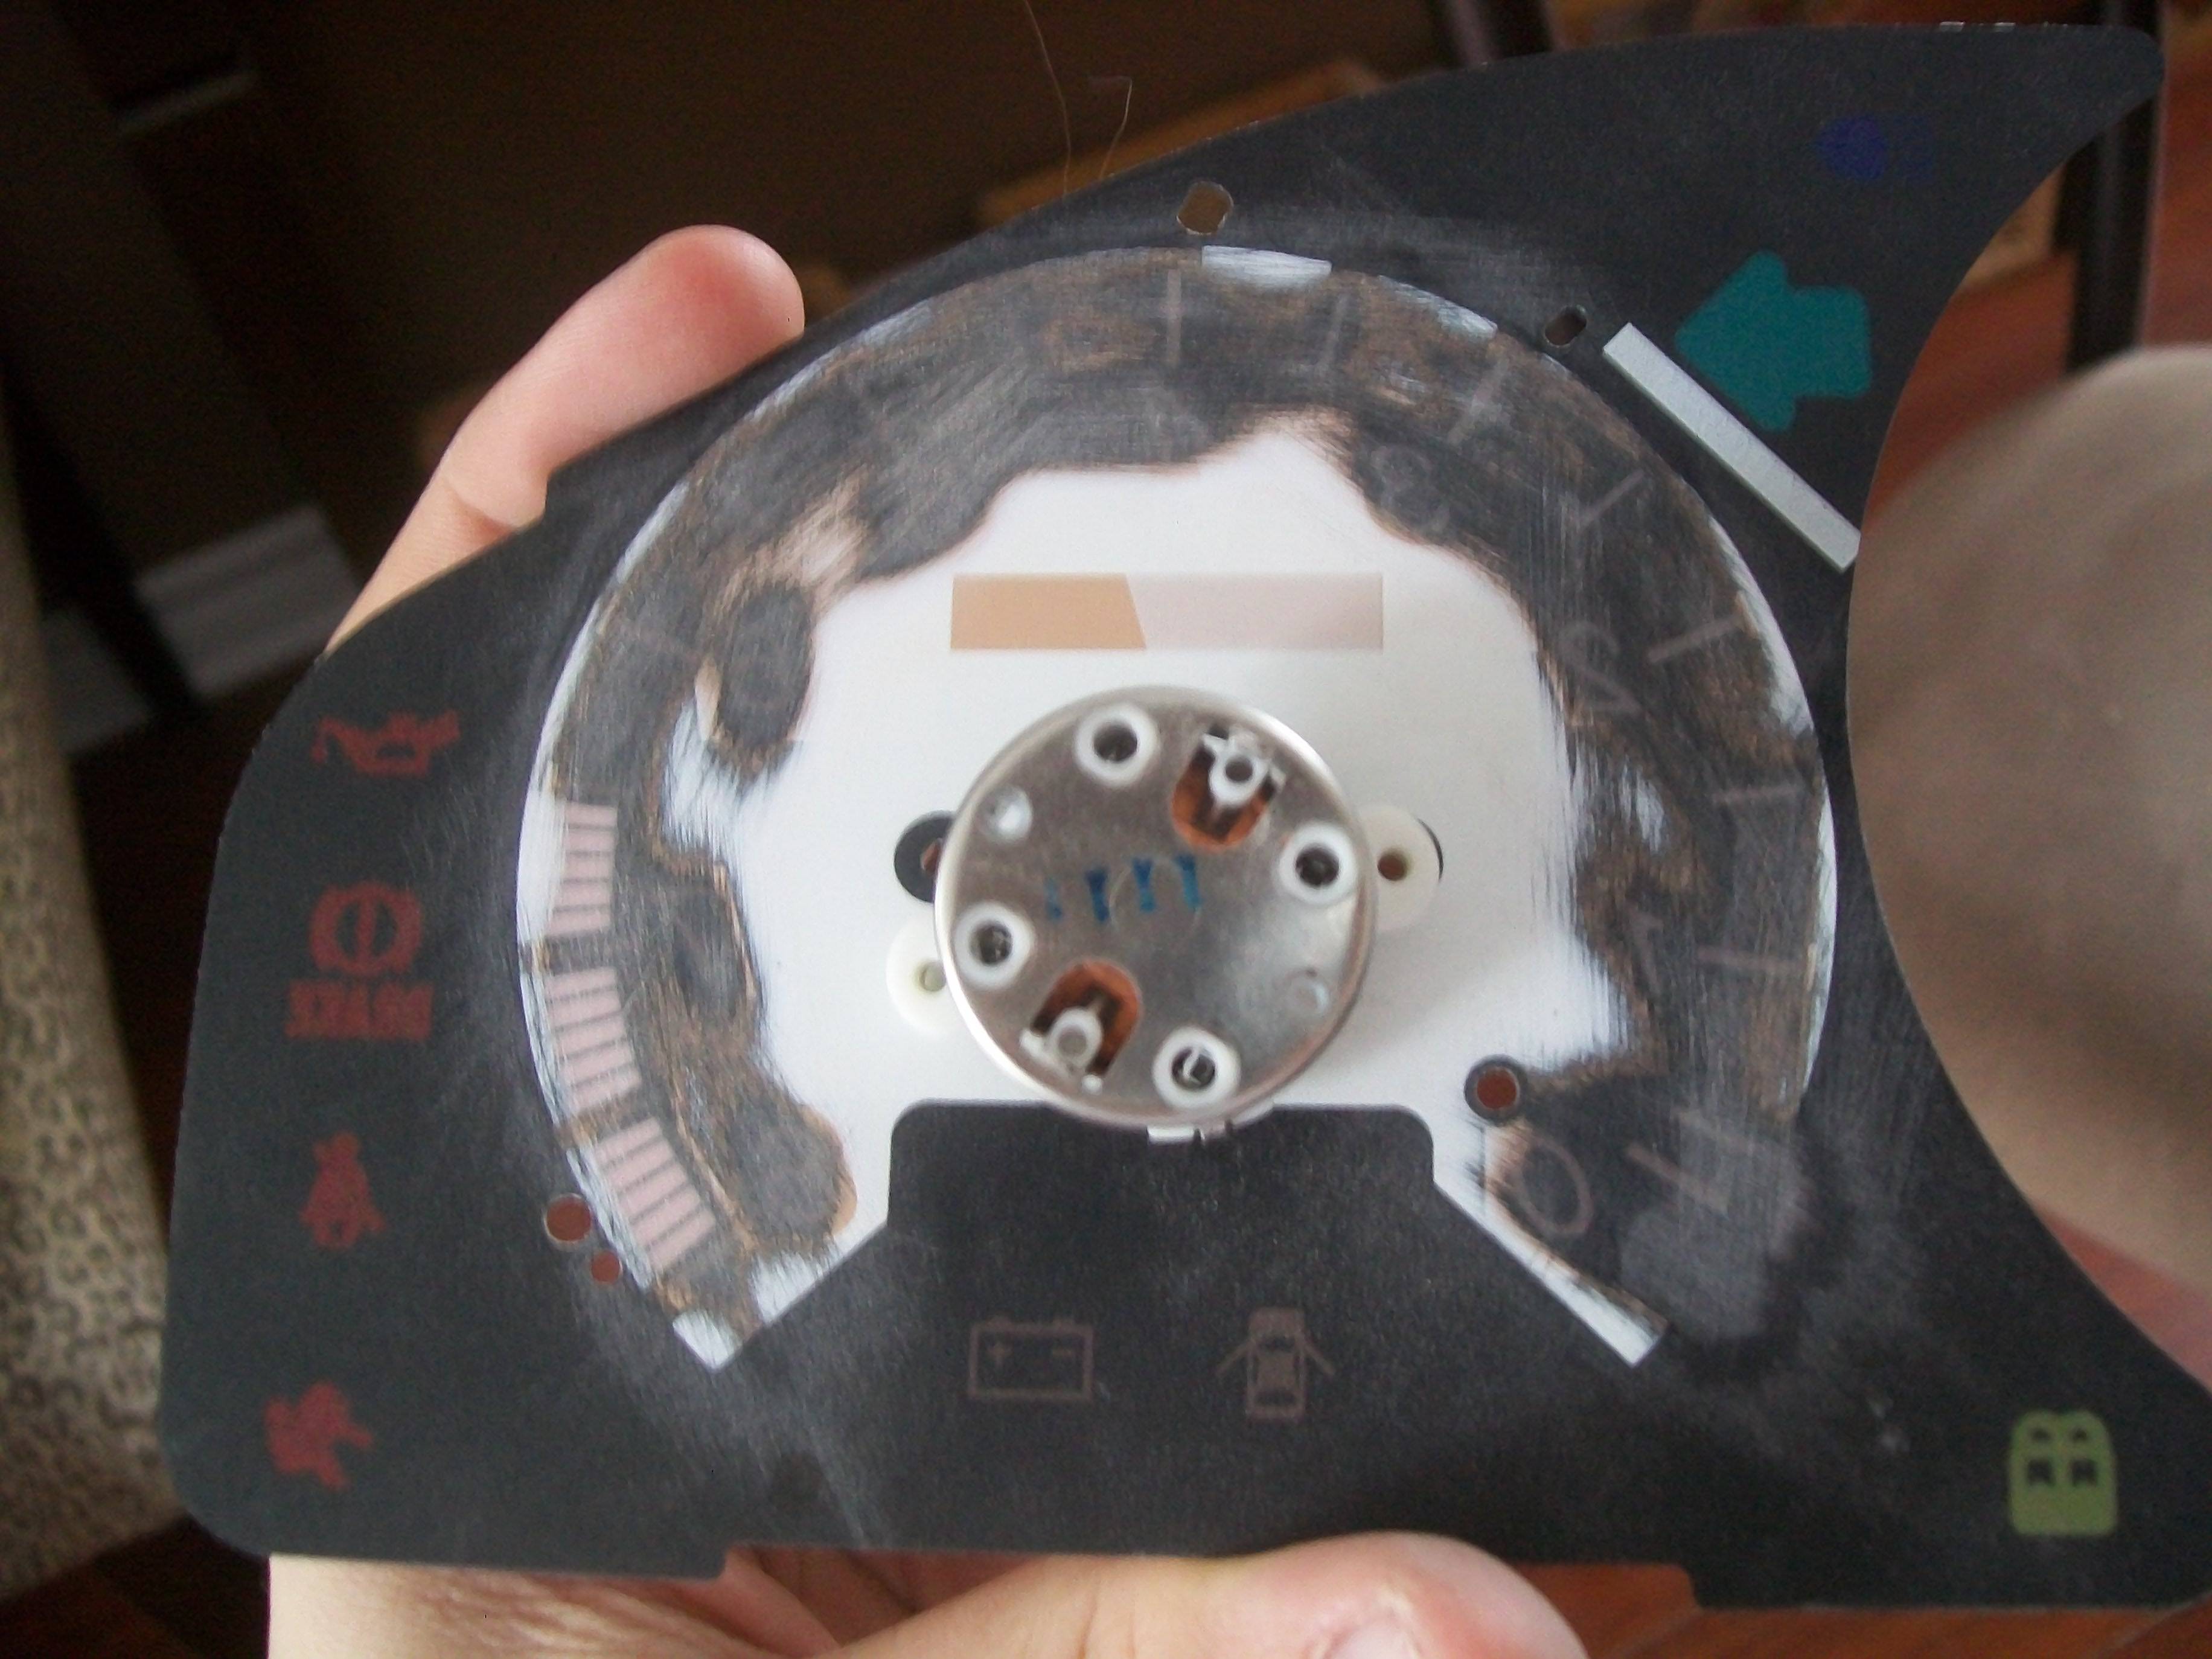
Here is the back of your naked cluster. Its right now that you have to put your new LEDS in. Circled in RED is where you have to put your 2x WLED-BHP5 LEDs. Circled in YELLOW is where you have to put your remaining 2x 74-BHP3 LEDS.
But wait, hold up cowboy, you thought it was this easy? Ofcourse its not! This is what will happen if you dont follow the next few steps!
- Now, flip the cluster over softly and undo these 6 screws to expose the cluster.
- By opening your instrument cluster, you will find a thick plastic layer that sits inbetween your needle motors and the white faceplate of your cluster, you must keep it, its important
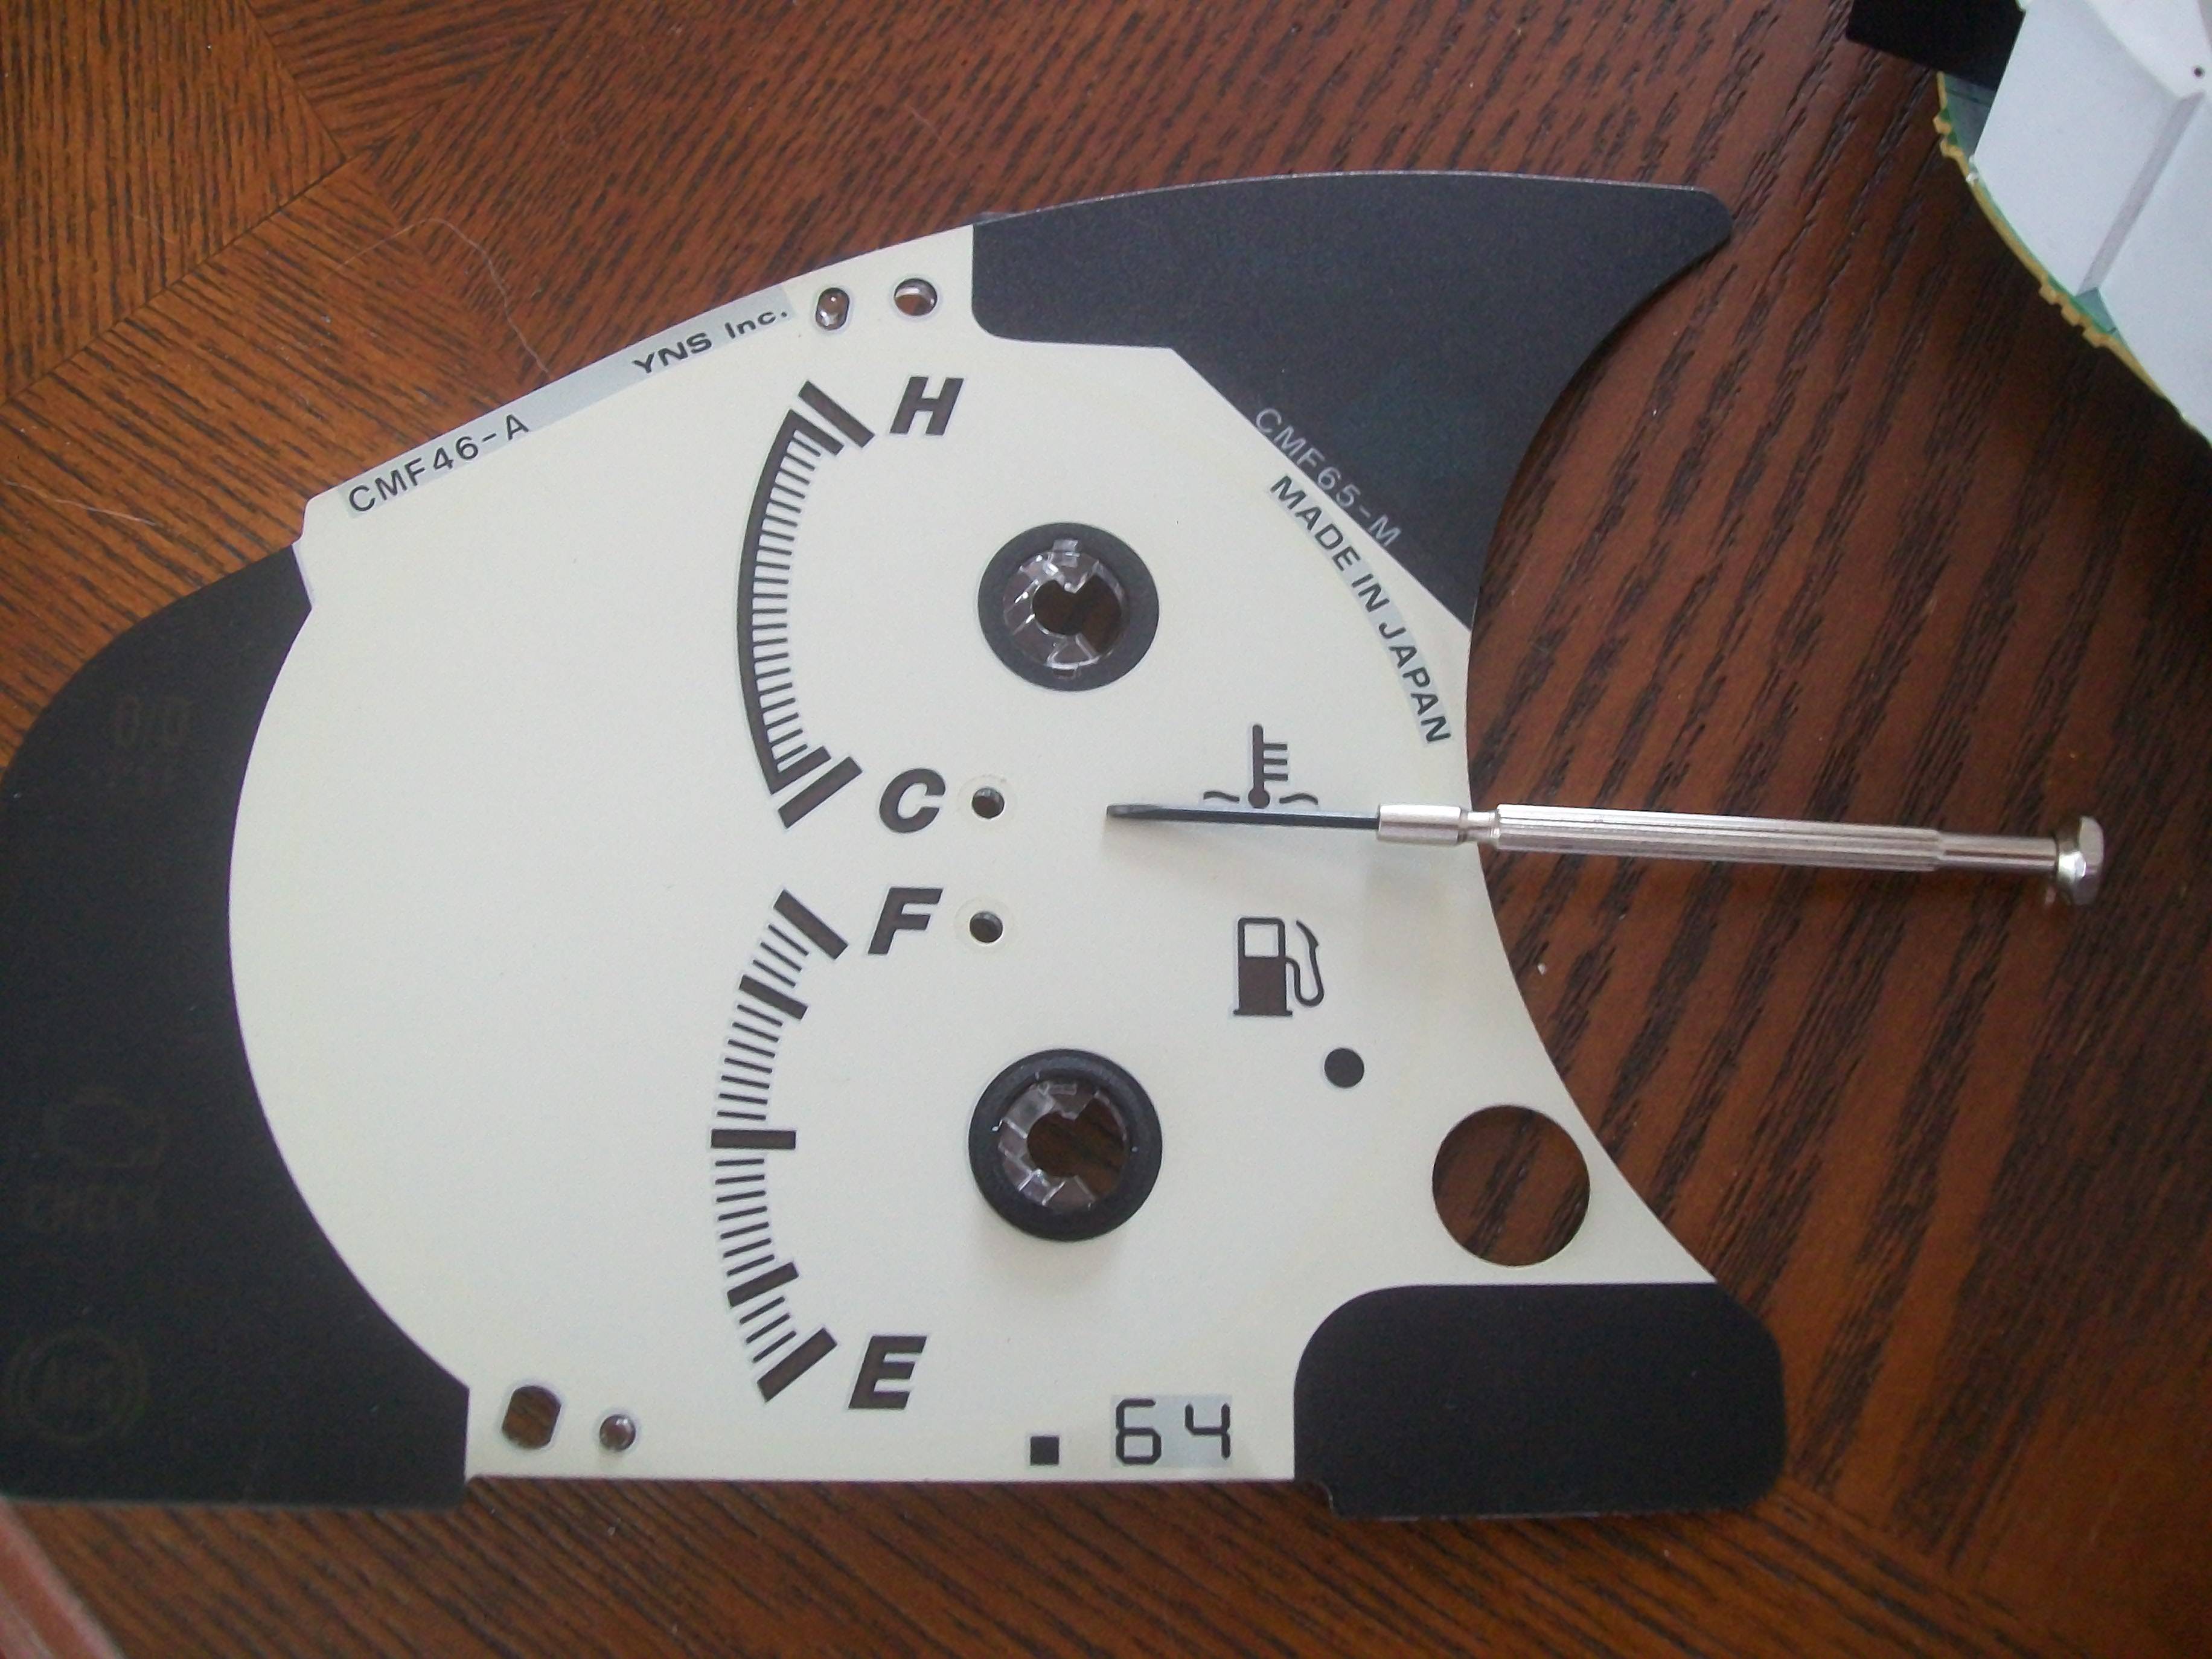
Nows the hardest part, pay attention!!!!
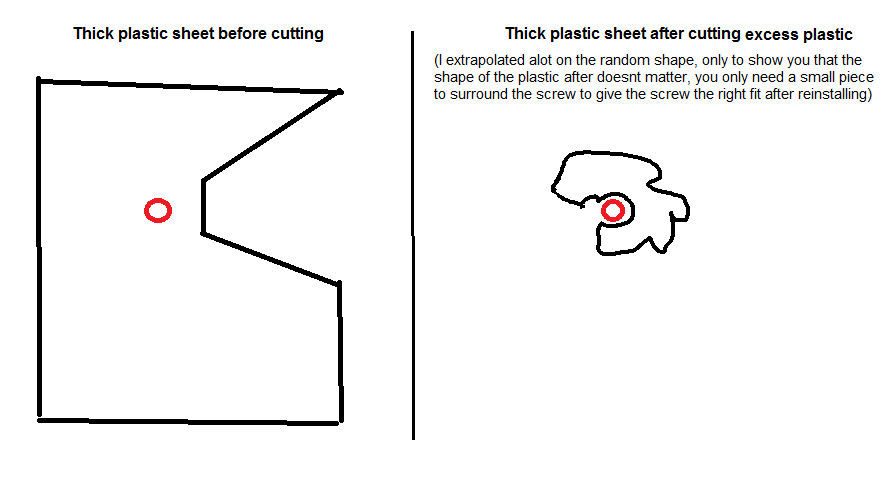
In order to reinstall the Motor with the right clearance, you need the Thick plastic sheet to be cut only where the screws attach. You only need a small plastic part large enough to surround the screw, you can scrap the rest. You will need some cutters. You need to cut it before sanding in order to access the back of the cluster faceplate. Begin by cutting the excess plastic, then shatter it to lay it free from the motor. I know this can be a royal PITA to do but the results are worth it. Here are my super good paint skills!
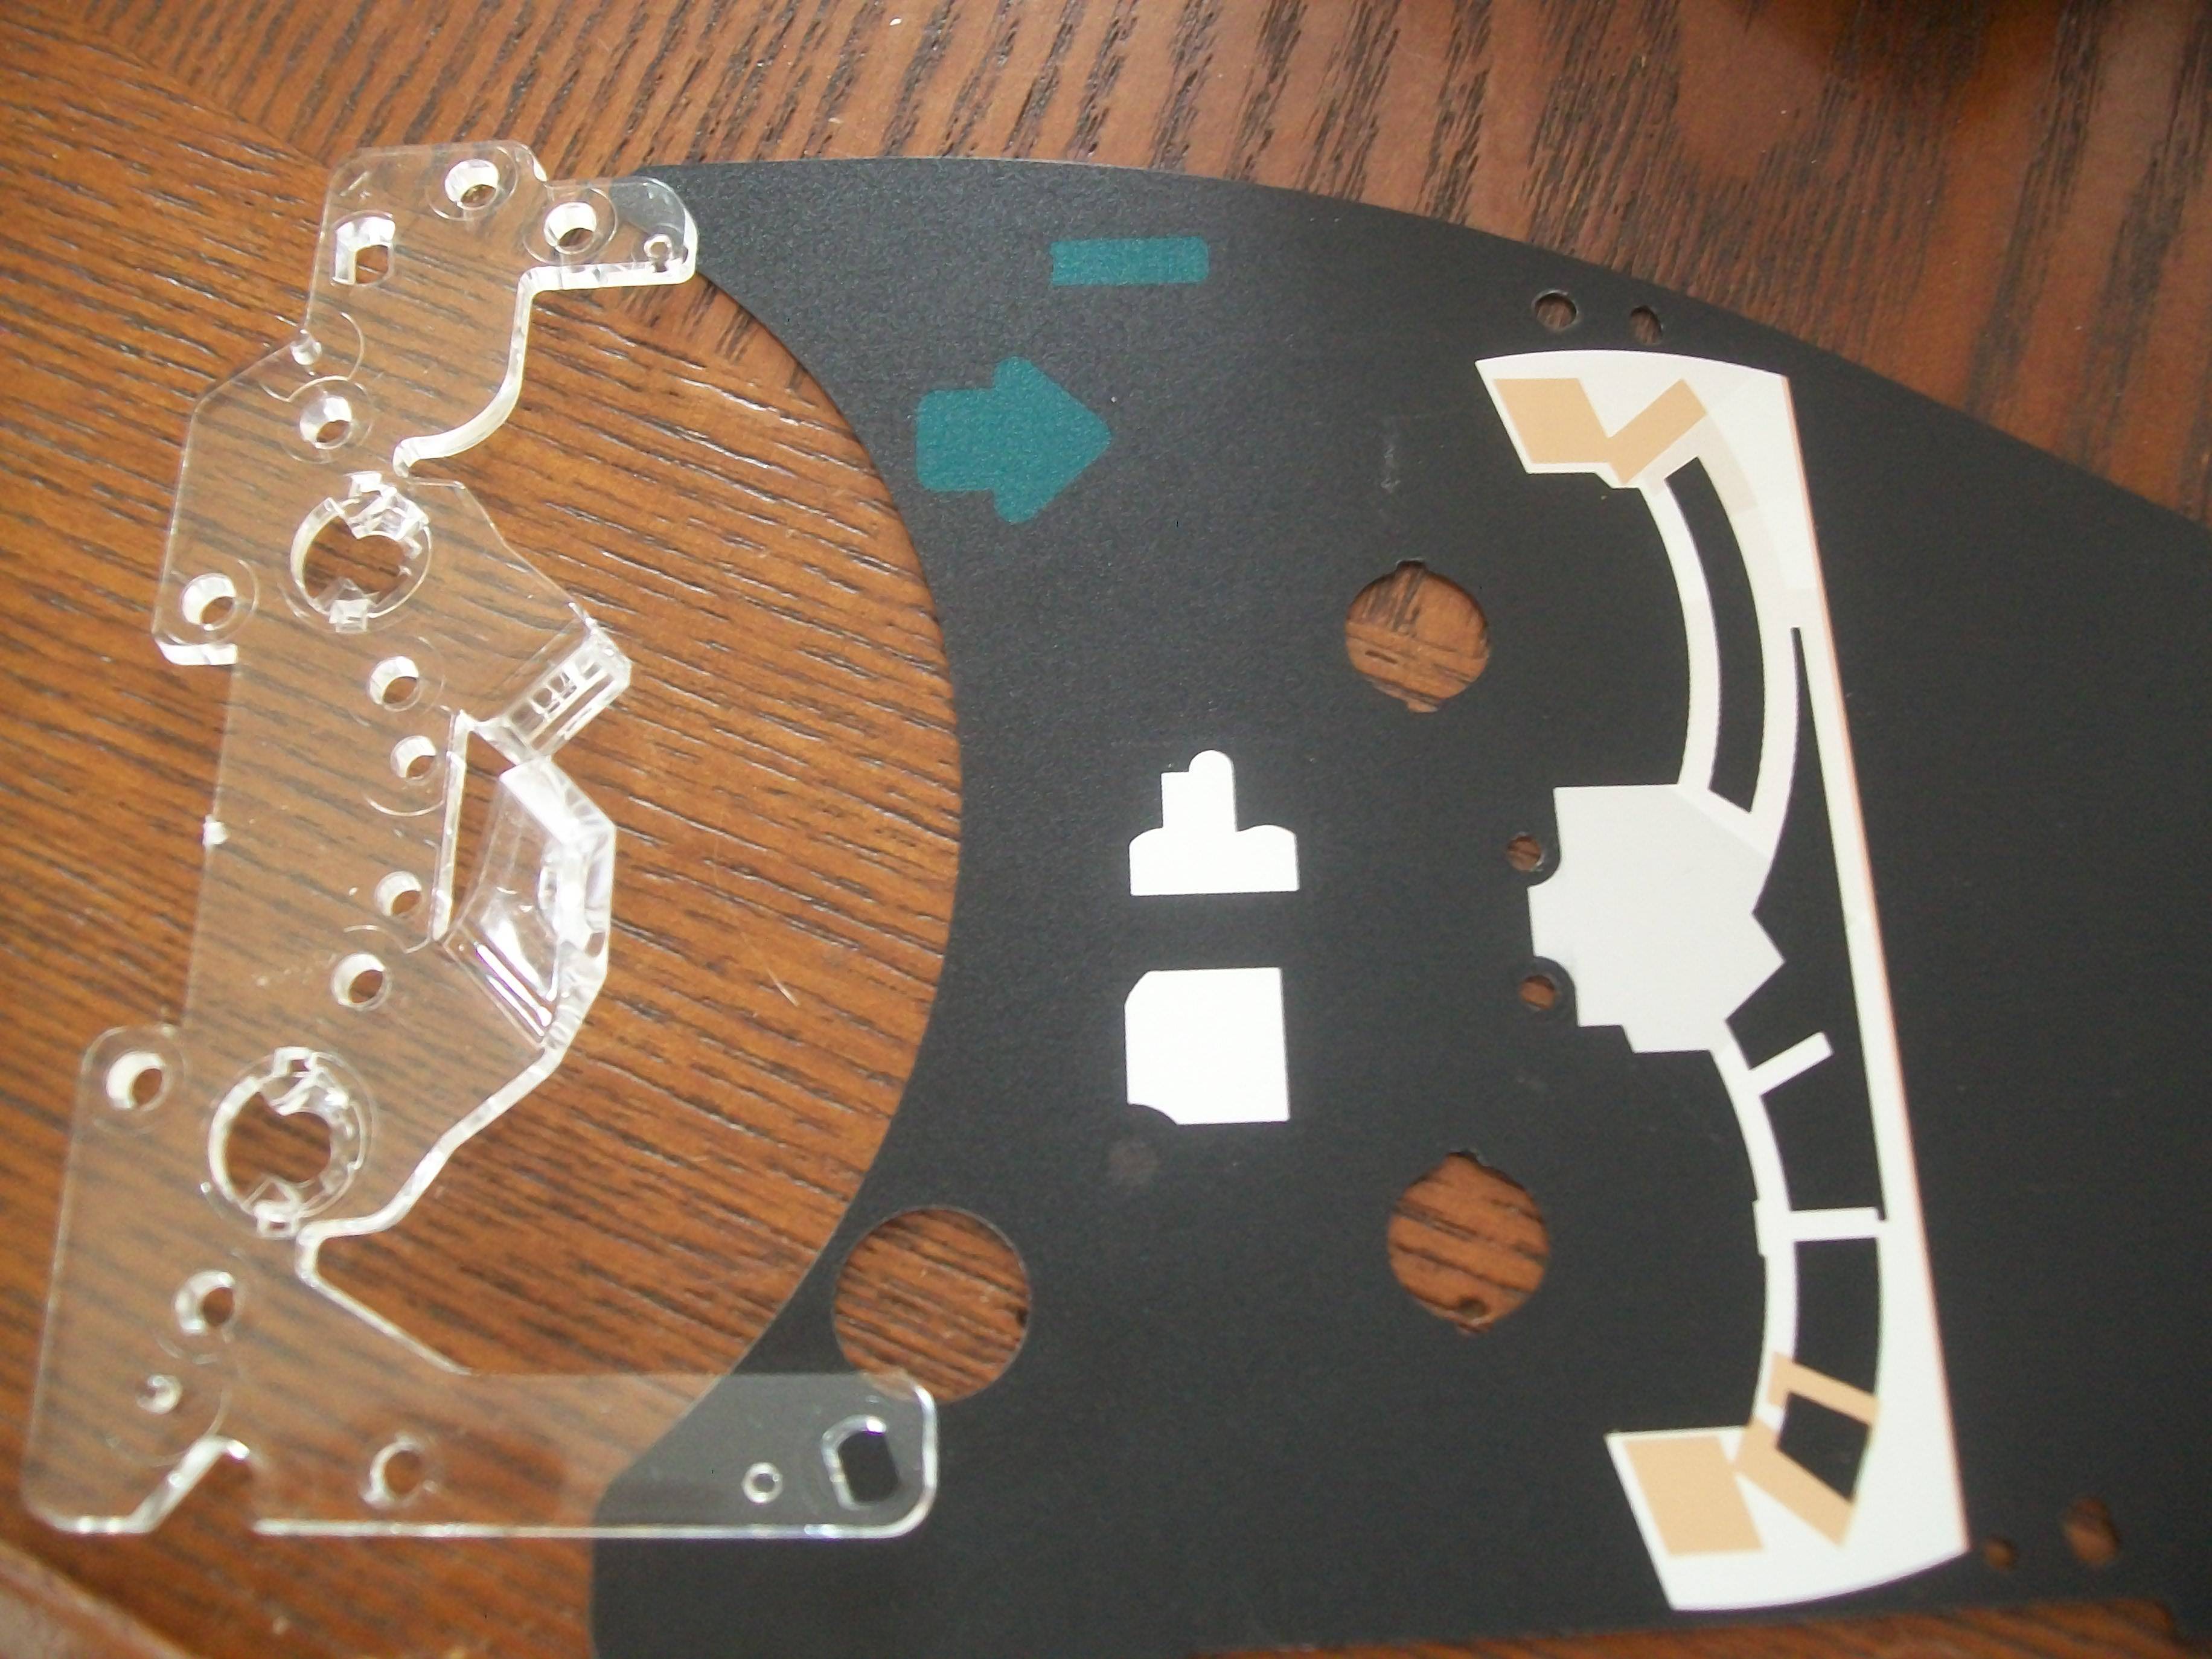
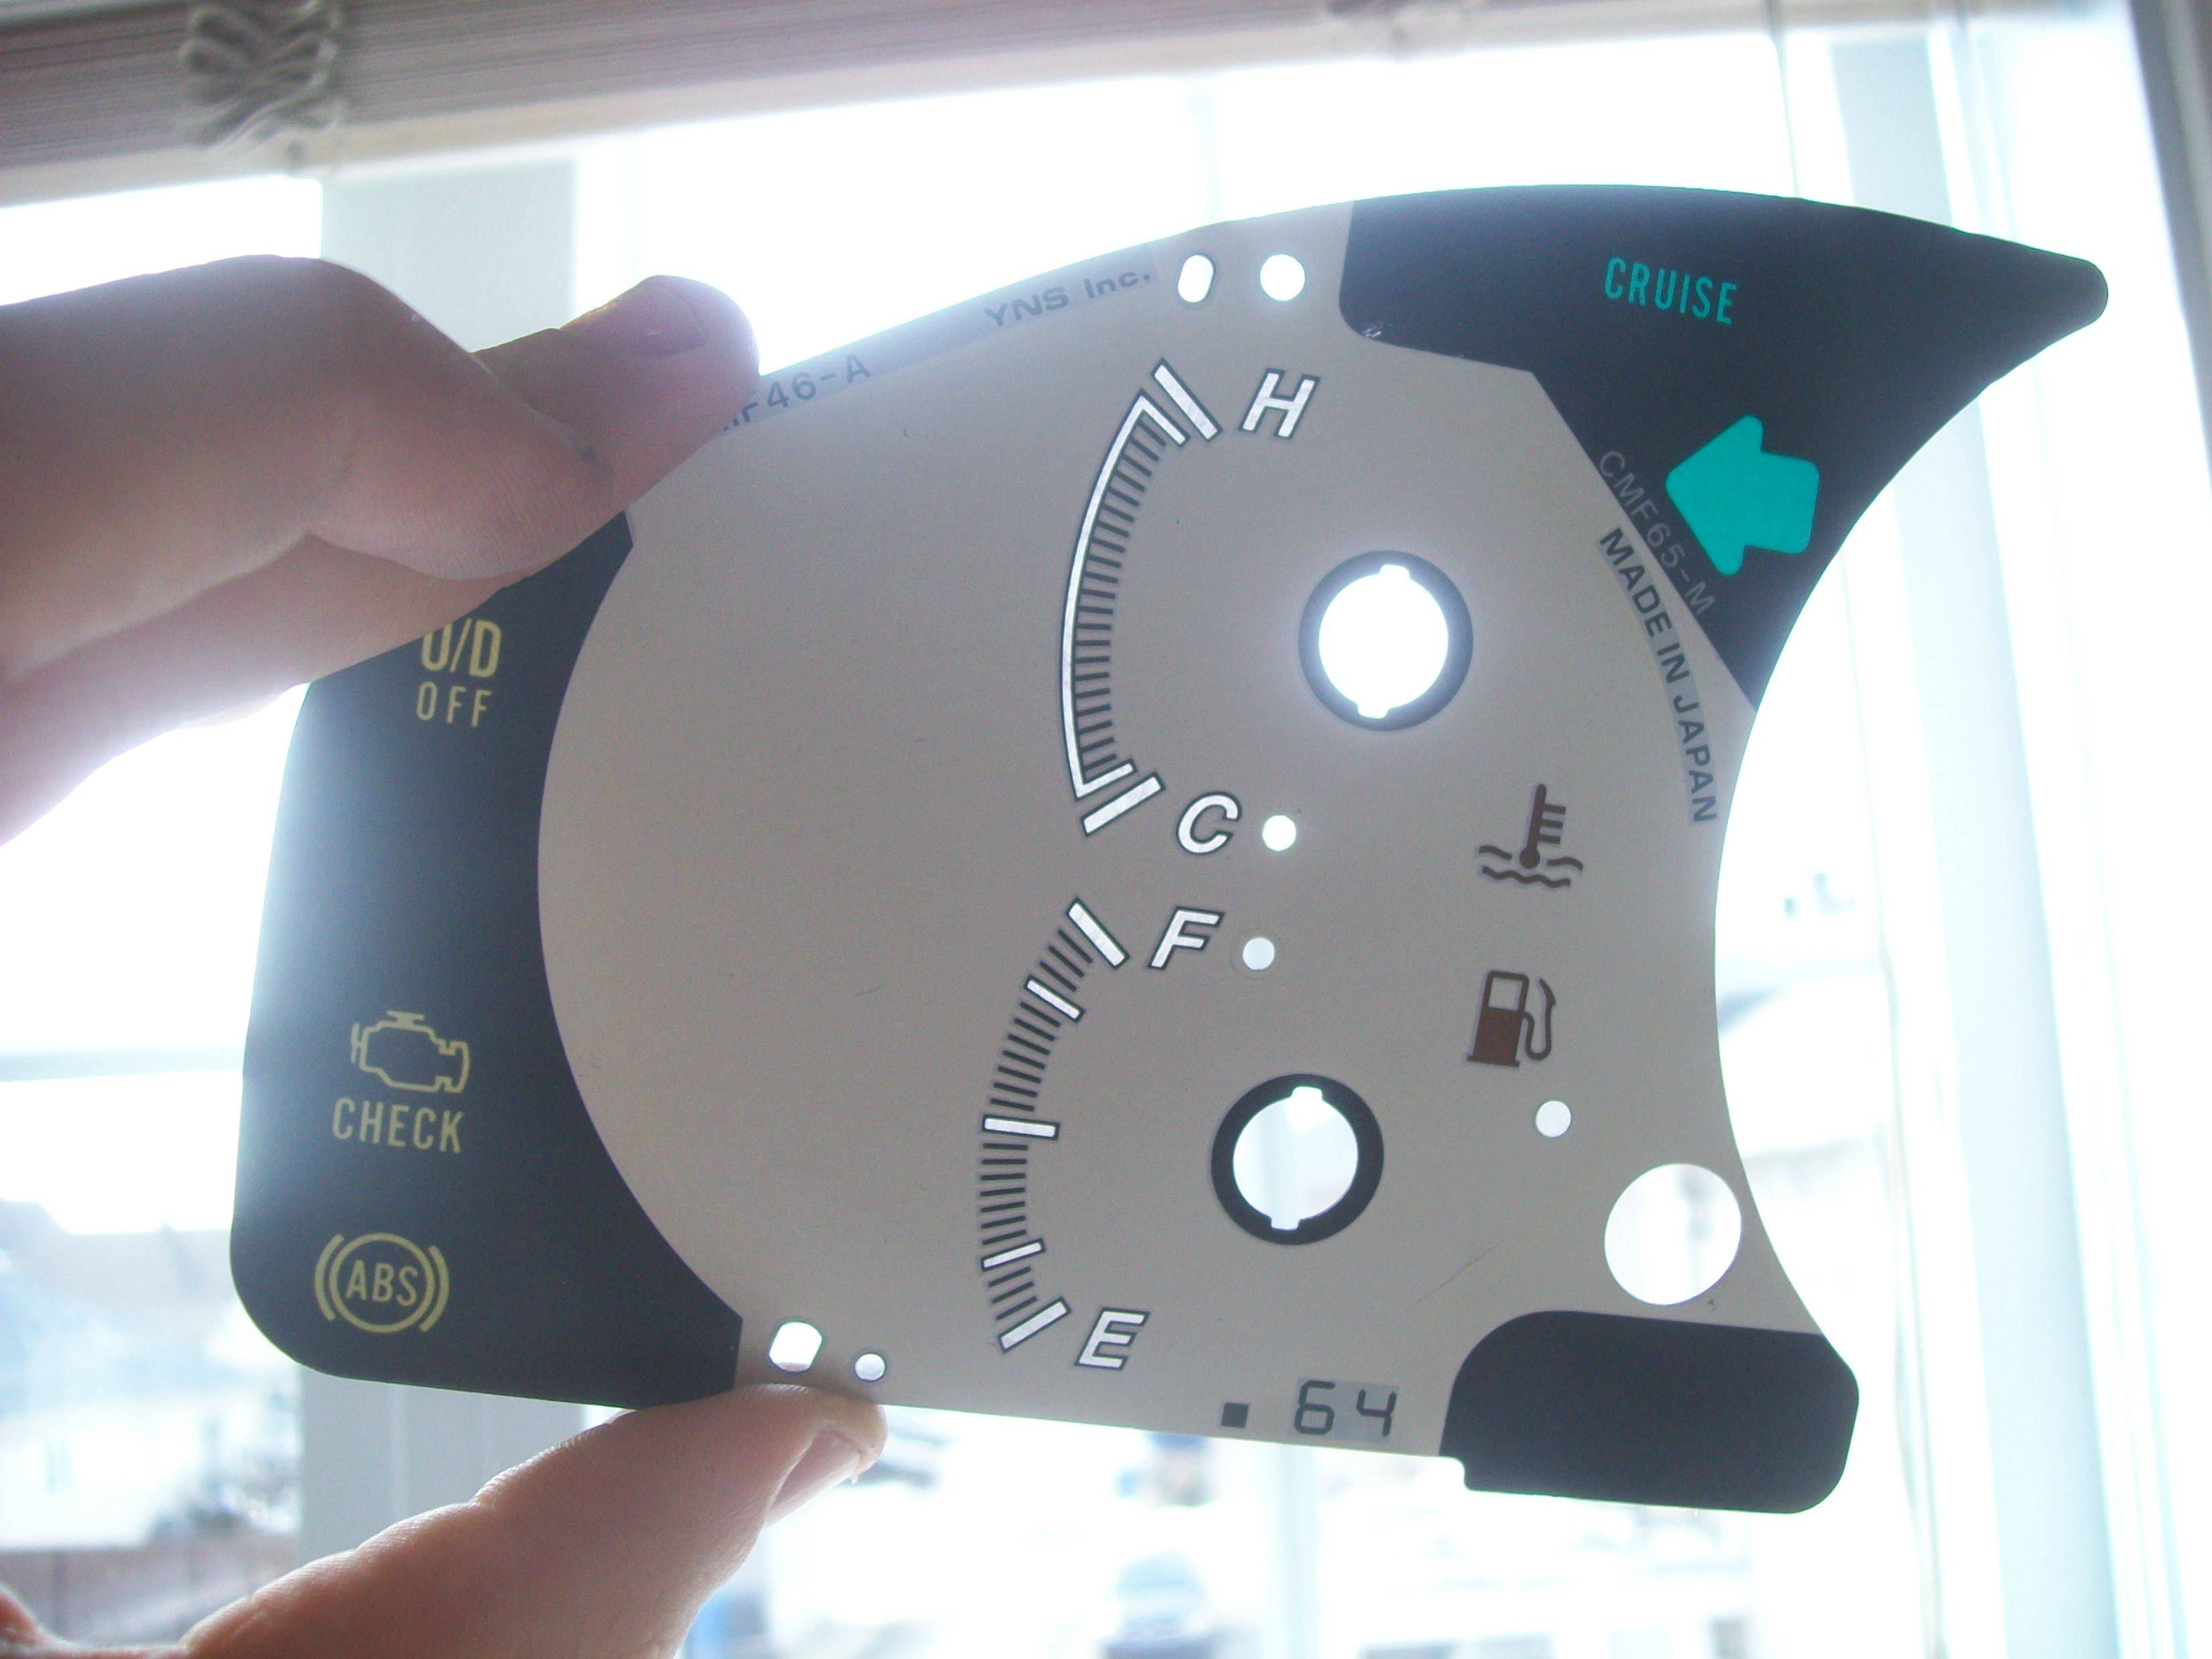
- Now its time to crack out the sandpaper and sand the back of your cluster. You cannot remove the motor from the faceplate when sanding, so be very careful when you sand not to push too hard & break your needles. While you're at it, sand down your needles to remove the red overlay if you want blue needles! If you want even lighting, you'll need to start with heavier grit then fall to lighter
You need to sand all the areas you want to be blue, so when you think youre done, check in the sun!
- After cutting the plastic & keeping the pieces that surround the screws, put it all back together, remembering to put the transparent plastic pieces back while tightening, this will ensure your needle motors dont wiggle around when you drive. Proceed to put the cluster and its 3 plastic surroundings back together in the correct order, Reinstall is the reverse of removal
I honestly hope i was clear enough.. The plastic cutting NEEDS to be done & it is not optionnal
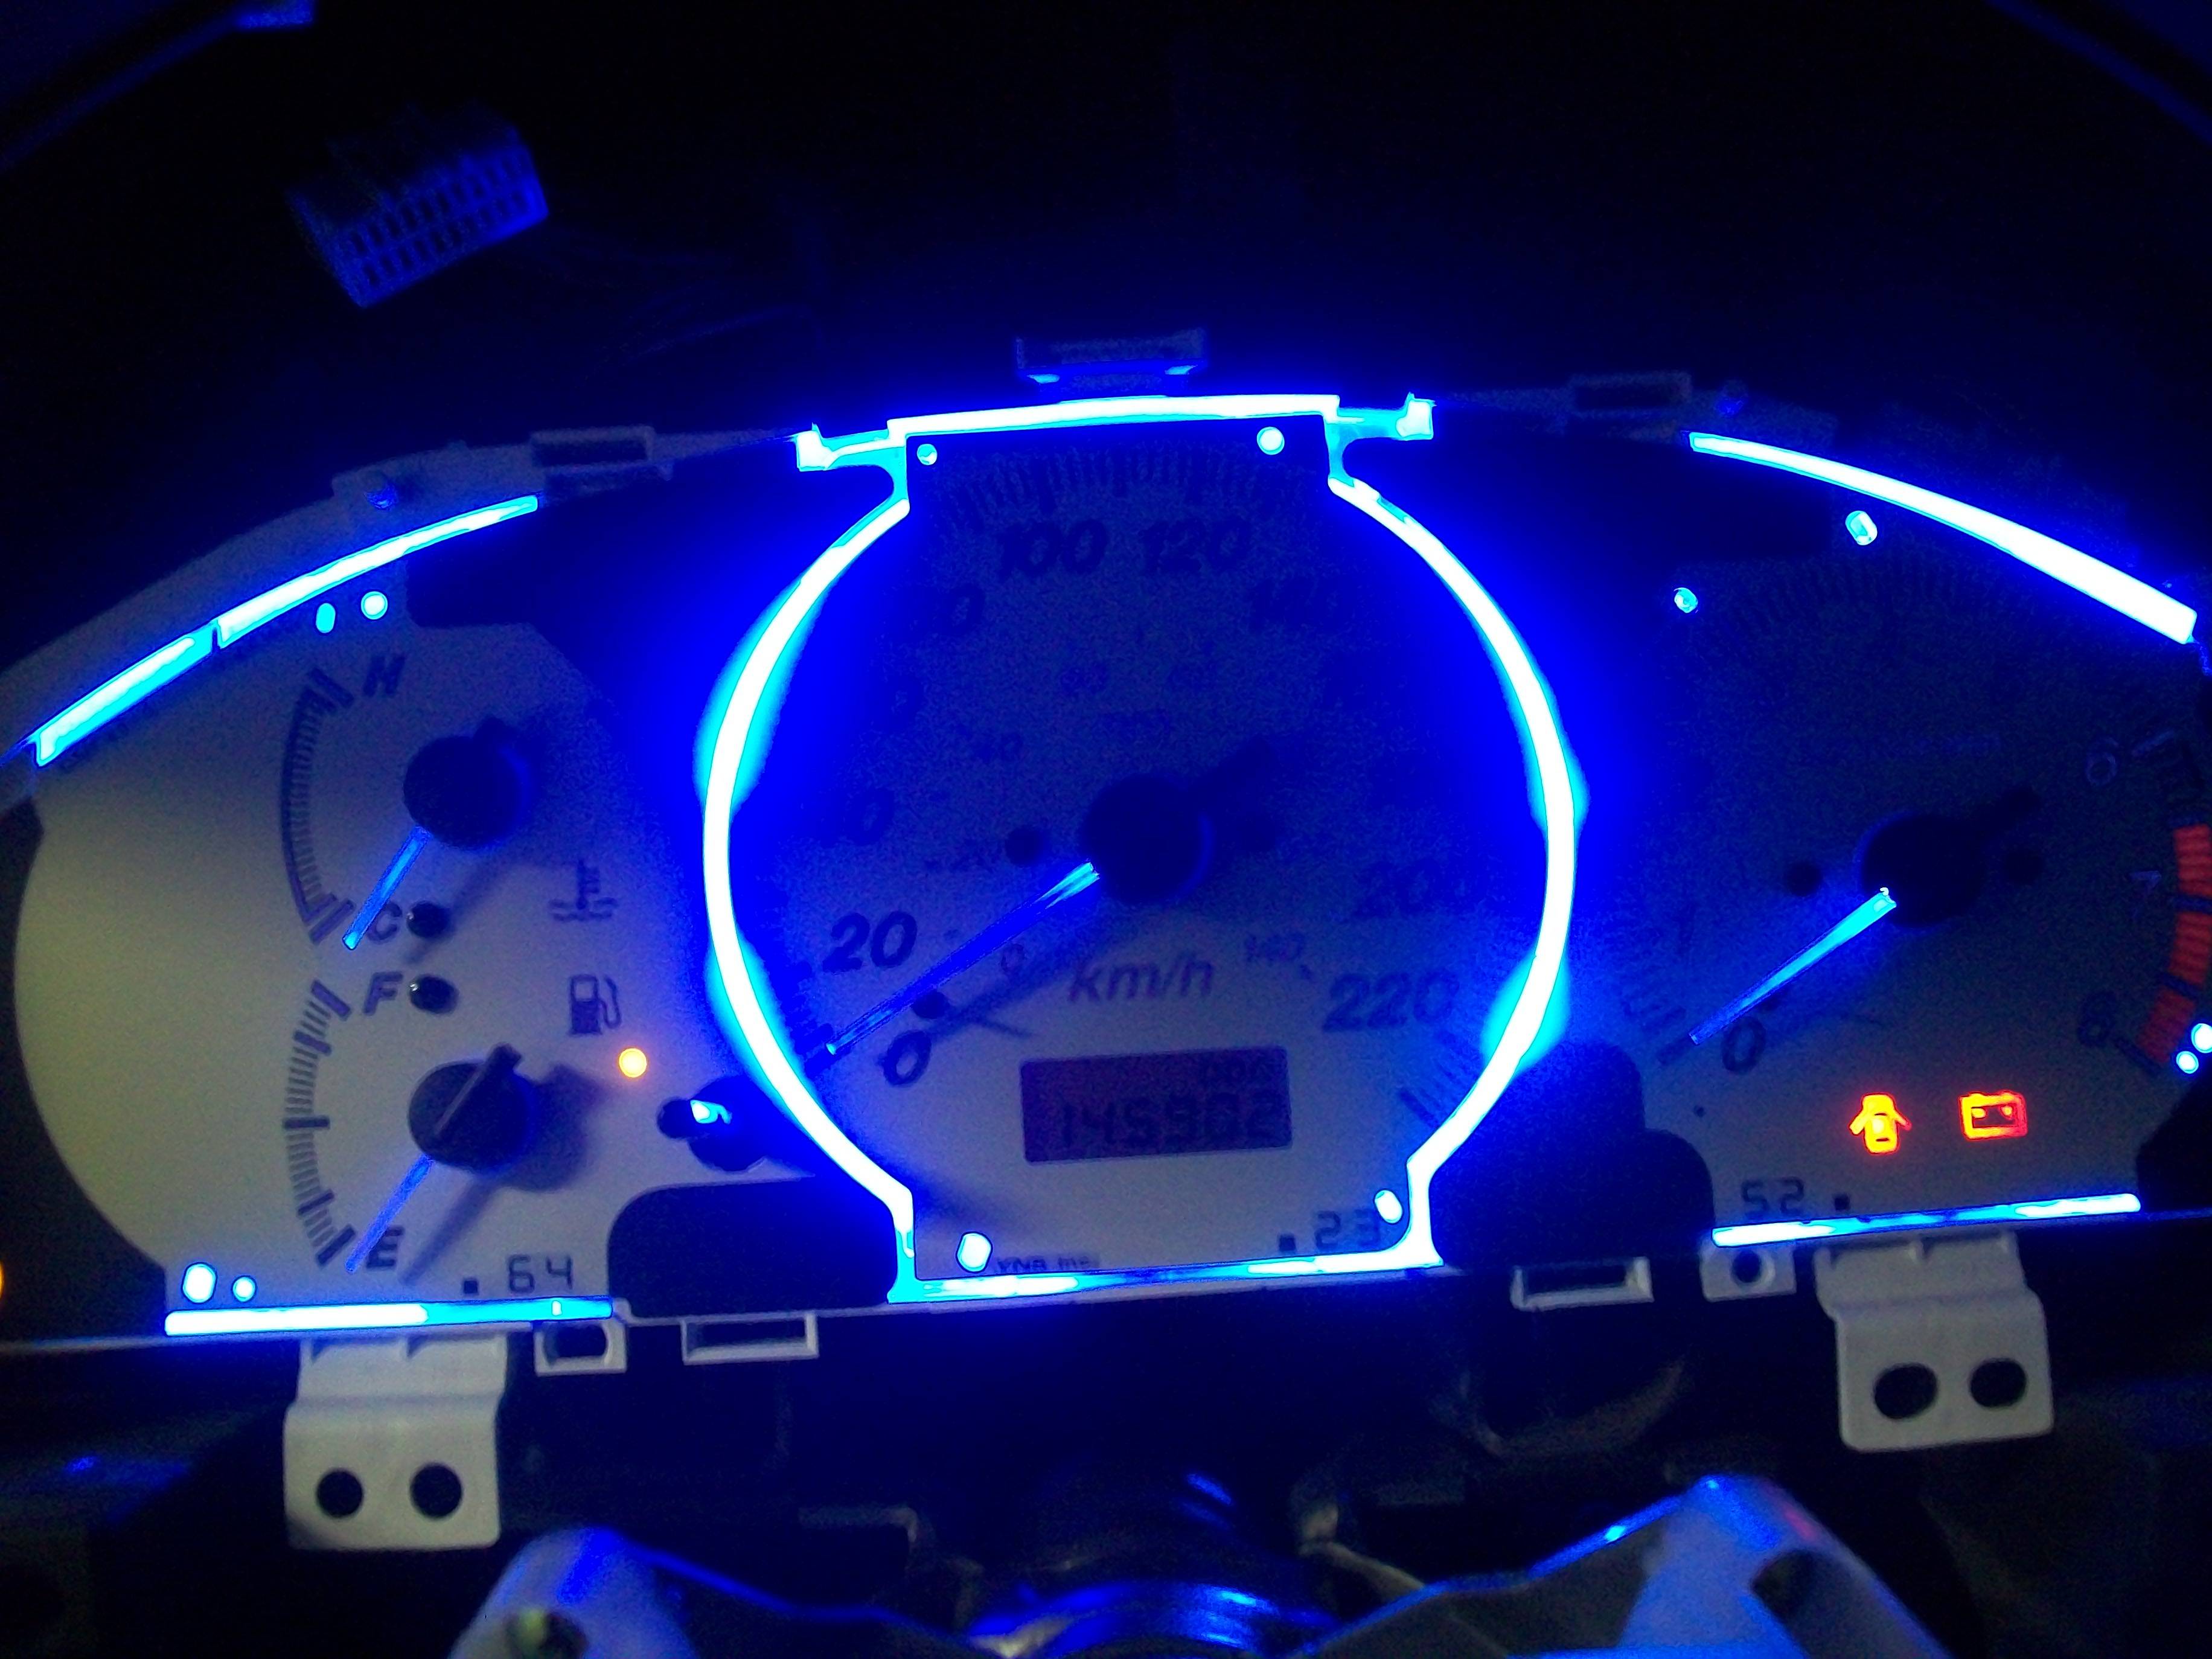
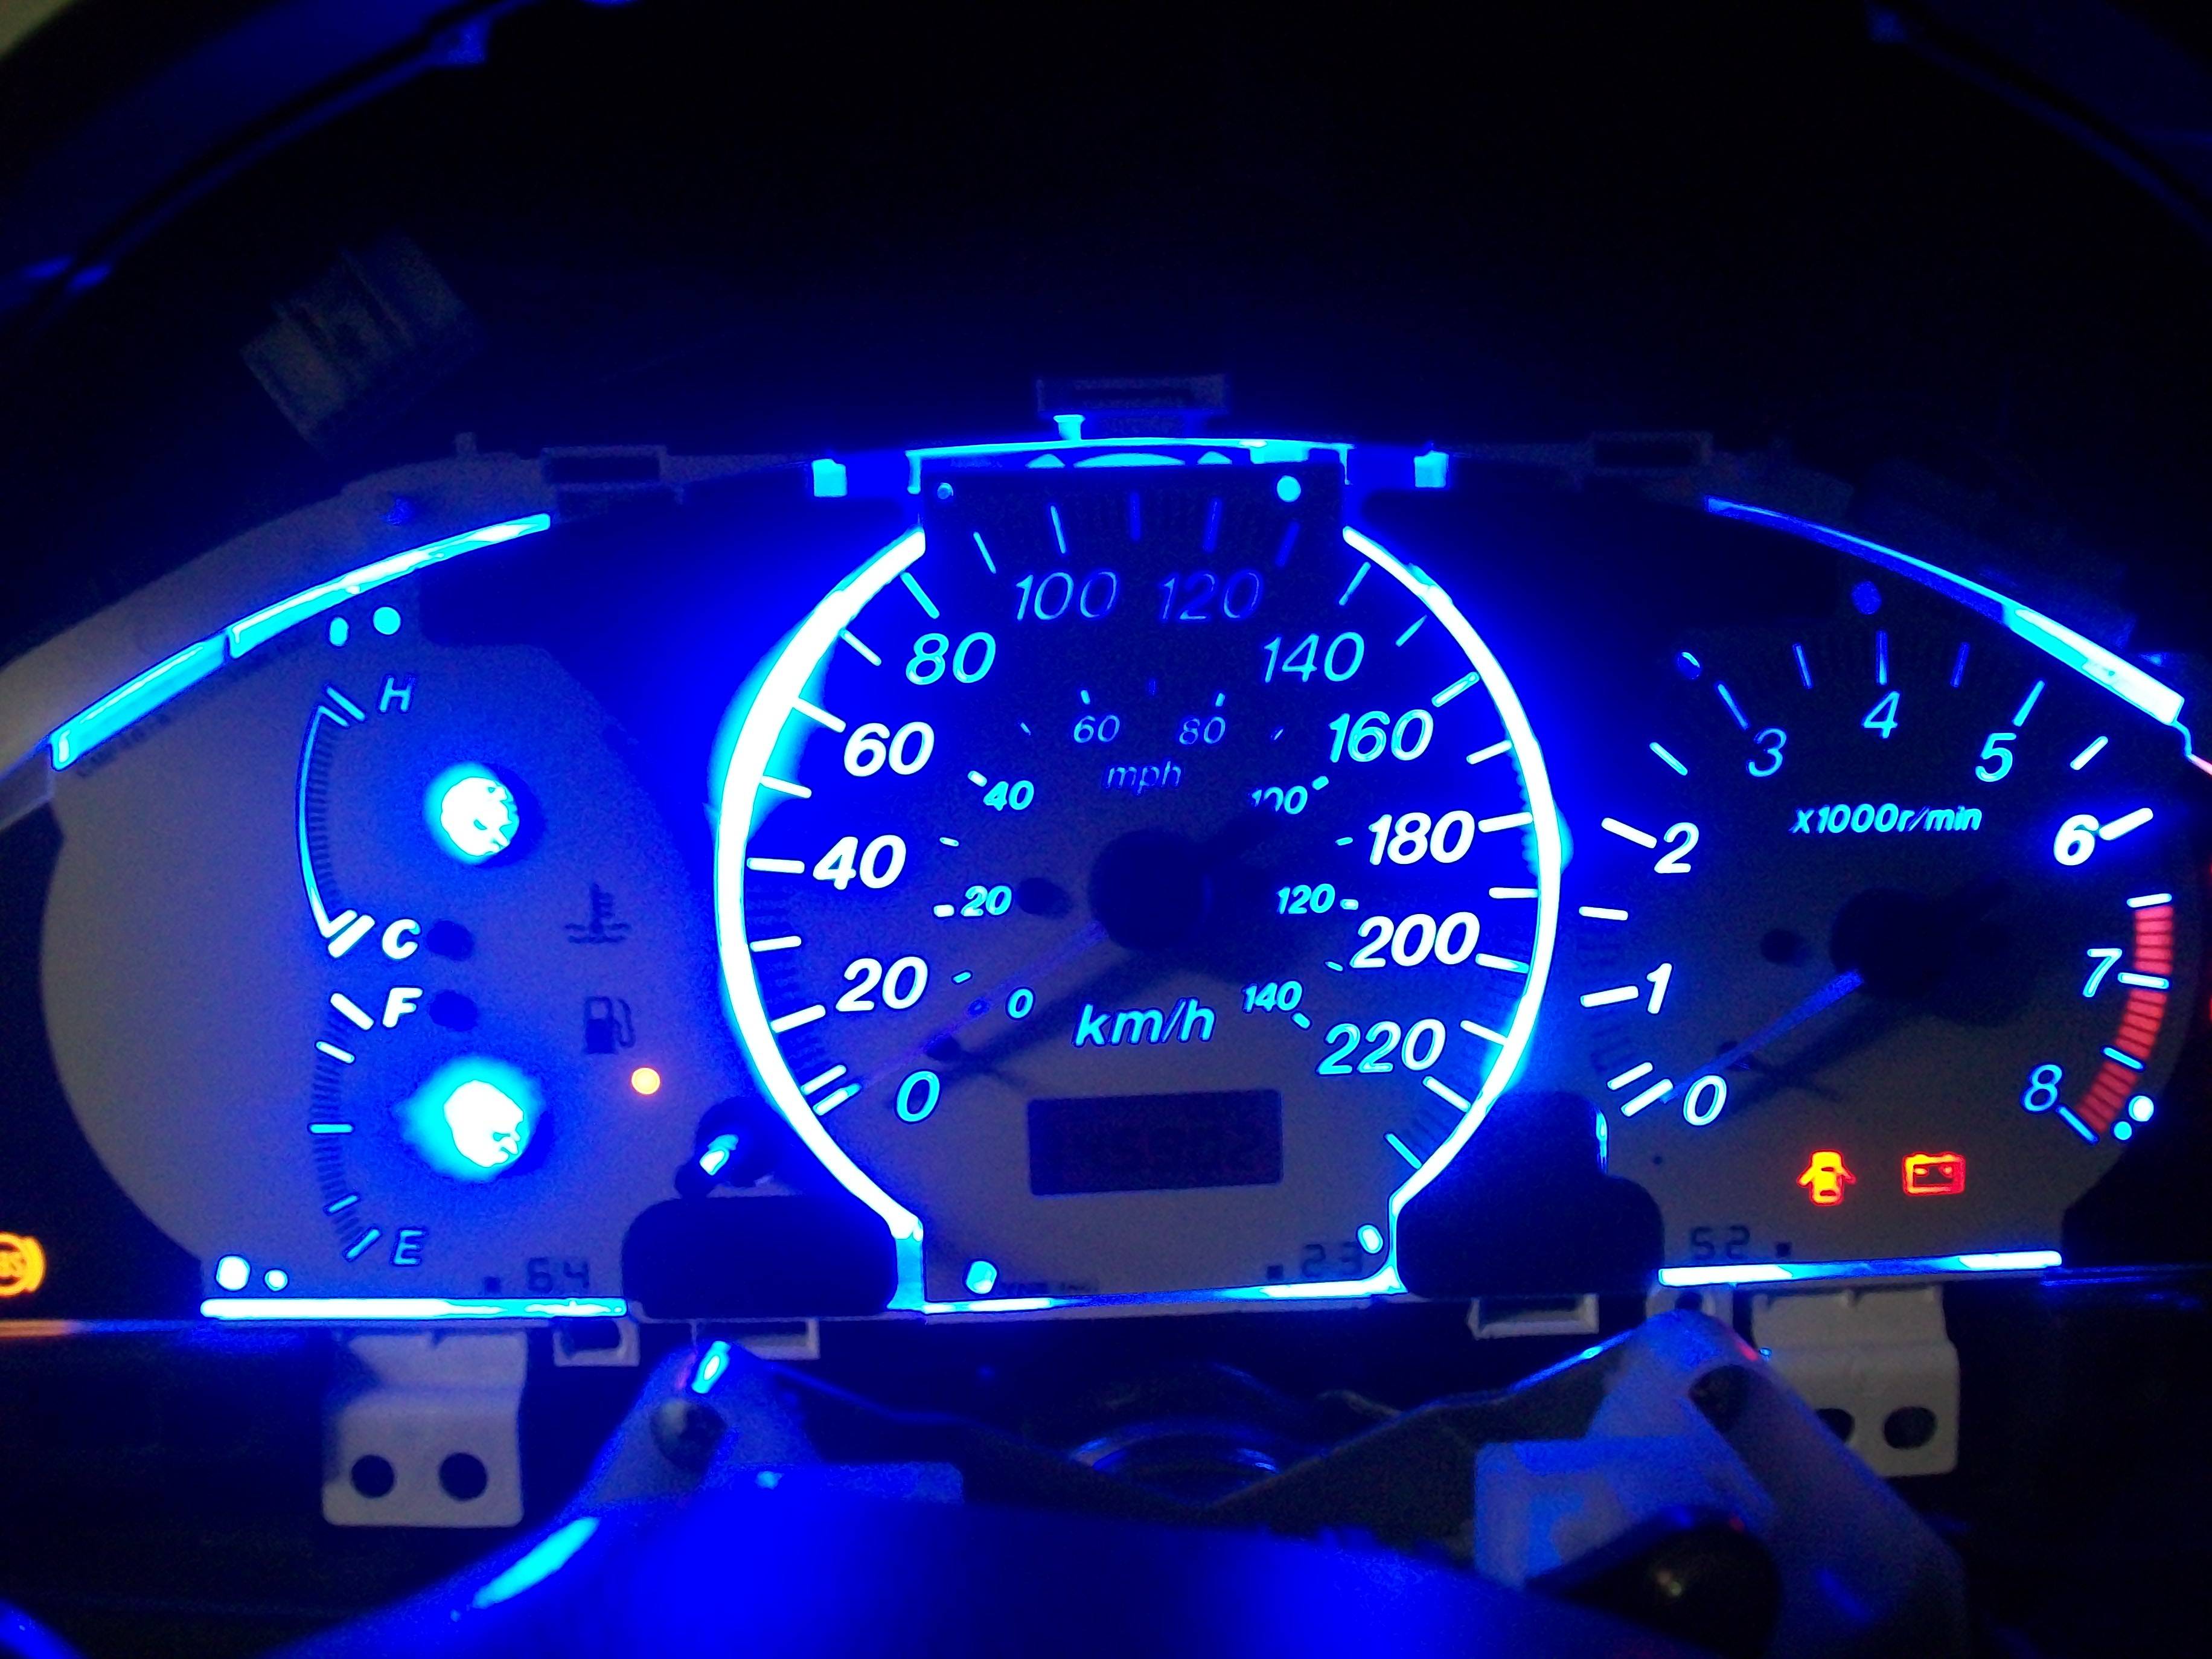
If you did a good job, you should be left with this
I hope I could help a few of you out there, and I hope this will make it into the mods "Bible" sticky as I call it hahah (How-to sticky thread : http://www.mazdas247.com/forum/showthread.php?123715657-How-To-Quick-Links-(sticky-version))
If you have any questions, post them here so I dont have to answer the same questions a few times
I will also try to make this a PDF & WORD document as alot of the mods in the sticky thread have expired images (2003 threads..)
Last edited:
")