
Nurburgringer
Member
- :
- '12 Mazda5 Sp 6MT (traded in on T&C)
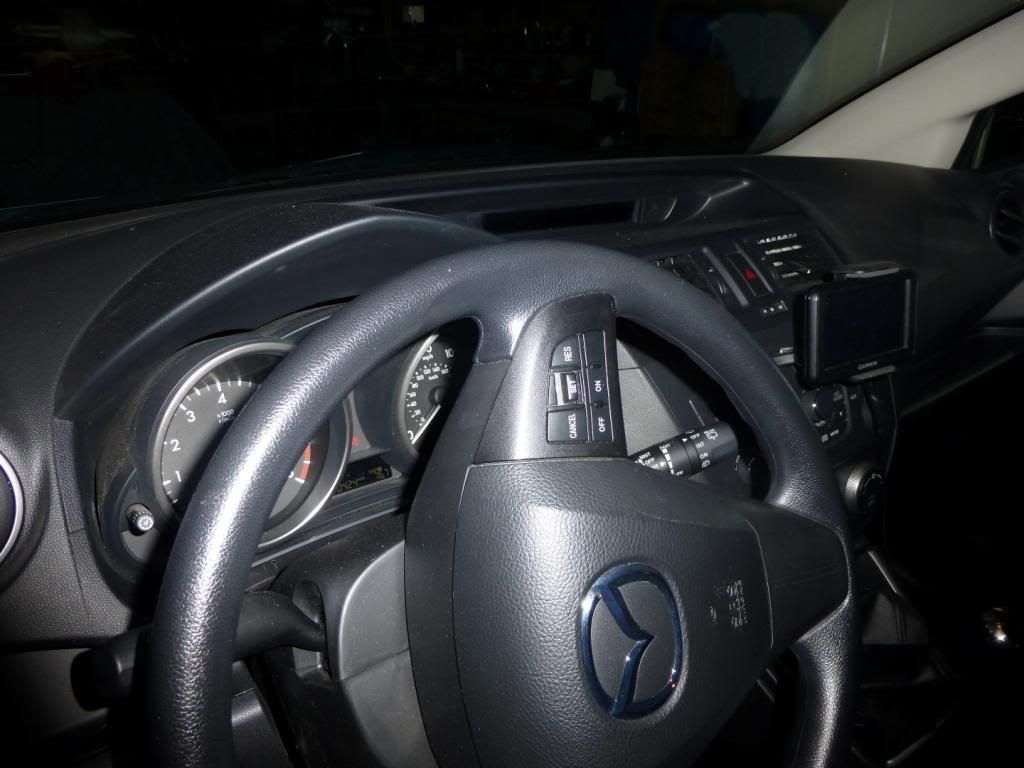
One of the things that's been bugging me about the 5 is the thin, rubbery yet slippery, lame steering wheel. It sucks that Mazda, a supposedly driver-oriented yet market-saavy company, forces people who like to use 3 pedals to deal with no "luxury" options at all.
We've been rowing through the gears with a fantastic leather Miata shift knob since we bought the 5 one year and 20,000 miles ago, but just got around to addressing the tiller.
Don Mallinson of DC Car Care answered a bunch of questions and quickly shipped me a black 14.5" x 3-7/8" Wheelskin cover with red thread.
http://www.dccarcare.com/whlskns.html
BTW - his price of ~$40 is about $15 less than ordering off Wheelskins' site so I'd definitely recommend going with him for this.
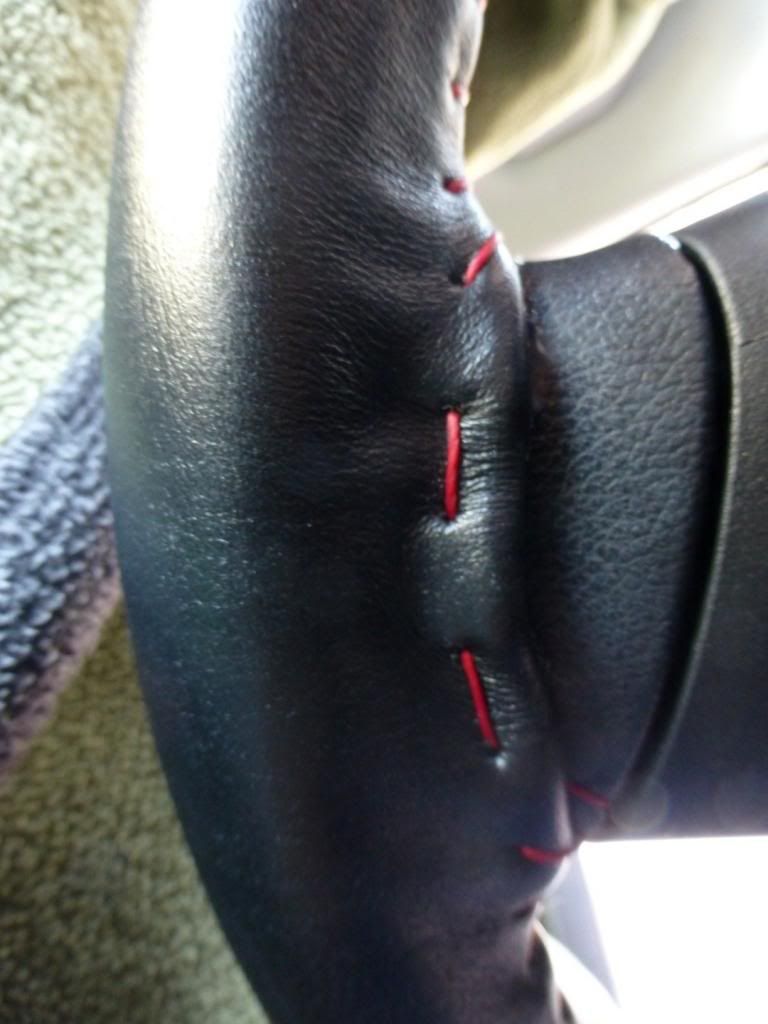
Although I toyed with burgundy or grey leather (would have brightened up the otherwise rather dark and monotonous black interior IMO) went with boring black and racy red thread (which is apparently discontinued, but he had some laying around which he was kind enough to send me. Current thread colors from Wheelskin are Black, Grey, Tan and White).
I opted to do the "regular" single stitch rather than the "Baseball" style described on his website, don't regret this.
Here's what the Baseball stitching looks like on another wheel: http://www.dccarcare.com/images/tipsimages/Crossstitch2.jpeg
Our BMW's leather wheel has red and blue cross-stitched thread and looks very nice, but I rightly guessed that the Wheelskin wouldn't fit exactly around the rim's circumference and therefore wouldn't lay perfectly flat.
This was only partly correct. For most of the wheel the 3-7/8" wide cover mates up just about perfectly when the thread was tightened, but for some reason in the 4-5 O'Clock area you might be able to see a little "bunching" where I suspect the cover wasn't EXACTLY 3-7/8 wide. Anyway this is in an area I don't usually put my hands (I'm a 10-2 kind of guy) so it doesn't bother me.
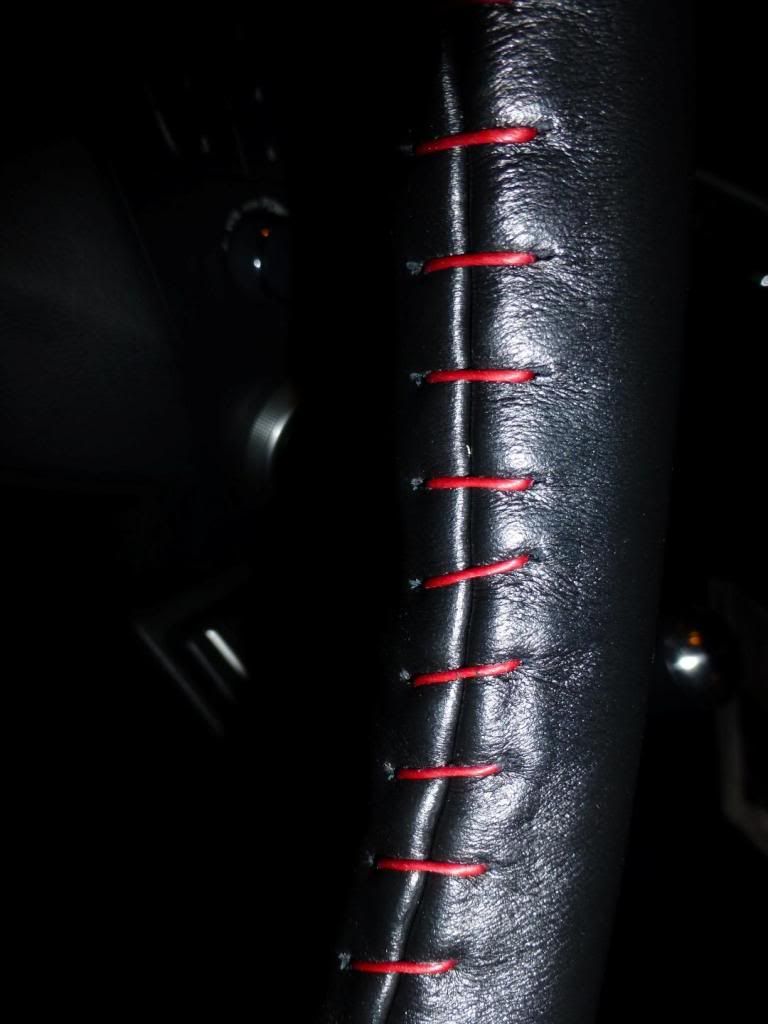
One thing that does bother me a little is the occasionally mis-spaced thread holes, which give the stitch a bit of a Frankenstein's
neck-scar look. It's not bad and would be almost invisible if black thread instead of red were used, hopefully it won't bug me too much.
The thread is quite heavy and coated with a tacky substance that helps it stay in place (and will get on your fingers&hands somewhat) once you've completed a thread (still want to leave about 6" of thread to pull the previous loop tight before finishing the current loop, and then hold the previous loop down with a finger while threading through the NEXT loop). I wrapped my right index finger with tape to protect it when pushing the (thick) needle through, not a bad idea.
I expected the three thick "spokes" to be the biggest problem, but it was relatively easy to route the thread through the cover, behind the spokes using common sense and a few undoing of stitches when it didn't work out.
Don had recommended against taking the wheel off and tucking the Wheelskin under the three spokes' covers (due to the airbag - you've got to treat this like a bomb. I followed this guy's Youtube instructions http://www.youtube.com/watch?v=onm5QAXhm4I ), but I'm really glad I did this. Not having the 3 plastic trim pieces overlap the cover on three spokes (especially the two side ones) would have really stood out in a bad way, both visual and tactile.
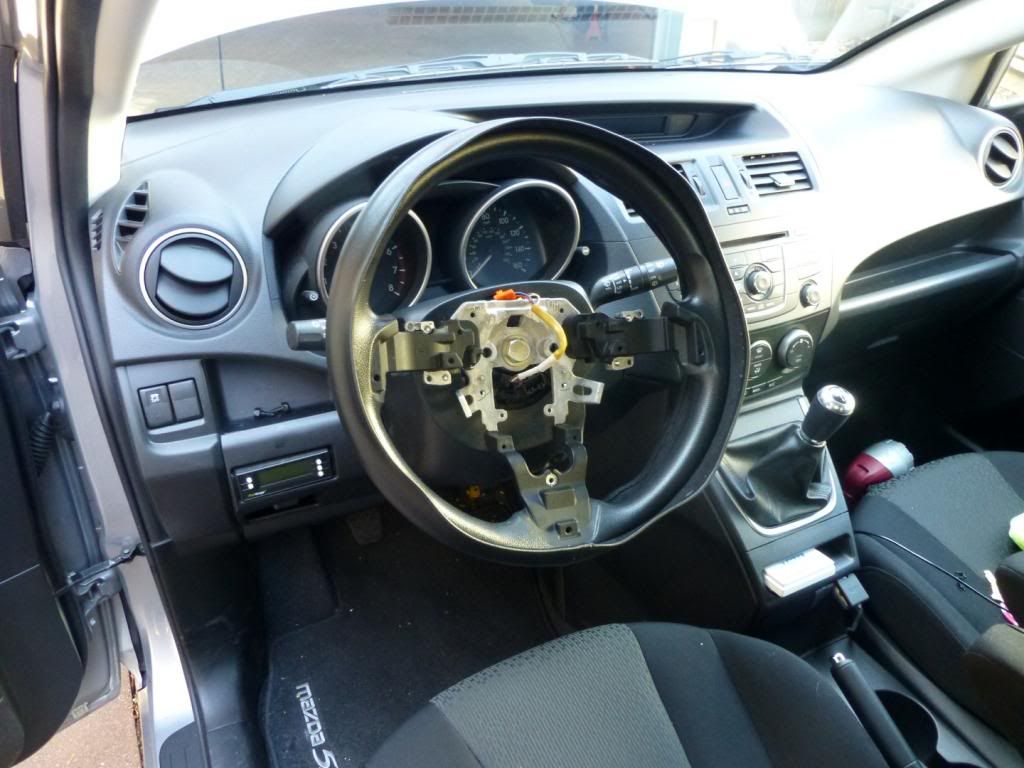
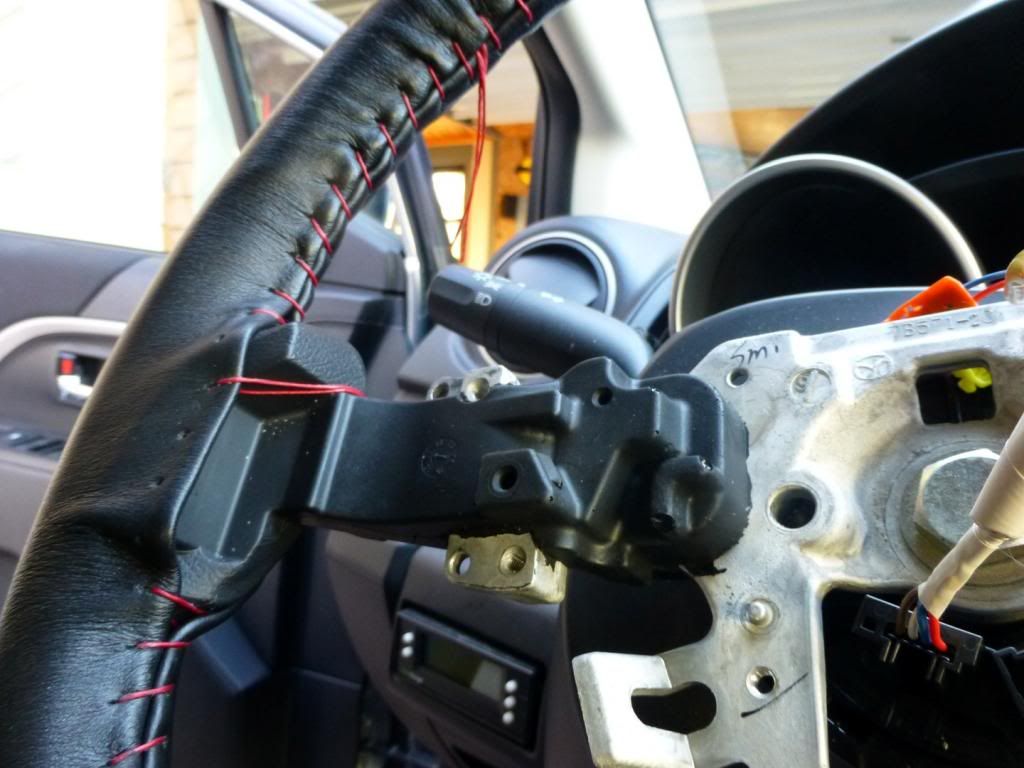
Once you remove the airbag and the cruise/radio plug from the column the wheel is removed, pop the rear cover off with 2 tabs and then you have access to the 5 Phillips head screws holding the three trim pieces (two side ones contain the cruise&stereo controls) to the wheel structure. Then you can re-install the wheel with the center 13/16" bolt only snug so it is firmly mounted, yet able to be rotated around for comfort when stitching.
Behind the spokes I used a little hot glue to hold the leather's edges flat against the wheel. I can still feel these (kind of thick since it's folded over) edges under my fingers but it's MUCH better than if there was no glue and the couple inches of loose edge was flapping around. If I did it again I may try cutting the cover's edge 1/2 way through where it goes behind the spokes, which would allow it to be glued down more flat to the stock wheel's surface and be less noticeable to the touch (can't see it).
Total install took a little over 3 hours (including wheel removal) but the threading part was somewhat therapeutic (turn on the garage radio, do one stitch at a time and make sure they're tight!) and the leather feels very nice indeed.
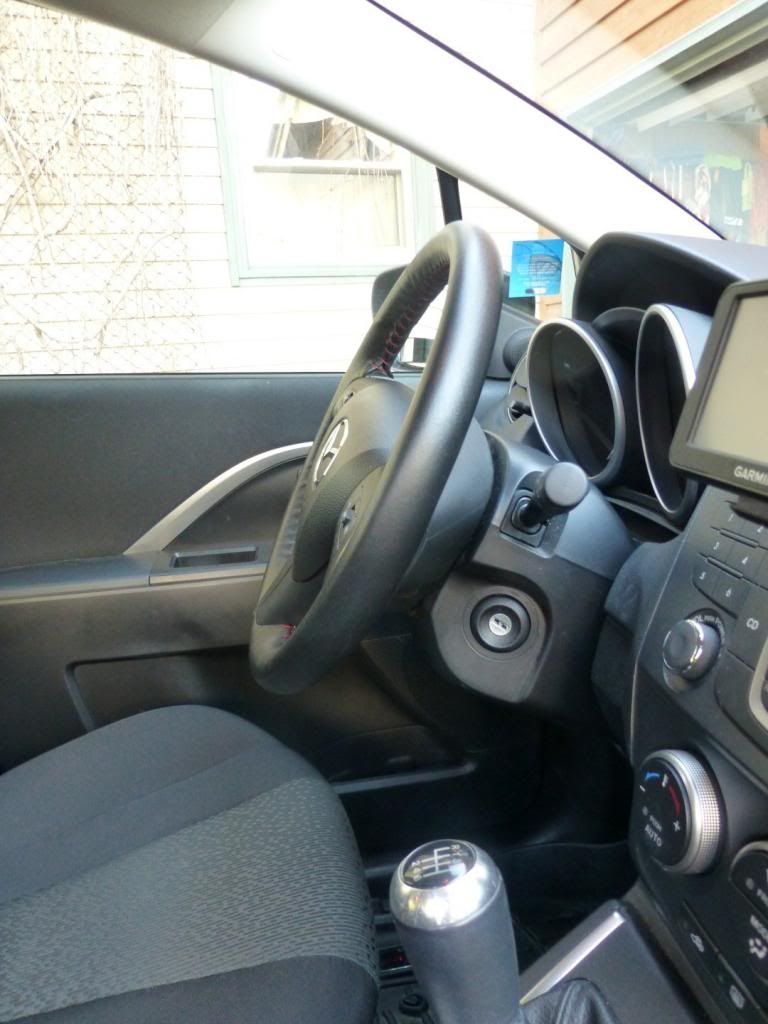
After driving with the leather Wheelskin for about an hour I'm quite happy with it. With my hands in the 10-2 position the seam is barely noticeable under my thumbs (where I'd worried it would be annoying) and palms (thanks to be the trim covers), and just a bit odd under my finger tips on the back. The added thickness and feel of the leather is really great, changes the whole driving experience if you can believe it. Plus the supple sheen of the leather adds a richness and bit of luxury to the interior that's lacking in the Sport model.
For my paws the added thickness is perfect and although I can feel the seem it's less distracting than I thought it would be.
Now just need to find a wrecked Grand Touring someone's parting out to get heated black leather seats and my trusty 5 will be just about how I want her.
Happy driving!
Kurt
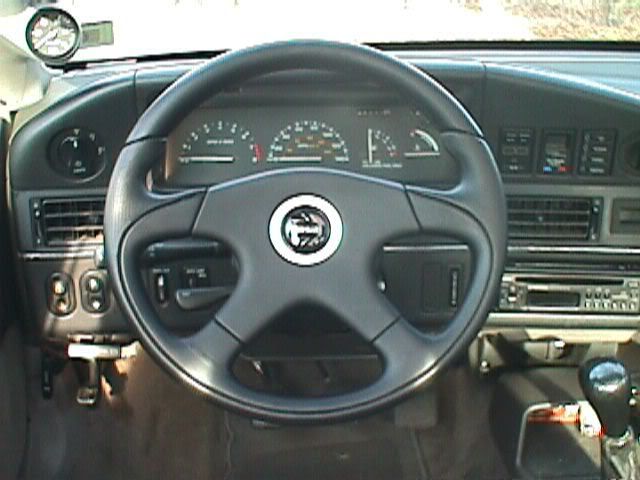
OEM wheel. Barf.
pre-threading (note: the wheel has to be taken out to remove the trim pieces, this is after temporarily re-installing for threading)
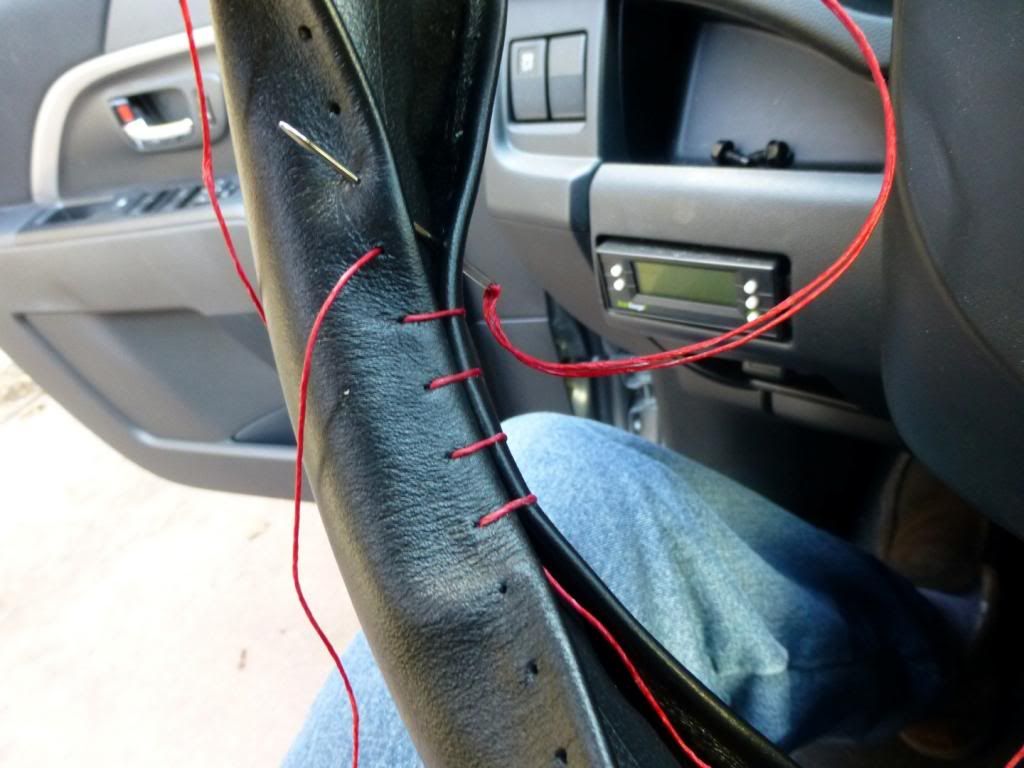
Started at about 10:30 if the wheel were a clock-face
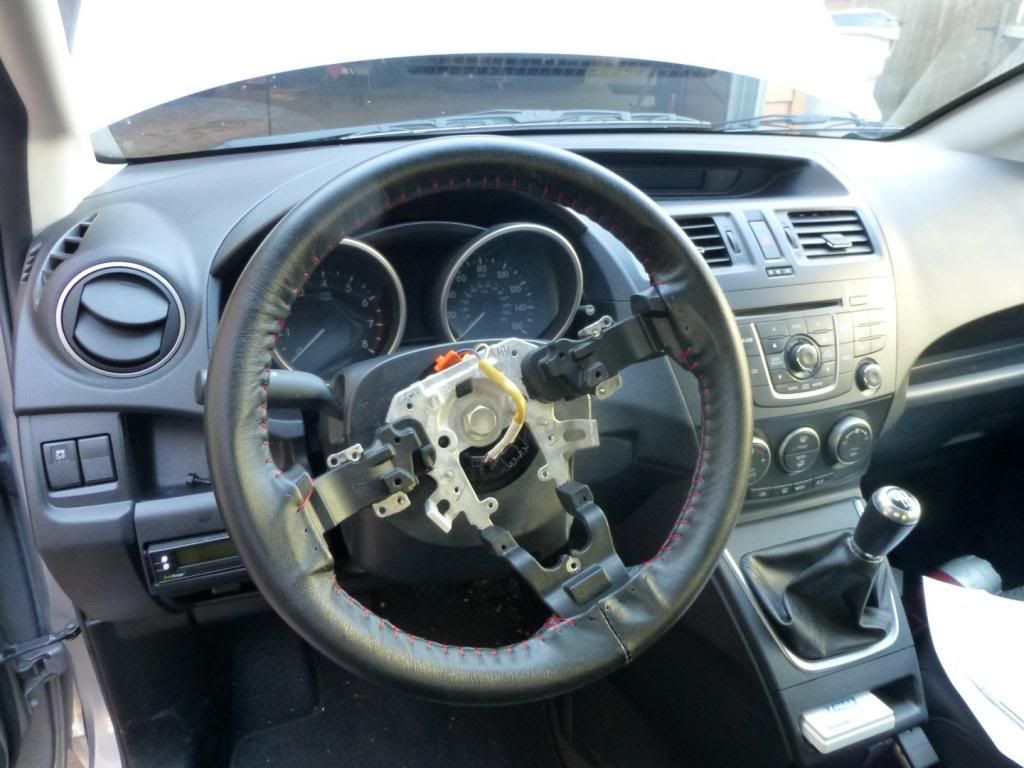
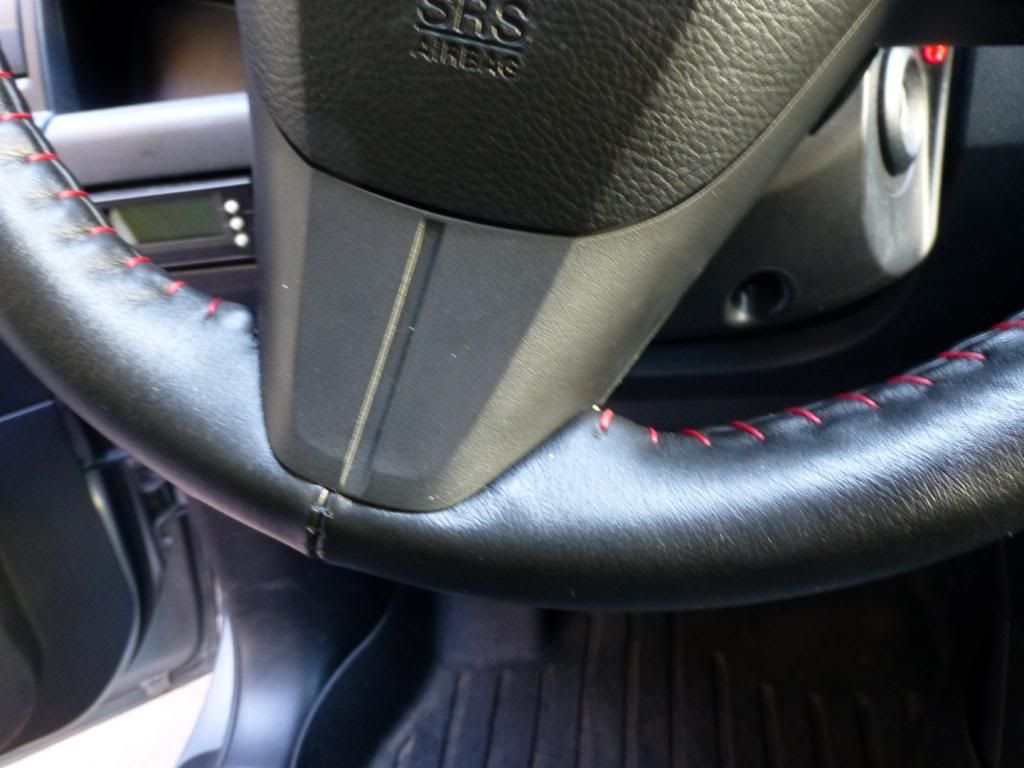
Done threading, time to take the wheel out again to put the trim covers back on, then re-install and torque down the wheel and re-install the horn&airbag.
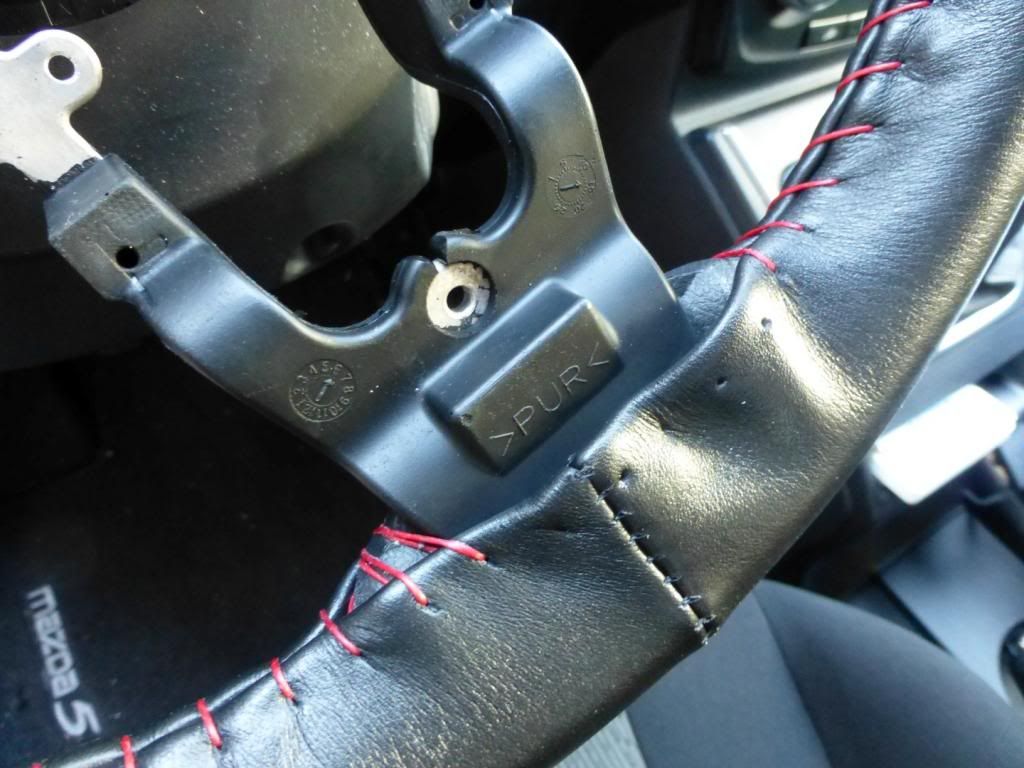
Center spoke (seam about 1/8" off center, doh). Need to trim a bit of the leather with a fresh X-Acto blade to open up space for the trim cover's post, also on the two side spokes.
Left spoke - the seam above this was the start/finish and shows the most "bunching", but it's not as bad as it looks in the pic and should go down once the leather "relaxes" some.
Button covers, horn/airbag installed. In person the "bunching" doesn't look as prominent as in the pic and should get better after sitting for a while.

Center Spoke, covered
Side spoke, covered
Back side of side spoke, with hot glue to hold it flat
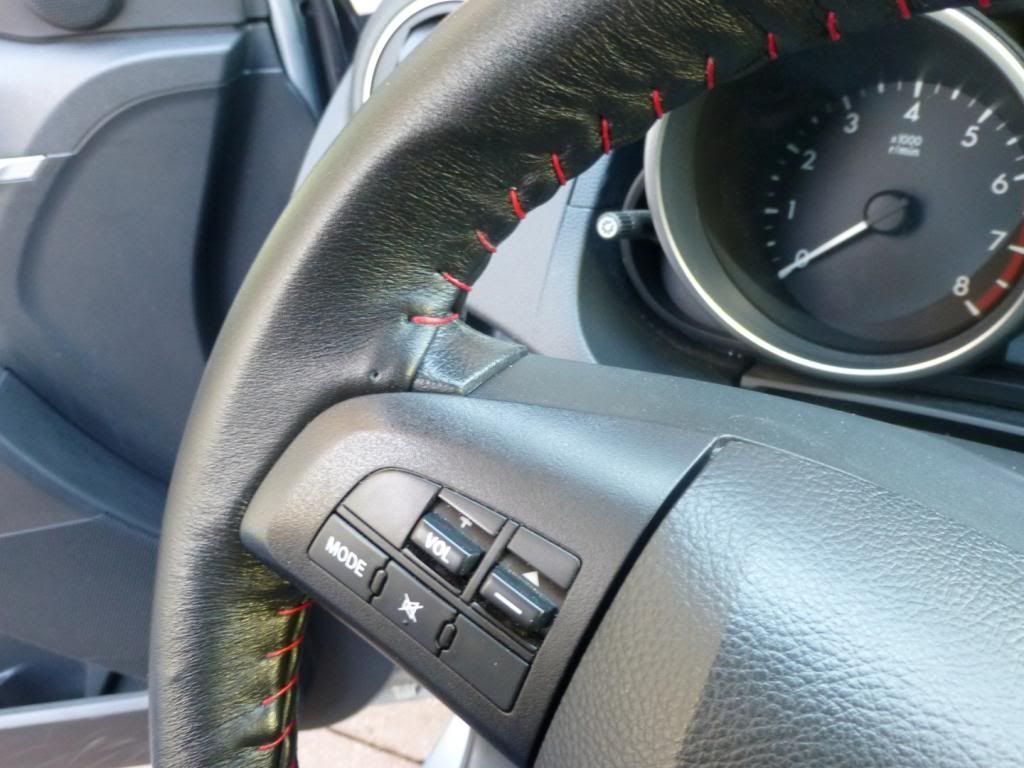
Side shot. Perfect size for my hands now
Slightly inconsistent holes, bit of a Frankenstein look in places
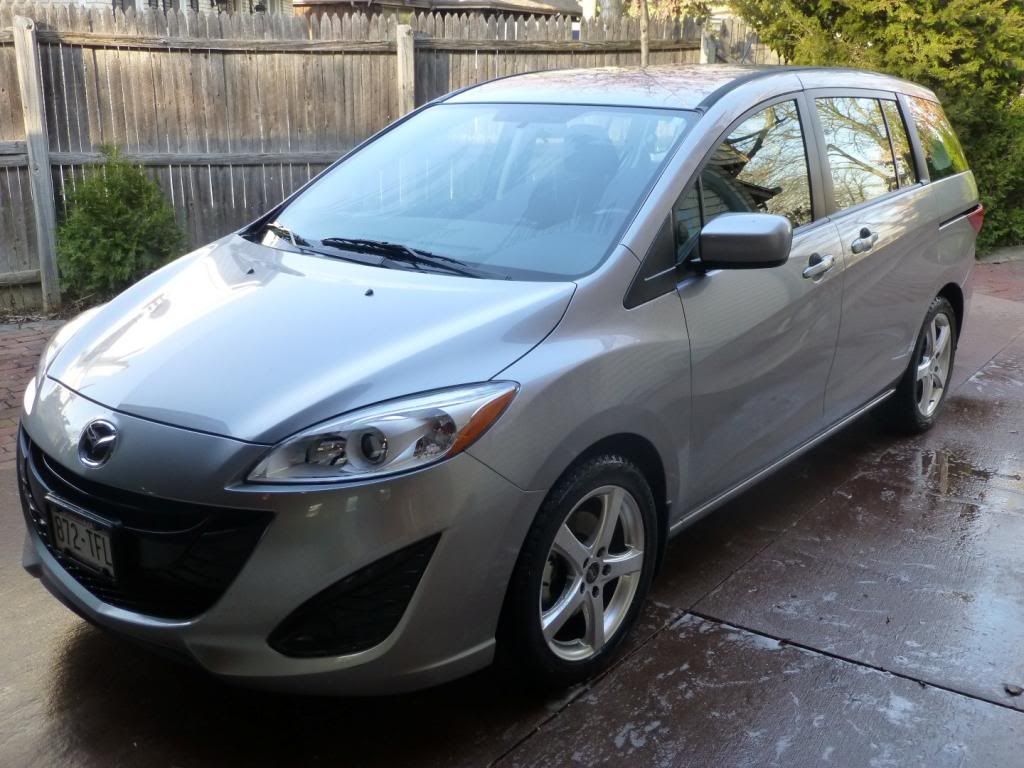
Gratuitous shot, freshly washed with winter shoes on
We've been rowing through the gears with a fantastic leather Miata shift knob since we bought the 5 one year and 20,000 miles ago, but just got around to addressing the tiller.
Don Mallinson of DC Car Care answered a bunch of questions and quickly shipped me a black 14.5" x 3-7/8" Wheelskin cover with red thread.
http://www.dccarcare.com/whlskns.html
BTW - his price of ~$40 is about $15 less than ordering off Wheelskins' site so I'd definitely recommend going with him for this.
Although I toyed with burgundy or grey leather (would have brightened up the otherwise rather dark and monotonous black interior IMO) went with boring black and racy red thread (which is apparently discontinued, but he had some laying around which he was kind enough to send me. Current thread colors from Wheelskin are Black, Grey, Tan and White).
I opted to do the "regular" single stitch rather than the "Baseball" style described on his website, don't regret this.
Here's what the Baseball stitching looks like on another wheel: http://www.dccarcare.com/images/tipsimages/Crossstitch2.jpeg
Our BMW's leather wheel has red and blue cross-stitched thread and looks very nice, but I rightly guessed that the Wheelskin wouldn't fit exactly around the rim's circumference and therefore wouldn't lay perfectly flat.
This was only partly correct. For most of the wheel the 3-7/8" wide cover mates up just about perfectly when the thread was tightened, but for some reason in the 4-5 O'Clock area you might be able to see a little "bunching" where I suspect the cover wasn't EXACTLY 3-7/8 wide. Anyway this is in an area I don't usually put my hands (I'm a 10-2 kind of guy) so it doesn't bother me.
One thing that does bother me a little is the occasionally mis-spaced thread holes, which give the stitch a bit of a Frankenstein's
neck-scar look. It's not bad and would be almost invisible if black thread instead of red were used, hopefully it won't bug me too much.
The thread is quite heavy and coated with a tacky substance that helps it stay in place (and will get on your fingers&hands somewhat) once you've completed a thread (still want to leave about 6" of thread to pull the previous loop tight before finishing the current loop, and then hold the previous loop down with a finger while threading through the NEXT loop). I wrapped my right index finger with tape to protect it when pushing the (thick) needle through, not a bad idea.
I expected the three thick "spokes" to be the biggest problem, but it was relatively easy to route the thread through the cover, behind the spokes using common sense and a few undoing of stitches when it didn't work out.
Don had recommended against taking the wheel off and tucking the Wheelskin under the three spokes' covers (due to the airbag - you've got to treat this like a bomb. I followed this guy's Youtube instructions http://www.youtube.com/watch?v=onm5QAXhm4I ), but I'm really glad I did this. Not having the 3 plastic trim pieces overlap the cover on three spokes (especially the two side ones) would have really stood out in a bad way, both visual and tactile.
Once you remove the airbag and the cruise/radio plug from the column the wheel is removed, pop the rear cover off with 2 tabs and then you have access to the 5 Phillips head screws holding the three trim pieces (two side ones contain the cruise&stereo controls) to the wheel structure. Then you can re-install the wheel with the center 13/16" bolt only snug so it is firmly mounted, yet able to be rotated around for comfort when stitching.
Behind the spokes I used a little hot glue to hold the leather's edges flat against the wheel. I can still feel these (kind of thick since it's folded over) edges under my fingers but it's MUCH better than if there was no glue and the couple inches of loose edge was flapping around. If I did it again I may try cutting the cover's edge 1/2 way through where it goes behind the spokes, which would allow it to be glued down more flat to the stock wheel's surface and be less noticeable to the touch (can't see it).
Total install took a little over 3 hours (including wheel removal) but the threading part was somewhat therapeutic (turn on the garage radio, do one stitch at a time and make sure they're tight!) and the leather feels very nice indeed.
After driving with the leather Wheelskin for about an hour I'm quite happy with it. With my hands in the 10-2 position the seam is barely noticeable under my thumbs (where I'd worried it would be annoying) and palms (thanks to be the trim covers), and just a bit odd under my finger tips on the back. The added thickness and feel of the leather is really great, changes the whole driving experience if you can believe it. Plus the supple sheen of the leather adds a richness and bit of luxury to the interior that's lacking in the Sport model.
For my paws the added thickness is perfect and although I can feel the seem it's less distracting than I thought it would be.
Now just need to find a wrecked Grand Touring someone's parting out to get heated black leather seats and my trusty 5 will be just about how I want her.
Happy driving!
Kurt
OEM wheel. Barf.
pre-threading (note: the wheel has to be taken out to remove the trim pieces, this is after temporarily re-installing for threading)
Started at about 10:30 if the wheel were a clock-face
Done threading, time to take the wheel out again to put the trim covers back on, then re-install and torque down the wheel and re-install the horn&airbag.
Center spoke (seam about 1/8" off center, doh). Need to trim a bit of the leather with a fresh X-Acto blade to open up space for the trim cover's post, also on the two side spokes.
Left spoke - the seam above this was the start/finish and shows the most "bunching", but it's not as bad as it looks in the pic and should go down once the leather "relaxes" some.
Button covers, horn/airbag installed. In person the "bunching" doesn't look as prominent as in the pic and should get better after sitting for a while.
Center Spoke, covered
Side spoke, covered
Back side of side spoke, with hot glue to hold it flat
Side shot. Perfect size for my hands now
Slightly inconsistent holes, bit of a Frankenstein look in places
Gratuitous shot, freshly washed with winter shoes on
Last edited:
")