
You are using an out of date browser. It may not display this or other websites correctly.
You should upgrade or use an alternative browser.
You should upgrade or use an alternative browser.
How To : Replace Front Caliper Dust and Piston Seals
- Thread starter Action Jackson
- Start date
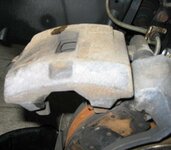
What to do? Replace those seals.
If you can change brake pads, then it's a matter of a few more steps and equipment.
Here's what you'll need (you may use something else but this is what I used):
- Socket Set
- Wrenches
- Allen Keys
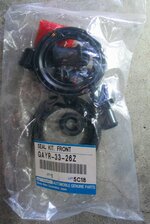
- A OEM Front Caliper Seal Kit # GAYR 33 26Z [I'd suggest getting 2 of these in case you screw up like I did]
- Jack and stands
- New Brake Fluid
- Disc Brake Spreader Tool [works better than a C Clamp]
- Brake Parts Cleaner Fluid/Spray
- Good Lighting
- Good Ventilation
- Bin to Catch Used Brake Fluid
- Several Clean Lintless rags
- Someone to help bleed the brakes (and maybe the clutch) unless you have Speedbleeders")
- Gloves If You Wish
- A Small Thin Tool to Remove Piston Seal like a Dull Putty Scraper
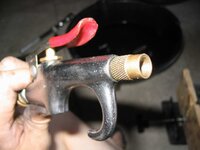
- Air Compressor suggested
- Brake Slider Lube of Your Choice
- Eye and Ear Protection If You Wish.
If you can change brake pads, then it's a matter of a few more steps and equipment.
Here's what you'll need (you may use something else but this is what I used):
- Socket Set
- Wrenches
- Allen Keys
- A OEM Front Caliper Seal Kit # GAYR 33 26Z [I'd suggest getting 2 of these in case you screw up like I did]
- Jack and stands
- New Brake Fluid
- Disc Brake Spreader Tool [works better than a C Clamp]
- Brake Parts Cleaner Fluid/Spray
- Good Lighting
- Good Ventilation
- Bin to Catch Used Brake Fluid
- Several Clean Lintless rags
- Someone to help bleed the brakes (and maybe the clutch) unless you have Speedbleeders
- Gloves If You Wish
- A Small Thin Tool to Remove Piston Seal like a Dull Putty Scraper
- Air Compressor suggested
- Brake Slider Lube of Your Choice
- Eye and Ear Protection If You Wish.
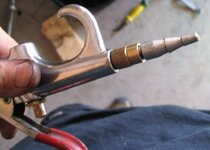
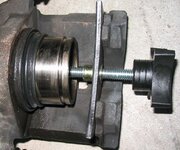
Below are pictures of some the tools and equipment.
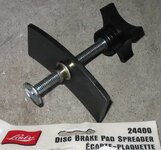
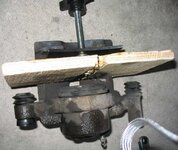
One is the brake spreader tool. You'll probably need either an old brake pad you don't need, or a thin piece of metal to help compress the piston.
The other picture is the seal kit from any Mazda dealership.
Cost is about $48 CDN + tax.
Each kit is enough to do both front calipers.
One is the brake spreader tool. You'll probably need either an old brake pad you don't need, or a thin piece of metal to help compress the piston.
The other picture is the seal kit from any Mazda dealership.
Cost is about $48 CDN + tax.
Each kit is enough to do both front calipers.
Attachments
8.
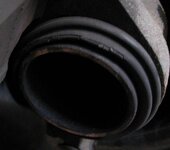
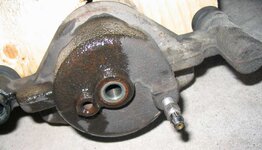
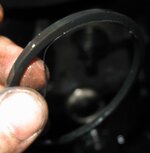
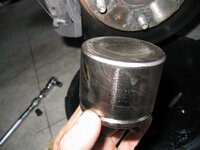
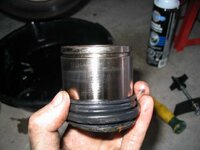
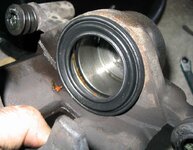
- don't know if the piston seal was already damaged, or damaged from having the piston popped out with air, but here it is:
- The 2nd picture shows when it's removed:
- don't know if the piston seal was already damaged, or damaged from having the piston popped out with air, but here it is:
- The 2nd picture shows when it's removed:
Attachments

15.
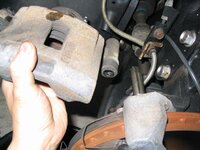
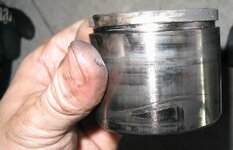
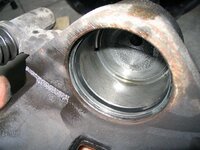
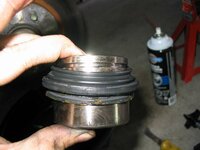
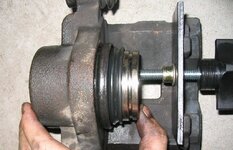
Now for the way I recommend which is a bit easier.
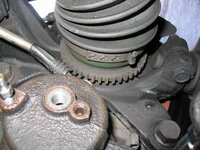
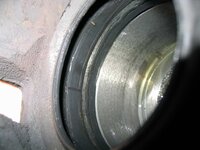
- carefully insert the piston with the seal near it's bottom into the caliper:
I'm showing a repeat picture to show you the positioning of the dust seal.
Now for the way I recommend which is a bit easier.
- carefully insert the piston with the seal near it's bottom into the caliper:
I'm showing a repeat picture to show you the positioning of the dust seal.
Attachments


Similar threads
- Replies
- 7
- Views
- 9K
- Replies
- 3
- Views
- 855