
You are using an out of date browser. It may not display this or other websites correctly.
You should upgrade or use an alternative browser.
You should upgrade or use an alternative browser.
How To: Ebay FMIC
- Thread starter Wagonbacker9
- Start date
Wagonbacker9
Member
- :
- 2004 'Hoe
Pretty much just drill holes in the foglight hole and bolt it down?
there is actually a treaded insert behind the fog light/delete that worked just fine. I used one of the bolts from the license plate bracket, which happened to be the correct size.
justanothermp5
Banned
- :
- Rust Bucket
At the hardware store. Made it out of 1" by 1/8" flat stock.
Also, FYI, the MAF will take a 2.5" coupler if you wrestle it on there. I didn't feel like spending the extra for a reducer. with 2.25" piping you may not have a choice though... By the same logic I would assume a 2.25 could be made to fit over the TB.
huh? the MAF is a 2.5", you dont have to wrestle it on there, it fits lol
Wagonbacker9
Member
- :
- 2004 'Hoe
huh? the MAF is a 2.5", you dont have to wrestle it on there, it fits lol
measure it again, the MAF is 2.75. Stop arguing with me just for the sake of starting an argument, its annoying.
He custom made those out of some aluminum stock.
Also the MAF is 2.75 and the TB is 2.5
So you would need (1) 2.25-2.5 reducer and (2) 2.25-2.75 reducers
justanothermp5
Banned
- :
- Rust Bucket
oh, could have sworn that said TB, my bad
and i could give a **** if i annoy you lol i think im going to start doing it more actually
and i could give a **** if i annoy you lol i think im going to start doing it more actually
Wagonbacker9
Member
- :
- 2004 'Hoe
oh, could have sworn that said TB, my bad
and i could give a **** if i annoy you lol i think im going to start doing it more actually
thank god for the infraction system.
justanothermp5
Banned
- :
- Rust Bucket
dont thank god, he didnt make it ")
719prottege
Member
- :
- 03 msp
ok, so I finished this about two weeks ago but forgot to post anything, I only really have a few cell phone pics because I had lost my camera (my mom had put it "away" but really just put it in a place she couldn't remember, but I found it now) but I had finished the install before I found the camera, but here is the recap...(also this is with the 03 spicy msp with the fogs in there, I just had to move my HID ballasts because they were on the splash guards before but now are on the frame above the fogs kinda.)
I cut the crash bar about, 1"- 1 1/2" up so that the fmic core was flush with the front bumper, I am very very happy that I did that, I don't think I cut enough away at all to sacrifice any real structural protection besides any small loss (but if you think about it your replacing a small section of metal with a big fmic core if you do get into a crash lol)
-I had bought the reccomended kit, I found that I didn't need many of the pipes, and that it MIGHT be cheaper just to go to CX Racing to get the couplers and pipes ordered seperatly or just call them and see if you can work a deal for the right pipes, I routed mine like CS fmic did, but with this kit, so it was a little different, but not by much, I had some WeaponR hardpipes left from my previous set up which I used on the cold side, but could be substituted for 1 90* pipe...
here is what pipes I used and instead of the WR pipes, what pipes you can order and couplers...all pipes were 2.5"
Hot Side- 1 2"-2.5" reducer coupler, 1 "U" bend pipe,1 straight coupler, 1 90* pipe, 1 90* coupler, 1 90* pipe cut to fit, I took off about 4-5" about and 1 45* coupler connecting to the fmic core (which was I think 27" L (total 21" core I think)
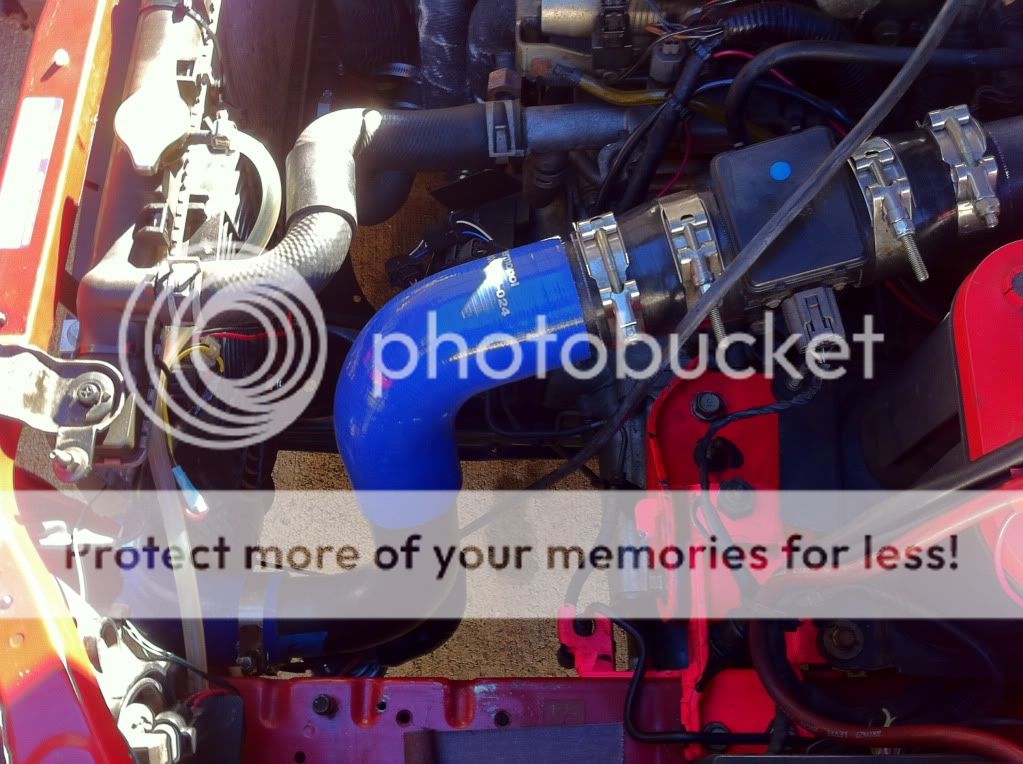
Cold Side- 1 45* coupler coming off of core , (I used the WR pipes here but you can use the 90* bent pipe, might want to cut the pipe so you can angle it better but just put a coupler there, but you prob. won't have to) 45* coupler after going through the frame section as seen in the CS install instructions, then I used a 45* pipe that I cut a few inches above the bend, this is where I put the MAF sensor, and with that I was able to reach the TB with 1 90* coupler, (straight couplers obviously for the MAF part), but it fit like a dream for the most part, once I finally got it all set, I didn't have to cut the splash guards, (although I did for the hot side just a little to trim it where it shows in the CS install instructions but I didn't really need to, I was just fed up with everything and wanted it in now lol) but I had the BOV flange welded onto the U bend of the hot pipe, right now with the HKS v2 bov only it flutters/turkeys a little at lower boosts, but is a good solid sound/blow off, when at mid to high boosts(from about 4-10psi), I plan to eventually get another hks v2 BOV welded onto the cold side before the MAF sensor just to take care of any turkey I might have at any boost, but not just yet...
here are a few cell phone pics I took while I was going through the process, I also got a slim fan for I think $15-20 off of amazon.com that works great, and I would HIGHLY recommend getting one for the hot side, I also had went the route on the hot side that is shown on the first page where I removed the windshield wiper fluid because I didn't have any need for it with the CF hood, but I'm sure you can just move the pipes down a little and keep it(also shown on the CS install instructions)
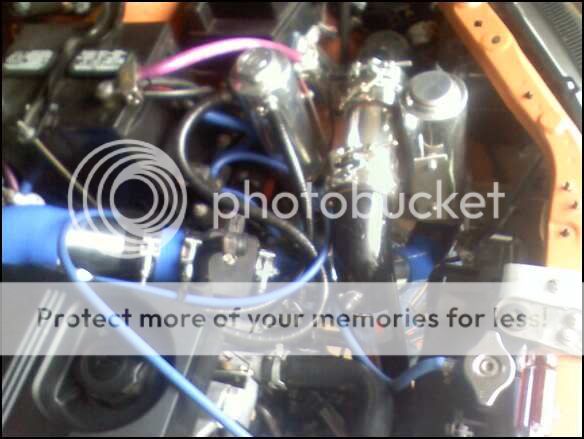
(quick bad pic of MAF relocated)
pic of the mounted core, without the cut 90* pipe on the hot side, and missing the 45* couplers coming off of core
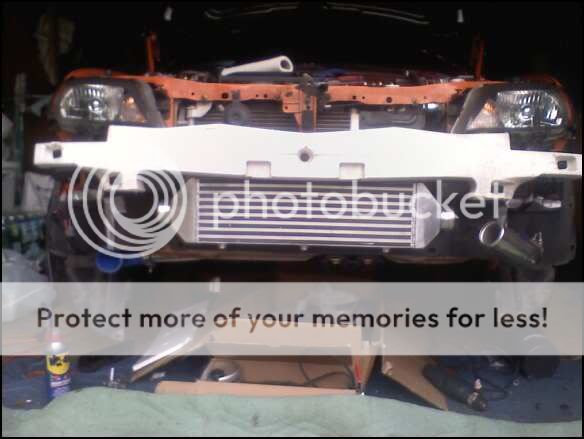
test fitment for fogs and everything else before putting everything back together(and before I had my 2 last 45* couplers come in the mail that would come off of the core)

I will have complete and good pics in one of the up coming MOTM once I get my GT Spec strut bar (sssh)
so you just removed the metal bumper reinforcment bar to fit a bigger intercooler? i am also running a slightly larger intercooler than some on here, so just wanting to rais it up a bit. what did you mount it to?
Wagonbacker9
Member
- :
- 2004 'Hoe
looks like he notched the crash bar, didn't remove it...
ScratchNSniff
Undisputed Parts God
- :
- Way to Many
thank god for the infraction system.
I pray to god that you will one day not be a mod...
dont thank god, he didnt make it
x2 Wag...that really bothers me that you would stoop that low...
Wagonbacker9
Member
- :
- 2004 'Hoe
definitely a slick setup. well done!
- :
- '13 CWP MS3 & '16 Mazda6 GT
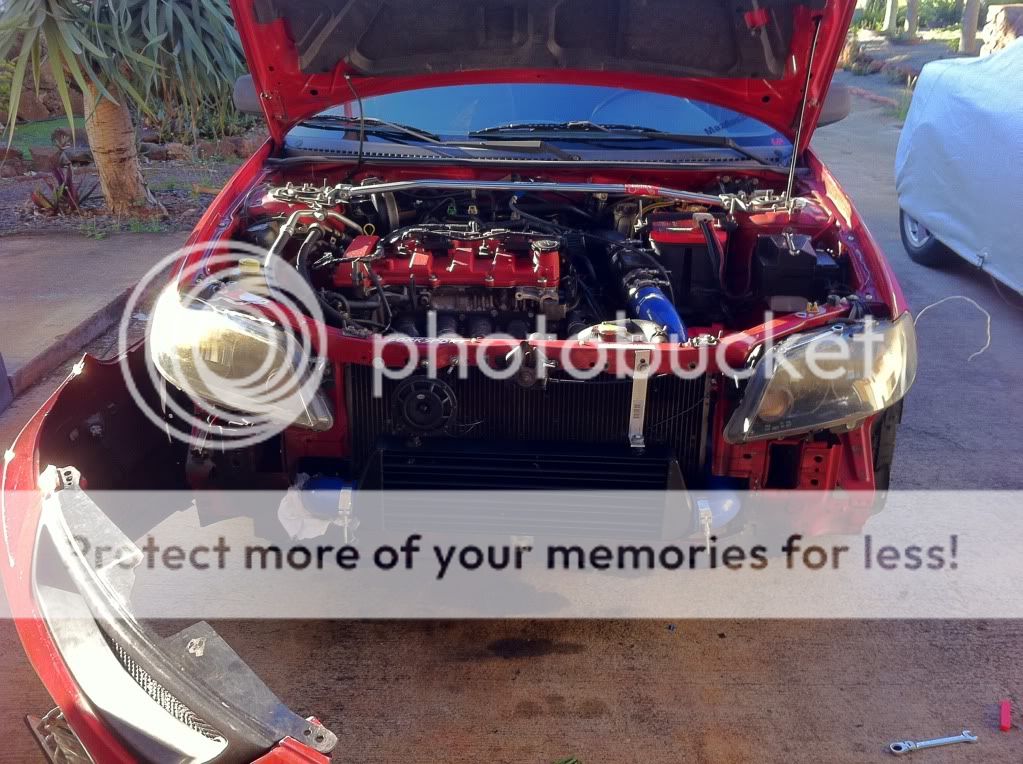
Liking that cold pipe routing!
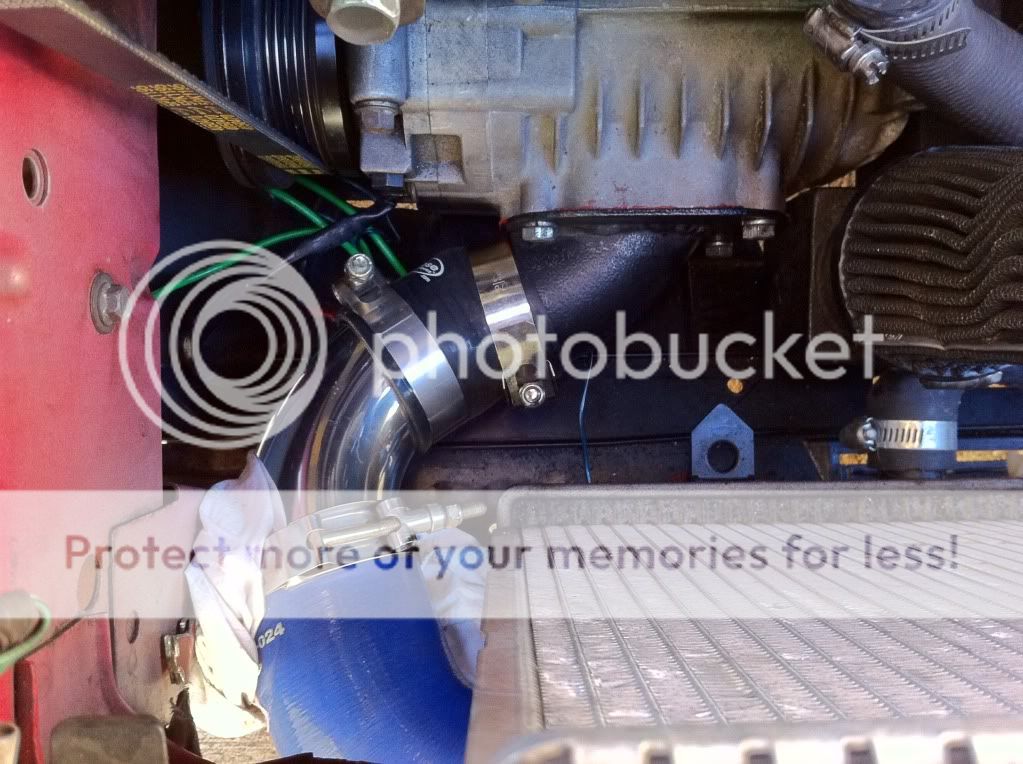
Thanks. I am still working with the SC outlet pipe. Im putting together some pie cut pipe so that I can make the SC outlet to the blue coupler one piece. Also going to use a 45* coupler instead of the blue 90* on the cold side. (if you can see the BOV is mounted under that pipe. lol)
that sc setup is really nice. one of the cleanest charged protege motors ive ever seen on this forum.
i have a question about maf relocation..
I scored a bunch of 2.25" pipe and a ssqv that i wanna run with the stock intercooler. so i was just gonna cut/join the pipes in stock arangment and relocate the maf to the cold side, run vta. just not sure where i should put the bov flange. should it be on the cold side just after the intercooler about 18" from the maf, or can i put it in the stock location on the hotside? would that evacuate the air fast enough to not give false readings?
Similar threads
- Replies
- 5
- Views
- 2K
- Replies
- 0
- Views
- 2K