
I know we have an install thread around here already, but I found this one from Insane on another board to be a little more helpful. This write up is for the CP-e mount, but I followed it for the AWR I purchased from protegegarage.com with only a couple changes.
So, here it is. Like I mentioned, Insane wrote this, not me, except where I add editorials.
Tools Used:
17mm socket (for mount bolts)
10mm socket (for plastic cover)
3/8" Craftsman socket wrench
Floor Jack
2 Jack Stands
Optional Tools:
Cordless Driver (to remove and re-install those 10mm plastic cover bolts easier)
Breaker Bar (To break the mount bolts free)
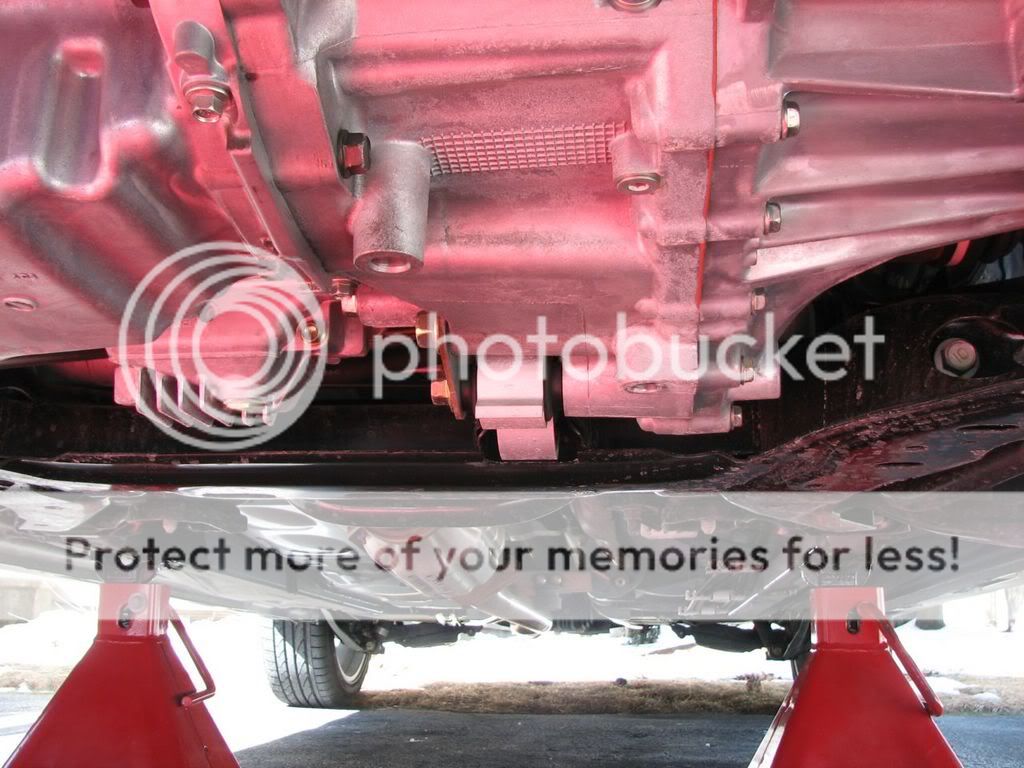
I started off by using the floor jack to raise the car using the front jacking point here...
Once I got it up in the air, I placed a jack stand under each frame rail and lowered the car slowly onto the stands. On my car at least, it seems the front of the frame rails are coated with a rubber-like undercoating which makes them sit on the jackstands without sliding.

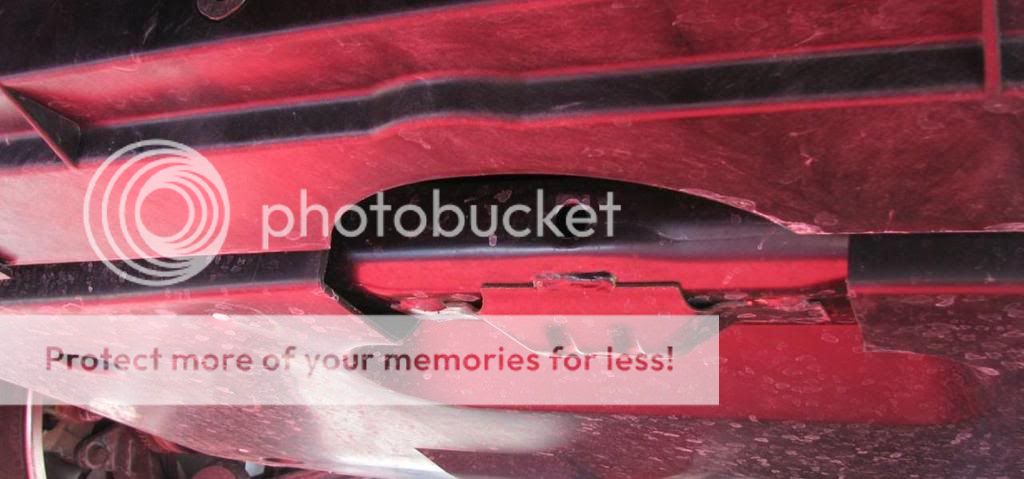
At this point I threw down a blanket type thing I had to make laying on the ground a bit more comfortable. The next step is to remove the plastic under cover with a 10mm socket. I found using my Makita cordless driver with a 10mm socket made this part a breeze. Take out each bolt one by one, doing the one in the front last. Then once you've got them all out, use a philips screw driver head to turn the plastic screw thing holding the plastic piece in. Once you've got the cover off, you should be seeing this underneath.
You can see the mount in the middle of the picture. Also take note of the flat area of the block to the immediate right of the stock mount. This is the key to making lining up the holes easier when you are installing the new one. If you use your floor jack to support that area as close to the mount as you can get without interfering with its removal, it makes removing the bolts easier as well as lining up the hole when you reinstall the bolts through the new mount. The trick is to jack up until you just feel pressure on the jack, then jack it up just a hair from that point so it takes tension off the bolts. If you jack it up too much, you will actually put more tension on the bolts. Here's how I did mine. I threw a towel on the jack cup just so the cup wouldn't do anything to the softer aluminum block, but this is probably not needed if you are careful.

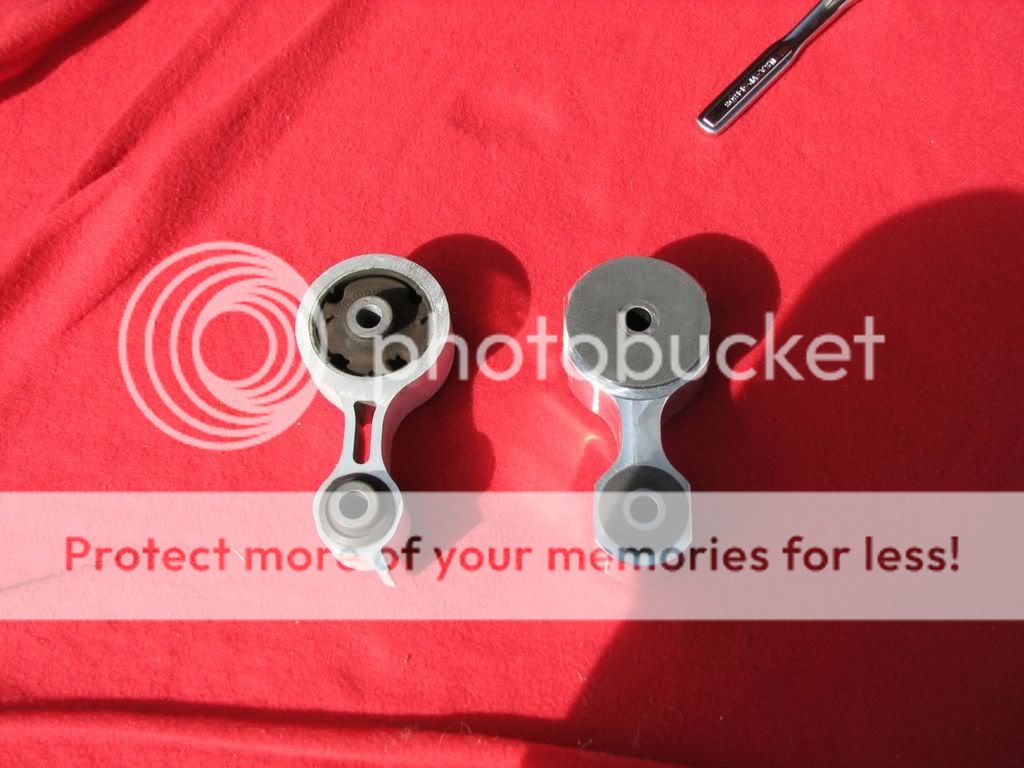
Now, you pretty much just need to remove the two 17mm bolts and pull the old mount out. You need to take the gold colored one out at the bottom of the triangle bracket that goes through the smaller end of the mount into the block. You also need to take out the silver colored on larger side of the mount going through the frame. You do not need to do anything with the two upper bolts on the triangle bracket. Once you get the stocker out of the car, you'll see just how flimsy it is compared to the new piece..

NOTE - If you purchased the AWR you will NEED to do the following, on the inside of the upper black bracket are L shaped tabs. These will need to be removed or bent back. I used a pair of needle-nose pliers to break the tabs away from the brackets, then just bent them back out of the way.
Now, the install is pretty much the reverse of removing. The first thing you need to do is grease up the sides of the rubber bushing in the new mount. This will help things slide in there easier because it will be a tight fit. You can see from the above pictures the SU mount is thicker, and the fact that the bushing has a "face" that adds some thickness as well makes it an even tighter fit. Some people have had to bend out the tabs that the larger end goes in between, but I didn't have to do that. It was a tight fit, but with the oil on the bushing, it slid right in. If you need to you can probably use something to bend those out a little to give you more clearance. Once you get the larger end in, hand tighten the bolt about half way in.
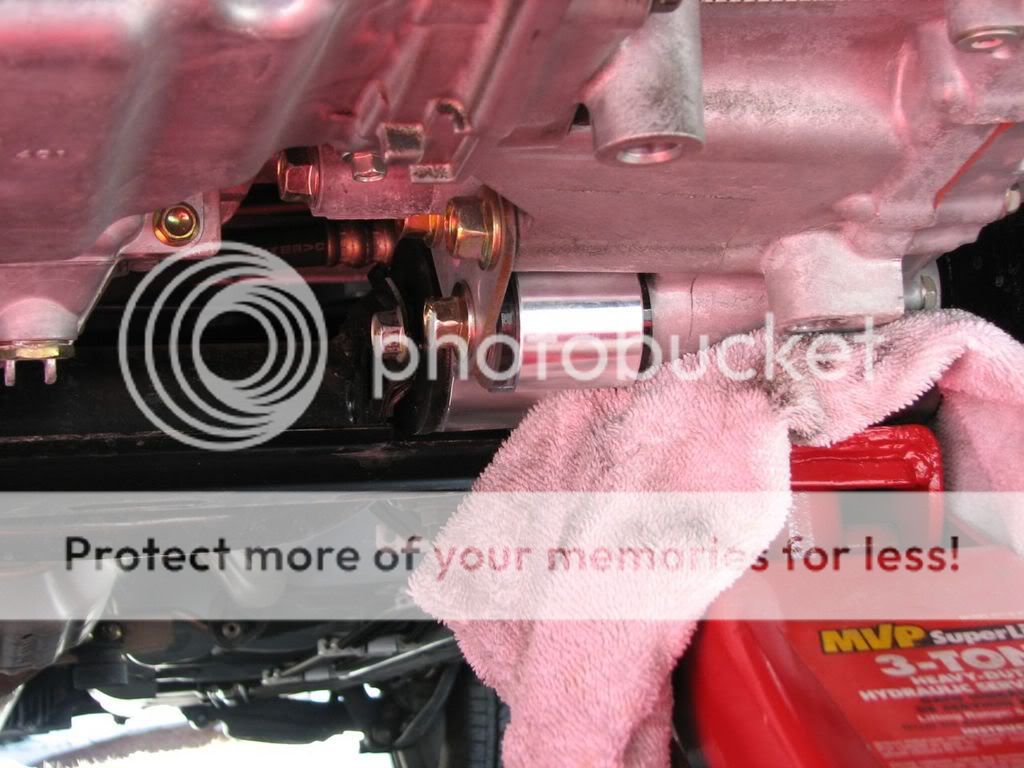
Now comes the tricky part, but it really wasn't bad at all with the jack supporting the motor. You need to slide the smaller end into it's spot, and make sure to get the washer in there as well. It's a really tight fit with the washer, but keep at it. I actually found the towel on the jack helped because I could cover the mount with that and tap it up with my hammer. Once I got it in there, I found the bolt would go all the way through, but the hole in the block was just slightly out of alignment because I had tapped the mount up to far. I backed out the bolt and used a punch thing I had to line up the holes, and re-installed the bolt. It threaded in fine. I never had to mess with trying to hold the motor in place and feed the bolt through. By supporting it with the jack, you make it a lot easier on yourself.
NOTE - once again on the AWR, the engine side of mine DID NOT fit. no matter how hard I tried, the metal ends of the mount just would NOT clear the bracket. this was easily fixed with my dremel, i just shaved about 1-2 MM off the end and it went in without much of a fight.
After I got everything tightened up it looked like this on my back...
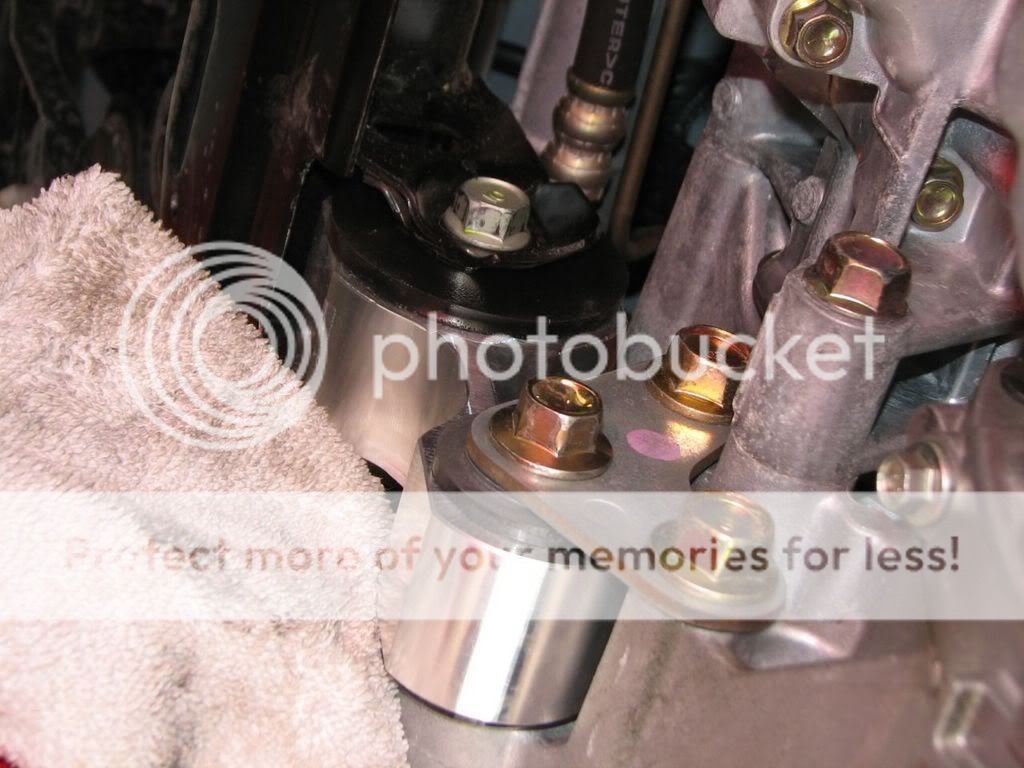
It looked like this with me looking at it normally...
One more installed pic...

I put the car down and went for a test drive. The difference is night and day. There is no more shift thump, and when you shift under power from a stop, it's much, much smoother. I also adjusted the clutch on Saturday, and between the two, this is like a whole new car. I have noticed a tiny bit more vibration at idle, but nothing that will bother me. I'll keep an eye on it and see if it goes away once it breaks in and we get some warmer weather. The whole job probably took me an hour including getting everything outside, jacking up the car, and taking some pictures along the way.
I would highly suggest this as a great first mod to any MS6 owner...
One last note: there actually is fairy significant vibration, even with the 70 durometer that I purchased. its nothing to make me not want it, and i'm sure it will settle a bit, but, its a little choppy when the a/c kicks on. otherwise, its a great upgrade (cheers)
So, here it is. Like I mentioned, Insane wrote this, not me, except where I add editorials.
Tools Used:
17mm socket (for mount bolts)
10mm socket (for plastic cover)
3/8" Craftsman socket wrench
Floor Jack
2 Jack Stands
Optional Tools:
Cordless Driver (to remove and re-install those 10mm plastic cover bolts easier)
Breaker Bar (To break the mount bolts free)
I started off by using the floor jack to raise the car using the front jacking point here...
Once I got it up in the air, I placed a jack stand under each frame rail and lowered the car slowly onto the stands. On my car at least, it seems the front of the frame rails are coated with a rubber-like undercoating which makes them sit on the jackstands without sliding.
At this point I threw down a blanket type thing I had to make laying on the ground a bit more comfortable. The next step is to remove the plastic under cover with a 10mm socket. I found using my Makita cordless driver with a 10mm socket made this part a breeze. Take out each bolt one by one, doing the one in the front last. Then once you've got them all out, use a philips screw driver head to turn the plastic screw thing holding the plastic piece in. Once you've got the cover off, you should be seeing this underneath.
You can see the mount in the middle of the picture. Also take note of the flat area of the block to the immediate right of the stock mount. This is the key to making lining up the holes easier when you are installing the new one. If you use your floor jack to support that area as close to the mount as you can get without interfering with its removal, it makes removing the bolts easier as well as lining up the hole when you reinstall the bolts through the new mount. The trick is to jack up until you just feel pressure on the jack, then jack it up just a hair from that point so it takes tension off the bolts. If you jack it up too much, you will actually put more tension on the bolts. Here's how I did mine. I threw a towel on the jack cup just so the cup wouldn't do anything to the softer aluminum block, but this is probably not needed if you are careful.
Now, you pretty much just need to remove the two 17mm bolts and pull the old mount out. You need to take the gold colored one out at the bottom of the triangle bracket that goes through the smaller end of the mount into the block. You also need to take out the silver colored on larger side of the mount going through the frame. You do not need to do anything with the two upper bolts on the triangle bracket. Once you get the stocker out of the car, you'll see just how flimsy it is compared to the new piece..
NOTE - If you purchased the AWR you will NEED to do the following, on the inside of the upper black bracket are L shaped tabs. These will need to be removed or bent back. I used a pair of needle-nose pliers to break the tabs away from the brackets, then just bent them back out of the way.
Now, the install is pretty much the reverse of removing. The first thing you need to do is grease up the sides of the rubber bushing in the new mount. This will help things slide in there easier because it will be a tight fit. You can see from the above pictures the SU mount is thicker, and the fact that the bushing has a "face" that adds some thickness as well makes it an even tighter fit. Some people have had to bend out the tabs that the larger end goes in between, but I didn't have to do that. It was a tight fit, but with the oil on the bushing, it slid right in. If you need to you can probably use something to bend those out a little to give you more clearance. Once you get the larger end in, hand tighten the bolt about half way in.
Now comes the tricky part, but it really wasn't bad at all with the jack supporting the motor. You need to slide the smaller end into it's spot, and make sure to get the washer in there as well. It's a really tight fit with the washer, but keep at it. I actually found the towel on the jack helped because I could cover the mount with that and tap it up with my hammer. Once I got it in there, I found the bolt would go all the way through, but the hole in the block was just slightly out of alignment because I had tapped the mount up to far. I backed out the bolt and used a punch thing I had to line up the holes, and re-installed the bolt. It threaded in fine. I never had to mess with trying to hold the motor in place and feed the bolt through. By supporting it with the jack, you make it a lot easier on yourself.
NOTE - once again on the AWR, the engine side of mine DID NOT fit. no matter how hard I tried, the metal ends of the mount just would NOT clear the bracket. this was easily fixed with my dremel, i just shaved about 1-2 MM off the end and it went in without much of a fight.
After I got everything tightened up it looked like this on my back...
It looked like this with me looking at it normally...
One more installed pic...
I put the car down and went for a test drive. The difference is night and day. There is no more shift thump, and when you shift under power from a stop, it's much, much smoother. I also adjusted the clutch on Saturday, and between the two, this is like a whole new car. I have noticed a tiny bit more vibration at idle, but nothing that will bother me. I'll keep an eye on it and see if it goes away once it breaks in and we get some warmer weather. The whole job probably took me an hour including getting everything outside, jacking up the car, and taking some pictures along the way.
I would highly suggest this as a great first mod to any MS6 owner...
One last note: there actually is fairy significant vibration, even with the 70 durometer that I purchased. its nothing to make me not want it, and i'm sure it will settle a bit, but, its a little choppy when the a/c kicks on. otherwise, its a great upgrade (cheers)
")