How To: Center Gauge Pod
This is a simple "how to" to make a center gauge pod. This is my first time making something like this, but it was easy. So if I made it, you can too.
First thing I did was to order some prosport gauges(boost & water temp.) and a center gauge pod from PG. Then I needed to find a oem dash piece. Brand new this part cost about $180, so obviously I decided against it. I started calling local junk yards, and found one for $65. Then a I got some plastic weld for the local parts store(see pic #1). I used 2 tubes. Now for the cutting.
Pic #1

The PG gauge pod is a pretty good pod. But it covers most of the oem part, meaning, the front part is too close to the a/c vents. So, when you apply the plastic weld, you risk getting some on the vent holes. Additionally I didn't like how it looked, I wanted the gauges a little farther back, not too much. I cut 1 to 1.5 in. from the back part of the pod, so I could move it back(see pic #2). Another benefit of doing this, is that the oem part has a rectangle figure under it. I cut this rectangle and it was a perfect size for the gauges, w/o having to guess(see pic #3).
Pic #2

Pic #3

Next, i sanded the pod and the oem part so the plastic weld can take hold. Nothing too crazy, just make it a little rough. Then, line up the two parts and apply the plastic weld. I left it to dry for about 1 hr under the sun(see pic #4). After is dry, start sanding to make it smooth. This is the hard part if you do it by hand like me. I don't have a lot of power tools, so it was all muscle. It takes more than two hrs to sand this ******* plastic weld. It gets really hard. I used sand paper #60 first, then #120 & #1000 to smooth it out(see pic #5 & #6).
Pic #4

Pic #5

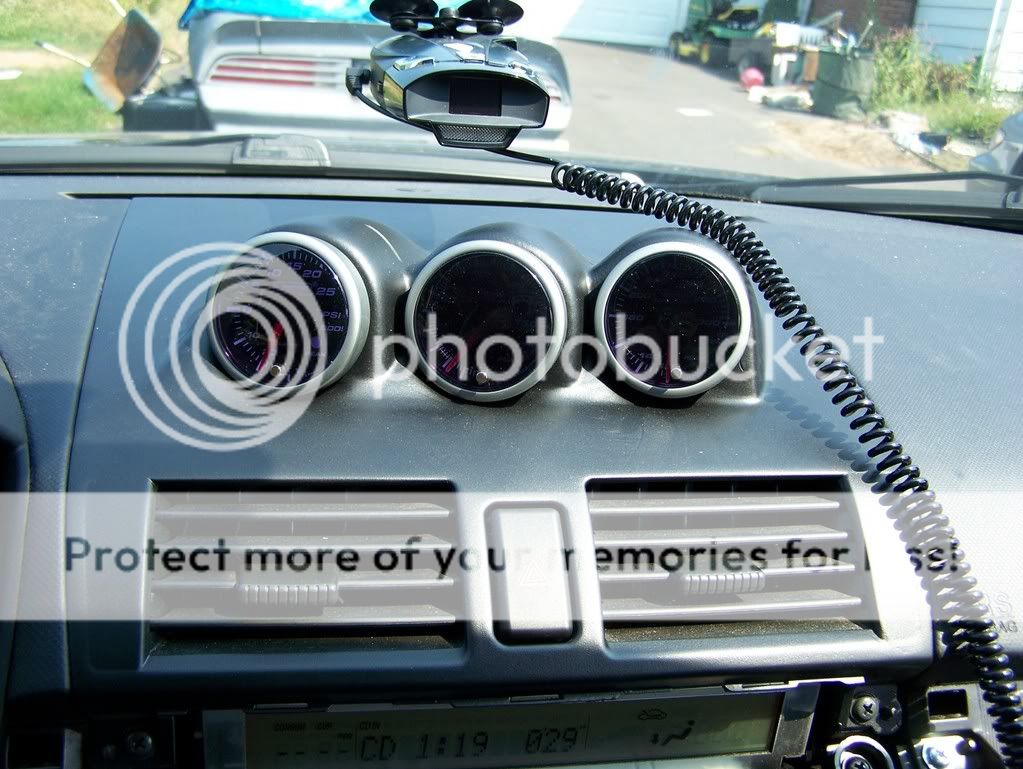
After you done sanding to your standard, clean it up and paint. I used flat black auto interior spray paint. This is the easy part and the paint dried really quick, but make sure you apply thin coats of paint to make it look more natural. If you look at the completed pics(#7 to #10), you can still notice the lines of the plastic weld. Is not a big deal to me, because I was satisfied with the results. But if you want it to look "perfect", you need to do a lot more sanding, and I was tired, so I stopped. Anyway, it looks a lot better than using the black silicone PG supply with the pod.
Hope you guys like it.
This is a simple "how to" to make a center gauge pod. This is my first time making something like this, but it was easy. So if I made it, you can too.
First thing I did was to order some prosport gauges(boost & water temp.) and a center gauge pod from PG. Then I needed to find a oem dash piece. Brand new this part cost about $180, so obviously I decided against it. I started calling local junk yards, and found one for $65. Then a I got some plastic weld for the local parts store(see pic #1). I used 2 tubes. Now for the cutting.
Pic #1
The PG gauge pod is a pretty good pod. But it covers most of the oem part, meaning, the front part is too close to the a/c vents. So, when you apply the plastic weld, you risk getting some on the vent holes. Additionally I didn't like how it looked, I wanted the gauges a little farther back, not too much. I cut 1 to 1.5 in. from the back part of the pod, so I could move it back(see pic #2). Another benefit of doing this, is that the oem part has a rectangle figure under it. I cut this rectangle and it was a perfect size for the gauges, w/o having to guess(see pic #3).
Pic #2
Pic #3
Next, i sanded the pod and the oem part so the plastic weld can take hold. Nothing too crazy, just make it a little rough. Then, line up the two parts and apply the plastic weld. I left it to dry for about 1 hr under the sun(see pic #4). After is dry, start sanding to make it smooth. This is the hard part if you do it by hand like me. I don't have a lot of power tools, so it was all muscle. It takes more than two hrs to sand this ******* plastic weld. It gets really hard. I used sand paper #60 first, then #120 & #1000 to smooth it out(see pic #5 & #6).
Pic #4
Pic #5
After you done sanding to your standard, clean it up and paint. I used flat black auto interior spray paint. This is the easy part and the paint dried really quick, but make sure you apply thin coats of paint to make it look more natural. If you look at the completed pics(#7 to #10), you can still notice the lines of the plastic weld. Is not a big deal to me, because I was satisfied with the results. But if you want it to look "perfect", you need to do a lot more sanding, and I was tired, so I stopped. Anyway, it looks a lot better than using the black silicone PG supply with the pod.
Hope you guys like it.
Last edited: