First purchase:
VHT-brand "Nite Shades" tinting paint ($10 per can)
Assortment of sandpaper 400, 800, 1000, 2000 ($4-10)
Small can of Clear Coat Paint ($3-6)
Dawn dishwashing Soap($1-2)
masking tape
Rubber/latex gloves (optional)
Car wax of your choice (optional)
======================================================
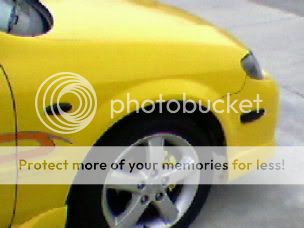
Go From This:

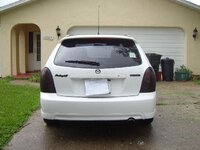
To This:

Remove your Bumper Lights
1. Remove the 3 retaining screws from the fender well.
2. Reach inside the fender well, and depress the metal clip on the back of the turn signal housing. (When I say Depress, I mean push down on, not tell the turn signal your life story.)
3. While holding this clip in, use your other hand to pull/wiggle the housing out of the bumper. This might take some force, since it's locked in there pretty well. Also, remember to be pulling on the middle/back end of the housing, not near the front end.
4. Once you free the rear end/sides of the signal, you should be able to swing (pull) out the front end and disconnect the housing/remove the bulb/wiring.
Clean Your Parts (car parts, not private parts)
5. Now give your turn signals a nice scrubbing with some Dawn dishsoap. This helps remove wax, bug guts, and other oils from the surface.
6. Once they are dry. sand them light-medium with the 400 grit paper. This will also help to get rid of the bumpy lense coding on the bottom.
7. Now sand well with the 800 grit paper. The better/smoother you sand it, the better it will come out.
8. Wash the lenses again with soap to remove any dust particles and fingerprint oil. From here out out, either be careful, or use a rubber
(or latex) glove.
9. Use masking tape to cover any part of the housing that you don't want to paint. Although this step might not matter, since people won't see the backside of the lense.
Spray Day
10. Once they are nice and dry, break out the VHT paint in a well ventilated area! This stuff smells worse than normal paint and will kick you right in the brain, so try not to breathe too much of it in. Be sure to spray in a straight line and keep the can about a foot away from the lense. This stuff goops easily, and if you F it up, you gotta let it dry, sand it all down, and start over! Apply light coats, so that you can get the look that you want. Plus this stuff will darken a little as it dries, so give it about 15 minutes between coats.
11. Once you get it to the desired darkness level, You should let it cure for a few hours, and then check the surface. If you need to, use a 1000-2000 grit paper to LIGHTLY remove "orangepeel" or dust. Be sure to use a nice (microfiber) rag to remove any dust before continuing.
13. Now you can add 2-3 coats of clear coat to the lense. Do this as per the directions, and let it cure, before giving it a light sanding with 2000 grit paper (if needed).
PS..Don't forget the Beer
15. Remove any Masking tape, and clean the lenses Just wash them off.
16. Add a coat or 2 of wax to shine them up nice and glossy
17. Reinstall by reversing the removal instructions. Don't forget to plug everything in.
18. Step back, revel in your craftsmanship, and post up some pics!
tony
Last edited:
")