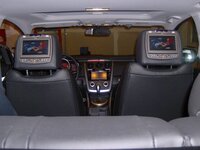
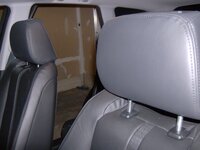
How to install DVD headrests (w/ pics) in a Mazda CX-7

chris41

Member
Contributor
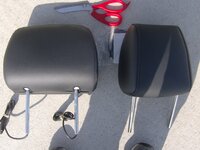
My Ford Freestyle headrests came yesterday (thanks Alpha Wolf) and I started my 1 hour installation (or so I thought).
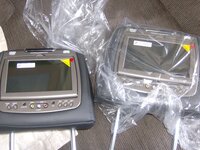
CX-7 DVD Headrests 001.jpg CX-7 DVD Headrests 003.jpg

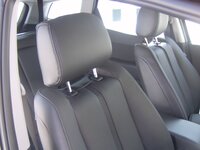
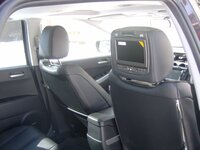
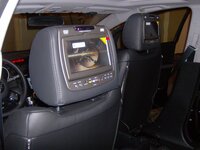
These fit perfectly but are a bit wider and they don't stick as far forward when mounted.

CX-7 DVD Headrests 014.jpg

I was chartering in unknown territory and wasn't entirely sure how I wanted to run the wiring. I have the service manual which was helpful, but also confusing and out of order. I knew I wanted to use the accessory outlet (I still call it a cigerette lighter) inside the console for my power source.

You have a centralized box where 2 wires from each headrest plug in, a power and ground wire plug in, and a wire that plugs in which is your FM antenna. Sounds fairly simple......

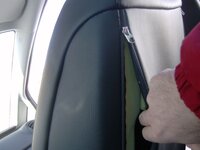
The seats have a zipper on each side in the back. Underneath the seat is a plastic wing attached to the zipper that simply hides the zipper from view. Simply pull it out and unzip each side, giving you access to the inside of your seat.

CX-7 DVD Headrests 005.jpg CX-7 DVD Headrests 007.jpg
 
continued.....

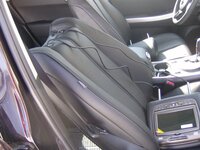
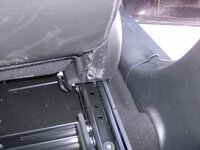
Remove your stock headrests and replace with the new ones while running the cable down the post holes.

CX-7 DVD Headrests 008.jpg CX-7 DVD Headrests 009.jpg CX-7 DVD Headrests 010.jpg

Zip tie the cables (not tight) to the seat frame inside the seat back. The cables need to be able to move when you slide the headrest up and down and when you adjust your seat.

That's the easy part.....

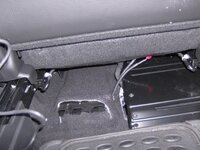
I decided to mount the central connection box with double sided tape on top of the Nav disc player under the passenger seat. I needed to run the cables from the driver's seat to this box with an obstruction in the way....the center console.

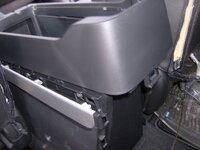
The easy way would be to run the cable over the carpet (under the seat), under the console, and under the passenger seat. But I wanted to run the cable UNDER the carpet. Therefore, I needed to remove the center console (I will post a thread on this soon). I didn't actually remove it from the car, but it was completely free and had my daughter hold the back end up in the air while I ran the cables.
 
Removing the Center Console

This was tricky for me at first but thanks to some posts here and my service manual, it's really quite simple.

First, remove the panel end at the back of the console by sliding in a small putty knife (drywall type). Do NOT use a screwdriver cause the plastic is soft. Just unsnaps fairly easily.

CX-7 DVD Headrests 016.jpg

Then starting from the rear, pull the brushed aluminum molding that runs along both sides at the top. They unsnap easily too.

CX-7 DVD Headrests 020.jpg

With the side moldings off, you can now remove the panel on top where the automatic shift handle is located. This has to be done in order to access some screws inside the console near the dashboard.

Unscrew the shift knob. Lift out the round panel that has the P N D M. Unsnaps very easily by pulling upward. Pull up the the next panel and it unsnaps too.

Where the shifter mounts, there are 2 screws in front of the shifter and remove. Don't worry, we're not doing anything to the shiftter itself. These screws hold down the console only.

Under the dash, there are 2 more screws to remove. You will need a right angle phillips screwdriver because they are actually under the radio and there is no room for a regular screwdriver.

And next, there are (2) 9/16 bolts (I thought for sure they would be metric) that mount the very front of the console to the front of the car. My radio bezel was already off when I started, so I'm not sure if these bolts can be accessed with the radio bezel still in place? (I think you can).

Sorry for no pics here, but it's a pain to always stop to take pictures. I will try and edit the next few days with diagrams from the service manual.

Along the bottom of the center console, on each side, are (2) plastic caps that pop out easily using a jewler's screwdriver. You need to move the seat forward to access the one, and all the way back for the other.

CX-7 DVD Headrests 015.jpg

There is also a plastic pin all the way up front on each side at the bottom (easily seen on the pic above). Gently pry it out using the jewler's screwdriver.

That's it! The console is free! I didn't quite do it in that order so if I forgot any screws, please forgive me. If you truly need to take it literally out of the car, you may have to pull off the sides which are snapped in. It's completely free at this point which allows you to raise the back high enough to run your cables and wiring.

This may seem complicated while reading, but is actually easy and the parts all unsnap without fear of breaking.
 
Last edited:
Running the wire

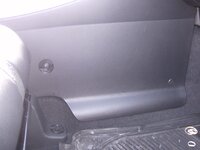
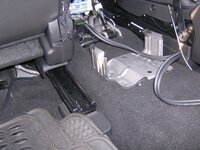
I ran the (2) cables inside the driver's seat out the right corner of the seat and thru the rubber guard at the right seat mount. Next, under the carpet where there is an opening for the HVAC vent under the seat.

CX-7 DVD Headrests 024.jpg

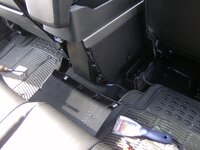
It came out the middle opening and I just kept it going to the passenger's side underneath the carpet too. I actually ran it under the HVAC floor vent underneath the passenger side and poked a hole in the carpet to exit.

CX-7 DVD Headrests 025.jpg

That is probably the hardest part from a logistical standpoint.
 
Connecting the power

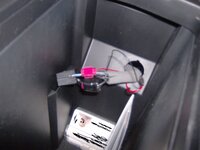
I pulled out the accessory outlet from the inside of the console pocket by using a hook like tool to grab the outlet where it has some cutouts and pulled hard upward. You now have access to both a ground (black) wire and power (blue) wire. I used wire splicing connectors from Radio Shack to connect my power wiring. Then I wrapped each one with electrical tape.

CX-7 DVD Headrests 026.jpg

I ran the wiring under the carpet and out the same hole as the cables (underneath the passenger seat).

I powered up the driver's side headrest and it actually worked!!

CX-7 DVD Headrests 027.jpg

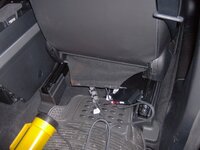
Next, I ran the cables out the bottom of the passenger seat to my box. There was a lot of cable since I was so close to the box itself.

CX-7 DVD Headrests 028.jpg

Notice the flashlight....it was dark outside.

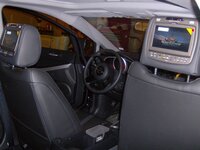
I powered up BOTH screens........

CX-7 DVD Headrests 030.jpg

Started feeling studly at this point....
 
Last edited:
Finishing up......

I wired tied the driver's side cable underneath the seat. You have to leave enough slack for seating and headrest adjustment so either can freely move without pulling on the cables.

I zipped up the zippers and tucked the plastic wing under the seat to hide the zipper.

I reinserted the (2) bolts back into the front of the console, the (2) screws with the right angle phillips screwdriver, the (2) screws in front of the shifter and the (2) screws on each side of the console along the bottom.

I reinserted the plastic pins along the bottom of the console at the very front and placed the plastic round covers over the screws along the bottom of each side.

I snapped the plastic cover over the shifting mechanism, then the P N R D M round piece, and followed by the shift handle.

Snap the brushed aluminum moldings back in place, starting from front to back. Insert the accessory outlet back into it's hole and snap the back end console back in place. I snapped in my radio bezel which was removed by the dealer during my Sirius installation and left off per my request.

The console is finished!!

Next, zip tie the passenger side cables under the seat and I think we're finished.....9 hours later!!

CX-7 DVD Headrests 031.jpg CX-7 DVD Headrests 034.jpg

I realize there are probably easier ways to install headrests, but I'm just a regular old dude that decided to post my experience in order to help others who may find themselves a slave to their kids too. I could have done this MUCH faster had I been able to read this first.

I will add stuff as I come across it, including the company's installation instructions too. Hope this was a help.....
 
Here is Invision's headrest installation instructions.

Hope this also helps.....
 

Attachments

  • 2006f150headrests.pdf
    688.5 KB · Views: 2,985
And now the service manual pics....

This should do it.....
 

Attachments

  • interior trim.pdf
    592 KB · Views: 1,525
  • interior trim 2.pdf
    779.4 KB · Views: 972
  • interior trim3.pdf
    736.9 KB · Views: 945
Nice post..

I have Rosen DVD/game units installed in my CX7

The kids are spoiled now and want them in the wifes Baja as well.

I had them installed though. Nice post and instructions....
 
I'm gonna post new instructions soon as I don't like all the extra cable coiled under my seats. This time I will install similar to what the manufacturer recommends. When you remove the radio bezel, there is a shelf just underneath the dash and above the radio that would be a great place to mount the connection box. I will tap into the auxiliary outlet by the shifter for power, and run the DVD player cables down each side of the center console (tucked underneath each side so you can't see them). Should be a cleaner install. Just waiting for warm weather....
 
Made some changes....

Yesterday I finally re-routed my video cables to make a cleaner install. I didn't take pics because it slows down everything to stop and take pics.

I originally placed the connection box under the passenger seat and simply coiled up any excess video cables. The problem I found is the wiring gets pulled a lot under the seat anytime someone adjusts the seat itself.

I re-mounted the connection box just under the dash behind the radio bezel (and above the HVAC vents). If you remove the radio bezel, you will see a nice shelf for mounting. Just to the right of the vent openings is an open slot to run the video cables up to this shelf where I now mounted the video connection box.

I simply re-ran the video cables along underneath each side of the center console. I used a piece of bendable metal (a hanger) to pull the cables up behind the radio and out the slot. I did the same for the power wire and spliced into the accessory outlet wiring.

After plugging in all my wires into the box and testing my video system, I simply reinstalled all the interior pieces and done!
 
My Ford Freestyle headrests came yesterday (thanks Alpha Wolf) and I started my 1 hour installation (or so I thought).
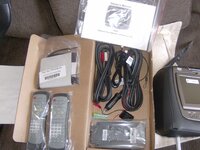
View attachment 126736 View attachment 126737

These fit perfectly but are a bit wider and they don't stick as far forward when mounted.
View attachment 126738

I was chartering in unknown territory and wasn't entirely sure how I wanted to run the wiring. I have the service manual which was helpful, but also confusing and out of order. I knew I wanted to use the accessory outlet (I still call it a cigerette lighter) inside the console for my power source.

You have a centralized box where 2 wires from each headrest plug in, a power and ground wire plug in, and a wire that plugs in which is your FM antenna. Sounds fairly simple......

The seats have a zipper on each side in the back. Underneath the seat is a plastic wing attached to the zipper that simply hides the zipper from view. Simply pull it out and unzip each side, giving you access to the inside of your seat.
View attachment 126739 View attachment 126740

Did you purchased them to Ford Dealer?
 
Last edited:
They are Ford OEM DVD headrests for a Ford Freestyle from a company called Invision. They will cost at least $1500 installed from a Ford dealer. I don't know if a Ford dealer would install them in the CX-7? They are covered under the new car warranty if you purchase and have them installed at the dealership. I bought mine from Bones Enterprises (Ebay) for $1000 but I have no warranty.

Ebay has many DVD headrests from China for cheap prices (and expensive shipping). Quality seems inconsistent....most are happy and others aren't. Some have poles too small and the headrests move back and forth. Many have extra large headrests that may impede checking your blind spot. They may also look funny since the top of the seats have a cut out and the headrests will look too large.

Some quality brand names are Invision, Myron & Davis and Rosen. You will pay top dollar for these brand names. You need to also determine whether you want a DVD player headrest mount, or just headrest monitors and a separate player. Overall, way overpriced but neat to own. Taking the wife to Niagara Falls next month and will probably rent some movies for the 4 hour ride.
 
gday mate
great post! Am looking at doing a similar thing myself. Tell me...what is the width of your new headrest. Obviously they dont sit in the groove int eh seat, and I am looking at the ones on the market which all seem about 300mm wide and want to see how they sit/look first
Chris
 
Back