The following is a cut and paste I pulled form a PM question on what would be needed after buying one of my DIY exhaust header flanges to build a DIY low boost turbo kit for the 1.6 ZM Proetege. It can all be done for under $1000.00 easily and you'd have the skills, knowledge, and tools (MIG WELDER) to make a lot more than just a turbo set up.
QUOTE,
"Question: If I go turbo in the 1.6, what is the best inexpensive, yet reliable way to do it... a kit or piece together. I've never put that kind of work into my car"
ANSWER: First get Corky Bell's Book Maximum Boost read it ten times then get a book titled How to Tune and Modify Engine Management Systems byJeff Hartman for understanding how EFI works and making it work for you. And either get the Hayes or Clinton service manual for the 1.6 Protg and maybe even the 99 Protg Field Manual service manual form the factory. I got one of ebay for like $10.
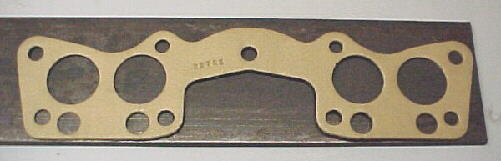
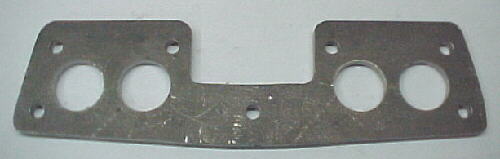
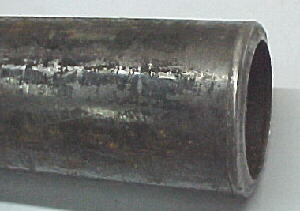
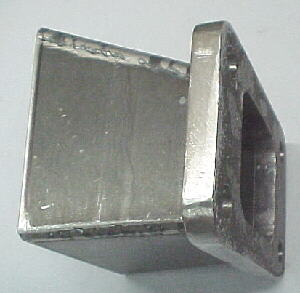
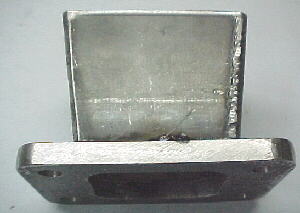
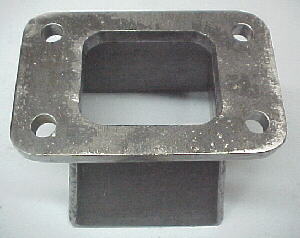
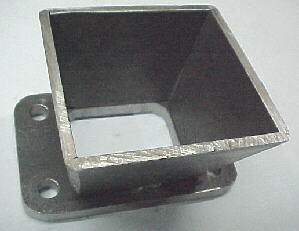
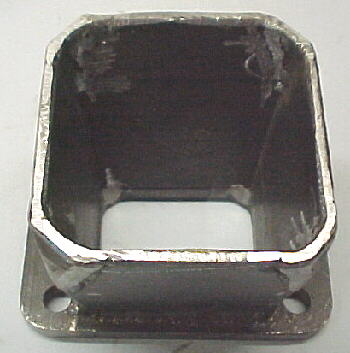
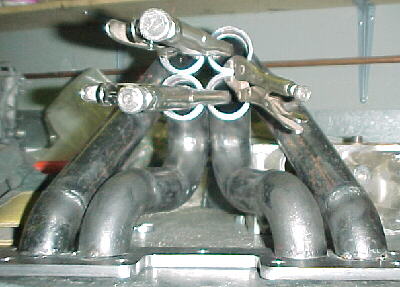
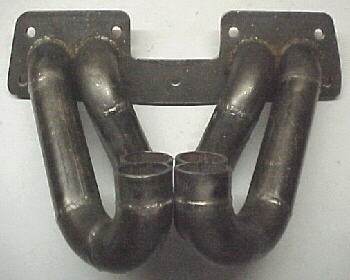
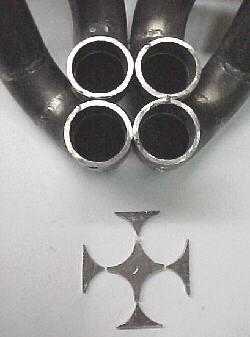
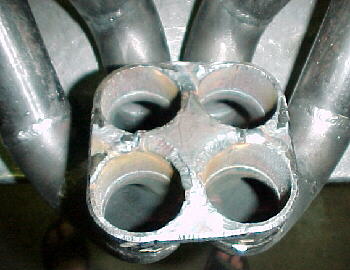
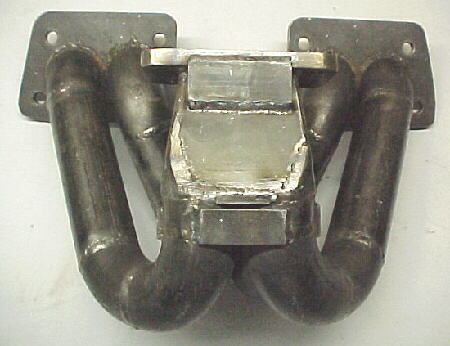
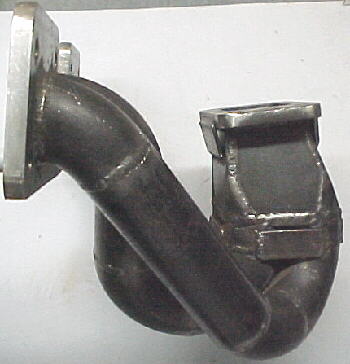
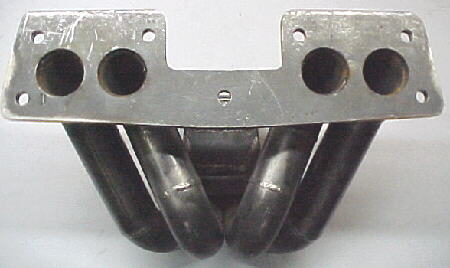
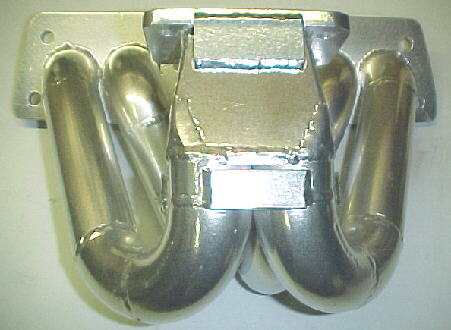
Then buy one of my exhaust flanges for the 1.6 motor. Then go to Sears, Lowes, Home Dept, Harbor Freight preferable a local welding supply shop get a now very afford MIG welder now a days under $200. Practice by making a nice welding table or coffee table or wall art for mom or the girlfriend.
Then make sure the engine is in top condition (maintenance should always be kept up to standards) with good tune up per standards set in the service manuals. Perform a compression and or leak down test make sure all is with in factory specs. Install new time belt or verify it’s good to go along with accessory belts. Upgrade oil to maybe a synthetic with lower cold weight viscosity for proper lubing of the turbo I use 5-30W. Add in a good oil filter. Considered maybe install an oil cooler cheap of eBay now-a-days. The turbo will mean keeping tabs on the oil due to the turbo adding extra wear and heat which means you'll have to stay on top monitoring the oil (make it a habit when putting gas in the car check the oil). You need to be prepared perform frequent oil and changes depending on how you drive the car. If I did a track day in July with five 20 minutes sessions on the daily driver I’d be change the oil before the event and maybe after if it really worn down. . The coolant system do a system flush and pressure check, mach sure all hoses are good. Then maybe consider installing a slight higher pressure cap (if the stock rad has lots of miles behind it these maybe to mush for the epoxy seals and spring a leak) or lower thermostat or best would be an fat racing aluminum bigger volume radiator w/1.1/3.bar cap. I ran a racing aluminum 55mm thick radiator made for use on a civic/ de-sol. Half the widths of stock but the same volume so I got the radiator over to the driver side more away form the turbo and header preventing it form getting heat soaked. I ran it with an 1.3 bar cap, 190 thermostat, silicon hoses, and 16" slim line fan the put out like 1400CFM at very low amps. I never had any cooling issues and it made more room for my oil cooler, turbo, external wastegate, header, downpipe, configuration. Of course I had no air conditioning either tit-for-tatJ. The Ignition system get some cooler heat range plugs (don't forget anti-seize on the threads as you'll want to be checking your plugs often one good way to see if your running lean or rich along with regular compression checks which means regularly removing the plugs) plus get some new plug wires and put AMBLE amounts of die-electric grease on all the electrical connections (to include the top of the plugs) in the engine bay at least once a year. Make sure the battery is charging up good and holding its charge that along with checking the alternators output is good and steady under load. Maybe consider getting a red or yellow top Optima. Make sure you have good grounding to the engine and chassis. The Hayes service manual explains all these and has checks you can do. . The wiring/electrical does go bad and faster then you think. Lastly check the fuel system via pressure check at idle thru WOT. Consider getting the injectors serviced/cleaned or bigger ones if you want to run higher boost. Also think about replacing the stock fuel pump with a Walboro 255gph bump very easy to do, basically all imports use the same type of internal fuel pump. I've ran a Walboro 255gph intended for a WRX in the Protg no problem.
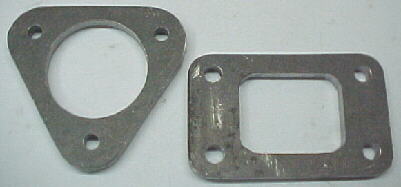
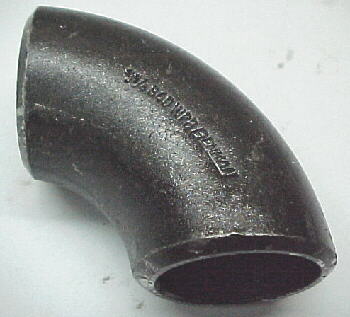
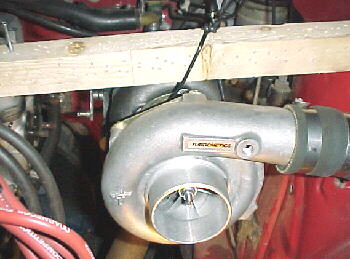
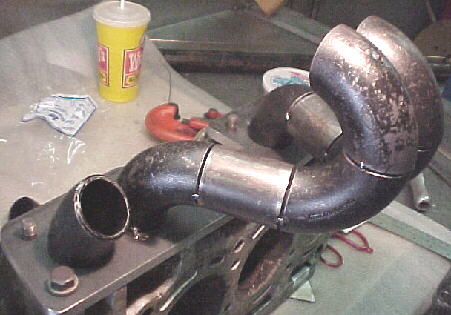
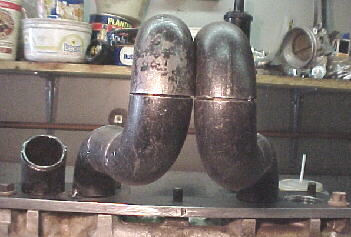
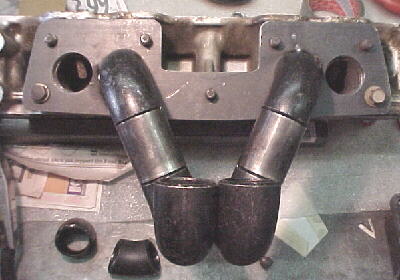
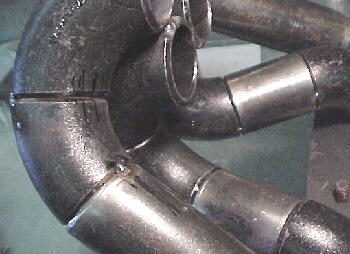
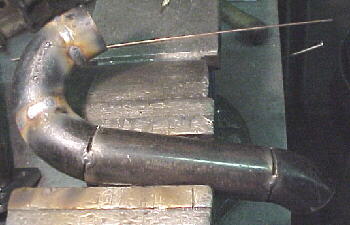
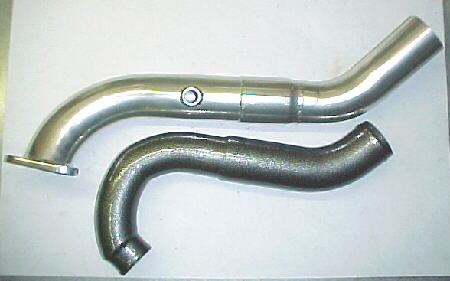
Now you’re ready for the turbo build. Start by buying a universal stainless steel header kit or steel if you want to go cheaper in 1 1/4" depending on the exhaust port sizes (Can’t remember what they are) with lots of bends for the making header basically just a big box of U bends is what needed. Then get a universal Stainless steel 2 1/2" exhaust pipe kit for making the down-pipe and exhaust system. If it doesn’t come with it get a piece of flex pipe for the mid pipe to isolate engine movement. A couple set of flanges or wide clamps for the downpipe to connection midpipe to the rest of the exhaust system connection may need one for routing the exhaust over the rear suspension to the muffler.. Some hangers and your done all cheap of eBay or several source on the web JEGs, Summit, Speedway, etc and if you need something quick there tons of muffler shops around that will sale ya just piece of pipe. If you need a cat get the highest flowing one you can afford same with the muffler. I like the new www.aeroexhaust.com brand of mufflers (used by Grand Am American Lemans series etc). NOTE the trick with exhaust system is to never go smaller in pipe diameter than the outlet diameter of the turbo, form the down pipe all the way back to the tail pipe. And if you do step it up in diameter anywhere in the system say at the cat or muffler do not step it back down in diameter after it. Then get the turbo a T3, 14G, or IHI VF22 etc (depends on what you want high end boost or quick spool up and what’s available) turbo kit of eBay that comes with the oil lines and stainless steel manifold and downpipe flanges I’ve seen them as cheap as $300 Always get new turbo if you can used ones are going to have issues unless you know the source and the condition of the turbo. Rebuilding the turbo seals is not the hard and kits be found all over eBay. . FYI The turbo oil supply will be via tapping into the OEM oil pressure sensor port on the engine block via a tee fitting which by the way is weird BPT or metric pipe thread pattern. Once you get the oil sender out you can measure the threads see what is you need. The oil drain will go into the top of the oil pan via a fitting all supplied in the kits usually. Then from eBay get an universal FMIC (Front Mount Intercooler) kit don't get a huge one ( like a lot of bone heads do) that will cause a lot of lag very bad, get one with a selection of IC piping with different bends, t-bolt clamps and couplers for like $150. Keep the FMIC size no bigger than maybe 15" long x 10' high x 3" wide with the IC piping being 2" for the inlet form turbo (you’ll need to measure your turbo high side outlet diameter) and 21/2" outlet to the throttle body which I believe is 60mm just under 2 ” . Next get a BOV (Blow Off Valve) kit that has small piece of pipe same diameter as your FMIC outlet 2 ” piping with the BOV flange welded to it usually around $50 of eBay. Then you’ll need a Raising Rate Fuel Pressure Regulator (FPR) kit from eBay usually around $50 that can do something like 7:1. The Super FPR like the ones from Bell or Vortec are nice as they can be adjusted to what ever manifold pressure level to fuel pressure raising rate i.e.2:1 to 12:1 you want. This will allow you to set the base fuel pressure which is spec around 38-40 psi and then under boost at six pounds you’ll have fuel pressure around 70-80 psi. Which means you’ll be forcing more fuel in needed for the added air for a proper AFR, which under boost should be somewhere between 13:1-10:1 around 11:1 I consider optimal for low boost in the 1.6 ZM but I’m way conservative on AFRs under boost more so than most but I’ve never blown a motor either form being to lean. . Remember after reading the above books these will all be easily to understand Plan on making six pounds of boost with an external or internal wastegate. Wastegate depend on the type of turbo you get if has internal onw or not I like external ones as they are easier to control but makes for more fabrication work and add to the price of it all. The wastegate is used to control boost via a spring and or diaphragm controlling a bypass valve for routing exhaust gases around the turbo once the desired boost level is reached. . With the external wastegate you can set the boost level via a spring rated for given boost level and forget about it. Very response, no fuss, and works every time no worries. Boost controllers add expense and weather manual or electrical are just and all around general pain in the ass they never seem to work right difficult to set up etc etc etc. On the 1.6 ZM at 6 to 8 pounds of boost you will be easily upping the power by 40% J! The power increase will be from 87whp to about 147whp that’s the results I got from my first turbo set up which is basically the same as being described where but with a used T25 turbo and a very small 1gen Eclipse side mount IC. On stock injectors and stock fuel pump eBay FPR an AFC two check valve inline on the MAP sensor. And a 2 cat back with anRandom Technology cat and cheap coffee can universal muffler! This will also cause you to need a new upgraded clutch as it will overpower the stock clutch handling capabilities. Depending on the age of the clutch and how you drive the now boosted, higher horse power motor will burn the clutch up in very sort amount of time if it holds at all. Also plan on getting the flywheel resurfaced when doing a clutch as 95% percent of time it will need it. Also note every time you replace a clutch and or flywheel always get a new throughout bearing for the clutch and pilot bearing and crank bolts for the flywheel very cheap parts that if they fail can make for a very bad day. Since you going to have to remove the tranny for the clutch might as well replace the tyranny with some nice synthetic gear lube since it going to see some more abuse with the added power. If you have an automatic go buy a car with a manual transmission sorry ! Or try and find some to do a higher stall converter, valve body job, along with a most important rebuilding the trans with upgraded clutch packs. And you may want to add a tranny cooler. if you can find someone good luck and be prepared as it will probably cost more money than the turbo kit along with the value of the car. So that is the basics of the kit. “Walla all-a peanut butter sandwich” J a simple DIY turbo kit on a 1.6 Protg ZM motor making about 6 to 8 psi.
But to be happily boosting along you'll need to along with keep the engine in top notch condition some, monitoring and safety items. You'll need a boost gauge foe sure and I recommend both an AFR gauge if possible an WBO2 one (wide band Oxygen sensor) and a EGT (exhaust gas temperature) gauge to keep tabs on things (you'll learn why when you read the books). Next to make it work with the OEM ECU happily. A voltage clamp device like a SAFC for fooling the MAF Mass Air Flow sensor which in the Protg is also an IAT Inlet Air Temperature sensor) sensor from seeing the increased air flow (Cork sport has something also to I think to do this a search of the web will find some other company make MAF fooling device also). Also some one way vacuum check valves to hide the boost form the MAP sensor (Manifold Absolute Pressure sensor) will be needed ($1 at the local Auto Parts store). You'll need to run 93 or 91 octane whatever is available in our area.
Next you may want to consider the following two safety items: first a Water / alcohol / methanol whatever you want to call it injection kit very cheap now days and can be found everywhere. Or can be done the good old DIY: Just need a 12V bilge/sump pump from the boating supply house or you guest it eBay capable of 70-100 psi, some type of bottle like and old windshield washer fluid bottle to hold the water, alcohol, or methanol (I like the Boost Juice from Snow Performance available though Summit). If you get a washer fluid bottle that has float in it you can wire it up to a LED so you know when the bottle is running low. Next you’ll need a NOS or fuel jet nozzle or you can get just a water injection nozzle form one of the suppliers that make the kits. You need a fitting for the nozzle for mounting it in the intake pipe to spray it directly into the throttle body/plate as best possible. Then some 1/4 hard with plastic refrigerator water supply hose (plenty capable of holding 100psi) to plum it all up how much depends on where you mount the pump in relation to the bottle in relation to the nozzle. I’ve seen guys use -3AN hose from NOS kits but that can get really expensive. Best to have the pump as close to the nozzle as possible and the supply bottle above the pump so its gravity feed allowing the pump have a ready supply of fluid available at any time. Next get either hose barb or push lock fittings for running the hose form the bottle to the bump then the pump to the nozzle. All the fittings can easily be found at local Home Depot or Ace Hardware in the pluming department Lastly you'll need boost pressure switch plumed into the a intake manifold vaccum line, (can be found on Ebay) for supplying 12V power to the pump while under boost to spray the methanol. You can even get switches that have manual setting to determine at what boost level they activate or even little smart boxes the will not only come on a certain boost level but control the amount of voltage to the pump which determines how much pressure it pumps at. Nice safe guard helps keep the internal temps down, adds air density, if done right can be used to increase horse power. Last is a Knock warming sensor device lets you know if there is detonation. They can be hard to set up properly but can have the ability to activate things like the water injection system, or if there is an electric boost controller cutting the boost.
to be continued in next post to many words

QUOTE,
"Question: If I go turbo in the 1.6, what is the best inexpensive, yet reliable way to do it... a kit or piece together. I've never put that kind of work into my car"
ANSWER: First get Corky Bell's Book Maximum Boost read it ten times then get a book titled How to Tune and Modify Engine Management Systems byJeff Hartman for understanding how EFI works and making it work for you. And either get the Hayes or Clinton service manual for the 1.6 Protg and maybe even the 99 Protg Field Manual service manual form the factory. I got one of ebay for like $10.
Then buy one of my exhaust flanges for the 1.6 motor. Then go to Sears, Lowes, Home Dept, Harbor Freight preferable a local welding supply shop get a now very afford MIG welder now a days under $200. Practice by making a nice welding table or coffee table or wall art for mom or the girlfriend.
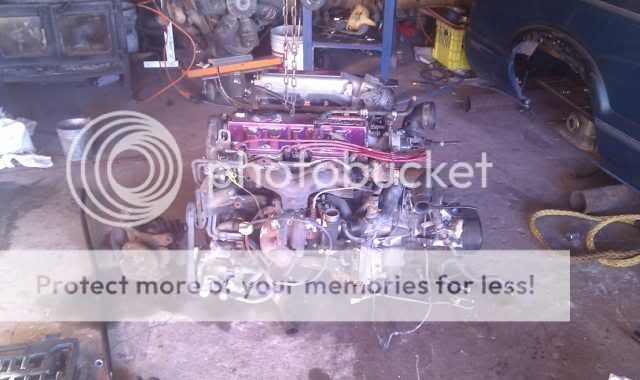
Then make sure the engine is in top condition (maintenance should always be kept up to standards) with good tune up per standards set in the service manuals. Perform a compression and or leak down test make sure all is with in factory specs. Install new time belt or verify it’s good to go along with accessory belts. Upgrade oil to maybe a synthetic with lower cold weight viscosity for proper lubing of the turbo I use 5-30W. Add in a good oil filter. Considered maybe install an oil cooler cheap of eBay now-a-days. The turbo will mean keeping tabs on the oil due to the turbo adding extra wear and heat which means you'll have to stay on top monitoring the oil (make it a habit when putting gas in the car check the oil). You need to be prepared perform frequent oil and changes depending on how you drive the car. If I did a track day in July with five 20 minutes sessions on the daily driver I’d be change the oil before the event and maybe after if it really worn down. . The coolant system do a system flush and pressure check, mach sure all hoses are good. Then maybe consider installing a slight higher pressure cap (if the stock rad has lots of miles behind it these maybe to mush for the epoxy seals and spring a leak) or lower thermostat or best would be an fat racing aluminum bigger volume radiator w/1.1/3.bar cap. I ran a racing aluminum 55mm thick radiator made for use on a civic/ de-sol. Half the widths of stock but the same volume so I got the radiator over to the driver side more away form the turbo and header preventing it form getting heat soaked. I ran it with an 1.3 bar cap, 190 thermostat, silicon hoses, and 16" slim line fan the put out like 1400CFM at very low amps. I never had any cooling issues and it made more room for my oil cooler, turbo, external wastegate, header, downpipe, configuration. Of course I had no air conditioning either tit-for-tatJ. The Ignition system get some cooler heat range plugs (don't forget anti-seize on the threads as you'll want to be checking your plugs often one good way to see if your running lean or rich along with regular compression checks which means regularly removing the plugs) plus get some new plug wires and put AMBLE amounts of die-electric grease on all the electrical connections (to include the top of the plugs) in the engine bay at least once a year. Make sure the battery is charging up good and holding its charge that along with checking the alternators output is good and steady under load. Maybe consider getting a red or yellow top Optima. Make sure you have good grounding to the engine and chassis. The Hayes service manual explains all these and has checks you can do. . The wiring/electrical does go bad and faster then you think. Lastly check the fuel system via pressure check at idle thru WOT. Consider getting the injectors serviced/cleaned or bigger ones if you want to run higher boost. Also think about replacing the stock fuel pump with a Walboro 255gph bump very easy to do, basically all imports use the same type of internal fuel pump. I've ran a Walboro 255gph intended for a WRX in the Protg no problem.
Now you’re ready for the turbo build. Start by buying a universal stainless steel header kit or steel if you want to go cheaper in 1 1/4" depending on the exhaust port sizes (Can’t remember what they are) with lots of bends for the making header basically just a big box of U bends is what needed. Then get a universal Stainless steel 2 1/2" exhaust pipe kit for making the down-pipe and exhaust system. If it doesn’t come with it get a piece of flex pipe for the mid pipe to isolate engine movement. A couple set of flanges or wide clamps for the downpipe to connection midpipe to the rest of the exhaust system connection may need one for routing the exhaust over the rear suspension to the muffler.. Some hangers and your done all cheap of eBay or several source on the web JEGs, Summit, Speedway, etc and if you need something quick there tons of muffler shops around that will sale ya just piece of pipe. If you need a cat get the highest flowing one you can afford same with the muffler. I like the new www.aeroexhaust.com brand of mufflers (used by Grand Am American Lemans series etc). NOTE the trick with exhaust system is to never go smaller in pipe diameter than the outlet diameter of the turbo, form the down pipe all the way back to the tail pipe. And if you do step it up in diameter anywhere in the system say at the cat or muffler do not step it back down in diameter after it. Then get the turbo a T3, 14G, or IHI VF22 etc (depends on what you want high end boost or quick spool up and what’s available) turbo kit of eBay that comes with the oil lines and stainless steel manifold and downpipe flanges I’ve seen them as cheap as $300 Always get new turbo if you can used ones are going to have issues unless you know the source and the condition of the turbo. Rebuilding the turbo seals is not the hard and kits be found all over eBay. . FYI The turbo oil supply will be via tapping into the OEM oil pressure sensor port on the engine block via a tee fitting which by the way is weird BPT or metric pipe thread pattern. Once you get the oil sender out you can measure the threads see what is you need. The oil drain will go into the top of the oil pan via a fitting all supplied in the kits usually. Then from eBay get an universal FMIC (Front Mount Intercooler) kit don't get a huge one ( like a lot of bone heads do) that will cause a lot of lag very bad, get one with a selection of IC piping with different bends, t-bolt clamps and couplers for like $150. Keep the FMIC size no bigger than maybe 15" long x 10' high x 3" wide with the IC piping being 2" for the inlet form turbo (you’ll need to measure your turbo high side outlet diameter) and 21/2" outlet to the throttle body which I believe is 60mm just under 2 ” . Next get a BOV (Blow Off Valve) kit that has small piece of pipe same diameter as your FMIC outlet 2 ” piping with the BOV flange welded to it usually around $50 of eBay. Then you’ll need a Raising Rate Fuel Pressure Regulator (FPR) kit from eBay usually around $50 that can do something like 7:1. The Super FPR like the ones from Bell or Vortec are nice as they can be adjusted to what ever manifold pressure level to fuel pressure raising rate i.e.2:1 to 12:1 you want. This will allow you to set the base fuel pressure which is spec around 38-40 psi and then under boost at six pounds you’ll have fuel pressure around 70-80 psi. Which means you’ll be forcing more fuel in needed for the added air for a proper AFR, which under boost should be somewhere between 13:1-10:1 around 11:1 I consider optimal for low boost in the 1.6 ZM but I’m way conservative on AFRs under boost more so than most but I’ve never blown a motor either form being to lean. . Remember after reading the above books these will all be easily to understand Plan on making six pounds of boost with an external or internal wastegate. Wastegate depend on the type of turbo you get if has internal onw or not I like external ones as they are easier to control but makes for more fabrication work and add to the price of it all. The wastegate is used to control boost via a spring and or diaphragm controlling a bypass valve for routing exhaust gases around the turbo once the desired boost level is reached. . With the external wastegate you can set the boost level via a spring rated for given boost level and forget about it. Very response, no fuss, and works every time no worries. Boost controllers add expense and weather manual or electrical are just and all around general pain in the ass they never seem to work right difficult to set up etc etc etc. On the 1.6 ZM at 6 to 8 pounds of boost you will be easily upping the power by 40% J! The power increase will be from 87whp to about 147whp that’s the results I got from my first turbo set up which is basically the same as being described where but with a used T25 turbo and a very small 1gen Eclipse side mount IC. On stock injectors and stock fuel pump eBay FPR an AFC two check valve inline on the MAP sensor. And a 2 cat back with anRandom Technology cat and cheap coffee can universal muffler! This will also cause you to need a new upgraded clutch as it will overpower the stock clutch handling capabilities. Depending on the age of the clutch and how you drive the now boosted, higher horse power motor will burn the clutch up in very sort amount of time if it holds at all. Also plan on getting the flywheel resurfaced when doing a clutch as 95% percent of time it will need it. Also note every time you replace a clutch and or flywheel always get a new throughout bearing for the clutch and pilot bearing and crank bolts for the flywheel very cheap parts that if they fail can make for a very bad day. Since you going to have to remove the tranny for the clutch might as well replace the tyranny with some nice synthetic gear lube since it going to see some more abuse with the added power. If you have an automatic go buy a car with a manual transmission sorry
! Or try and find some to do a higher stall converter, valve body job, along with a most important rebuilding the trans with upgraded clutch packs. And you may want to add a tranny cooler. if you can find someone good luck and be prepared as it will probably cost more money than the turbo kit along with the value of the car. So that is the basics of the kit. “Walla all-a peanut butter sandwich” J a simple DIY turbo kit on a 1.6 Protg ZM motor making about 6 to 8 psi. But to be happily boosting along you'll need to along with keep the engine in top notch condition some, monitoring and safety items. You'll need a boost gauge foe sure and I recommend both an AFR gauge if possible an WBO2 one (wide band Oxygen sensor) and a EGT (exhaust gas temperature) gauge to keep tabs on things (you'll learn why when you read the books). Next to make it work with the OEM ECU happily. A voltage clamp device like a SAFC for fooling the MAF Mass Air Flow sensor which in the Protg is also an IAT Inlet Air Temperature sensor) sensor from seeing the increased air flow (Cork sport has something also to I think to do this a search of the web will find some other company make MAF fooling device also). Also some one way vacuum check valves to hide the boost form the MAP sensor (Manifold Absolute Pressure sensor) will be needed ($1 at the local Auto Parts store). You'll need to run 93 or 91 octane whatever is available in our area.
Next you may want to consider the following two safety items: first a Water / alcohol / methanol whatever you want to call it injection kit very cheap now days and can be found everywhere. Or can be done the good old DIY: Just need a 12V bilge/sump pump from the boating supply house or you guest it eBay capable of 70-100 psi, some type of bottle like and old windshield washer fluid bottle to hold the water, alcohol, or methanol (I like the Boost Juice from Snow Performance available though Summit). If you get a washer fluid bottle that has float in it you can wire it up to a LED so you know when the bottle is running low. Next you’ll need a NOS or fuel jet nozzle or you can get just a water injection nozzle form one of the suppliers that make the kits. You need a fitting for the nozzle for mounting it in the intake pipe to spray it directly into the throttle body/plate as best possible. Then some 1/4 hard with plastic refrigerator water supply hose (plenty capable of holding 100psi) to plum it all up how much depends on where you mount the pump in relation to the bottle in relation to the nozzle. I’ve seen guys use -3AN hose from NOS kits but that can get really expensive. Best to have the pump as close to the nozzle as possible and the supply bottle above the pump so its gravity feed allowing the pump have a ready supply of fluid available at any time. Next get either hose barb or push lock fittings for running the hose form the bottle to the bump then the pump to the nozzle. All the fittings can easily be found at local Home Depot or Ace Hardware in the pluming department Lastly you'll need boost pressure switch plumed into the a intake manifold vaccum line, (can be found on Ebay) for supplying 12V power to the pump while under boost to spray the methanol. You can even get switches that have manual setting to determine at what boost level they activate or even little smart boxes the will not only come on a certain boost level but control the amount of voltage to the pump which determines how much pressure it pumps at. Nice safe guard helps keep the internal temps down, adds air density, if done right can be used to increase horse power. Last is a Knock warming sensor device lets you know if there is detonation. They can be hard to set up properly but can have the ability to activate things like the water injection system, or if there is an electric boost controller cutting the boost.
to be continued in next post to many words
Last edited: