Okay, mostly finished my Kenwood SW11 powered subwoofer install. Apologies for all you visual people like me, but I didn't take any worthwhile photos, and in fact, those I did were too dark or had flash flares. I had to close my garage door as I was getting interrupted too many times by curious/chatty neighbors.

--The single side (can't remember if it was loops or hooks) of Velcro adheres extremely well to the flooring "carpet" under the seats. I used two strips of 2"x4" Velcro Industrial and attached them to the underside of the Kenwood SW11 avoiding the area where the instructions indicate is the warmest spot. The unit fits in the area to the left side of the air vent (viewed from the rear), and as mentioned, I placed it sideways (left to right) so it would not show as much from the back seat. You can see a bit of the side from the driver's door view, but I guess it all comes down to personal preference which orientation works best.
--Even after trimming the power/remote turn on wires, there is just way too much extra wiring to contend with, especially due to the unit's remote control cord. Crutchfield's specs state that it is a 6 conductor RJ-25 connector at the end, so perhaps it can be successfully shortened with a replacement connector and a crimping tool for those phone-style jacks. The extra cabling for all is just lying around and on top of the unit for now. I bought some split loom, but I don't think that's going to be adequate.
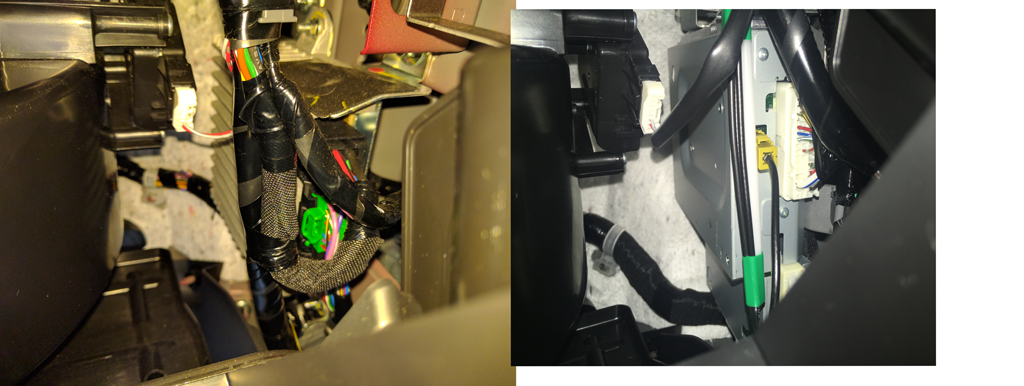
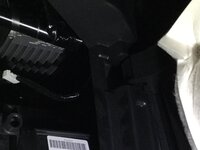
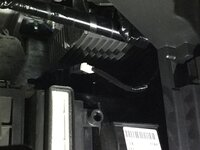
--My power problem referenced above was indeed the ground. My cheap little 12v tester showed power coming from fuse slot 11 when the ignition was on. My original ground attempt was to one of the two bolts just behind and to the left of the fuse box, but even after paint removal and a bit of sanding, I apparently could not get a ground. I could not get any of the seat Torx bolts loosened, so I just used the same bolt shown in this photo from another thread:
http://www.mazdas247.com/forum/attachment.php?attachmentid=206868&d=1396996859
--As others have, I used a fuse tap into slot 11, but found it rather loosely fitting so I used a bit of electrical tape to better hold it in place. FYI, the hot side of this fuse slot at least is the right side, so I inserted the tap with the fuses facing up. According to what I read online, you want the hot connection to be on the left blade of the typical fuse tap add-a-circuit. I used a crimp connector to connect the power and remote turn-on wires to the tap. I prefer Posi-Locks, but didn't have any in my tool box as I thought I had.
--I ran the power/ground wires down the driver's side and under the scuff plate, which removes easily. I pushed them under the loom that's already under the scuff trim. There's a bit of a cut out on the scuff plate on the seat side towards the back end where I ran the wires out to avoid too much pressure on them. The wires go under the seat rail once they come out of the trim piece. I intend to put a bit of black loom on that area to make it look a bit more professional, or I may eventually run them under the carpet and cut a hole for them under the seat.
--The PAC module installed exactly as shown in the earlier part of this thread. One thing I wasn't sure about was which direction increases the signal on the PAC module's adjustment screws--no mention of it in the instructions. Online I found references that other PAC modules should be turned clockwise, so that's what I did. I think the little arrow style screw heads were pointing to about 7 o'clock at the furthest most clockwise setting. Based on the sound output from the woofer, I think that's correct.
I will likely need to go back and lash the module behind the glove box using cable ties if I encounter rattling.
--I ran a 3 meter dual RCA cable from the PAC down and behind the HVAC controls after removing the inner footwell trim pieces (they pop off and on easily from each side of the console. There's a relatively open space in the lower area and easy to get a wire through, although I used a wire fish tape to make it even easier. I then ran the RCA cable down the driver's side of the console, just pushing it under the bottom edge with my fingers, and then had it come out about midway down the console and again under the right seat rail to the subwoofer. I didn't have to loosen any of the center console screws to do it this way.
--I wanted to install the subwoofer wired control in my center console storage area, so I popped off the back external console trim piece (again, no screws need to be removed) and put an old shirt under the back outer edge of the inner lining for protection, as there is a wire and connector in that same area. I then used a drill bit of sufficient size to allow the RJ connector through and drilled a hole immediately to the left of the right inner support rib inside the storage bin. Whatever drill bit I used plus the type of plastic resulted in a completely smooth hole, so I didn't even have to sand. The remote wire was run down through that hole and then to the left side of the console and out the same midpoint area as the RCA cable. I left some extra length inside the console to allow the remote to be pulled out once removed from the mounting Velcro. The rubber mat insert inside the console does a good job of holding the remote cable in place when mounted.
Don't panic as I briefly did during your system test when everything is hooked up but before everything is back together when your system sounds terrible--oh, that's right, disconnecting that TAU harness removes power to the HU, so you just have to dial back in your preferred audio settings.
I'm happy with the sound so far. It fills in some deeper bass just as I wanted, beyond the front door mid-bass speakers. On electronic music with a strong bass track, it really shines to me. If you turn up the subwoofer volume too much on really bass-heavy dance remix tracks, while it doesn't distort, it does sound muddy. I'm going to have to futz with the frequency and volume settings when I have more time and find a happy medium that works for most of my music and to limit my tendency to constantly fiddle with such things.
I found I've already increased my usual treble settings on the HU up one notch, and my bass setting down one. I also noted that the Centerpoint setting does not affect the subwoofer--when you adjust that option off and on, the speaker sound cuts out briefly, but the subwoofer remains on with no apparent change, so that processing must indeed occur in the Bose amp. And of course, since the sub is connected to the front outputs of the PAC, the HU F/R fader will impact the subwoofer output if faded too far to the back. Mine has been set to I think two notches towards the rear, and that continues so far to be good for the subwoofer as well.