Just about done with it (the fitment at least), so I wanted to share. 


Specs:
Enkei RPF1 18x9.5 +45 (F/R)
Front offset reduced to +37 via 8mm custom spacer
Bridgestone Potenza RE760 Sport 245/35/18
BC Racing BR Series Extreme Drop
ACDelco/SPC Rear Camber Arms
Camber: 2.4F/2.5R
Toe: 0F/0R
The goal with my build was to fit very wide wheels and tires to the Skyactiv3 without sacrificing its best strengths (gas mileage) and without aggravating its weaknesses (acceleration). Given that this is my daily driver, grocery/furniture/people mover and canyon car, I also needed to make sure that the aggressive fitment I wanted to do would not rub or scrape, or stretch tire, and it must allow tire rotation to maximize my tread life. Safety first.

So I did a little math and looked at a lot of Speed3's running 18x9.5 for about a month... then spent another month debating whether I wanted to go the easy route with 17x9, or take the untrodden path with 18x9.5. I was however dead set on RPF1's: the 17x9 would have left me with a lighter-than-stock setup and huge grip, and even the 18x9.5 (with Bridgestones) would be just a pound heavier than stock.
Plunked down for a set of 18x9.5 +45's in the normal silver color, and planned to wrap them in 245/35/18 rubber.

I went with BC coils due to the low price, huge height adjustment range and customization aspect: I've never used coilovers before so I figured I'd eventually bust something, so to minimize the entry cost without killing myself (Racelands) I chose the BC's. It was nice that BC offers you custom spring rates: I went with 8k front/6k rear to keep the wheels from going too far up into the fender under compression. The stiff damper valving also not a bad thing.
Only trouble is, they sent me the wrong rear springs. I was astounded to find that a <1 finger gap was the HIGHEST that my coils could go!

I decided I'd work with it, the ride height was just high enough to clear speed bumps without scraping frame so all the other issues (scraping the undertray, front and rear suspension geometry, rubbing, etc.) I would play by ear. I went and got an alignment for 0 toe, and 2.0F/2.2R camber.
From the get-go I knew that I'd need an big pull up front and at least a flat roll in rear to fit 18x9.5 and 245-wide tires, no matter what offset. I found Adrian at FendraRolla.com via some other forum recommendations, and found that he had done a 1cm front pull on a Honda Fit and made it look factory! No flared lip or anything, the fender was pulled straight out without messing up any panel gaps. Impressed, I gave him a call and drove down to Fullerton on a Saturday morning. We introduced ourselves and he began on my rear left (accident damaged) fender, being super careful not to crack the layer of body filler. Half an hour later, the first test fit had us giddy.

As an added bonus the offset I picked located the inner rim of the wheel only about 5mm away from the rear suspension arm, so I really had maxed out my available horizontal space.

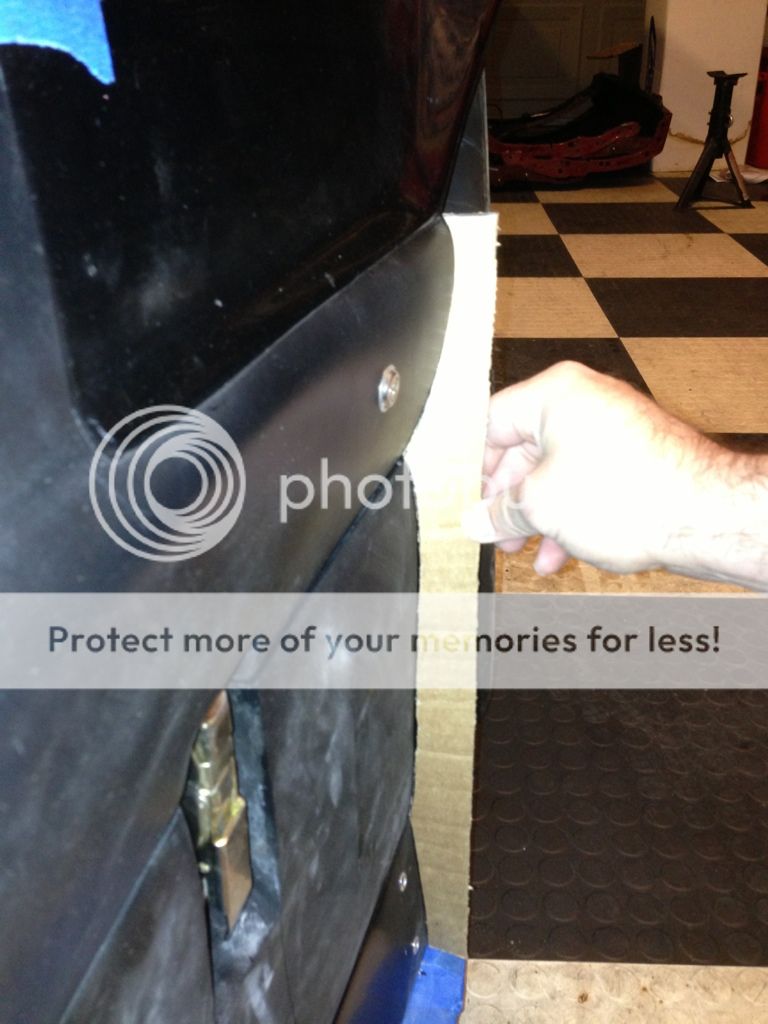
Onto the front, at the time of this picture I had an H&R 5mm spacer in front, and we discovered that the RPF1 actually didn't bolt on. It hit the BC strut right about where the Mazda sticker is:

Nonetheless, we were less than 0.5mm away from clearing said strut, so Adrian went to town on the front fender and produced the same 1cm pull for me that he had done for the Fit:

I asked if he could go more at the fender-bumper interface, but he told me that was the limit, so I'd have to live with it till there was a better solution. Nonetheless, the rim went flush with the fender, so we agreed that 3mm more spacer (totaling 8mm) and maxing out the camber in front would allow the wheel to fit. Close call, but also extremely promising.

With the data gained from this experience I went home and bought a 10mm RX-8 spacer from Eibach -- somehow nobody listed a 10mm spacer for the Mazda3/MS3, but the RX-8 had one, and I made sure that the hubs, studs, etc. matched stock-for-stock between the SE3P and BK chassis. With that on the way, I went to JC Auto House for my second alignment in preparation for final fitting of the wheels and tires. While I sat in the car, Cyrus opened up my shock tower and re-aligned the front end to 0 toe/2.4 camber, and the rear end to 0 toe/2.5 camber. Then I went to a friend's place to borrow his driveway, and we proceeded to start mauling the heck out of the fender liners:


This actually wasn't enough. *Oops* But more on that later.
A few days afterwards I dropped off the RPF1's to have my tires of choice mounted, Bridgestone Potenza RE760 Sports in 245/35/18. I chose 245's for the grip and looks, and also because stretching 215's or 225's on these wheels would have fallen out of Bridgestone's "Recommended Wheel Width" spec. To keep my arse safe even for spirited driving, I stayed within the specs and went 245/35.

I'm not a patient fella so the first thing I did was slap my Eibach 10mm spacers on in front and test fit the wheels. Meh, extended studs... I only had two turns of thread on the front nuts lol.

Undriveable, yes, but I liked the look a lot. The front fitment was especially nice:

But I was hugely worried about that fender/bumper transition and how it might contact the tire -- not even the sidewall, the tread! -- under compression.

I checked the strut clearance and it seemed like I could go closer, so I looked up companies that would do me a custom spacer -- 8mm wheelcentric spacers for the Mazda3 apparently don't exist, and I demanded hub- and wheel-centric for safety reasons. I found Adaptec Speedware would do pretty much any spec and thickness you want, so I emailed them with what I needed and $80 later, received a custom cut pair of 6061 aluminum spacers with a 67.1mm bore ID (to match the Mazda hub) and 73.1mm bore OD (to match the RPF1). Sorry no picture here, but the fit is insanely precise, so much so that the spacer press-fits into the RPF1 centerbore, and then this assembly press-fits onto the hub! Assuming that the spacer itself has good runout tolerance, this kind of fit keeps the whole assembly precise and impervious to misalignment over time (I'd have to bend the spacer itself to misalign the wheel). It's even better than plastic hubcentric rings to an extent, as the aluminum does not compress nearly as readily as plastic.
They arrived a Friday later and I took the car, RPF1's and tools in the trunk, to the Kohl's AlSlambra meet, where we bunch of car nerds proceeded to rip the stock wheels off my car, replace the 5mm spacer with the new 8mm custom piece, and try out the RPF1's for a rolling test! Lots of attention that night when we rolled into Cha for Tea, the big RPF1's and my Indigo Lights Mica really popped in the fluorescent lighting.
Driving really slowly back home (still no extended studs -- only about 3 turns of thread per lug nut) I checked my strut clearance and found gold. 3mm lol. Rim to strut, and tire to strut, both just north or south of 3mm. Just enough!

I did have some issues rubbing the fender liner at full lock though, so I took out the heat gun and mallet again and punched some plastic.


The following Monday I took the car to Evasive Motorsports for lunch, where they installed the RX-8 studs into my hubs and allowed me to finally drive my car with the new wheels! I took it to the SFV meet Wednesday and onto Box Canyon Road, where I discovered that A) I have enough grip to keep up with a Speed3 my first time driving the road, and B) I have woefully little suspension travel before the tire destroys my fender liner, and C) aside from destroying the fender liner, the screw holding on the bumper was scraping the tread! Not good at all, so I took out the screw and inspected the damage.


After taking the photos I realized this wasn't actually unsalvageable, as the tire didn't seem to have touched any metal (except for the screw). So if it's all just plastic, it's all just Dremel time! I cut a few more chunks out of the fender liner, took out the burned-up bumper clip (to be relocated later) and inspected the goods underneath:

Didn't seem so bad really, so I dremeled the crap out of the plastic bulkhead, then drilled a 5/16" hole through a remaining part of the fender liner and bumper underneath it, and put in a new bumper clip.


At this point I realized how I was going to flare out the fender-bumper interface to match the rest of Adrian's insane 1cm fender pull. The plastic bulkhead is of course where the bumper clips on, and it sits on the fender's internal metal, which for its part is bolted through the bulkhead to the frame. So to widen this part of the fender -- and take the bumper out with it -- why not force the entire assembly outwards?

With some help, we had my bumper off and shoved 6-8mm of shims in between the frame and the fender on the outside (fender side) screw hole, and on the inside (headlight side) screw hole we put in 2mm of shims just to get the angle back to stock (the fender was insetting underneath the headlight without the 2mm of shims). Add a little "hand-pulling" of the entire fender/frame assembly in this spot, and we were able to pull this corner of the fender out another 5-6mm more, making the fender-bumper transition look nearly OEM, and at the same time gaining a lot of suspension bump clearance for spirited driving.

And with that done, I now have a Skyactiv3 that can still get almost 40mpg, punches well above its weight on the downhill, fits a seriously aggressive wheel/tire combo and yet looks subtle enough that you wouldn't ever suspect it.

Specs:
Enkei RPF1 18x9.5 +45 (F/R)
Front offset reduced to +37 via 8mm custom spacer
Bridgestone Potenza RE760 Sport 245/35/18
BC Racing BR Series Extreme Drop
ACDelco/SPC Rear Camber Arms
Camber: 2.4F/2.5R
Toe: 0F/0R
The goal with my build was to fit very wide wheels and tires to the Skyactiv3 without sacrificing its best strengths (gas mileage) and without aggravating its weaknesses (acceleration). Given that this is my daily driver, grocery/furniture/people mover and canyon car, I also needed to make sure that the aggressive fitment I wanted to do would not rub or scrape, or stretch tire, and it must allow tire rotation to maximize my tread life. Safety first.
So I did a little math and looked at a lot of Speed3's running 18x9.5 for about a month... then spent another month debating whether I wanted to go the easy route with 17x9, or take the untrodden path with 18x9.5. I was however dead set on RPF1's: the 17x9 would have left me with a lighter-than-stock setup and huge grip, and even the 18x9.5 (with Bridgestones) would be just a pound heavier than stock.
Plunked down for a set of 18x9.5 +45's in the normal silver color, and planned to wrap them in 245/35/18 rubber.
I went with BC coils due to the low price, huge height adjustment range and customization aspect: I've never used coilovers before so I figured I'd eventually bust something, so to minimize the entry cost without killing myself (Racelands) I chose the BC's. It was nice that BC offers you custom spring rates: I went with 8k front/6k rear to keep the wheels from going too far up into the fender under compression. The stiff damper valving also not a bad thing.
Only trouble is, they sent me the wrong rear springs. I was astounded to find that a <1 finger gap was the HIGHEST that my coils could go!
I decided I'd work with it, the ride height was just high enough to clear speed bumps without scraping frame so all the other issues (scraping the undertray, front and rear suspension geometry, rubbing, etc.) I would play by ear. I went and got an alignment for 0 toe, and 2.0F/2.2R camber.
From the get-go I knew that I'd need an big pull up front and at least a flat roll in rear to fit 18x9.5 and 245-wide tires, no matter what offset. I found Adrian at FendraRolla.com via some other forum recommendations, and found that he had done a 1cm front pull on a Honda Fit and made it look factory! No flared lip or anything, the fender was pulled straight out without messing up any panel gaps. Impressed, I gave him a call and drove down to Fullerton on a Saturday morning. We introduced ourselves and he began on my rear left (accident damaged) fender, being super careful not to crack the layer of body filler. Half an hour later, the first test fit had us giddy.
As an added bonus the offset I picked located the inner rim of the wheel only about 5mm away from the rear suspension arm, so I really had maxed out my available horizontal space.
Onto the front, at the time of this picture I had an H&R 5mm spacer in front, and we discovered that the RPF1 actually didn't bolt on. It hit the BC strut right about where the Mazda sticker is:
Nonetheless, we were less than 0.5mm away from clearing said strut, so Adrian went to town on the front fender and produced the same 1cm pull for me that he had done for the Fit:
I asked if he could go more at the fender-bumper interface, but he told me that was the limit, so I'd have to live with it till there was a better solution. Nonetheless, the rim went flush with the fender, so we agreed that 3mm more spacer (totaling 8mm) and maxing out the camber in front would allow the wheel to fit. Close call, but also extremely promising.
With the data gained from this experience I went home and bought a 10mm RX-8 spacer from Eibach -- somehow nobody listed a 10mm spacer for the Mazda3/MS3, but the RX-8 had one, and I made sure that the hubs, studs, etc. matched stock-for-stock between the SE3P and BK chassis. With that on the way, I went to JC Auto House for my second alignment in preparation for final fitting of the wheels and tires. While I sat in the car, Cyrus opened up my shock tower and re-aligned the front end to 0 toe/2.4 camber, and the rear end to 0 toe/2.5 camber. Then I went to a friend's place to borrow his driveway, and we proceeded to start mauling the heck out of the fender liners:
This actually wasn't enough. *Oops* But more on that later.
A few days afterwards I dropped off the RPF1's to have my tires of choice mounted, Bridgestone Potenza RE760 Sports in 245/35/18. I chose 245's for the grip and looks, and also because stretching 215's or 225's on these wheels would have fallen out of Bridgestone's "Recommended Wheel Width" spec. To keep my arse safe even for spirited driving, I stayed within the specs and went 245/35.
I'm not a patient fella so the first thing I did was slap my Eibach 10mm spacers on in front and test fit the wheels. Meh, extended studs... I only had two turns of thread on the front nuts lol.
Undriveable, yes, but I liked the look a lot. The front fitment was especially nice:
But I was hugely worried about that fender/bumper transition and how it might contact the tire -- not even the sidewall, the tread! -- under compression.
I checked the strut clearance and it seemed like I could go closer, so I looked up companies that would do me a custom spacer -- 8mm wheelcentric spacers for the Mazda3 apparently don't exist, and I demanded hub- and wheel-centric for safety reasons. I found Adaptec Speedware would do pretty much any spec and thickness you want, so I emailed them with what I needed and $80 later, received a custom cut pair of 6061 aluminum spacers with a 67.1mm bore ID (to match the Mazda hub) and 73.1mm bore OD (to match the RPF1). Sorry no picture here, but the fit is insanely precise, so much so that the spacer press-fits into the RPF1 centerbore, and then this assembly press-fits onto the hub! Assuming that the spacer itself has good runout tolerance, this kind of fit keeps the whole assembly precise and impervious to misalignment over time (I'd have to bend the spacer itself to misalign the wheel). It's even better than plastic hubcentric rings to an extent, as the aluminum does not compress nearly as readily as plastic.
They arrived a Friday later and I took the car, RPF1's and tools in the trunk, to the Kohl's AlSlambra meet, where we bunch of car nerds proceeded to rip the stock wheels off my car, replace the 5mm spacer with the new 8mm custom piece, and try out the RPF1's for a rolling test! Lots of attention that night when we rolled into Cha for Tea, the big RPF1's and my Indigo Lights Mica really popped in the fluorescent lighting.
Driving really slowly back home (still no extended studs -- only about 3 turns of thread per lug nut) I checked my strut clearance and found gold. 3mm lol. Rim to strut, and tire to strut, both just north or south of 3mm. Just enough!
I did have some issues rubbing the fender liner at full lock though, so I took out the heat gun and mallet again and punched some plastic.
The following Monday I took the car to Evasive Motorsports for lunch, where they installed the RX-8 studs into my hubs and allowed me to finally drive my car with the new wheels! I took it to the SFV meet Wednesday and onto Box Canyon Road, where I discovered that A) I have enough grip to keep up with a Speed3 my first time driving the road, and B) I have woefully little suspension travel before the tire destroys my fender liner, and C) aside from destroying the fender liner, the screw holding on the bumper was scraping the tread! Not good at all, so I took out the screw and inspected the damage.
After taking the photos I realized this wasn't actually unsalvageable, as the tire didn't seem to have touched any metal (except for the screw). So if it's all just plastic, it's all just Dremel time!
I cut a few more chunks out of the fender liner, took out the burned-up bumper clip (to be relocated later) and inspected the goods underneath:
Didn't seem so bad really, so I dremeled the crap out of the plastic bulkhead, then drilled a 5/16" hole through a remaining part of the fender liner and bumper underneath it, and put in a new bumper clip.
At this point I realized how I was going to flare out the fender-bumper interface to match the rest of Adrian's insane 1cm fender pull. The plastic bulkhead is of course where the bumper clips on, and it sits on the fender's internal metal, which for its part is bolted through the bulkhead to the frame. So to widen this part of the fender -- and take the bumper out with it -- why not force the entire assembly outwards?
With some help, we had my bumper off and shoved 6-8mm of shims in between the frame and the fender on the outside (fender side) screw hole, and on the inside (headlight side) screw hole we put in 2mm of shims just to get the angle back to stock (the fender was insetting underneath the headlight without the 2mm of shims). Add a little "hand-pulling" of the entire fender/frame assembly in this spot, and we were able to pull this corner of the fender out another 5-6mm more, making the fender-bumper transition look nearly OEM, and at the same time gaining a lot of suspension bump clearance for spirited driving.
And with that done, I now have a Skyactiv3 that can still get almost 40mpg, punches well above its weight on the downhill, fits a seriously aggressive wheel/tire combo and yet looks subtle enough that you wouldn't ever suspect it.