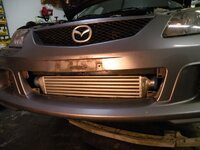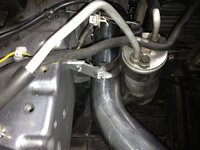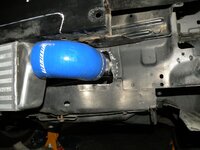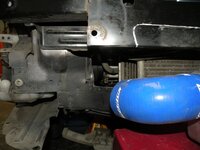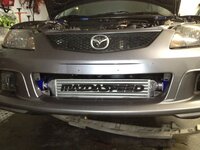
I did an eBay FMIC and tok lots of pictures. Here's how.

DSCN2753.jpg
DSCN2752.jpg
DSCN2748.jpg
IMG_6150.jpg
IMG_6102.jpg

When I decided to do an eBay Front mount intercooler, I first read this thread front to back to decide how I want to go about it.

I decided:
  • I did not want to cut a big chunk out of the crashbar
  • I did not want to block the foglight holes in the bumper
  • I did not want to remove the windshield washer tank or block the CAI hole

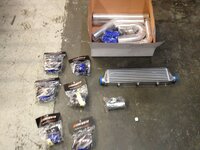
I made a list of parts, and ordered it all up on ebay. I totally forgot that I would need parts to make an intake since I did not already have a CAI, so I had to buy those parts locally.

Parts:
  • FMIC kit : https://www.ebay.com (commissions earned) $159
  • 2x 2.5" -> 2.75" couplers for the MAF $22
  • 1x 2.25" > 2.5" coupler for turbo inlet $11
  • 1x 2" > 2.5" coupler for turbo outlet $11
  • 2.5" pipe with BOV flange to suit BOV of your choice (I went with an HKS) $24
  • BOV $100 (used)
  • 2x 2.75" T bolt clamps for MAF $14
  • 8" length of 1/8" vacuum hose or BOV $1
  • 2x M8x1.5mmx25mm Flange bolts $laying around
  • 2x M10 washers(very large) $laying around
  • Assorted scrap metal to make brackets $laying around
  • some ~1cm thick bits of hard rubber or plastic $laying around
  • Cone filter if you don't already have an intake.$60

total: $402

tools
  • Drill
  • holesaw kit
  • hacksaw
  • dremel or cutoff wheel
  • tinsnips
  • ratchets and combo wrenches (ratcheting boxwrenches are nice too)
  • tiny flathead for dealing with plastic body clips

Procedure:

Take the front bumper off. Here are some how-to's on that.
http://www.aggressiveautoculture.com/protege/bumper_brackets/AAC_Protege_Bumper_Install_Guide.pdf
http://www.motobild.com/mazda/2003-mazda-protege5-front-bumper-removal-installation.html
http://en.wikibooks.org/wiki/Mazda_Guide/Protege_5/Headlight_Blackout

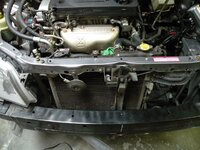
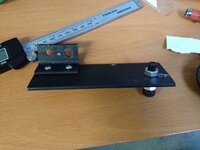
Remove drivers side fan and the old FMIC. actually maybe you don't have to but I didn't want to leave them in there. Make a bracket to hold the bottom of the rad. You can re-mount the top rad mount to hold the top. Remove all the intercooler piping and filter box.
 
Last edited:
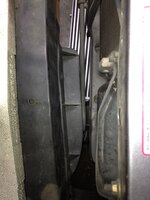
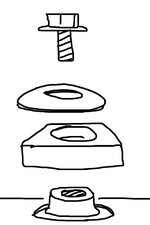
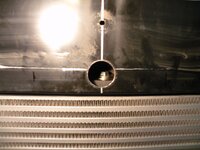
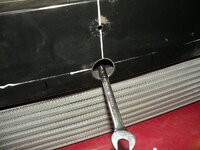
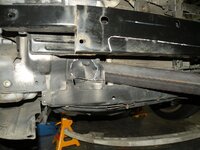
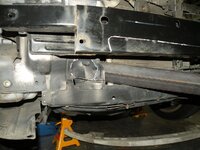
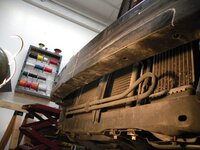
Measure placement of holes to mount intercooler. with this intercooler, the corners needed to be about 1cm from the front of the crash bar. I used the hole saw to drill the bottom the crashbar with holes big enough to recess the threaded bosses into the bumper. I then drilled holes in the front of the crashbar to insert a wrench. I ended up only using the two outside holes because there wasn't enough space in the middle to fit the bolt head when the intercooler was pushed back far enough. If the intercooler is too far forward you will have to trim the bumper cover to fit. If it's too far back, you wont be able to move the steering oil cooler if you need to. I then made really thick washers out of some hard rubber blocks.

IMG_6128.jpg
IMG_6167.jpg
DSCN2750.jpg
DSCN2755.jpg
DSCN2751.jpg
 
Last edited:
IMG_6156.jpg
DSCN2762.jpg
DSCN2754.jpg
DSCN2752.jpg

cut out holes for the pipes. Use tinsnips or you will be there all day grinding! use the cutoff wheel or dremel to clean up the edges. Don't accidentally grind through the steering or Aircon pipes! Carefully move the Aircon condenser by bending the tubes. Make a bracket to hold it there!
 
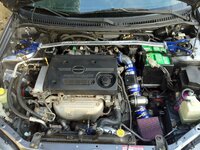
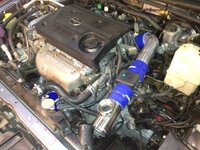
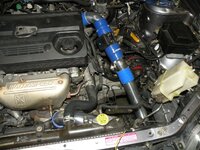
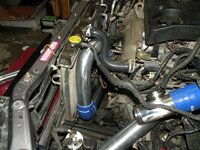
Mount everything up and start cutting pipes! The original airbox used to mount to the coolant tank bracket and the battery tray. I cut those tabs off and moved the coolant tank slightly. On the hot side, I routed the pipes under the turbo and down the drivers side. Lots of people do it over the turbo and down the passenger side. I found it very tight doing it that way. Of course, this way, I can't fit the drivers side fan. So I wired the relay outputs of both the drivers and passenger side fans together so that if either fan is commanded to be on by the ECU, the passenger side fan will run. I might be able to squeeze a 7" slim fan in there, but I don't know how much difference that will make.

IMG_6152.jpg
IMG_6166.jpg
IMG_6129.jpg
DSCN2761.jpg
DSCN2760.jpg

I have additional finishing work to do, but overall, the car drives better than ever! I think the HKS VTA is way too loud for me though. I might recirc it or just find a different BOV. Also it was hard to put in.

attachment.php
 
Last edited:
good write up... mind sharing an estimated price you paid? I'm just being lazy and not pricing it out myself
 
Damn I totally wish I had seen this a few days ago I just did a fmic setup last Friday and I ended up removing my crash bar and having to trim my bumper a bit :-( good write up bro and good work.
 
Thanks guys,

man i sure wish i hadn't misspelled the thread title after all that work. (freak)

Ill update the parts list with prices.

I will probably buy an additional mishimoto "hump" coupler to replace the straight one between the BOV flange and the forward intercooler outlet pipe, a 7" slim fan and a filter for the head vent hose. this will cost another 50 bucks.
 
Last edited:
Update! One fan may not be enough. It was really hot out today's and I was idling in traffic with the ac on, and the car started spitting boiling water into the overflow tank.
 
man I really want to clock my turbo now. then i can put the fans back and get rid of piping. is anyone currently running a clocked stock turbo?
 
There's a select few. IIRC you have to drill and tap new holes for the stocker
 
It's not really that necessary. If you check that thread again there are a few of us(myself included) that routed the piping a specific way which still allows the use of stock fans. Been running mine this way for a while now. Only problem I had was I didnt realize I had a pipe rubbing the AC line so it caused a leak but I fixed it.

One fan is not enough for this set up. You need both as one is for the AC system and the other is a dedicated radiator fan.
man I really want to clock my turbo now. then i can put the fans back and get rid of piping. is anyone currently running a clocked stock turbo?
 
Back