
flatlander937
Member
- :
- '11 Mazda2 Sport
Just recently moved into a new house with an awesome garage(though I am still lacking my big toolbox and many special tools which are still at a friend's shop that I've been working out of for the last 2 years...) so that means I can walk right outside and work on my car without being a pain in my friend's ass or rotating tires outside when his garage is full of piece of s*** cars that drove in but now need pushed out(whistle)
I have an auto-x event coming up this weekend and wanted to rotate my tires. Also I just picked up a 2 ton aluminum floor jack from Harbor freight(http://www.harborfreight.com/2-ton-lightweight-aluminum-racing-jack-with-rapid-pump-68051.html) and two pairs of 3-ton jack stands. Harbor Freight is not the highest quality stuff ever, but given that everything at Sears is now made of Ching Chong parts it's not like Craftsman is any better now. I'm frankly REALLY impressed with the jack I got... time will tell how it holds up, though I did leave it jacking up the rear diff of my Jeep overnight about 3in off the ground overnight to test the seals and make sure they wouldn't start leaking... it still works. Nicest thing about this jack is it is LIGHT at just over 40lbs... if I decide to run R-comps for auto-x then it will be pretty easy to toss in the trunk to take along.
Onto the main topic though: I want to jack the car up safely, quickly, and without damaging anything on the car... importance in that order.
Obviously I take no responsibility for anything you mess up on your own car... this is how I do this. FWIW I am an automotive technician who's been working on cars for going on 7 years so I know a bit about what I'm doing.
On most cars it is easiest and quickest to chock the rear wheels and set the e-brake, and jack up under the sub-frame in the front... but on the MZ3 the splash shield makes it a b**** to do so... and frankly from what I recall the sub-frame doesn't even cross over at the very front under the radiator and it is thin sheet metal that is in that area... so getting a jack WAAAY under the car behind the engine near the trans mount is possible(I think?), but very very likely a huge pain in the butt. The rear it is pretty easy to jack it up on it's own under the center of the rear sub frame... it's the front that screws us on these cars.
First off... SET YOUR E-BRAKE AND PUT THE CAR IN GEAR/PARK!!
What I do is jack it up one side at a time.
There is a "pinch weld" seam that runs along the side of the car at the bottom(might be harder to see if you have the side-skirts). This is the structural point for jacking up the car. READ YOUR OWNER'S MANUAL and you'll see that this pinch seam at the front and back are the factory jacking points... this is where a 2 post lift would be used, or your spare jack in an emergency.
I put a 2x4 on the pad of the jack(MY jack has a large pad that can fully support the block of wood... I would NOT recommend one of the little trolley-jacks with a 2.5" wide pad) and raise it up a bit forward of the middle(because of the car's weight distribution). About 3-4" forward of the exterior door handle is about right. You'll know if it's off if it feels super unstable or starts to lean forward/backwards slightly.
The wood makes the jack spread it's force across a longer surface area so it will not damage or bend the pinch weld. Without it you'll probably put small indents into the pinch weld or bend it.
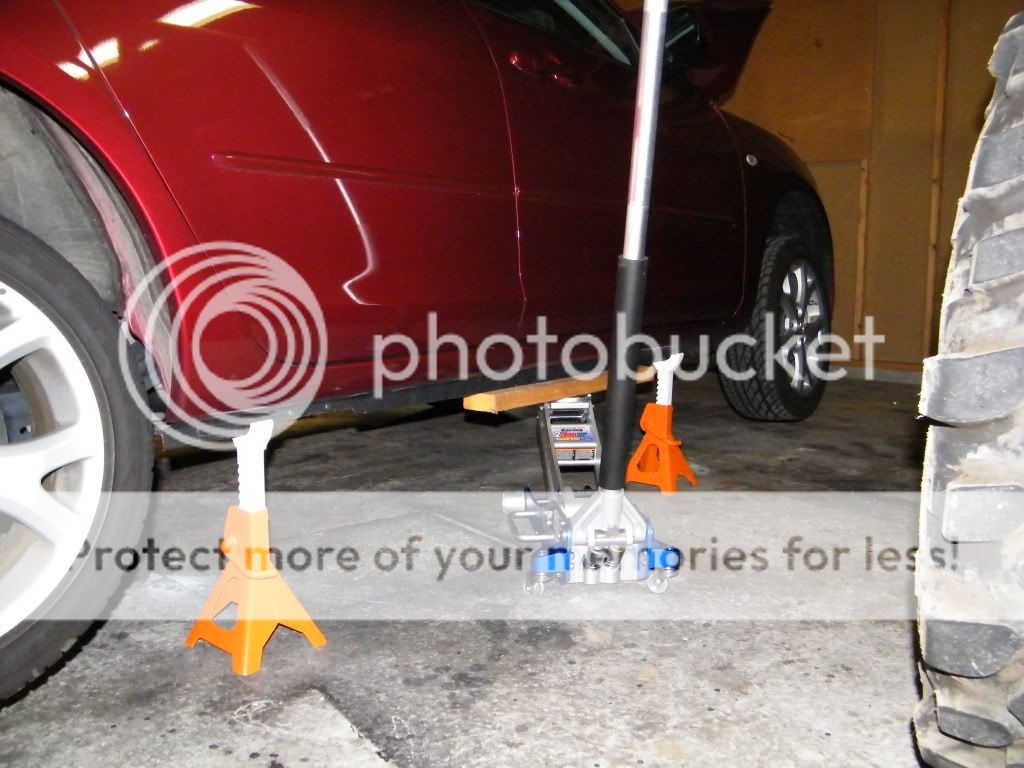
Notice that the minute I got the car high enough, I slide the jackstands under the car. NEVER trust a hydraulic jack to hold 3000lbs over your head.
Because of the shape of my jack stands(and most others), and the way the sheet metal is on the MZ3, you'll want to put them slightly off from where the normal emergency jacking points are. Peek under and you'll see why. You want the pinch weld to rest in the groove of the jack stands.
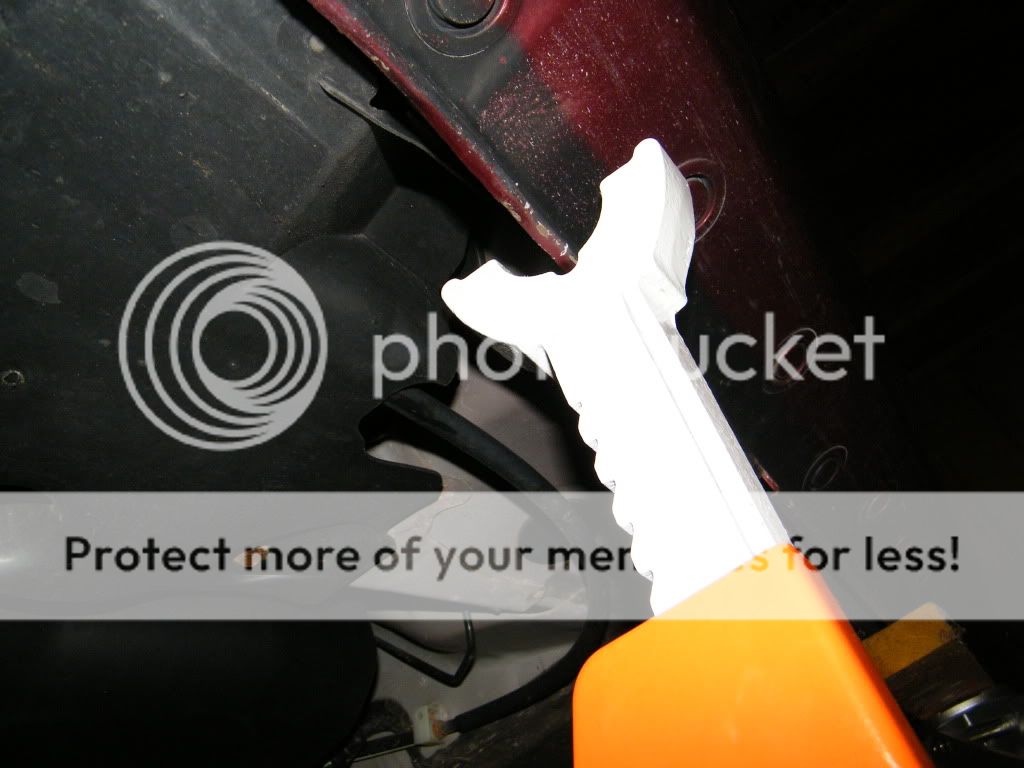
This is the front of the car... notice I am avoiding stabbing a hole through the lower "structural" shaped stamped sheet metal with the jack stand:

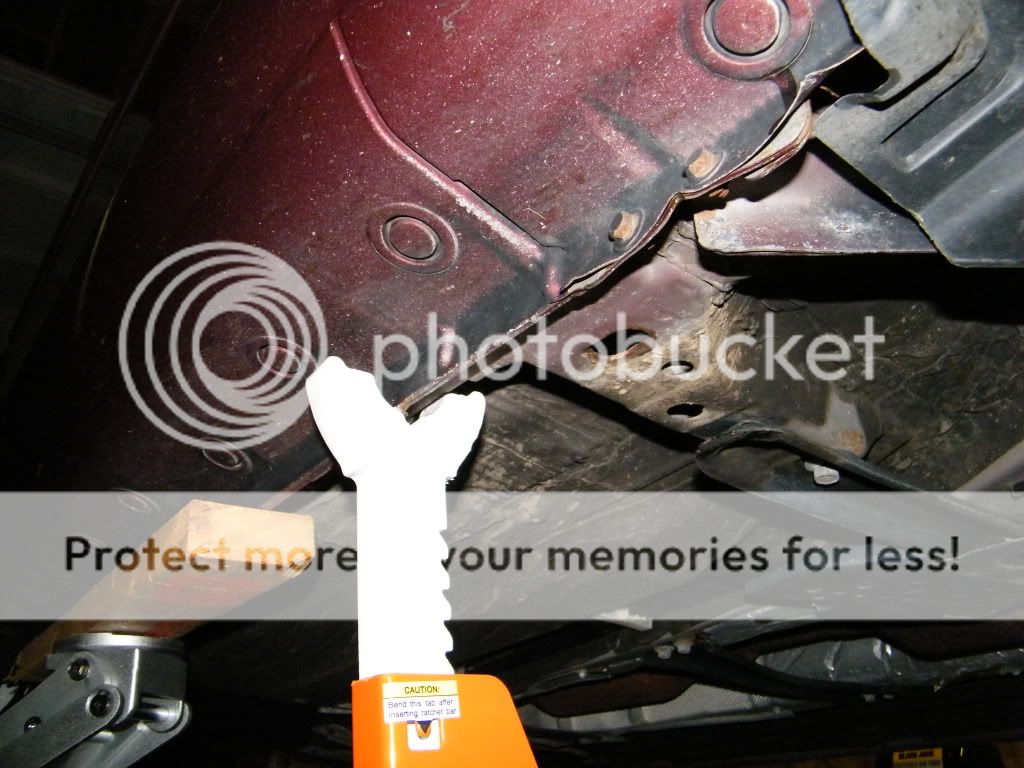
And this is the rear... notice it is forward of the plastic piece so it doesn't get broken:
Couple more front and rear from different angles:

You repeat for the opposite side. Just go slowly and stay smart about it. Don't take any wheels off until it is completely stable on all 4 jack stands. If you are not using air tools, then just break the lug nuts loose prior to jacking(so they are just finger tight) to make it easier on you.
Hopefully this helps someone")
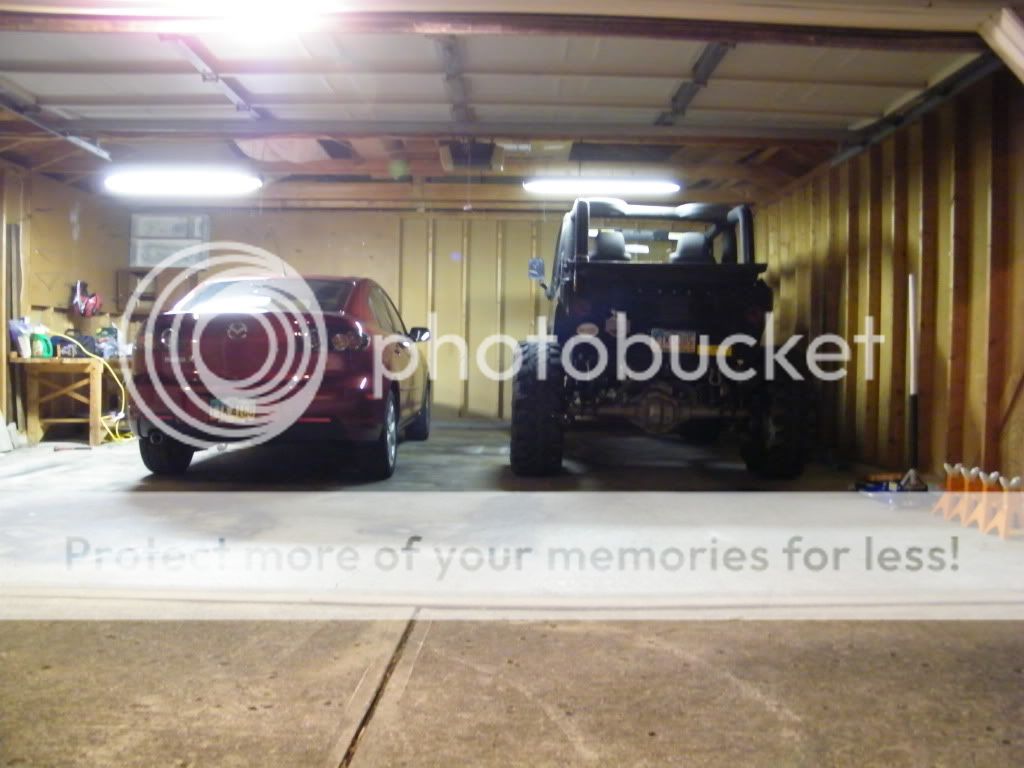
And for the hell of it, this is the Jeep that I tested the jack out on overnight.
I have an auto-x event coming up this weekend and wanted to rotate my tires. Also I just picked up a 2 ton aluminum floor jack from Harbor freight(http://www.harborfreight.com/2-ton-lightweight-aluminum-racing-jack-with-rapid-pump-68051.html) and two pairs of 3-ton jack stands. Harbor Freight is not the highest quality stuff ever, but given that everything at Sears is now made of Ching Chong parts it's not like Craftsman is any better now. I'm frankly REALLY impressed with the jack I got... time will tell how it holds up, though I did leave it jacking up the rear diff of my Jeep overnight about 3in off the ground overnight to test the seals and make sure they wouldn't start leaking... it still works. Nicest thing about this jack is it is LIGHT at just over 40lbs... if I decide to run R-comps for auto-x then it will be pretty easy to toss in the trunk to take along.
Onto the main topic though: I want to jack the car up safely, quickly, and without damaging anything on the car... importance in that order.
Obviously I take no responsibility for anything you mess up on your own car... this is how I do this. FWIW I am an automotive technician who's been working on cars for going on 7 years so I know a bit about what I'm doing.
On most cars it is easiest and quickest to chock the rear wheels and set the e-brake, and jack up under the sub-frame in the front... but on the MZ3 the splash shield makes it a b**** to do so... and frankly from what I recall the sub-frame doesn't even cross over at the very front under the radiator and it is thin sheet metal that is in that area... so getting a jack WAAAY under the car behind the engine near the trans mount is possible(I think?), but very very likely a huge pain in the butt. The rear it is pretty easy to jack it up on it's own under the center of the rear sub frame... it's the front that screws us on these cars.
First off... SET YOUR E-BRAKE AND PUT THE CAR IN GEAR/PARK!!
What I do is jack it up one side at a time.
There is a "pinch weld" seam that runs along the side of the car at the bottom(might be harder to see if you have the side-skirts). This is the structural point for jacking up the car. READ YOUR OWNER'S MANUAL and you'll see that this pinch seam at the front and back are the factory jacking points... this is where a 2 post lift would be used, or your spare jack in an emergency.
I put a 2x4 on the pad of the jack(MY jack has a large pad that can fully support the block of wood... I would NOT recommend one of the little trolley-jacks with a 2.5" wide pad) and raise it up a bit forward of the middle(because of the car's weight distribution). About 3-4" forward of the exterior door handle is about right. You'll know if it's off if it feels super unstable or starts to lean forward/backwards slightly.
The wood makes the jack spread it's force across a longer surface area so it will not damage or bend the pinch weld. Without it you'll probably put small indents into the pinch weld or bend it.
Notice that the minute I got the car high enough, I slide the jackstands under the car. NEVER trust a hydraulic jack to hold 3000lbs over your head.
Because of the shape of my jack stands(and most others), and the way the sheet metal is on the MZ3, you'll want to put them slightly off from where the normal emergency jacking points are. Peek under and you'll see why. You want the pinch weld to rest in the groove of the jack stands.
This is the front of the car... notice I am avoiding stabbing a hole through the lower "structural" shaped stamped sheet metal with the jack stand:
And this is the rear... notice it is forward of the plastic piece so it doesn't get broken:
Couple more front and rear from different angles:
You repeat for the opposite side. Just go slowly and stay smart about it. Don't take any wheels off until it is completely stable on all 4 jack stands. If you are not using air tools, then just break the lug nuts loose prior to jacking(so they are just finger tight) to make it easier on you.
Hopefully this helps someone
And for the hell of it, this is the Jeep that I tested the jack out on overnight.