What have you done to your Miata today?

woah, I am glad to see this thread is still active. It's been a cool minute since i have been on M247 .
Cool to see a lot of familiar people are still on here.

Anyways, to go back on topic. My bought a new set of falkens for the rear, fronts are still good. I have been wearing out the back considerably faster so I need to watch how drive lol
New meat ! by Joseph Garcia, on Flickr


ooh and my car looks like butt right now. But i am still determined to continue working on it even though many things are on hold because of budget reasons.

IMG_0183 by Joseph Garcia, on Flickr
 
Thanks Mike. Dropped the tank off yesterday morning. Hoping to have it back in hand at the end of the week.

Make sure you tuck the girls in real good, Mark and Levi. Too bad you weren't closer Levi, you could wake her up on New Year's Day for the LVMOC Polar Bear Run.

Hiya Joe!
 
Installed the GWR tank today! It took about 20 minutes, having a siphon pump was great for extracting the coolant out of the OEM tank. Also used a torch to heat up the hoses, after about 15 seconds, they slipped right off. I used some 5/8 worm gear clamps for the small hoses and painted them gloss black. Sitting atop it, is an OEM rad cap with custom revlimiter.net M80 insert. I had the OEM coolant tank bracket powdercoated gloss black to flow with the newly installed hardware and tank. Upon pulling it off, I realized that white hood rod clip had to go. Found a black one at a local Nissan dealer. :) Next up, I ordered the IL Motorsports power steering cap cover and A/C check valve caps from Moss. I had these powdercoated Volk Mag Blue along with the coolant tank. The guys in the machine shop at work made some stainless steel covers for the plastic battery and fuse box covers and I had them powdercoated gloss black. Used some silicone to affix them. I know the stock intake is well designed, but that stock air box is killing me. lol

Engine Bay - Before
attachment.php


Engine Bay - After
attachment.php


GWR Tank / revlimiter M80 Insert / Battery Cover / IL Motorsports PS Cap Cover and H A/C Check Valve Cap
attachment.php


Zip Ties and Rubber Bands came in handy while the bracket was MIA
attachment.php


OEM Coolant Tank Bracket / Nissan Hood Rod Clip
attachment.php


IL Motorsports L A/C Check Valve Cap
attachment.php


Fuse Box Cover
attachment.php


So you may be thinking - Why Volk Mag Blue? Well, earlier this year I was contemplating buying new wheels when I needed to buy tires. I shopped (and drove my wife crazy) for a few weeks and finally decided to just keep my stock wheels....for now. While shopping, I found some Volk TE37s in the Mag Blue color and couldn't get it out of my head. Since my stock wheels were chipped and had some light curb rash, I said "what the hell" and set about trying to find a way to duplicate the color. After some googling, I found that All Powder Paints sells a powder named Volk Mag Blue. :D I ordered a sample along with other samples from other powder companies that seemed close to match, on the monitor. Once I had the samples in hand, I knew that VMB was the winner. My next dilemma was how do I tackle the center caps. The OCD in me was going insane thinking of how they eye would be drawn to that grey center cap in the middle of the wheel. More googling revealed that Duplicolor makes a pretty close match in a spray can known as Ford Royal Medium Blue. Off to Autozone I went, where I bought a can of Ford Medium Blue (guess they dropped the Royal(dunno)) along with a can of primer and clear. It is pretty darn close and IMO looks better than the grey would have. I applied two coats of primer, and three coats each of color and clear. C'mon Spring!

OEM Wheel with Satin Finish (I will admit, it killed me a little inside to have these sandblasted)
attachment.php


OEM Wheel Sandblasted :(
attachment.php


OEM Wheel in Volk Mag Blue with matching Center Caps
attachment.php


Center Cap Paint
attachment.php
 
I'm back to work so you all know what that means. Parts (aka Robyn's pain)! I have purchased a used Racing Beat Power Pulse dual exit muffler. I love how my system sounds now with the top down, but with it up (or the hard top on) it's a little annoying. Since the RB is supposed to be one of the quietest around I'll see how it plays with the MS header and RS midpipe. I have also picked up some spare center caps for my Flatouts.
 
Too funny Mike. Hope that RB works out for you.

Removed the FSTB and sandblasted it, going to drop it off with the powder coater tomorrow. While at it, I removed the PSV bracket and painted that Ford Medium Blue along with the nuts for the FSTB. Once I've reinstalled it, I plan on painting the studs to match. Why, oh why did I wash my engine bay last Summer?

attachment.php


*edit - Stopped in to see Mike at Moto-East today and walked out with this. :D Dropped it off along with the FSTB at the coater.
attachment.php
 
Last edited:
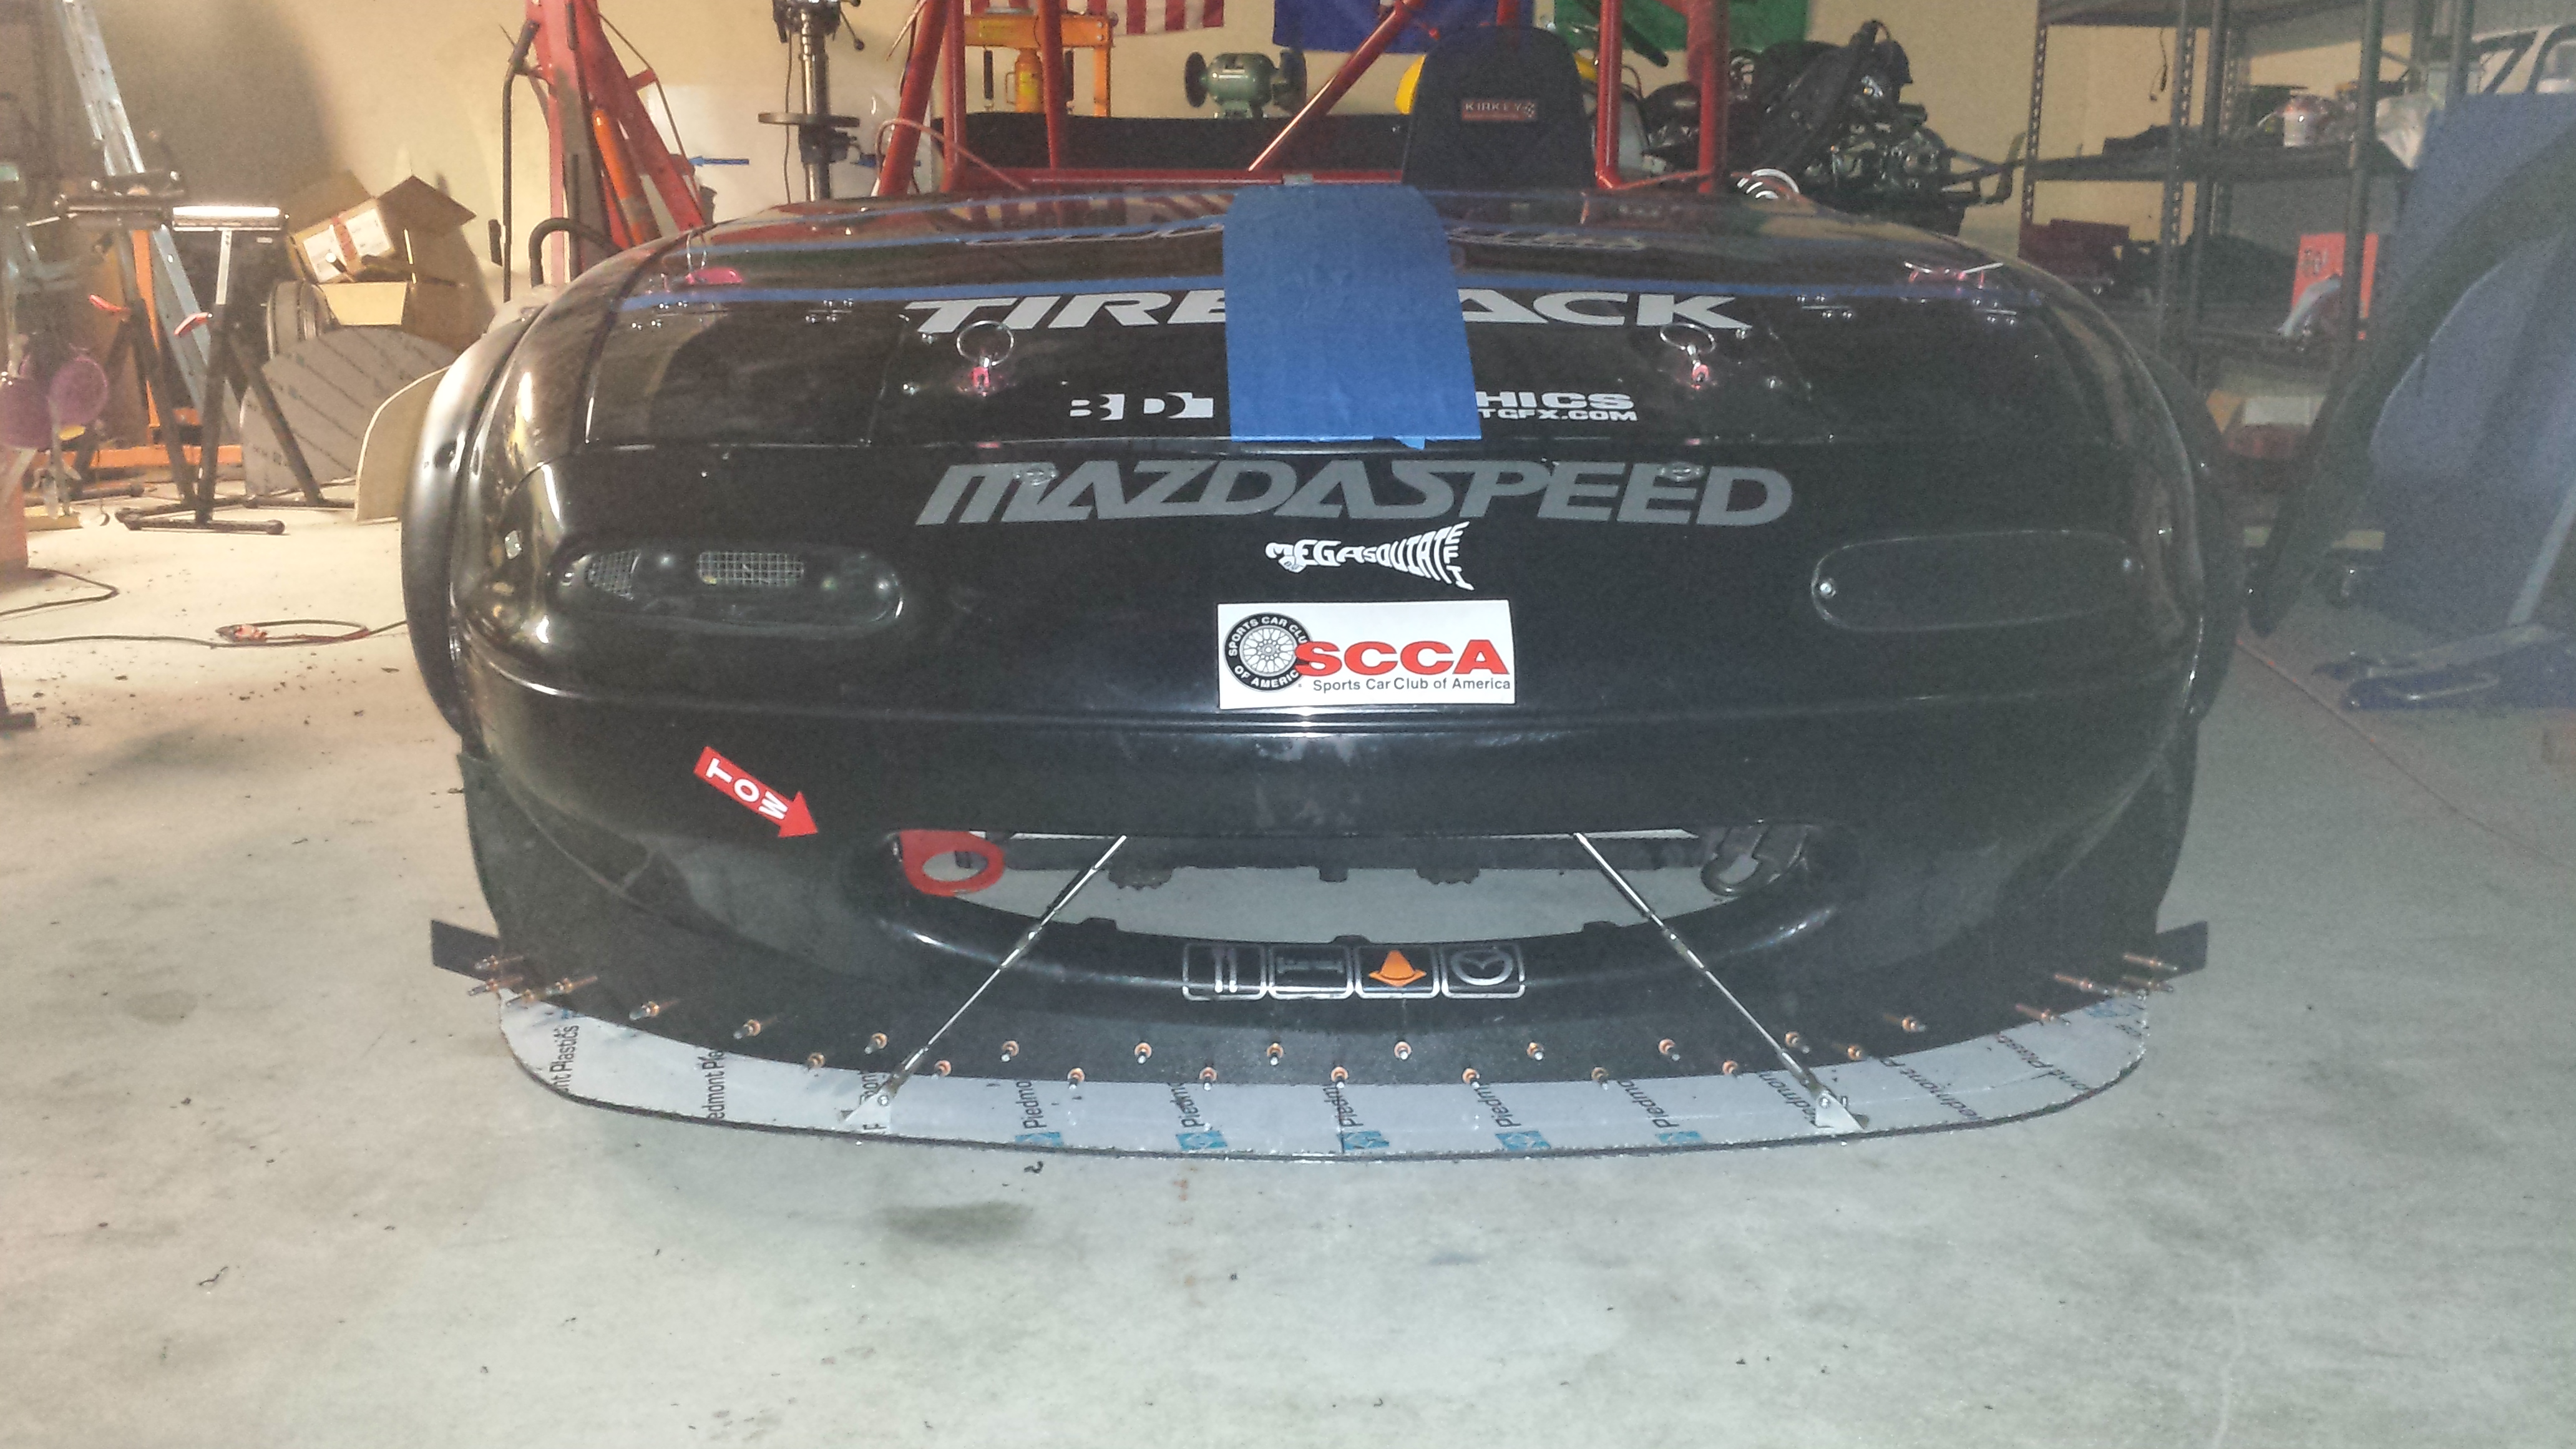
I spent the day chipping away at the mounts for the new splitter. I've got most of it done, but still a ways to go (especially the actual "make the splitter" bit).

I'm making the rear mounts on the splitter out of 2.25" x .25" aluminum angle. Figured out how I wanted to design the hooks and took a few measurements so I could repeat it.


I got a jump start on this year's Christmas decorations. Tinsel for days :D
Three 1/2" holes for the path for the hook to engage, then a 3/8" at the top for a close fit with the actual chassis mount hook I built:


A bit of time spent with a jig-saw, a dremel and some sanding drums (there HAS to be a better way to do that...) to clean everything up and get the end of the slot fit close to the hook:


Some finished and some in progress pieces. I need to trim the ears off the d-ring brackets, and weld those to the front chassis mount bracket (center of picture), and figure out how long I need to make the fixed "eyelet" end of the front mounting struts before welding those together, but that'll happen once I have the splitter made and can take some measurements. Some 3/16" rod will be welded into / between the end of the turnbuckles and the eyelet.

 
A bit of time spent with a jig-saw, a dremel and some sanding drums (there HAS to be a better way to do that...) to clean everything up and get the end of the slot fit close to the hook:

Turns out there IS a better way! A friend suggested finding an aluminum die grinder burr, but everything I could find was 1/4" shank (dremel style tools are 1/8" shank). However, during my googling I stumbled over a couple fabrication forums suggested spraying the part and a normal carbide burr (which I have a set of) with WD-40 to avoid it getting gummed up. Sure enough, that was exactly what I needed, and made finishing up the 2nd set of hooks FAR easier than the 1st set.


I also finished up the 2nd set of rear-mount hooks for the splitter, and the front chassis mounts. A friend has commissioned a similar splitter from me, hence the duplicates.

 
I made a template so that next time it'll take me about 2 minutes to make a splitter (attaching all the mounts and the air-dam will take a bunch more time, obviously). Cut out a chunk of DiBond, clamp it to the template, then run the router all the way around it. Boom, splitter.

Gotta love CAD! :D
This was the original cardboard template I made when I made splitter version 1.0. I made some corrections and smoothed the lines out, and made the design even side-to-side. It wasn't TOO far off, but it was far enough for me.


Ran a test cut with 1/8" Dibond and some scrap to make sure the router bit I have will work before ruining a virgin sheet of dibond. The splitter will be 1/4". Beautiful, clean cut.


I also spent a few minutes here and there over the last few days making a bunch of my rear splitter supports.


Last edited:
Finally dropped in the new uber lightweight lithium battery and modified the tie-down so it would work. It definitely has more oomph than the one that was on there. First crank was way stronger than the ETX9s ever were.
6 weeks until the season starts :D
 
4x8 sheet of Dibond acquired. Splitter 2.0 build this weekend. Should be better in just about every measure. Barring just running into a bunch of stuff, it should be a damn sight more durable than 1.0, and should something break, it should be a damn sight more serviceable. Really pleased with how it's coming together.
 
Last edited:
^^^Good stuff!

Nothing too exciting, failed state inspection due to rear pads. Just ordered Stoptech Sports and Centric Premium rotors for the rear axle. Rotor will be here Sunday and pads will be here Monday. Have to love Amazon Prime.
 
Made a huge amount of progress on the splitter.

The buck worked a treat. Managed to cut 3 'blanks' out of a 4x8 sheet, then shaped them to final size with a flush-trim router bit:


With a little (...lot) help, we got it mostly together. The air-dam that's on there is the old one and is basically a place holder that I'll modify to fit and use as a template to cut a new one. The Home Depot Racing Supply 'fence' supporting the air-dam needs to be trimmed (as it's sticking out the ends) still.


My helper :D

 
It is not a particularly clean process, but it is spectacularly effective.

 
Last edited:
looks good maff. i said hi to my car yesterday. its on storage insurance and it was 60. i wanted nothing more to get her out and stretch her legs yesterday :/
 
looks good maff. i said hi to my car yesterday. its on storage insurance and it was 60. i wanted nothing more to get her out and stretch her legs yesterday :/
I looked into that insurance last year for our daughters car. Decided to pass on it though.
Bought her a 3rdbrakeflasher for installation this spring!
Nice! A little extra piece of mind knowing drivers behind you will see that yoh are braking. That is if they arent staring at their phones. Lol

Sent from my Galaxy S7 Edge using Tapatalk
 

Latest posts

Back