- :
- P5
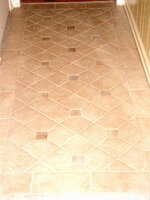
Hey now. I'm getting ready to lay ceramic tiles in about half of my house. Does anyone have any last-minute words of advice for a novice?

Well, sounds like you have done this before, so do I put the shiny or rough side facing up?jred321 said:mortar on first, then tiles")
Ha ha. I say maybe 10 per new castle? I'm not sure it depends on how fast you can drink.+ friction said:Thanks...I am on a slab so I think it is fairly level. We bought the house in September and I've renovated about everything (paint, outlets, switches, ceiling fans, fixtures etc.) by myself. I didn't know s*** about working on a house, but I think I have a knack for it so I am not terribly nervous about this...just don't want to screw it up too bad!
I am putting down 12X12 tiles. How many tiles per Newcastle do you recommend?
We would love to have woodfloors, just right now the cost is prohibitive. We are still bad at saving money, so we are hoping to make a killing on this house in about 4 or 5 years...the market in Charleston is by no means appreciating like Cali, but things are still looking very good...we "Yankees" are taking over down here.Greg S said:Only thing you really have to do is make sure the floor is completely level, don't trust the slab to be level check it first. Also lay out your tiles first to make sure you have them positioned so that you don't have a real thin slivers against a wall that you will always see. Takes a bit more time to test lay but it's worth it in the long run. I've already done this with a kitchen and bathroom in my old house and am currently redoing one of the bathrooms in my new house. The bigger the tile the more work you have to do to make sure everything is even. Also don't mix up more thinset than you can use in a 15 minute time period as it'll get too dry to set right otherwise.
That $1000 invested will probably pay you back about 5 fold when you sell. With all the upgrading to the last house we managed to get about $15,000 over market value for our old house with the tile work and painting. Probably helped that I had completely remodled the bathroom and flipped an old closet in the master bedroom into a seperate shower in the bathroom. With the current house I'll be redoing all three bathrooms and replacing all the upstair carpet with wood floor and replacing the carpet and tile downstairs with new tile and more wood. Then a complete repaint inside and out. All told we'll probably spend about $10,000 on it but we planned for it when we bought and it'll probably increase the value approximately $25-30,000, along with the $65,000 it's already gone up in value since we moved in in December.
I agree 100%. Thanks for your guidance everyone.Jeff Solomon said:The best part about doing this yourself is all the money that you save on labor. Plus you get the satisfaction at the end of the day to step back and say "I did that".
Sounds like a job. (eek2)Greg S said:I wouldn't worry about time, I'm still working on redoing my kids' bathroom, three months later. I've actually got the backer board, drywall and tub done. Now I have to finish the third coat of mud and start tiling everything.
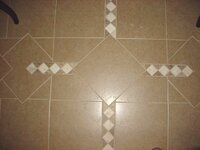
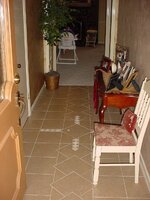
So do you have finished pics for us to see?