Guide 2nd Generation CX-9: Dashcam installation

sm1ke

2018 Mazda CX-9 Signature
Moderator
Contributor
:
Canada
This is a DIY How-To for a dashcam installation for the 2nd Generation Mazda CX-9. I decided to document this process as it seems nobody has done it yet. Please note that this guide is specifically for the installation of the Viofo A129 Duo dashcams (front and rear), hardwired to the Homelink-enabled rear view mirror with an Invisicord.

This process was documented/photographed by myself, using my crappy cellphone camera and my 2018 Mazda CX-9 Signature as the "demo" vehicle. This DIY is provided as a learning aid and reference guide. I assume no responsibility for any warranties you may void or damages you may inflict on yourself or your vehicle.

The camera set I installed is the Viofo A129 Duo. Both front and rear cameras record in 1080p 30 FPS (if the rear is disconnected, the front changes to 1080p 60 FPS). It takes still photos, and has a mic. Along with other standard features, it has GPS and Wi-Fi functionality, and can accept up to a 256gb microSD card. Viofo has stated that the best cards to use for their dashcams are Transcend High Endurance. Samsung Pro cards also work well, but they will not honor the 10 year warranty if the card is used for "surveillance recordings". Since both cameras write to the single card in the front camera, it makes sense to splurge for the higher capacity SD cards designed for dashcam use.


What you'll need:

- A pry tool
- MicroSD card (Ensure that you buy one specifically used for dashcams, like a Transcend High Endurance card)
- Invisicord (micro connectors with mini USB cable)


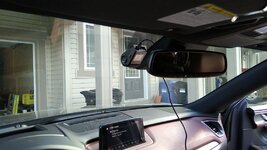
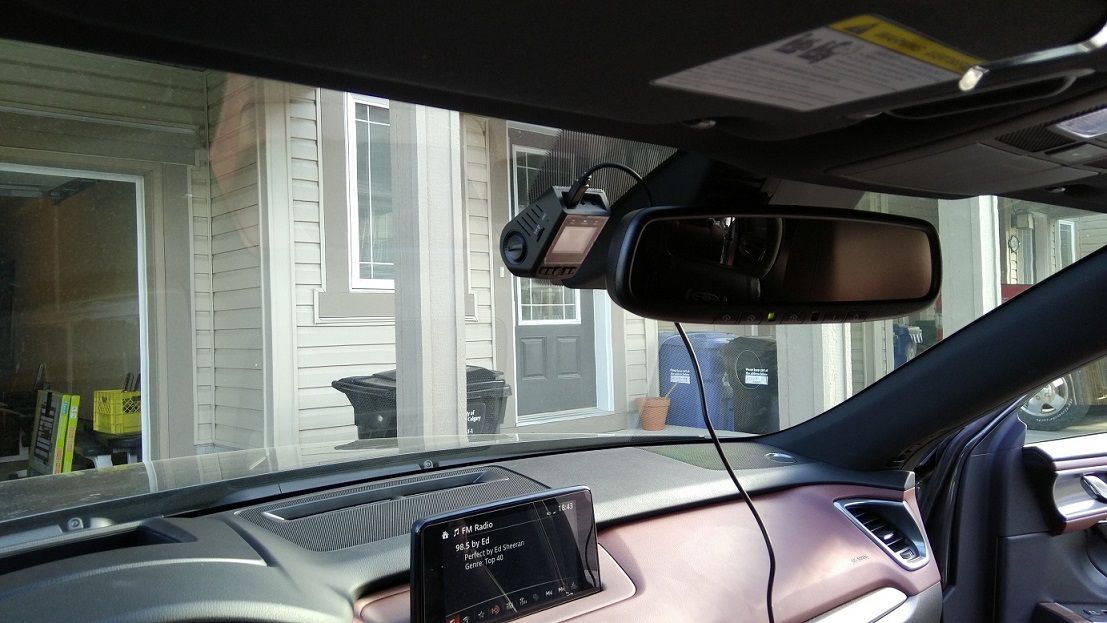
1. Figure out where you want to mount the dashcam. If your camera has a video display, you can connect the power cable and turn the car on, then mount the camera using the video output as a guide. After mounting the camera, turn off the car.
attachment.php


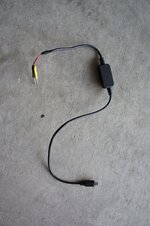
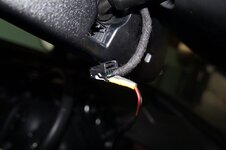
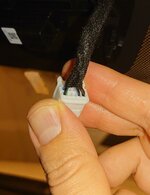
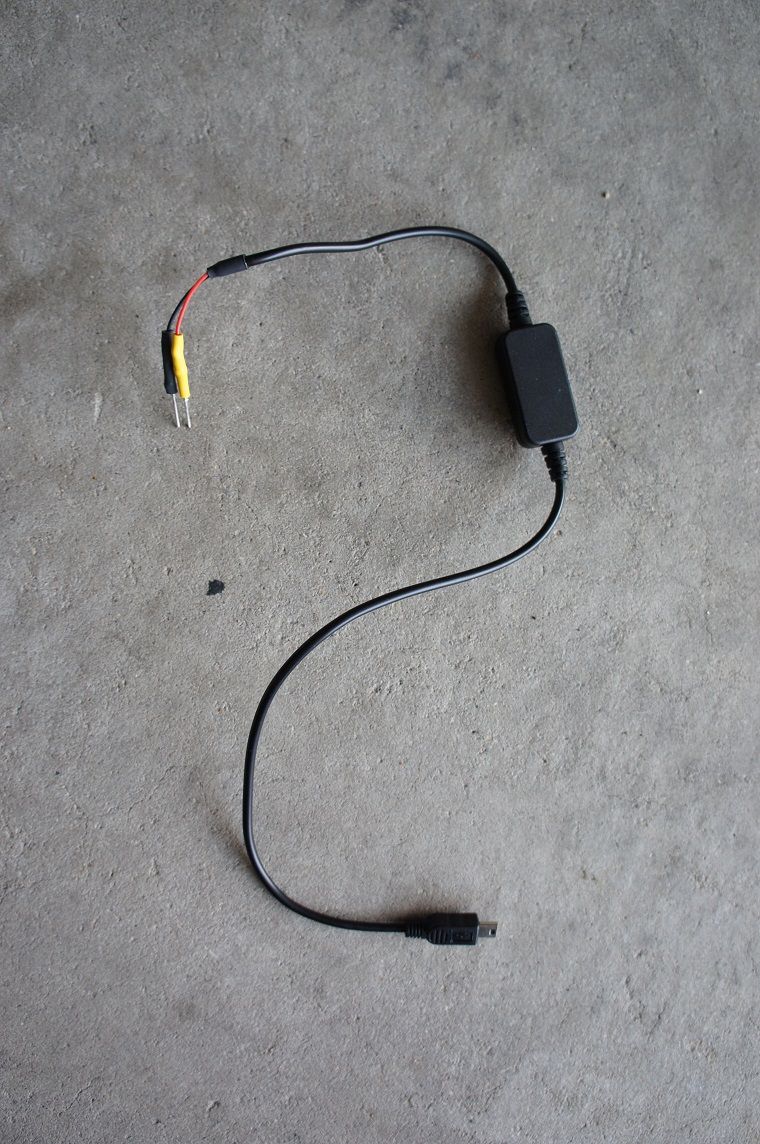
2. This is the Invisicord. The yellow lead is the positive tap, and the black lead is the negative/ground tap. The other end is a mini USB connector that will plug into my dashcam.
attachment.php


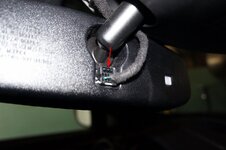
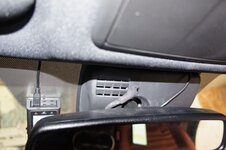
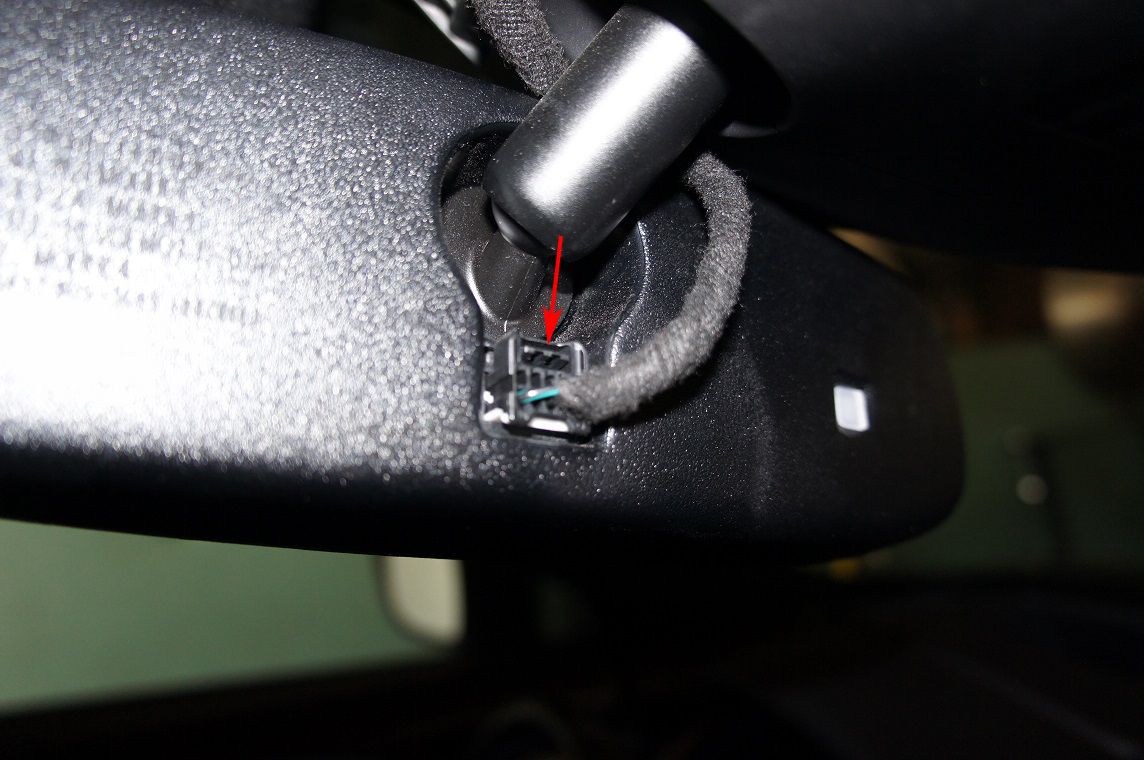
3. Locate the wiring harness on the back of your homelink rear-view mirror. Press down on the tab and pull the connector out.
attachment.php


Note that on models with the frameless rear view mirror, the wiring harness is located inside the enclosure mounted to the windshield. See post #38 for more info.


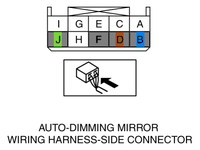
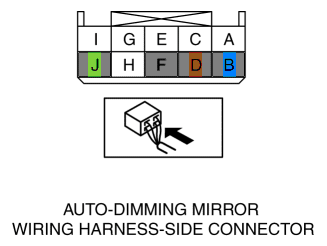
4. Refer to the diagram below (credit: DBLXX). As you can see, the green/black wire on the bottom left is your constant power. The bottom middle (black) is the ground.
attachment.php


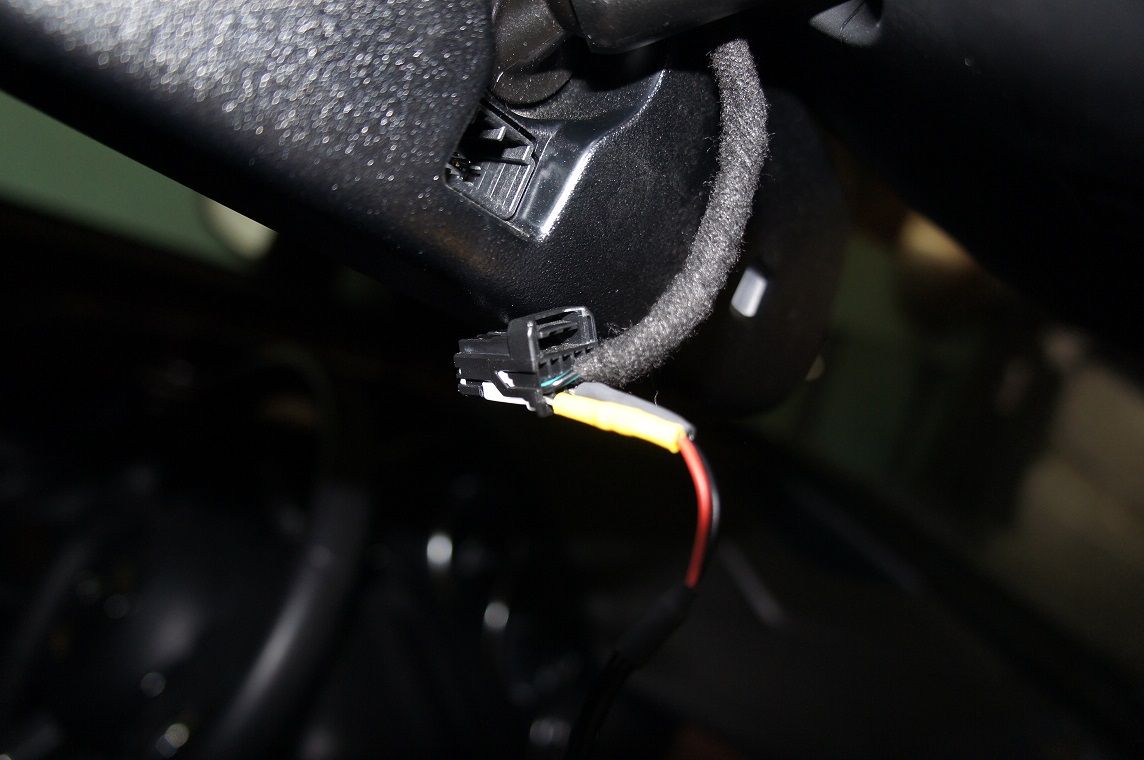
3. Press the black lead into the grounding socket of the harness (bottom middle, black wire). Then, without letting the yellow lead touch anything, insert it into the constant power socket (bottom left, green and black wire). The leads require some effort to get into the sockets, but once they're in, they won't easily wiggle/vibrate out. Also, if you're worried about accidentally blowing fuses, you can just disconnect the battery before this step.
attachment.php


4. If you disconnected the battery, reconnect it now. Connect the mini USB connector to the dashcam, and it should power on.

5. Push the extra cabling into the headliner.
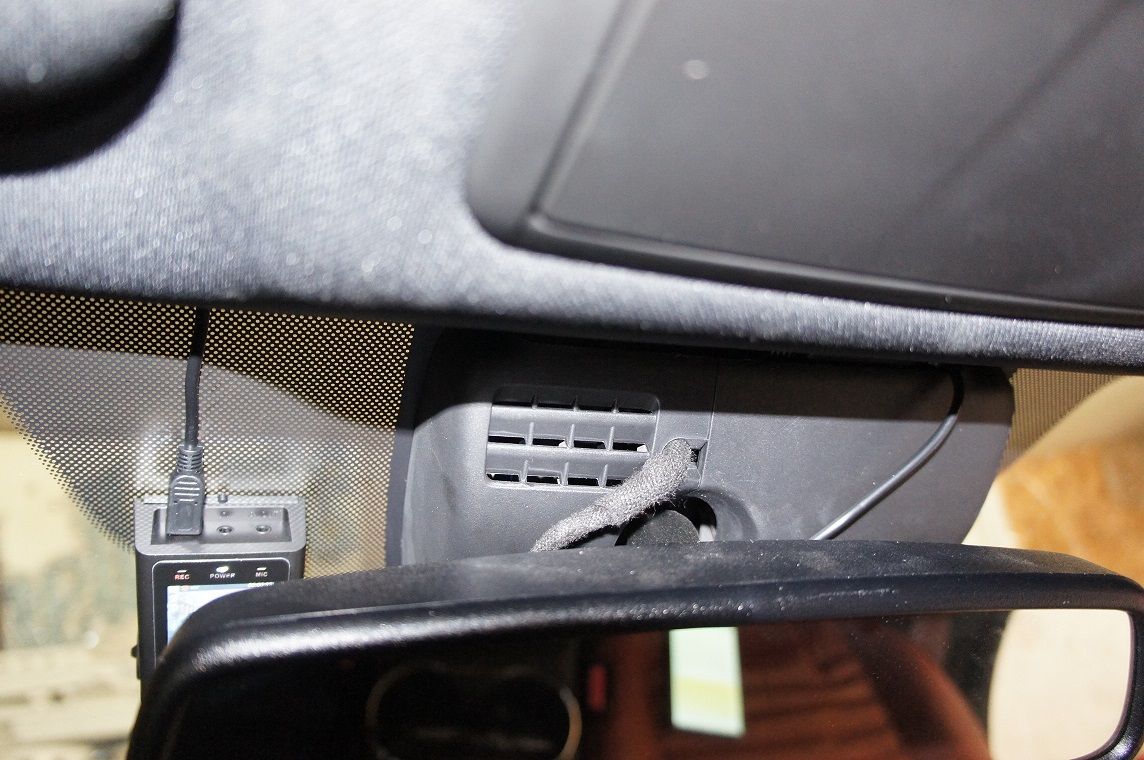
attachment.php


6. Turn the motion detection feature on, and that's it!


Hope that helped you guys out! If you have any questions, post them here and I'll do my best to answer them.
 

Attachments

  • 1-1.jpg
    1-1.jpg
    108.9 KB · Views: 8,178
Last edited:
Thanks SK77X for linking this thread: https://www.mazdas247.com/forum/sho...da-CX-5-NR-Dashcam-that-can-be-powered-by-USB

.. which led me to this thread, with some great info from DBLXX: https://www.mazdas247.com/forum/sho...ap-(Photos)-and-Amazon-Radar-deal-TODAY-ONLY-


Also, thanks to superp4 for the Invisicord install. I basically just rehashed his instructions, added pictures and edited one step to use the constant power instead of the switched power. If you just want your dashcam to turn on and off with the car, follow superp4's instructions in post #11.

Lastly, thanks Anchorman for pointing out my mistake in the original guide, where I was running the power cable across the A-pillar instead of down the A-pillar.
 
Last edited:
Here's some sample footage showing a daytime clip and a nighttime clip, with audio from the dashcam mic. As you can see and hear, its a very, very basic cam. I will probably upgrade the camera in the near future at some point.


Attachments

  • DSC03243.JPG
    DSC03243.JPG
    176 KB · Views: 7,295
  • DSC03251.JPG
    DSC03251.JPG
    112.7 KB · Views: 6,865
  • Mirror Electrical.png
    Mirror Electrical.png
    5.7 KB · Views: 6,828
  • DSC03256.JPG
    DSC03256.JPG
    79.2 KB · Views: 6,845
  • DSC03257.JPG
    DSC03257.JPG
    135 KB · Views: 6,864
Last edited:
The video quality is actually pretty good for a cheap cam. Clean install! Although the 12v cigarette chord wouldn't play nice with my OCD.
Oh, not sure about others but the attachments for parts 1-3 seem to be broken (at least from my computer).
 
The video quality is actually pretty good for a cheap cam. Clean install! Although the 12v cigarette chord wouldn't play nice with my OCD.
Oh, not sure about others but the attachments for parts 1-3 seem to be broken (at least from my computer).

I can't see the attachment either.

Very interested in this. I want to hide my dashcam cable and I was figuring out how to. Thanks, @sm1ke.
 
That is exactly what I did! the only thing is now my only 12v outlet is used up and the usb ports in the armrest are really slow at charging.... anyone know how to hardwire the camera to the fusebox?
 
dm1ke, thank for the tutorial. Let us know the longevity of the dash cam. I got one cheap also but it eventually broke down after a few months. thanks for the share.
 
Sorry for the late replies everyone, I was a bit busy with moving to a different city.

The video quality is actually pretty good for a cheap cam. Clean install! Although the 12v cigarette chord wouldn't play nice with my OCD.
Oh, not sure about others but the attachments for parts 1-3 seem to be broken (at least from my computer).

Yeah, quality is a little better than I was expecting, but it's not on the same level as some of the $350 cameras out there. Not being able to read license plates at night on the cam was troubling, but I played with the white balance settings and it's better now. When I spend more money on a cam, I want one that has an auto white balance feature, lol. Thanks for letting me know about the broken links, I could have sworn they were there when I first posted. I'll try to fix them now.

I can't see the attachment either.

Very interested in this. I want to hide my dashcam cable and I was figuring out how to. Thanks, @sm1ke.

Happy to help!

That is exactly what I did! the only thing is now my only 12v outlet is used up and the usb ports in the armrest are really slow at charging.... anyone know how to hardwire the camera to the fusebox?

Nice! Yeah, if anyone has any experience hardwiring a dashcam to the fusebox, that would be very helpful! I think wiring the cam to the correct fuse would allow for the use of the motion detection feature.

dm1ke, thank for the tutorial. Let us know the longevity of the dash cam. I got one cheap also but it eventually broke down after a few months. thanks for the share.

Thanks, I'll be sure to keep you updated if this cam breaks. One of the characteristics that seems to be advertised a lot with the cheaper dashcams is heat resistance. I wonder if that's why your cam broke widdy88?
 
I ended up buying an invisicord.
http://invisicord.com/osc2/catalog/...id=58&osCsid=911d3ba422bb7115912cd973f6b93dcc
Optioned it with mini USB connector for my dashcam, micro connector which fit perfectly into the powered harness, and added a fuse
Disconnected the power harness going to my homelink autodimming mirror. Looking at the harness from behind, there are 10 sockets. Only the bottom 5 do anything. Green (bottom left) is always on. Middle is ground, and so is the one just to the right of it. Blue (bottom right) is switched (12V on but only with ignition on). I plugged invisicord black micro connector into the middle grounded socket, then the yellow positive lead into the same socket as blue. This way, dashcam turns on with ignition, off when car is off. Avoids having to tuck wires into trim and frees up 12V power for other things.

Nice! Thanks for contributing with some easy steps to follow.

I think I'm going to order the Invisicord now. The only difference between what you did and what I want to do is have continuous power to the dashcam, even when the car is off (so I can use the motion detection feature on the cam when the car is parked). If I want that, I would just plug the positive lead from the Invisicord into the green (bottom left) socket of the homelink mirror, correct?

Edit: Also, it looks like the server issues wiped the pics from the first post. I'll try to get those pics up again in a couple of days.

Yes, just plug the yellow into the same socket as green. Just be careful not to touch yellow and black leads together otherwise could blow a fuse or something. Also there is a risk of running down your battery if you plug it into the always on port, depending on how long you leave the car off.
 
Yes, just plug the yellow into the same socket as green. Just be careful not to touch yellow and black leads together otherwise could blow a fuse or something. Also there is a risk of running down your battery if you plug it into the always on port, depending on how long you leave the car off.

Thanks! Updated post #1 and post #3 with Invisicord install and photos.
 
Also, here is some info from tekz regarding the rear cam installation.

... I installed another dashcam in the rear. I placed it on the inside top portion of the rear windshield and ran the wiring through the plastic cover above it, then the wiring remains exposed on the right side when facing the cargo area just above the 12v outlet. Of course the wiring exposure is not as tidy as the front but nevertheless works for its purpose!
 
Just did mine..

Also installed a dashcam that receive power from the mirror on my cx9 GT (2018). I basically doctored my own invisicord by buying the mini usb with the 12v to 5v converter built in with two wires. I think soldered the wire with two jumper pins and connected to the ignition power. (See above for other ppls excellent instructions).. Works like a charm!
 
i have the 2019 cx9 I can't get the access to the mirror plug with the new frameless mirror. anyone has a 2019 and did the mirror tap can share some clue?

edit: so I was able to access the plug. with the new frameless mirror in 2019 they have the connector hid in the rain sensor area behind the cover.
pull over the cover and you will see the connector.
 
Last edited:
i have the 2019 cx9 I can't get the access to the mirror plug with the new frameless mirror. anyone has a 2019 and did the mirror tap can share some clue?

edit: so I was able to access the plug. with the new frameless mirror in 2019 they have the connector hid in the rain sensor area behind the cover.
pull over the cover and you will see the connector.

Good to know! Thanks for posting :)
 
i have the 2019 cx9 I can't get the access to the mirror plug with the new frameless mirror. anyone has a 2019 and did the mirror tap can share some clue?

edit: so I was able to access the plug. with the new frameless mirror in 2019 they have the connector hid in the rain sensor area behind the cover.
pull over the cover and you will see the connector.

But the wiring harness is different than described here. Have you found wiring harness scheme?
Mine looks like this:
_20181210_143321.JPG
 

Latest posts

Back