Anyone know how to...

:
23 CX-5 Premium
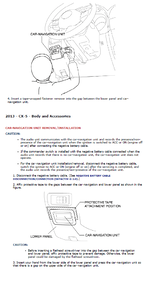
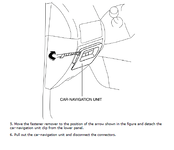
..remove the accessory switch panel (the one containing the TPMS and other switches) to the left of the steering column? Supposedly you're supposed to push it out from behind after removing the cubby or nav switch below it, but I can't figure out how to get the cubby out without damaging it.
 
It comes out not too easy. You are on the right track, push it from below from the back out. Left and right it is clicked in or up and down,(can't remember right now) but you can push it with your fingers together so that you can push it out.
I installed a LED next to the buttons wich show when the diesel particle filter regeneration is (SKY)active. Then there is a decrease of power around 10% so not the time for big actions. Around every 200km it takes around 20km for one run. Looks like factory made.

Cheers 101
 
Problem is I cannot get to the back side to push because the cubby hole is in place below it. So how do I remove that?
 
Problem is I cannot get to the back side to push because the cubby hole is in place below it. So how do I remove that?

easy.. just hire a really small man to take it out:
(hope this helps.. sorry the pages are out of order)
attachment.php
attachment.php
 

Attachments

  • New Bitmap Image.png
    New Bitmap Image.png
    38.8 KB · Views: 526
  • Untitled.png
    Untitled.png
    11 KB · Views: 502
Last edited:
The cubby pushes out from the back also... Or can be pulled out from the front.

This video shows the easiest process for frontside cubby removal..
 
Last edited:
I installed a LED next to the buttons wich show when the diesel particle filter regeneration is (SKY)active. Then there is a decrease of power around 10% so not the time for big actions. Around every 200km it takes around 20km for one run. Looks like factory made.

Cheers 101

Oh, yes....can you be willing to share on how you went about this? One of the biggest annoyance the CX-5 & DPF regen is that there is no simple telltale light to show that it's active. Of course I have a OBD reader and Forscan but I don't run this every time. When I know I'm doing a regen I usually hold it back in forth gear to get the revs up to 2000 or more. The PDF regen becomes more stable and complete when the exhaust temps are at around 700 degrees.

It would be great to share how you did it.
 
How to remove the plastic parts, around the 12V socket, below the temperature control?
I want to install, a panel mount HDMI connector(extension cable for MHL)
 
Oh, yes....can you be willing to share on how you went about this? One of the biggest annoyance the CX-5 & DPF regen is that there is no simple telltale light to show that it's active. Of course I have a OBD reader and Forscan but I don't run this every time. When I know I'm doing a regen I usually hold it back in forth gear to get the revs up to 2000 or more. The PDF regen becomes more stable and complete when the exhaust temps are at around 700 degrees.

It would be great to share how you did it.

I got the modul wich read out the can bus for the information like you know it from forescan from a guy from our german forum. He is really a genius figured out the canbus he need's to get the informations for also OIL TEMPERATURE(most important to me) +battery charging, engergy run, AWD transaction and so on him self over a year and build a modul now already plug and play principe, wich works absolutely reliable for me.

https://2can.etrich.de/

Now he set up a website for this product. I had one of the first modules which is directly connected to the main energy strain of the car because my OBD plug is different due to C&S System security.
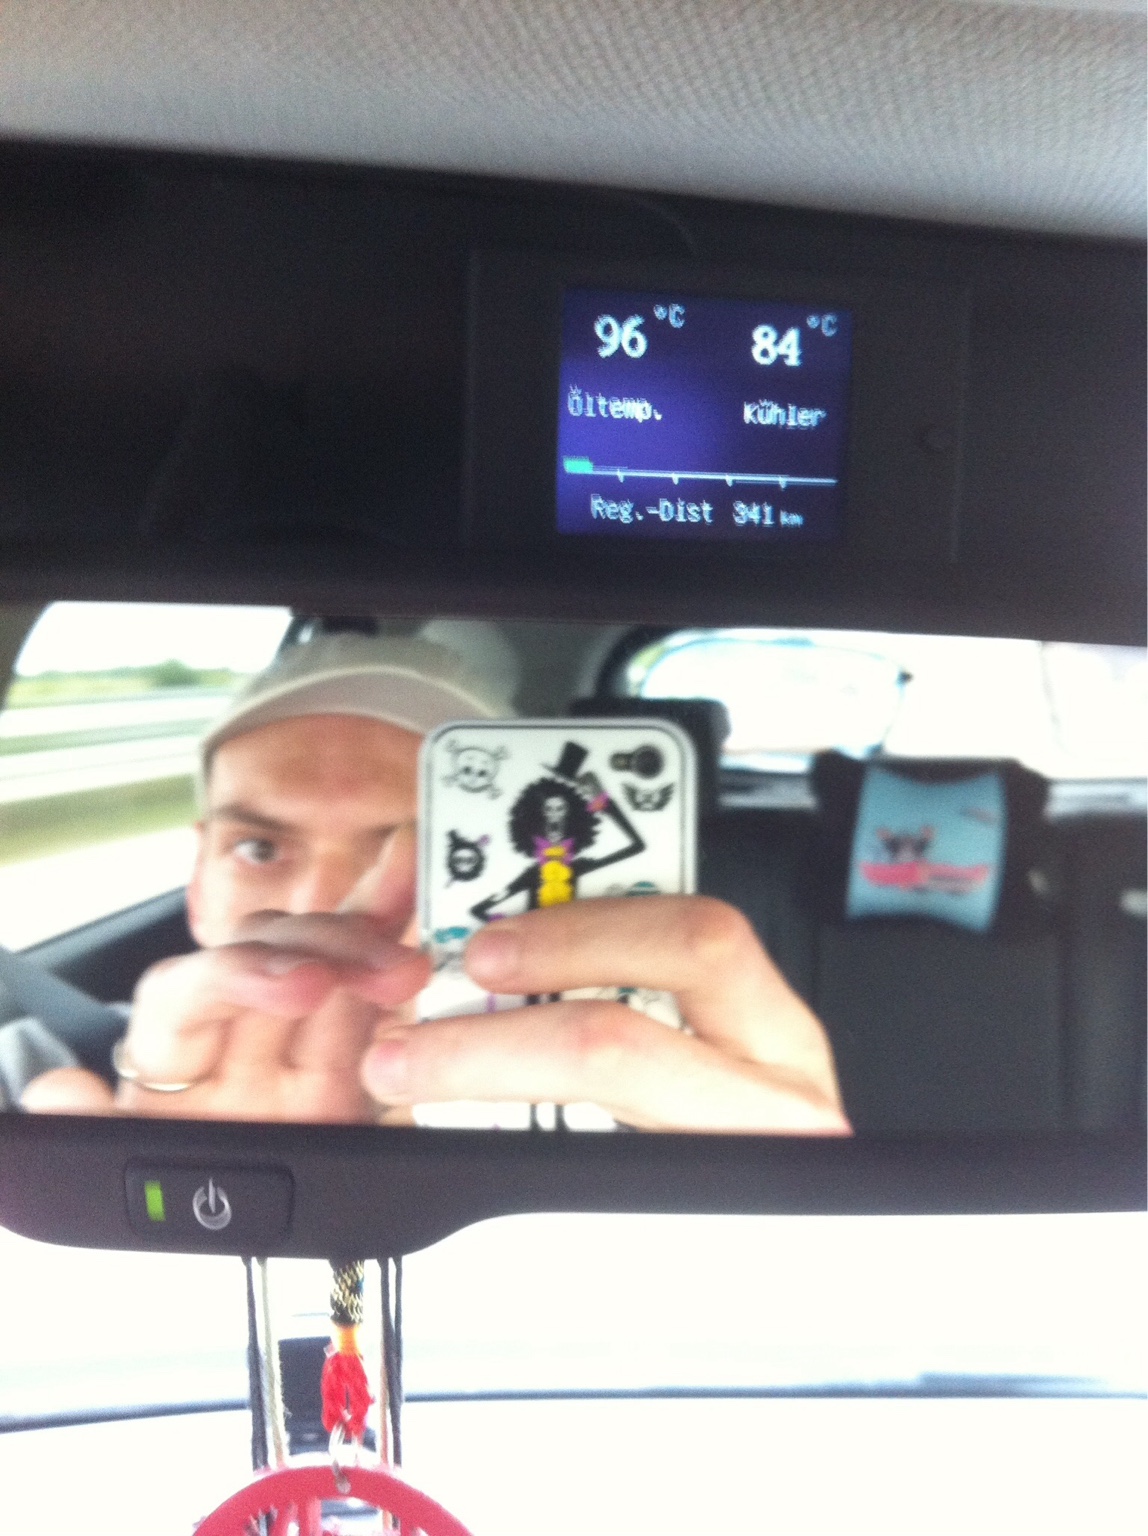
Now you can just plug it on OBD put the wires were you want and set the display and the LED were you like to have it. I have the display above the back mirror and the LED were I Said.
67cda440f4dad47be429690a54f4f5d3.jpg

The display got a litle button to change the four levels- 3 with lot of different informations and the fourth black for service time.(they don't need to see[emoji6]) the temperature figures even change the color blue=cold, green=normal, yellow=a bit hot, red=drive slower NOW!!!
BTW TomTom curfer or forescan with a modem on the OBD to show it on your device would do the same job.
Hope the information helps.

Cheers 101
 
Last edited:
Back