
- :
- FC, FE, Mazda5
Two weekends ago I got to the source of a metallic rattling noise coming from the back of the 5 when going over bumps - a piece of the driver's side rear spring had rusted/sheared off! It was trapped between the rest of the spring and the lower control arm, free to rattle about. To remedy this, I ordered 2 new rear springs (replace them in pairs to avoid uneven ride height due to spring sag & fatigue, especially in rust-induced cases!) as well as the rubber spring mounts & the rear sway bar links. I decided to replace the sway links because I don't know when they were last done, and because I typically have to cut them off to remove them due to rust.
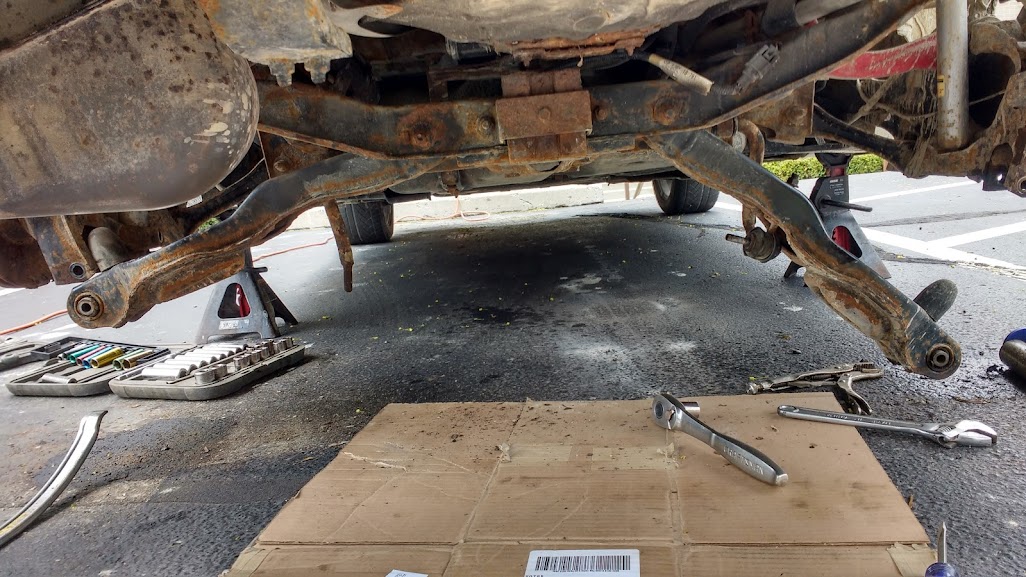
First, jack the rear of the car up & support it on jack stands. You want both rear wheels off the ground since you're doing both sides, and having both sides at full droop takes the load off of the sway bar and links. Then, I removed the rear sway links - in theory, you should be able to remove them like so:
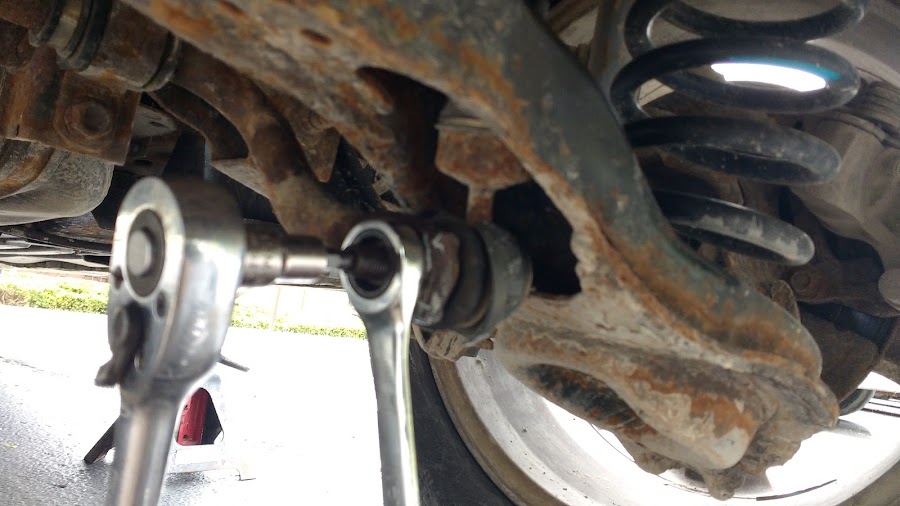
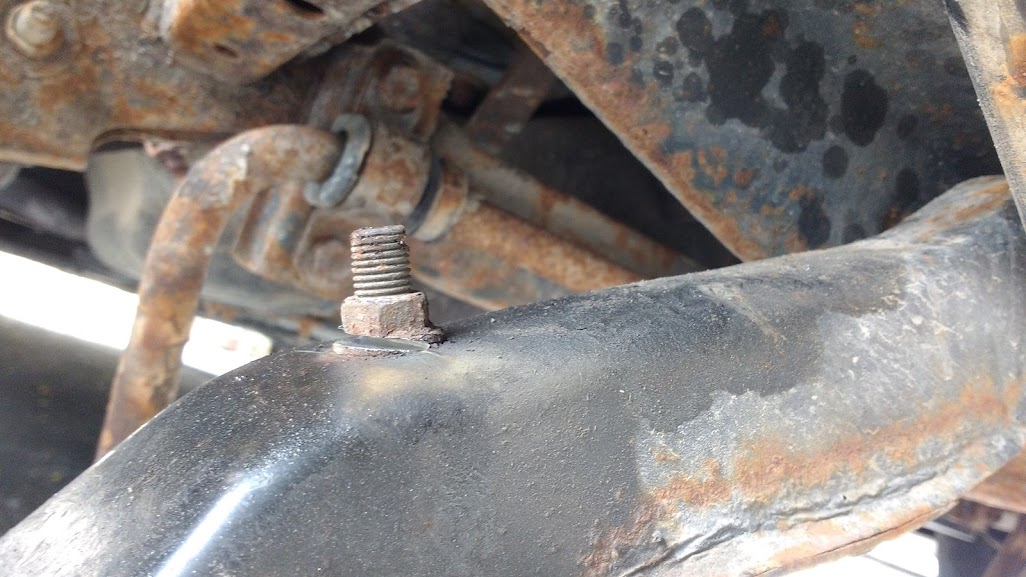
with a box-end wrench on the nut, and an allen key inside the stud to keep it from turning with the nut. I was able to remove 1 of the 4 nuts this way (thank you MI rust...), one of them with the box wrench and some vice grips when the allen key stripped, and the other two required some destructive removal with an angle-grinder & cut-off wheel. Yay sparks!
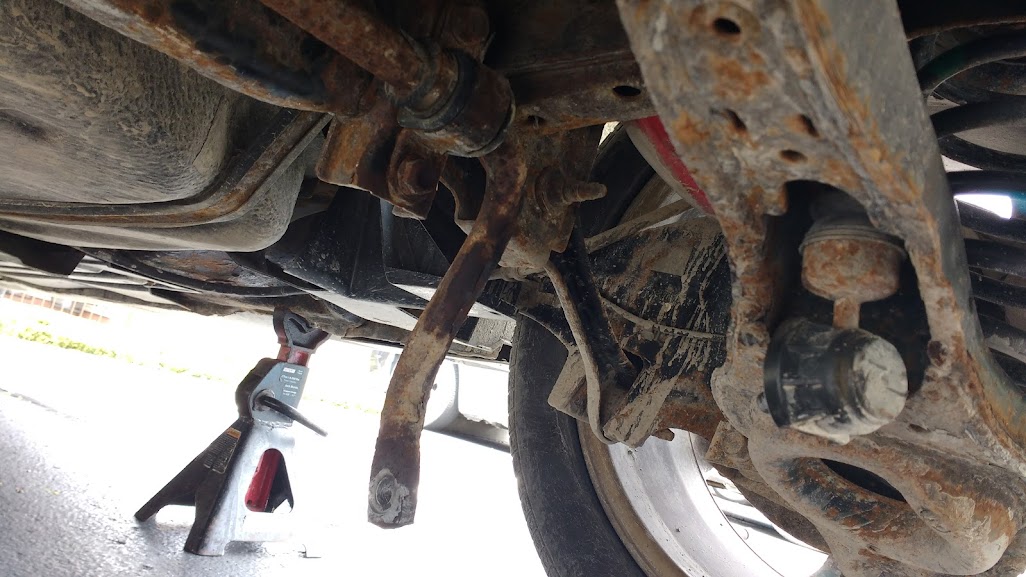
That last image is slightly out of order, since I was able to remove one nut per side of the sway bar, I could disconnect it from both arms and swing it down & out of the way of the lower control arms.
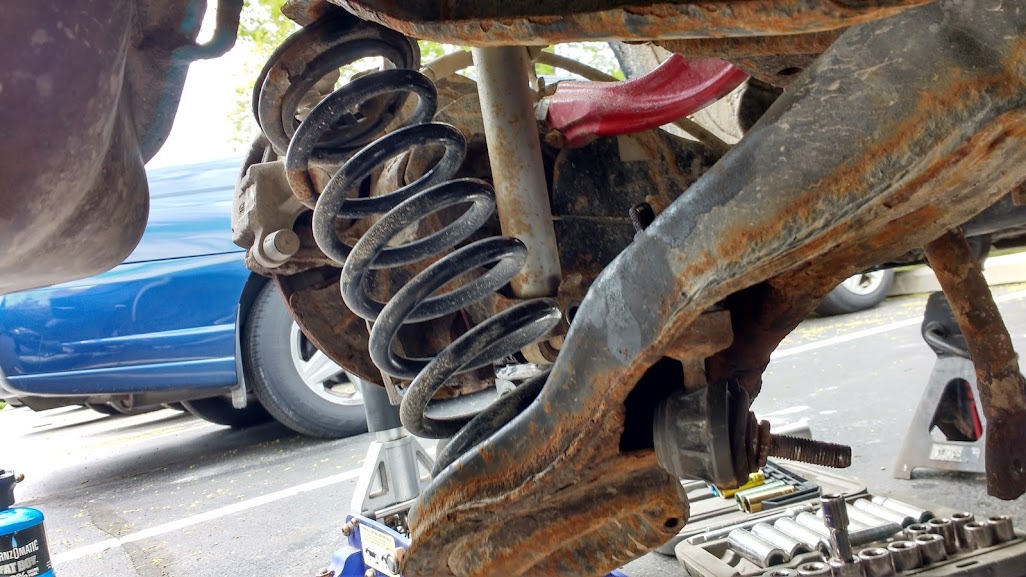
At this point, I raised the jack underneath one of the knuckles, making sure that the jack pad was supporting the outer end of the control arm and the knuckle. You need to support the knuckle and outer end of the control arm since the spring is still under compression when the suspension is at full droop, meaning that if you unbolt the arm from the knuckle, the spring will try to force the arm out of the knuckle, potentially injuring you in the process.
Now its time to remove the lower control arm - to - knuckle bolt, and once that's out, release the jack slowly and the lower control arm should get pushed out of the knuckle by the spring. The knuckle is held up by the shock absorbers bump stop, and the binding of the other control arms, so it can't fall far enough to dislocate any other components or stretch the brake line. At this point, the spring will just fall out from between the subframe and the lower control arm.
Repeat this process on the other side of the car. Once the springs are out and the lower control arms are hanging here, it's a great time to cut off those sway bar links if necessary.
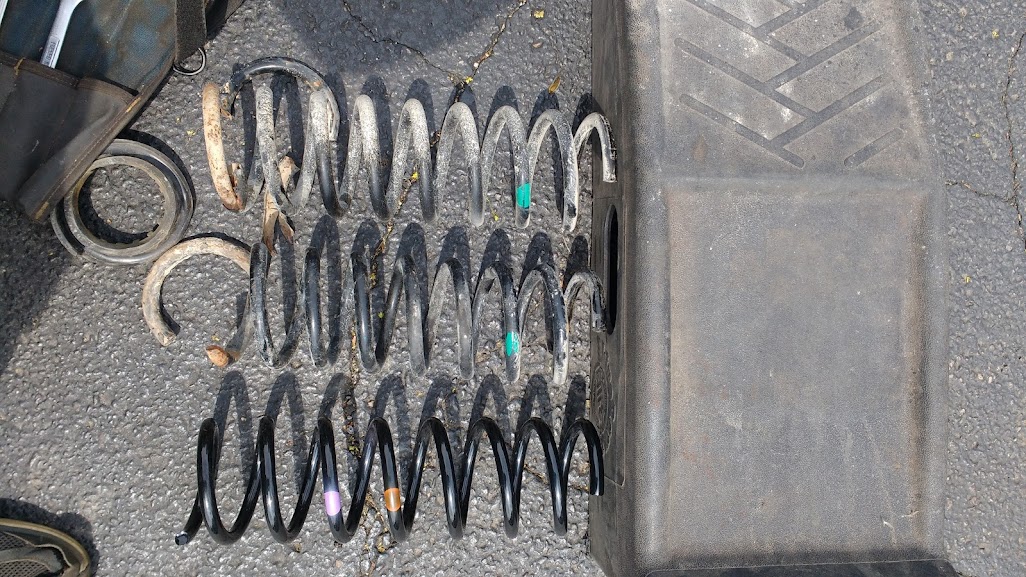
In addition to the broken piece of spring that I fished out two weekends ago, there was another broken piece on each side, meaning that I had lost a whole coil on the driver's side, and about half a coil on the passenger's side. This is why you plan on replacing suspension components in pairs - if one side has broken, the other likely isn't far behind!
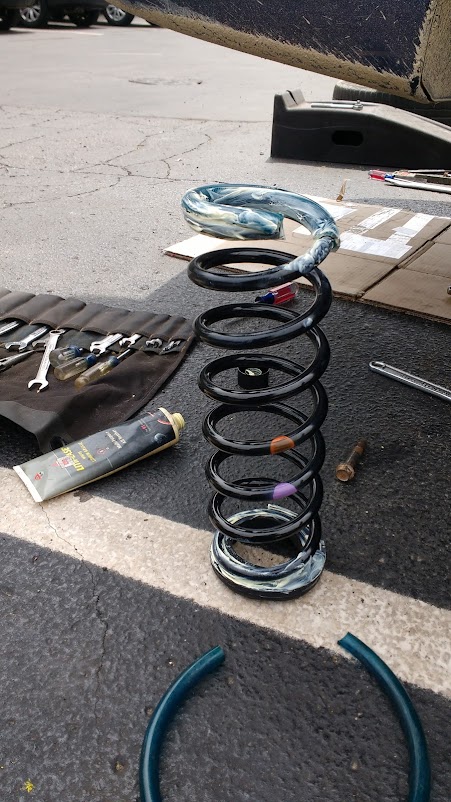
Since the bottom end of the spring was so rusted, I took some rubber tubing and cut a slit along the outside of a coil's worth. Then, I coated the inside with lithium grease and slid it on to one end of the spring (they didn't seem to have dedicated top & bottom ends). I coated the top mount inside & out with the grease too, as well as the outside of the tubing. This should help prevent rust & squeaking in the future.
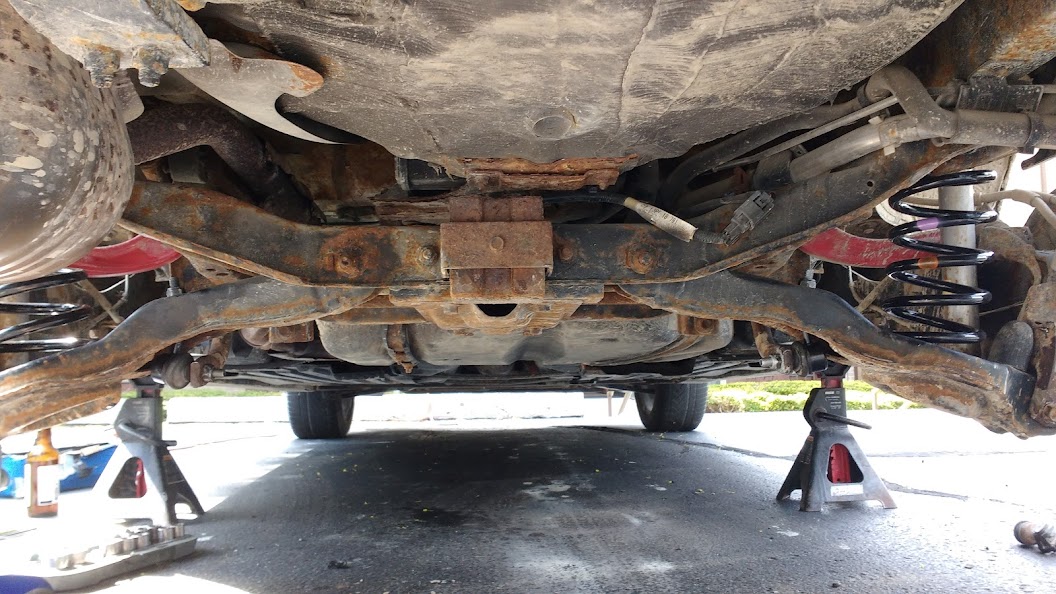
Then, as they say in the manuals, installation is the reverse of removal. To compress the spring and line up the lower control arm and knuckle bolt holes, its helpful to use the jack on the end of the lower control arm. Make sure that you put some anti-seize grease on the various threads so that next time you need to do some suspension work, they aren't as difficult to remove.
First, jack the rear of the car up & support it on jack stands. You want both rear wheels off the ground since you're doing both sides, and having both sides at full droop takes the load off of the sway bar and links. Then, I removed the rear sway links - in theory, you should be able to remove them like so:
with a box-end wrench on the nut, and an allen key inside the stud to keep it from turning with the nut. I was able to remove 1 of the 4 nuts this way (thank you MI rust...), one of them with the box wrench and some vice grips when the allen key stripped, and the other two required some destructive removal with an angle-grinder & cut-off wheel. Yay sparks!
That last image is slightly out of order, since I was able to remove one nut per side of the sway bar, I could disconnect it from both arms and swing it down & out of the way of the lower control arms.
At this point, I raised the jack underneath one of the knuckles, making sure that the jack pad was supporting the outer end of the control arm and the knuckle. You need to support the knuckle and outer end of the control arm since the spring is still under compression when the suspension is at full droop, meaning that if you unbolt the arm from the knuckle, the spring will try to force the arm out of the knuckle, potentially injuring you in the process.
Now its time to remove the lower control arm - to - knuckle bolt, and once that's out, release the jack slowly and the lower control arm should get pushed out of the knuckle by the spring. The knuckle is held up by the shock absorbers bump stop, and the binding of the other control arms, so it can't fall far enough to dislocate any other components or stretch the brake line. At this point, the spring will just fall out from between the subframe and the lower control arm.
Repeat this process on the other side of the car. Once the springs are out and the lower control arms are hanging here, it's a great time to cut off those sway bar links if necessary.
In addition to the broken piece of spring that I fished out two weekends ago, there was another broken piece on each side, meaning that I had lost a whole coil on the driver's side, and about half a coil on the passenger's side. This is why you plan on replacing suspension components in pairs - if one side has broken, the other likely isn't far behind!
Since the bottom end of the spring was so rusted, I took some rubber tubing and cut a slit along the outside of a coil's worth. Then, I coated the inside with lithium grease and slid it on to one end of the spring (they didn't seem to have dedicated top & bottom ends). I coated the top mount inside & out with the grease too, as well as the outside of the tubing. This should help prevent rust & squeaking in the future.
Then, as they say in the manuals, installation is the reverse of removal. To compress the spring and line up the lower control arm and knuckle bolt holes, its helpful to use the jack on the end of the lower control arm. Make sure that you put some anti-seize grease on the various threads so that next time you need to do some suspension work, they aren't as difficult to remove.
Last edited:
")