
You are using an out of date browser. It may not display this or other websites correctly.
You should upgrade or use an alternative browser.
You should upgrade or use an alternative browser.
SkyActiv Oil Analysis Thread
- Thread starter Kedis82ZE8
- Start date
- :
- Denver, CO
- :
- Denver, CO
Alright, here's the first guide. This will just allow you to link the PDF in the post. I'll write a second one to post it as an image. You can choose which you want to do, I'd recommend for this case using the second guide so that you can blot out your name and address from the UOA. That guide will be up shortly.
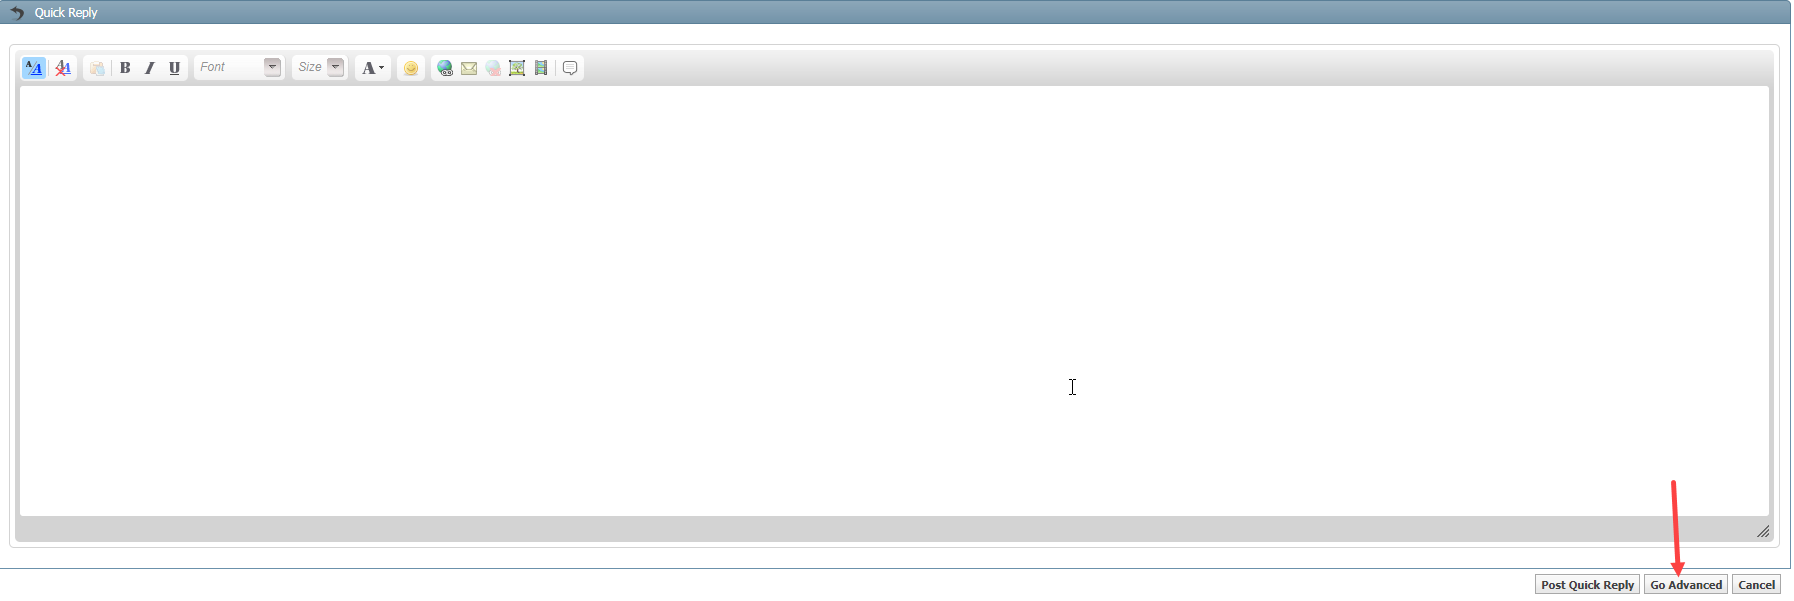
1. Make sure you go to the "Go Advanced" reply form.
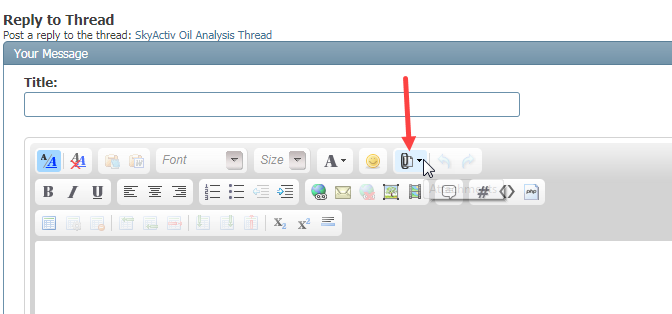
2. In the advanced reply form, click the "Attachments" button.
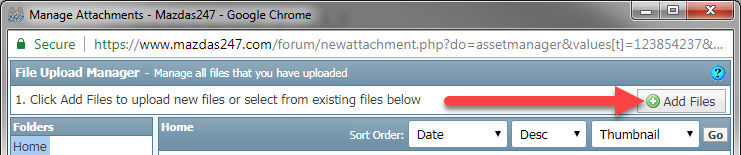
3. The attachment window will pop-up. Click the "Add Files" button.
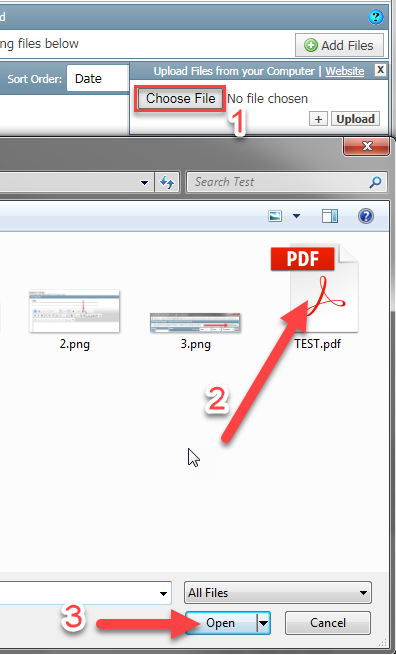
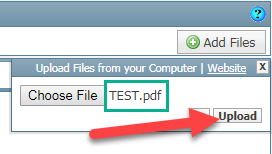
4. A smaller box will open to upload files from your computer. Click the "Choose File" button. You can then select your PDF file on your computer. Then click "Open".
5. You'll notice the file name appear in the area I outlined in green in the next pic. Click "Upload".
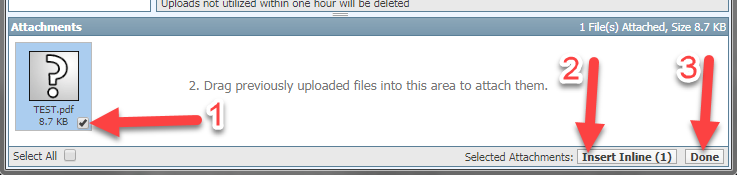
6. When the image is done uploading, it will appear under attachments. Make sure the checkmark is selected, then click "Insert Inline (1)", then click "Done".
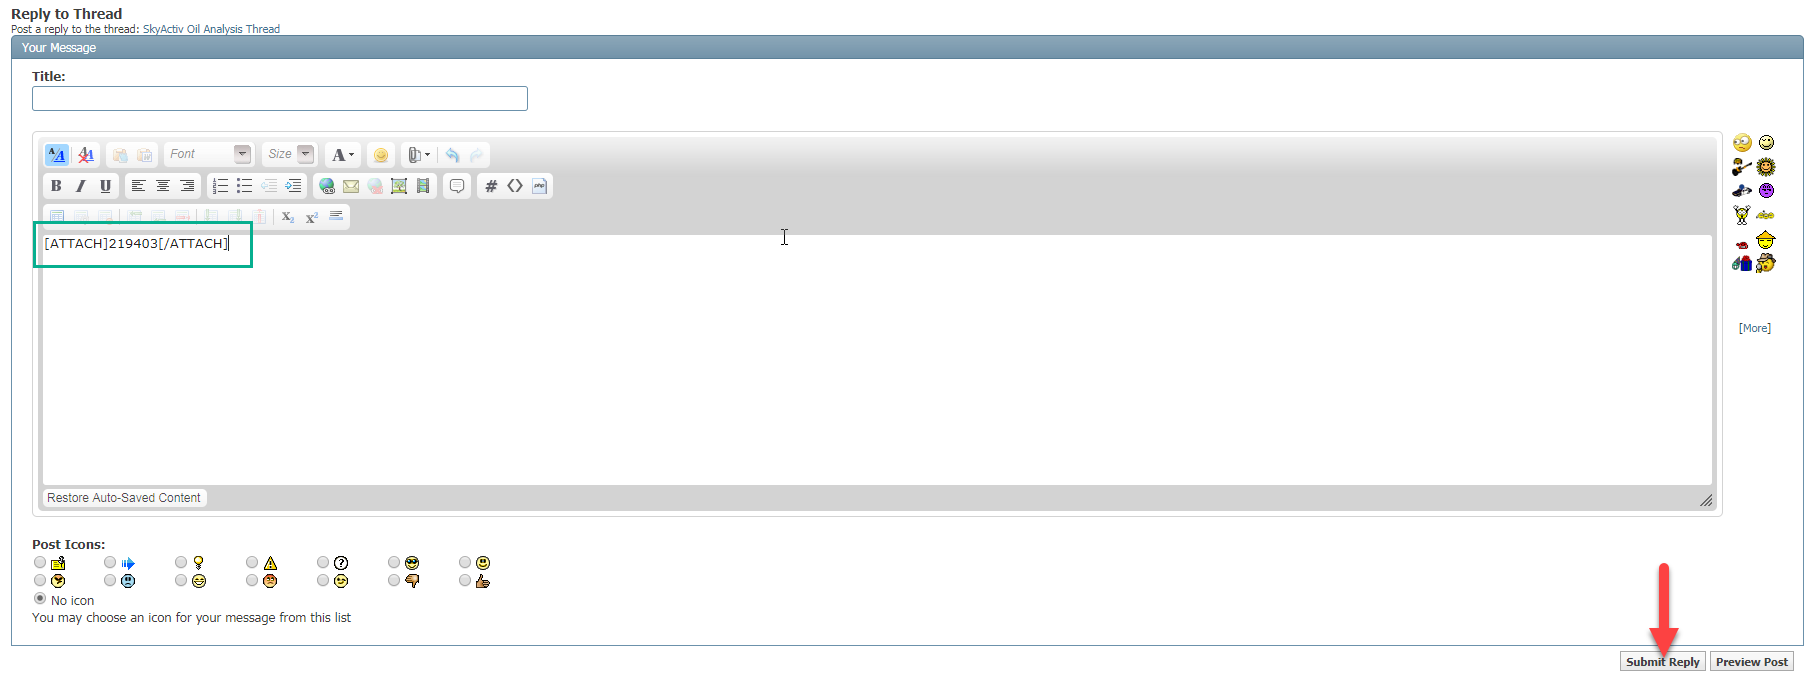
7. This will insert the file into your post. Then click "Submit Reply".
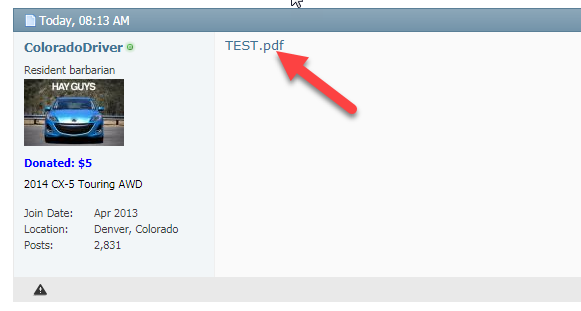
8. You're done!") PDF will now be in your post as a clickable link.
PDF will now be in your post as a clickable link.
1. Make sure you go to the "Go Advanced" reply form.
2. In the advanced reply form, click the "Attachments" button.
3. The attachment window will pop-up. Click the "Add Files" button.
4. A smaller box will open to upload files from your computer. Click the "Choose File" button. You can then select your PDF file on your computer. Then click "Open".
5. You'll notice the file name appear in the area I outlined in green in the next pic. Click "Upload".
6. When the image is done uploading, it will appear under attachments. Make sure the checkmark is selected, then click "Insert Inline (1)", then click "Done".
7. This will insert the file into your post. Then click "Submit Reply".
8. You're done!
PDF will now be in your post as a clickable link.
Last edited:
- :
- Denver, CO
OK, for this second guide, you'll be able to post it as an image. This one is advantageous as you can use paint to block out any personal identifying information (name, address, etc.) from your UOA before posting it here.
Convert the PDF to an image
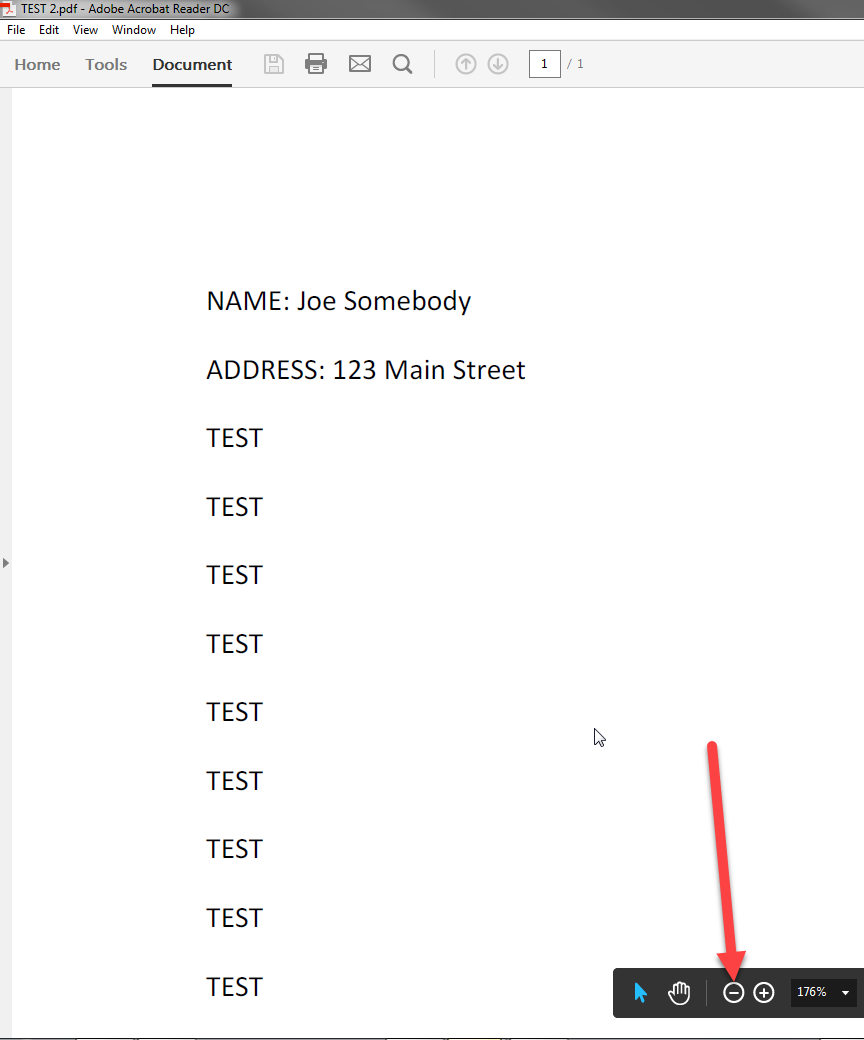
1. Convert the PDF file to an image. Easiest way to do this is to open the PDF file. When it's open you may need to resize it so that it fits all the data on your screen without scrolling. (Note: you may have a different PDF reader program than me, so this may look different for you.
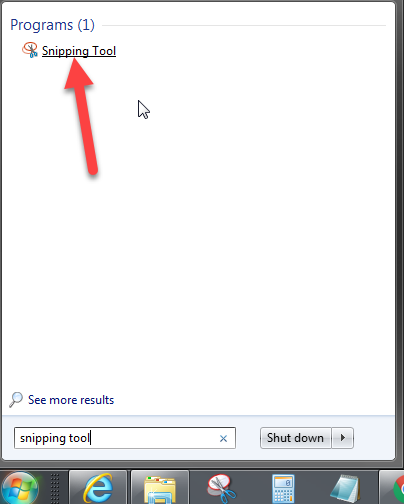
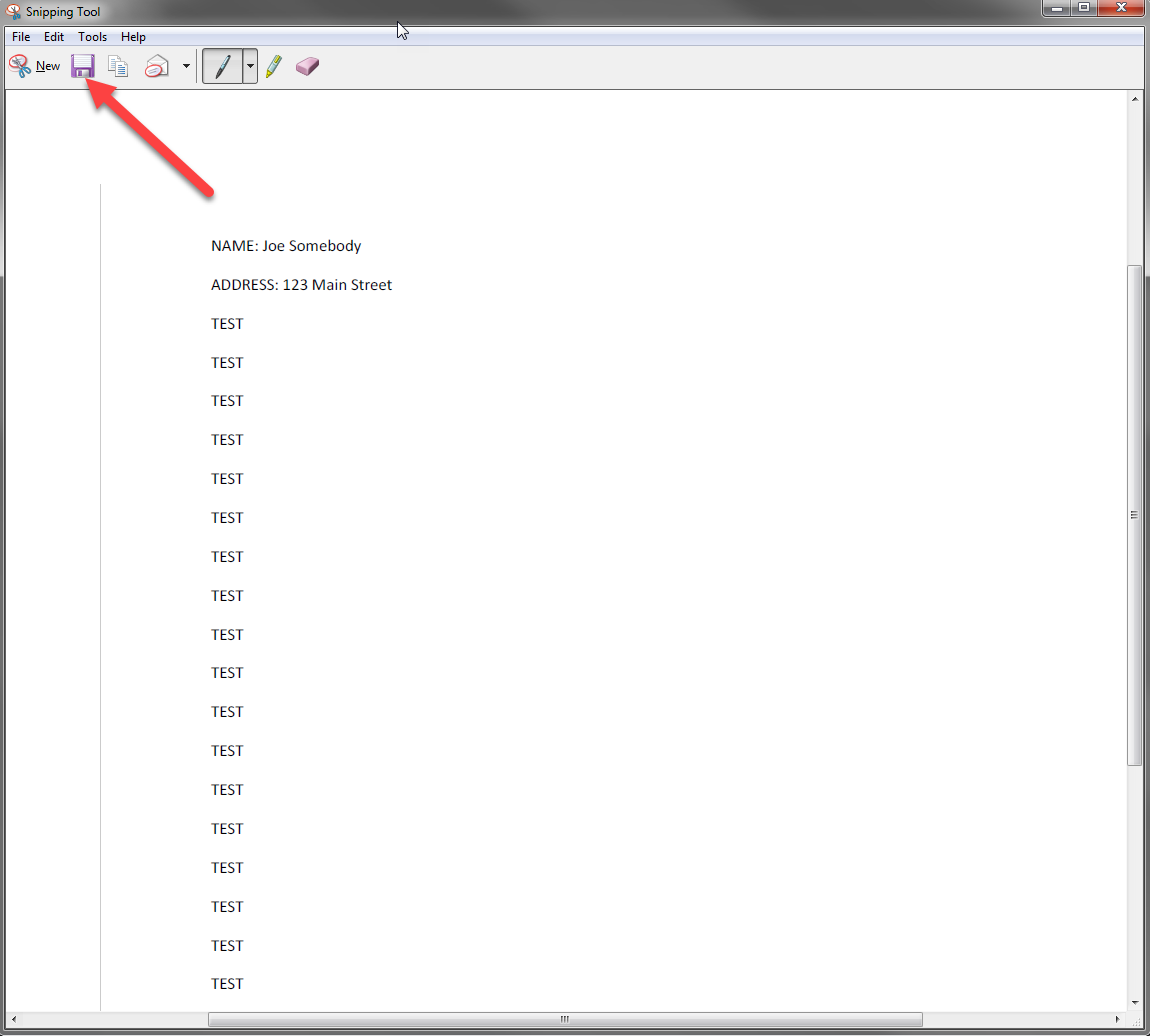
2. When the PDF has been sufficiently sized so that all the necessary data fills your screen, open a program called "Snipping Tool". This is a tool build into Windows.
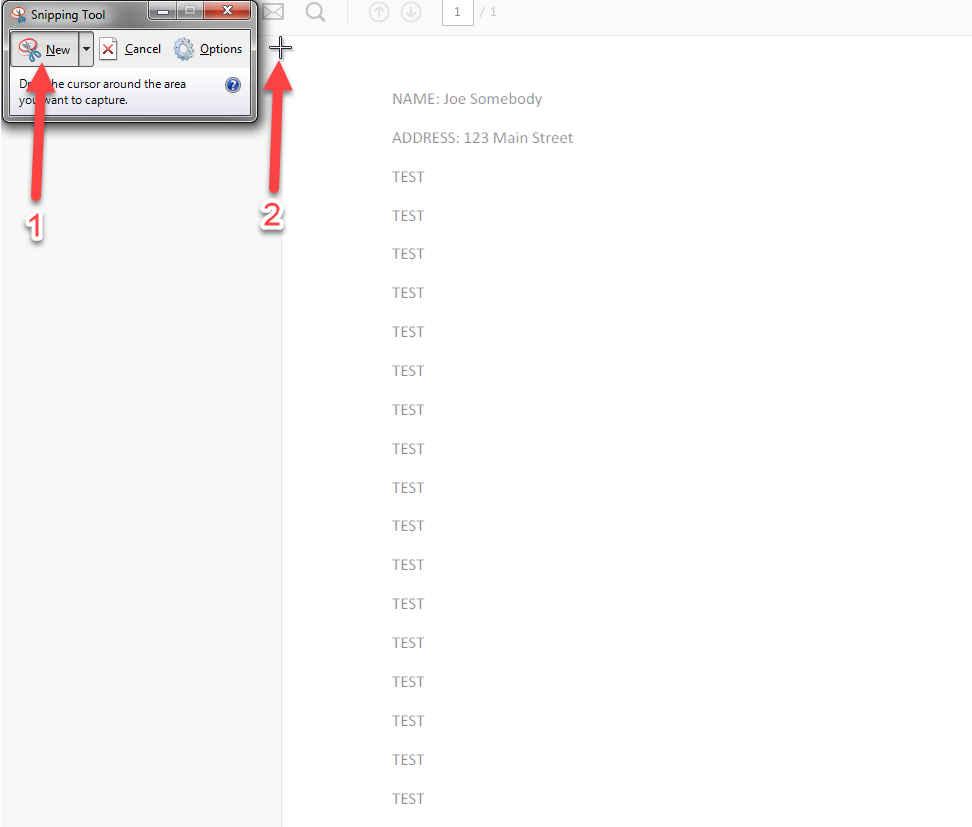
3. When the Snipping Tool opens, it will allow you to drag over an area on your computer screen to capture it as an image. It's like a budget version SnagIt if you have ever used it. It usually auto selects "New" open opening the program, but in case it doesn't, click "New". When you do, your mouse will turn into crosshairs, and the rest of your screen will sort of "white out" a bit.
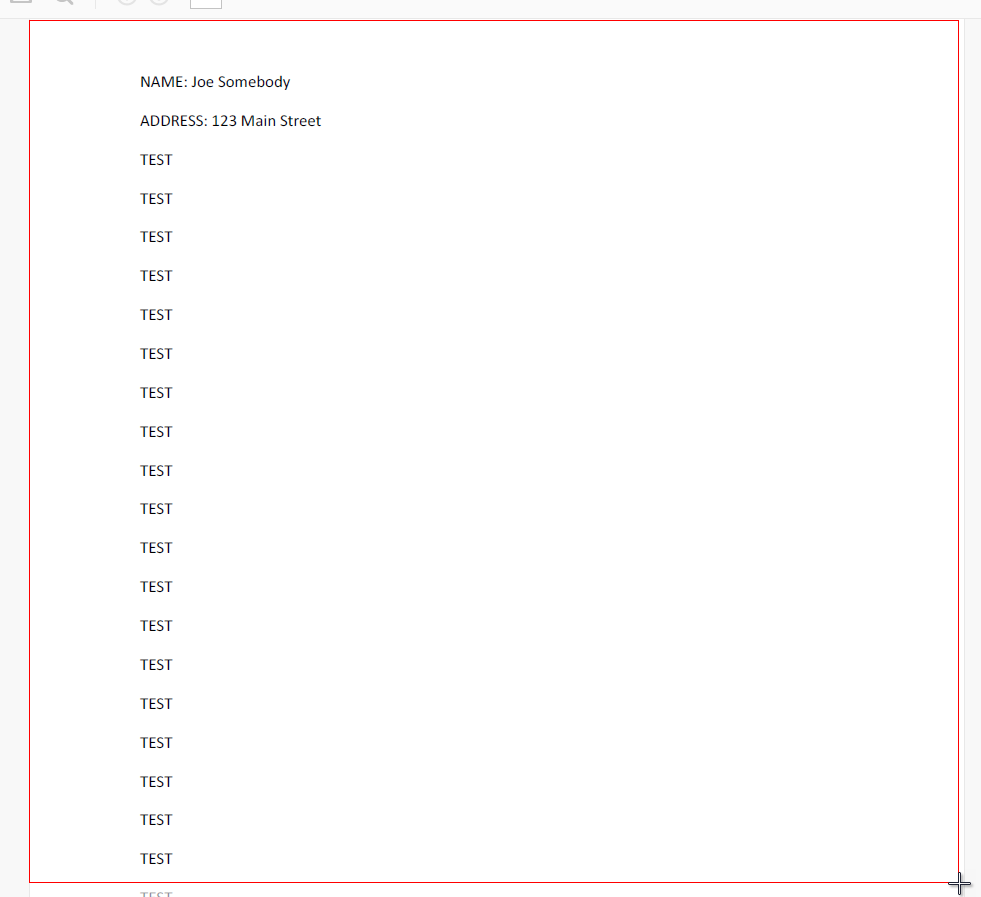
4. Click and hold your mouse button down and drag a rectangle around your opened UOA PDF. You'll see a red outline showing what you are "snipping". When you have captures the entire page, let go of your mouse button. Notice how I dragged from the upper left corner to the bottom right corner.
5. Upon letting go of the mouse button, the image will capture and you will get this window pop-up. Click on the "Save Snip" button, and save the file to your desktop, or anywhere else you can easily find it.
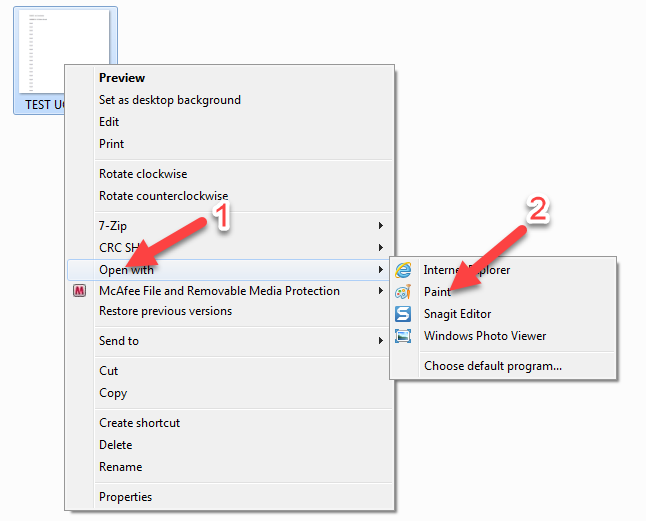
6. Once you have saved the file, close Snipping Tool if it is still open, and close the PDF. We are done with those. Then find the image file you just saved, right-click it, select "Open with", and select "Paint".
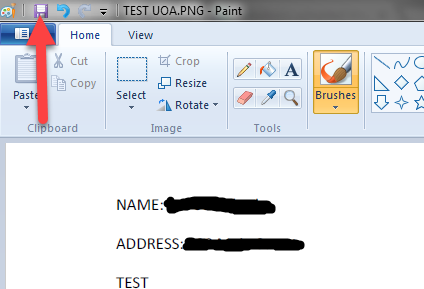
7. This will open the image file within paint. Use any of the drawing, erasing, or other tools in paint to erase/cross/black out your personal identifying information.

8. When completed, click the "Save" button, and then close paint. You are done with creating your image.
9. Your image file is now complete, you can now follow the steps in the first guide I posted to upload the file into your post.
Convert the PDF to an image
1. Convert the PDF file to an image. Easiest way to do this is to open the PDF file. When it's open you may need to resize it so that it fits all the data on your screen without scrolling. (Note: you may have a different PDF reader program than me, so this may look different for you.
2. When the PDF has been sufficiently sized so that all the necessary data fills your screen, open a program called "Snipping Tool". This is a tool build into Windows.
3. When the Snipping Tool opens, it will allow you to drag over an area on your computer screen to capture it as an image. It's like a budget version SnagIt if you have ever used it. It usually auto selects "New" open opening the program, but in case it doesn't, click "New". When you do, your mouse will turn into crosshairs, and the rest of your screen will sort of "white out" a bit.
4. Click and hold your mouse button down and drag a rectangle around your opened UOA PDF. You'll see a red outline showing what you are "snipping". When you have captures the entire page, let go of your mouse button. Notice how I dragged from the upper left corner to the bottom right corner.
5. Upon letting go of the mouse button, the image will capture and you will get this window pop-up. Click on the "Save Snip" button, and save the file to your desktop, or anywhere else you can easily find it.
6. Once you have saved the file, close Snipping Tool if it is still open, and close the PDF. We are done with those. Then find the image file you just saved, right-click it, select "Open with", and select "Paint".
7. This will open the image file within paint. Use any of the drawing, erasing, or other tools in paint to erase/cross/black out your personal identifying information.
8. When completed, click the "Save" button, and then close paint. You are done with creating your image.
9. Your image file is now complete, you can now follow the steps in the first guide I posted to upload the file into your post.
- :
- Denver, CO
Amazing investment of time and effort to benefit another forum user!
I hereby nominate ColoradoDriver for a "Mazdas247 good Samaritan" award!
I'll second the nomination, but I worry about his Barbarian image. (spin)
ROFL, thanks you guys. I just hope that helps Ed.
As for my barbarian status, that remains the same. I still like a fun to drive, simple car without all the damn tech gadgets (expensive to fix) and nannies. I think my 2014 Touring no packages still fits the bill.
Hi ColoradoDriver. What a wonderful effort and I thank you so much. I am embarrassed that I became so frustrated with this and at 80 years old, I haven't the patience I had for many years. I have an MS in Physics and worked in the field for 36+ years solving problems until this. Gads, what will I do when I get OLD) I will give it my best when I feel fully rested. Ed
) I will give it my best when I feel fully rested. Ed- :
- Denver, CO
Hey don't sweat it Ed. Sometimes this computer stuff is not the most straightforward. If you have any issues still please let me know and I will try to help further.Hi ColoradoDriver. What a wonderful effort and I thank you so much. I am embarrassed that I became so frustrated with this and at 80 years old, I haven't the patience I had for many years. I have an MS in Physics and worked in the field for 36+ years solving problems until this. Gads, what will I do when I get OLD
- :
- '16.5 CX-5 Touring AWD
Good lookin' UOA. Nice to see a sample that doesn't show fuel dilution. Any reason you've chosen to go with 5w30 over 0w20?
- :
- Denver, CO
Woot, looks great Ed! (thumb)
I keep forgetting to mail off my sample. Will have to remember to grab it today.
I keep forgetting to mail off my sample. Will have to remember to grab it today.
- :
- Denver, CO
You're welcome Ed! Glad that worked. (thumb)Thank you so much ColoradoDriver. Ed
- :
- '16.5 CX-5 Touring AWD
Woot, looks great Ed! (thumb)
I keep forgetting to mail off my sample. Will have to remember to grab it today.
C'mon man! Get your ish together! (lol2)
- :
- Denver, CO
Ok, ok. I replaced my spark plugs this morning, grabbed the sample and filled out the card. Put it in the car so I can drop it off at the post office.C'mon man! Get your ish together! (lol2)
- :
- Denver, CO
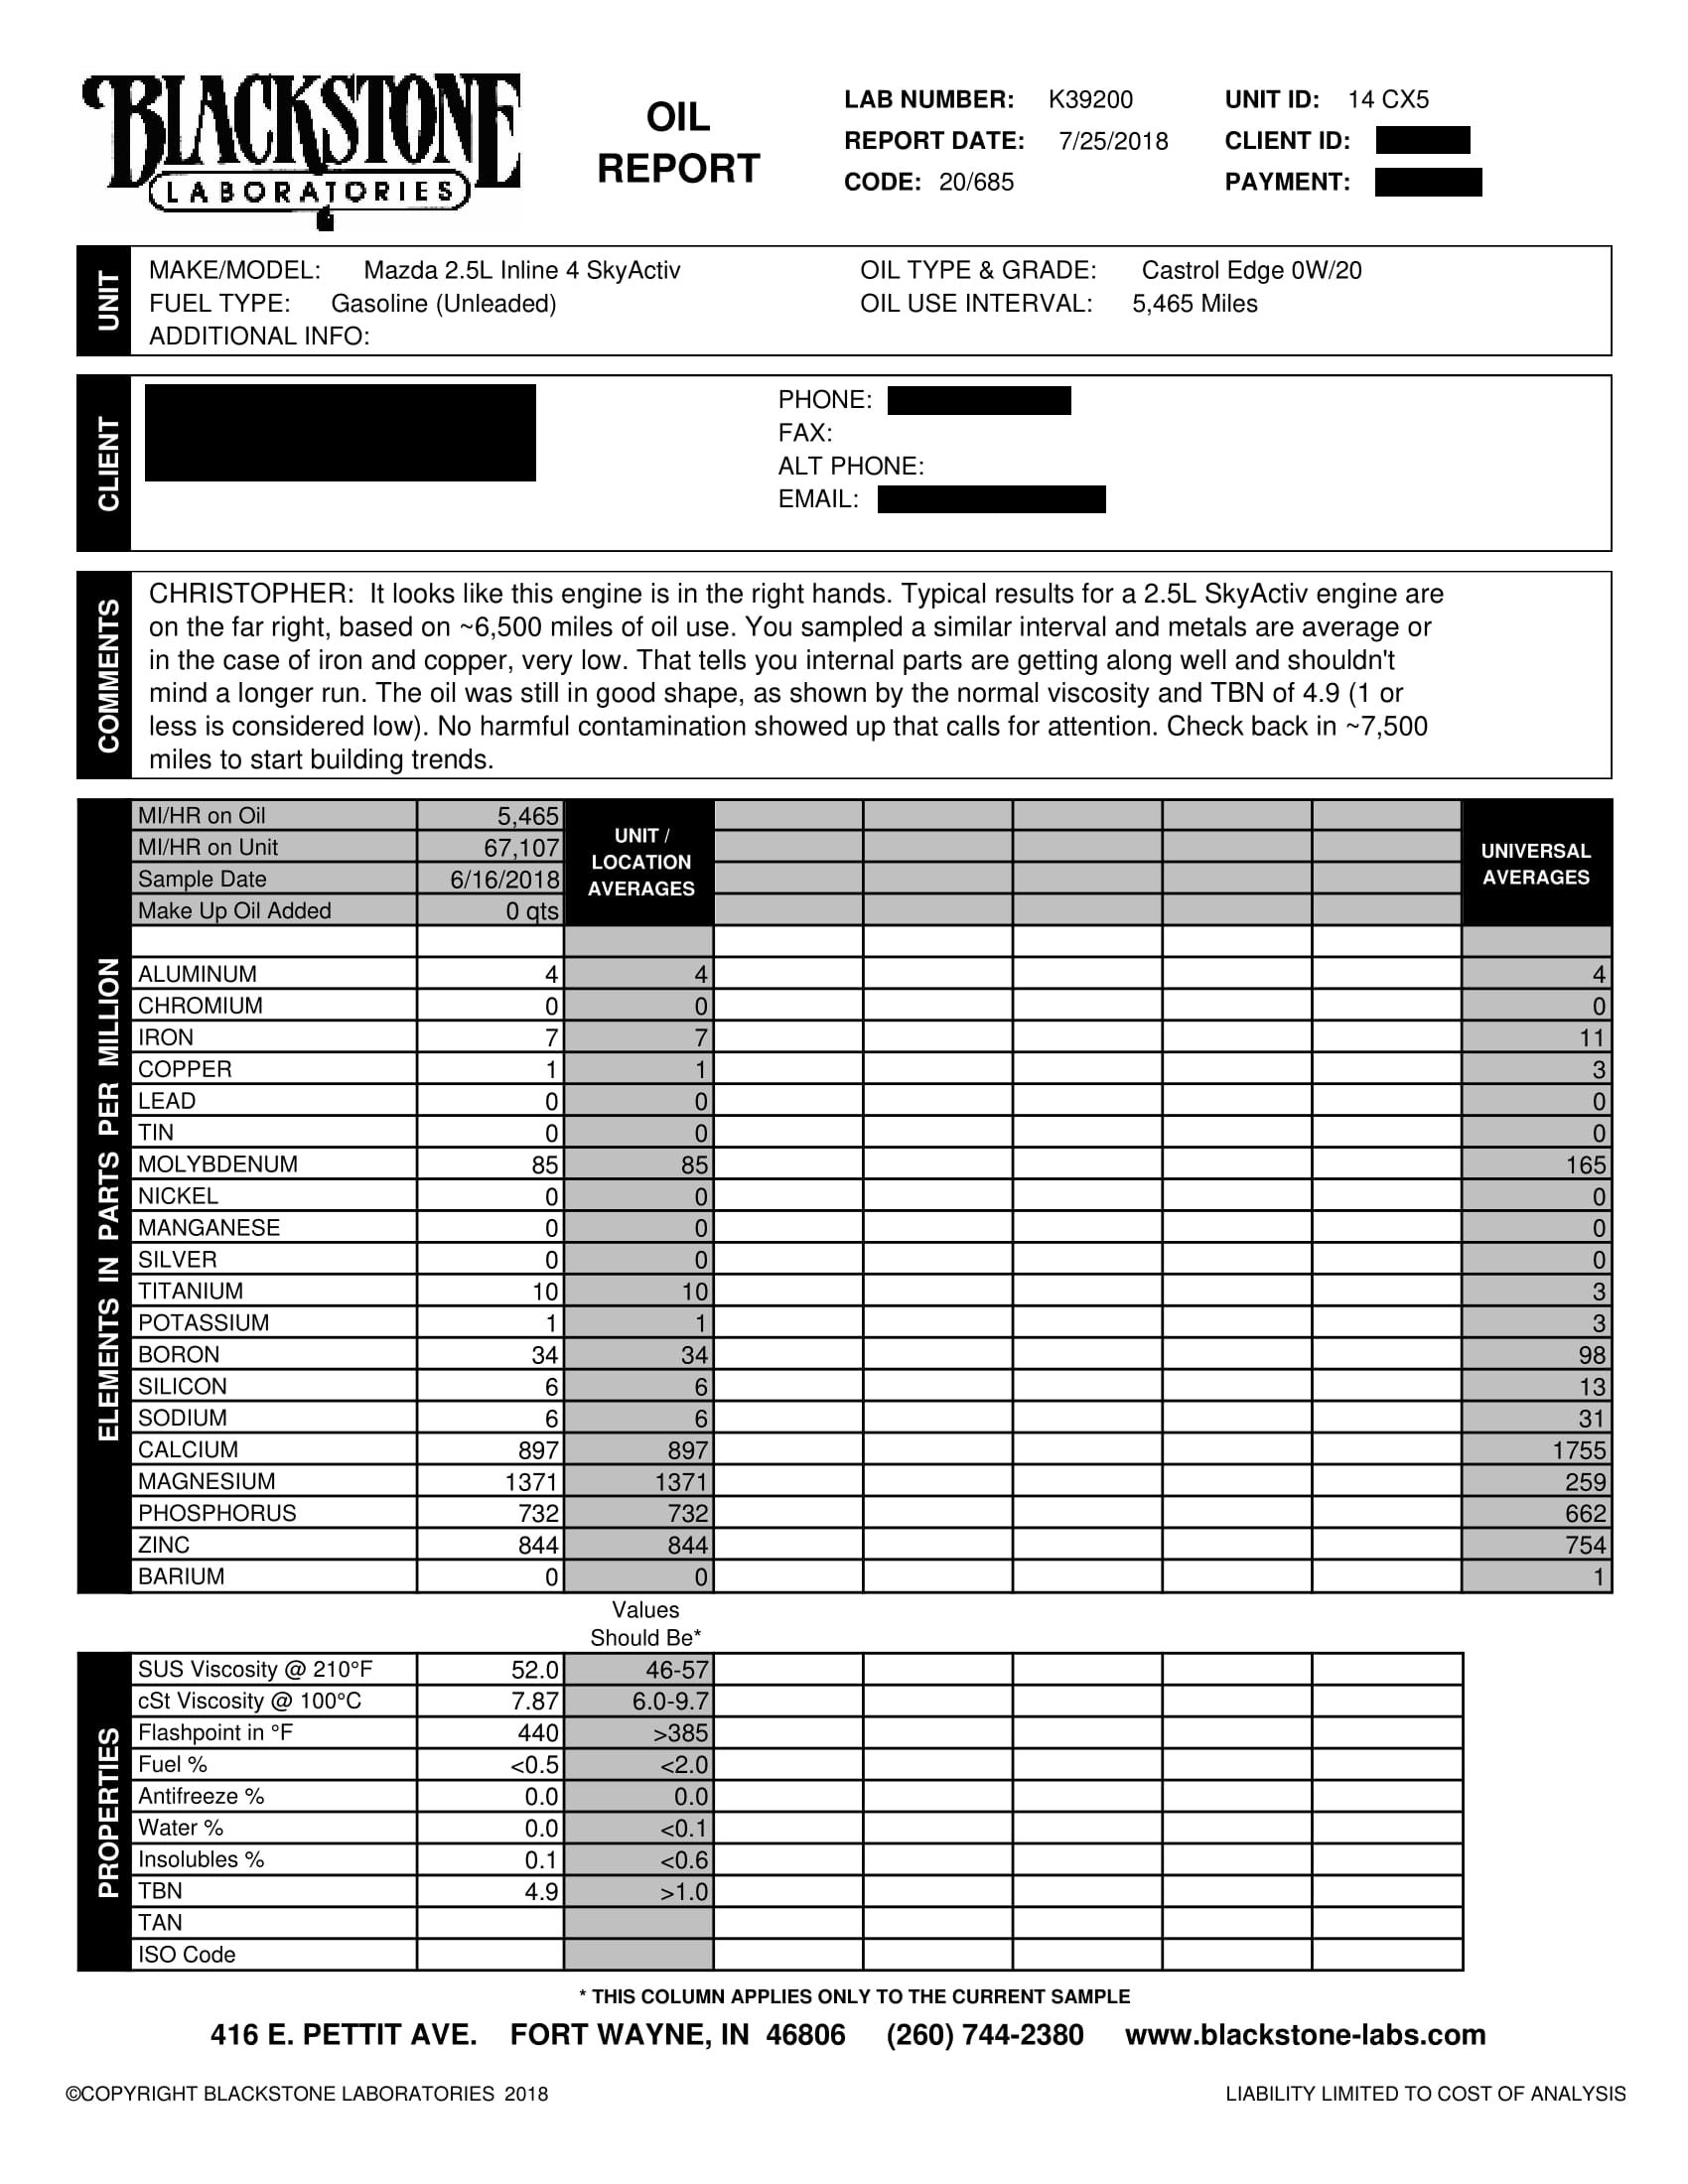
Hey guys, just got my very first report back on my CX-5.
NelsonLewis
Banned
- :
- 16.5 CX-5 GT AWD w/Tech BRMica
Looks great man! I wouldn*t hesitate to bump it on up to 7500 mile intervals.
- :
- Denver, CO
Looks great man! I wouldn*t hesitate to bump it on up to 7500 mile intervals.
Yep, I think I shall give that a shot!
Similar threads
- Replies
- 23
- Views
- 4K
- Replies
- 57
- Views
- 26K
- Replies
- 38
- Views
- 15K