
Superbrowndude
Member
- :
- 2013 CX-5 GS
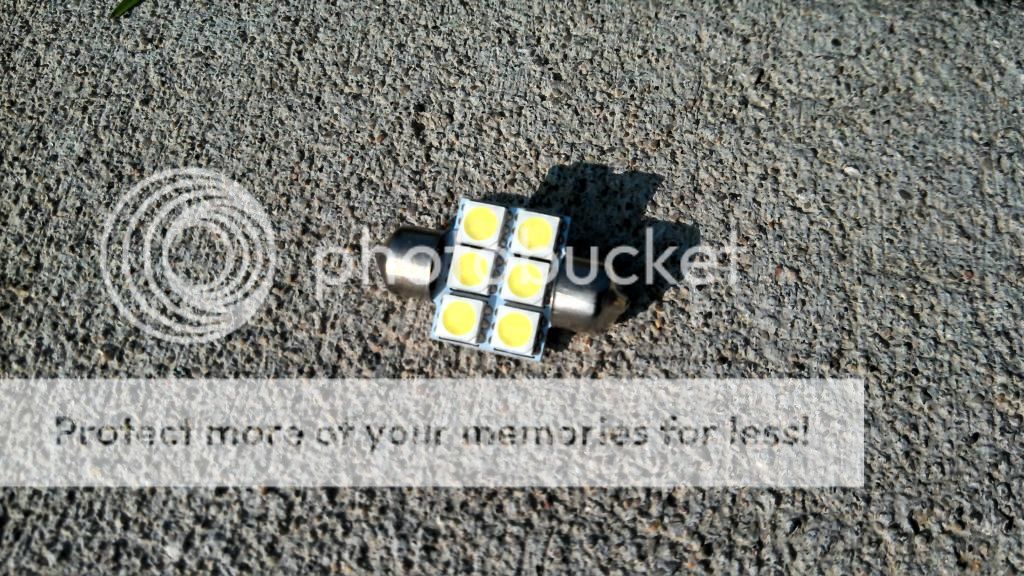
I ordered a SMD kit from iJDMtoy, I have used them in the past and the price with shipping and quality is pretty good.
This is my first write up, I am not responsible if you damage anything or stab your self.
The only tool you will need is a small flat head screw driver.
Always remember to either disconnect the battery or remove the 15amp(ROOM) fuse under the hood before doing any interior electrical lighting.
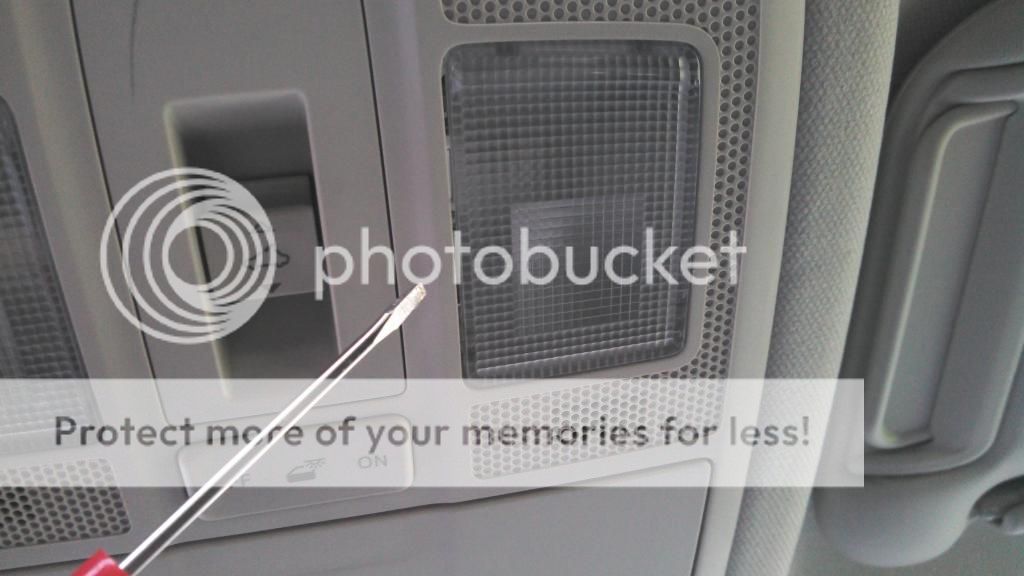
Step 1.
Insert your small flat head screw driver between the narrow part of the lens and plastic trim. You should only need to apply a very mild amount of force to gently pry the lens cap off.
 [/URL
[/URL
Observe the two tabs at the top part of the lens, for when re installing it.
[URL=http://s771.photobucket.com/user/superrowndude/media/Mobile%20Uploads/IMG_20140728_142343_759_zps3slvzjvi.jpg.html]
Step 2.
Gently use your finger to open one side of the metal bracket that is holding one side of the bulb. Then pull the bulb out down towards you with your other hand.
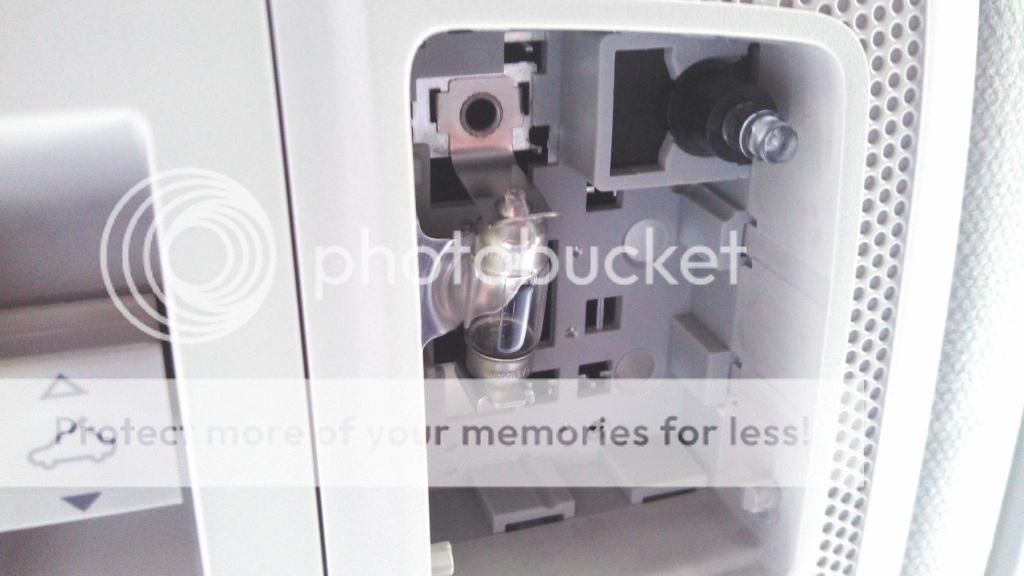
Step 3.
Re install your new bulb, lift the bracket again and slowly insert your new light.
This is the style smd unit that I used for the interior dome lights.

Now onto the vanity lights.
Just slide your flat head screw driver between the lens and plastic trim and pop the lens cap off.
Same idea as the dome light for taking out the bulb, use gentle force to remove the old bulb.

I did not take any pics of the cargo light bulb. It's also easy to replace.
Just pop out the lens assembly by gently prying one corner out, open the bracket to where the bulb is being held and remove the bulb.
Insert the new bulb and you are clear for testing.
After you reconnect the battery or reinsert the fuse try your new lights out.
If they one of them does not work, try rotating the bulb 180 degrees.
This is my first write up, I am not responsible if you damage anything or stab your self.
The only tool you will need is a small flat head screw driver.
Always remember to either disconnect the battery or remove the 15amp(ROOM) fuse under the hood before doing any interior electrical lighting.
Step 1.
Insert your small flat head screw driver between the narrow part of the lens and plastic trim. You should only need to apply a very mild amount of force to gently pry the lens cap off.

 [/URL
[/URLObserve the two tabs at the top part of the lens, for when re installing it.
[URL=http://s771.photobucket.com/user/superrowndude/media/Mobile%20Uploads/IMG_20140728_142343_759_zps3slvzjvi.jpg.html]
Step 2.
Gently use your finger to open one side of the metal bracket that is holding one side of the bulb. Then pull the bulb out down towards you with your other hand.

Step 3.
Re install your new bulb, lift the bracket again and slowly insert your new light.
This is the style smd unit that I used for the interior dome lights.


Now onto the vanity lights.
Just slide your flat head screw driver between the lens and plastic trim and pop the lens cap off.
Same idea as the dome light for taking out the bulb, use gentle force to remove the old bulb.

I did not take any pics of the cargo light bulb. It's also easy to replace.
Just pop out the lens assembly by gently prying one corner out, open the bracket to where the bulb is being held and remove the bulb.
Insert the new bulb and you are clear for testing.
After you reconnect the battery or reinsert the fuse try your new lights out.
If they one of them does not work, try rotating the bulb 180 degrees.
")