deepfriedsushi
Member
- :
- 95 Miata, 14 CX5 Touring FWD, 18 CX9 GT FWD
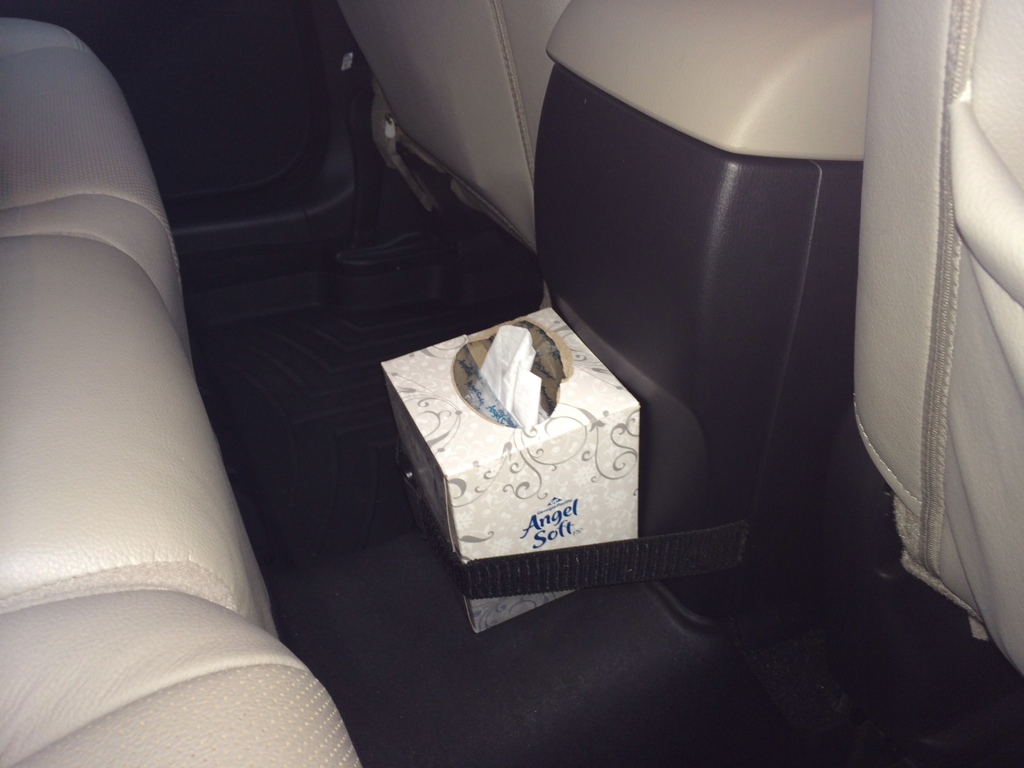
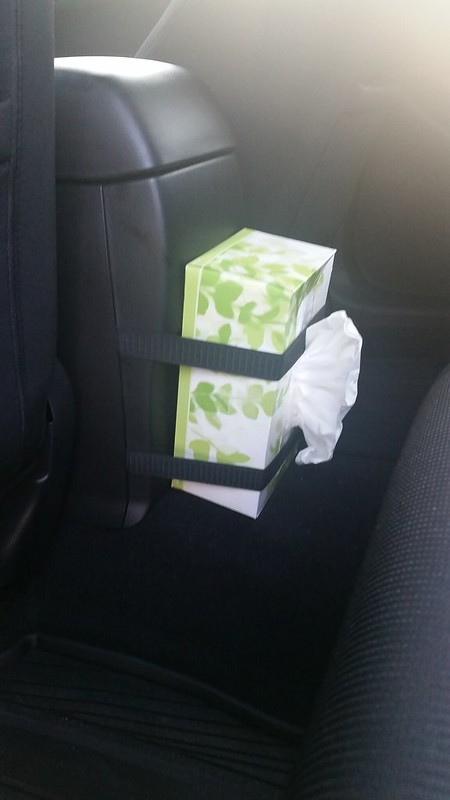
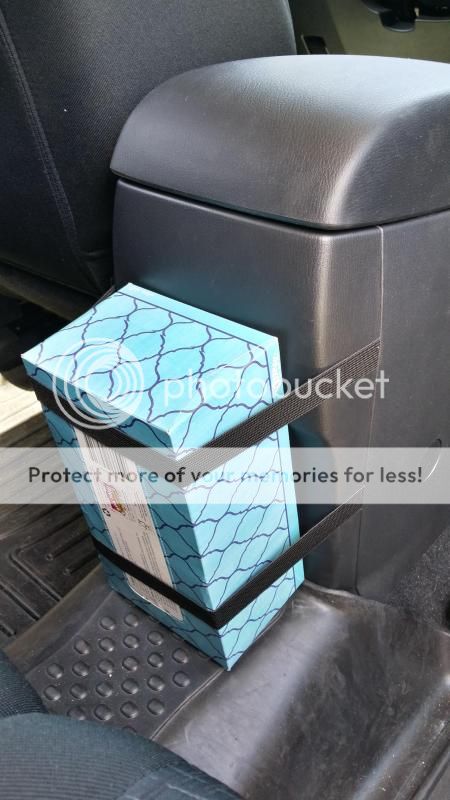
Not sure about you guys, but I like to keep a box of tissues in the car. However, I could never find a good place in the CX5 to keep the tissue box in a stable place. So I made my own.
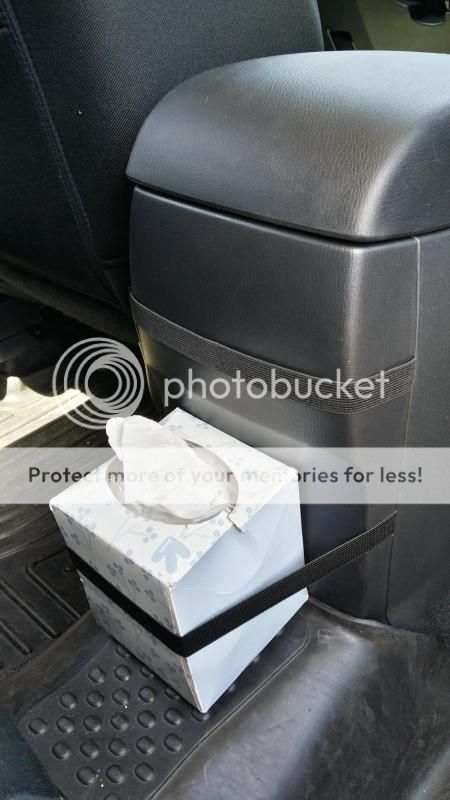
The location of the box does not interfere with the folding down of the rear seats. The straps also make it easy to remove the tissue box when carrying that 5th person and maintains the original foot space.
Here's how you can do it too!
Materials:
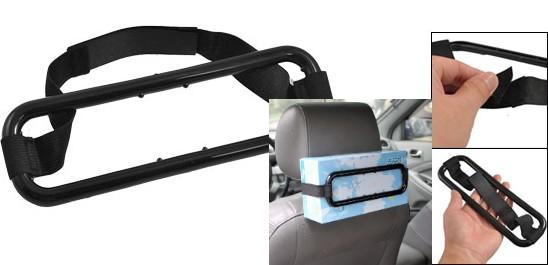
- about 2ft of 1 inch wide black stretchy band. I bought mine at a fabric store, but I'm sure arts and craft places have it too.
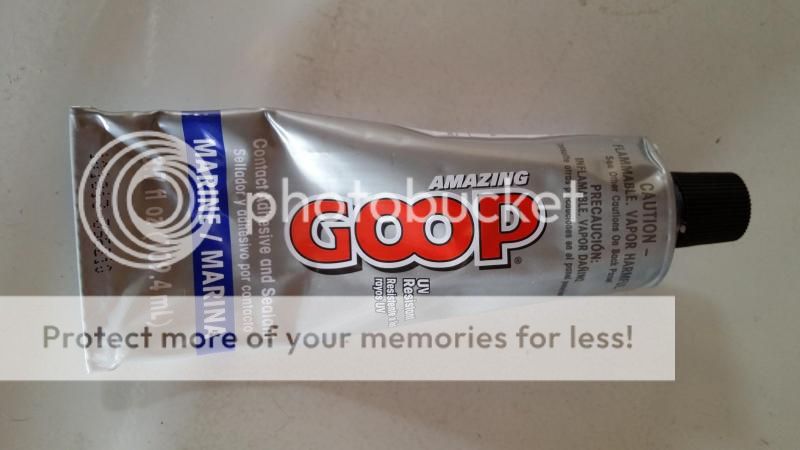
- Any sort of glue that can glue the fabric to plastic. I used Marine Goop because I had some left over. Hot glue + hot glue gun should work fine too.
- File or sand paper to roughen surface of plastic.
- Clothes pins to help hold things in place.
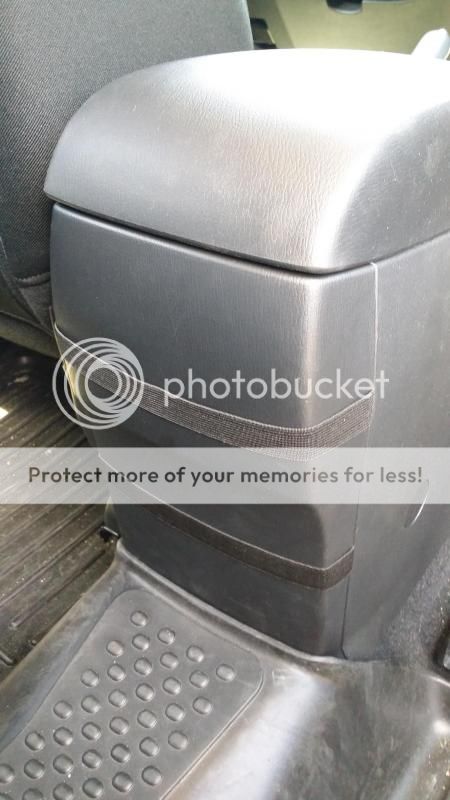
1. First remove the plastic cover by pulling straight back. I used a plastic crowbar and pried at the top first, then worked my way down.
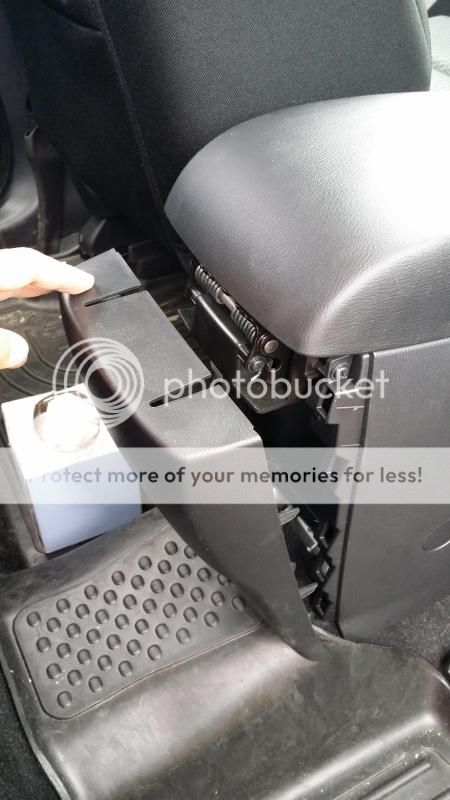
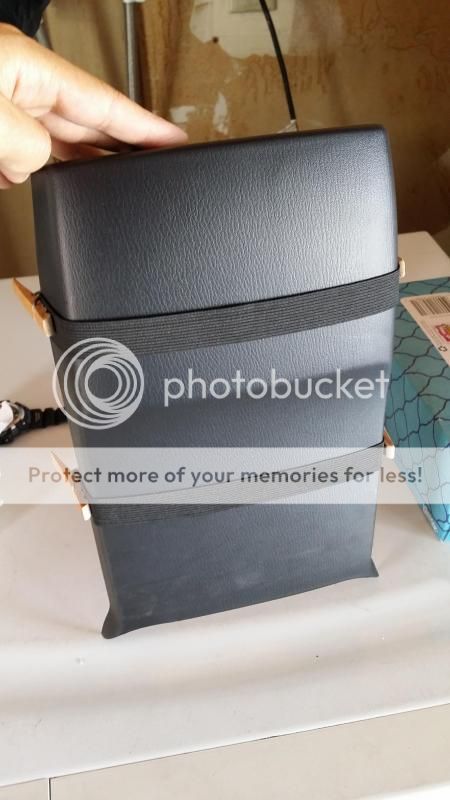
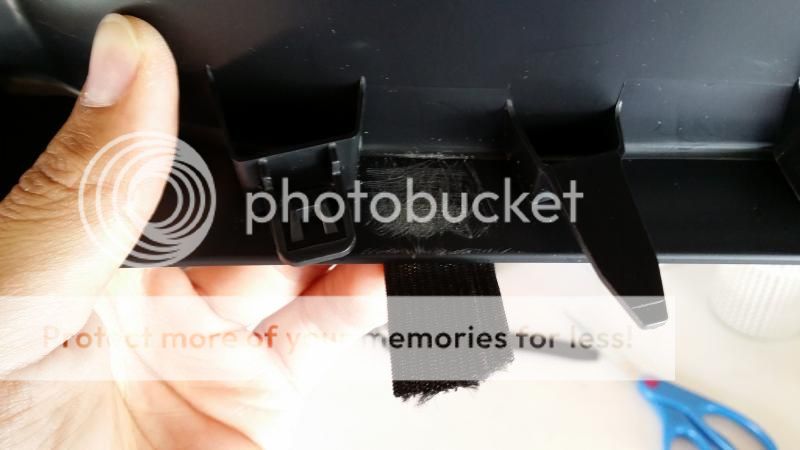
2. Using my tissue box and some clothes pins, I test fit where a good height would be for the strap. You can also add an additional strap higher up to hold the standard/larger tissue box. Cut the stretchy band to a length where the straps won't be loose when there is no tissue box. The straps should be able to stretch enough to accommodate a box.
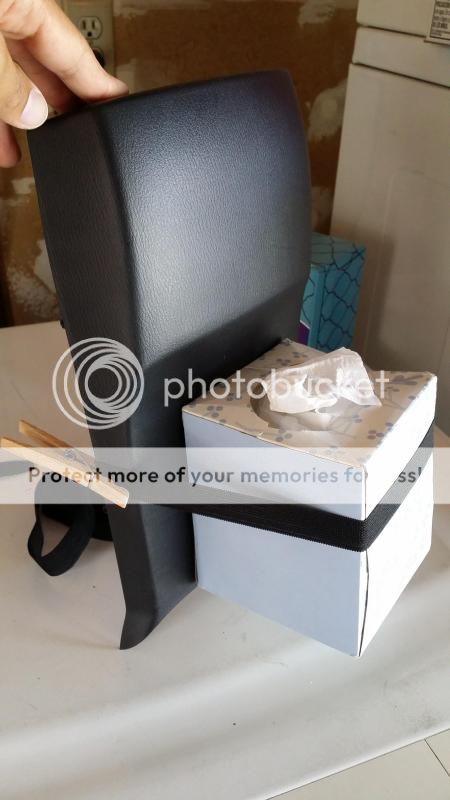
3. Use the sand paper or file to roughen up where the ends of the straps would be for your ideal heights.
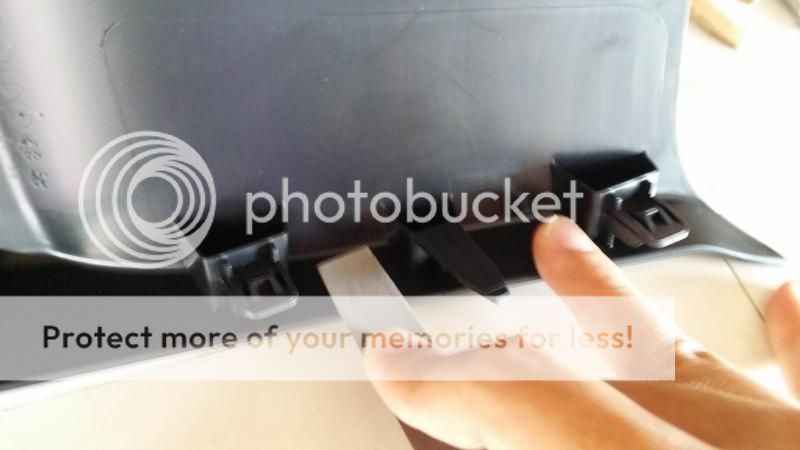
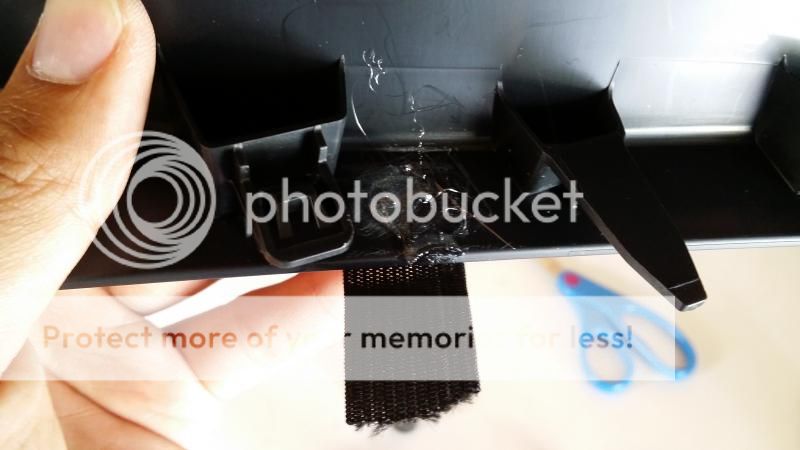
4. Add a nice dollop of glue to roughened area and glue on straps. Adjust straps as necessary for optimal appearance and functionality before glue sets. You can use clothes pins to hold the straps in place while glue dries.
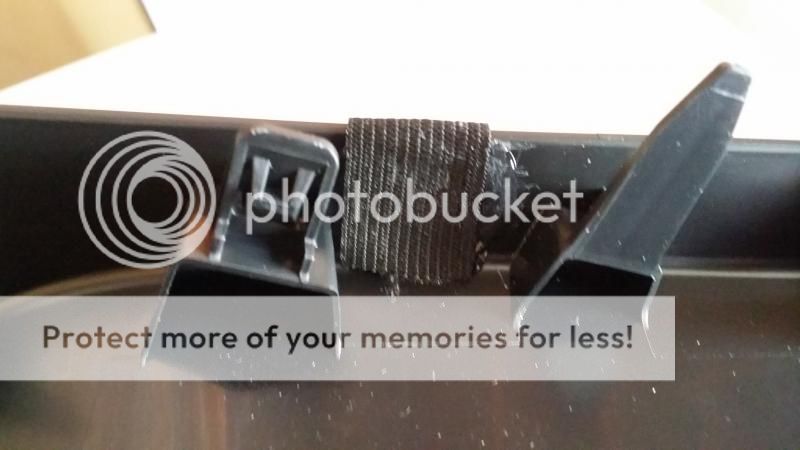
5. Let the glue dry, then re-install the panel, and say good bye to the days of a wandering tissue box!
(cheers)
The location of the box does not interfere with the folding down of the rear seats. The straps also make it easy to remove the tissue box when carrying that 5th person and maintains the original foot space.
Here's how you can do it too!
Materials:
- about 2ft of 1 inch wide black stretchy band. I bought mine at a fabric store, but I'm sure arts and craft places have it too.
- Any sort of glue that can glue the fabric to plastic. I used Marine Goop because I had some left over. Hot glue + hot glue gun should work fine too.
- File or sand paper to roughen surface of plastic.
- Clothes pins to help hold things in place.
1. First remove the plastic cover by pulling straight back. I used a plastic crowbar and pried at the top first, then worked my way down.
2. Using my tissue box and some clothes pins, I test fit where a good height would be for the strap. You can also add an additional strap higher up to hold the standard/larger tissue box. Cut the stretchy band to a length where the straps won't be loose when there is no tissue box. The straps should be able to stretch enough to accommodate a box.
3. Use the sand paper or file to roughen up where the ends of the straps would be for your ideal heights.
4. Add a nice dollop of glue to roughened area and glue on straps. Adjust straps as necessary for optimal appearance and functionality before glue sets. You can use clothes pins to hold the straps in place while glue dries.
5. Let the glue dry, then re-install the panel, and say good bye to the days of a wandering tissue box!
(cheers)