First off, I want to say a big thanks to RedBaron, Mentalcase, danieljw, and lhendricks92 for helping me prep for my own aftermarket install.
I figured I would take all the hours of research i did and looking at various threads on here and post what I've learned to help anyone looking to install a Pioneer AVH or AVIC unit in their CX-5, though a lot of this information would work fine for other brands as well.
First the good news. With the exception of a bit of soldering and MacGyver'ing that you have to do for the backup cam. It is relatively easy to replace your head unit with an aftermarket one. I have a Grand Touring with Tech, so for the purpose of my install, I have the NAV and Bose.
How much is this going to cost and what do you need?: So to complete this install you are going to need the following...
Pioneer AVH-4000 NEX (or other radio): Price depends on where you buy. Normally I would purchase this stuff through Crutchfield, since they have amazing support and include the dash kit, antenna adapter and they will give you half off the special wiring harness you need. However, after speaking with Crutchfield, I realized that they currently do not have the "master sheets" for the CX-5, and that purchasing at full retail price from them plus adding the extended warranty is more than just buying the unit new off eBay, and putting a Squaretrade warranty on it. The Crutchfield rep even told me that Squaretrade was better than just counting on the manufacturer warranty. If you do decide to purchase through eBay or another online source, note that in order for the manufacturer warranty to be valid, you MUST purchase the unit through an authorized seller. If you don't you will have absolutely no warranty, unless you purchase the Squaretrade 3 year warranty. Here's a breakdown of the items I purchased...
Pioneer AVH-4000 NEX: $570 on eBay with $85 3 year squaretrade warranty
Metra 95-7522B Double DIN dask kit: $18 on eBay
Metra 40-hd10 Antenna adpater (says honda but works for CX-5): $6 on eBay
PAC RP4-MZ11 Wiring Harness and SWC Module: $91 on eBay
(2) Kicker KISL Speaker wire to RCA adapters: $20 on eBay
Total cost buying through eBay: $790 vs buying through Crutchfield: $885. It will save you roughly $100
Other optional items:
Parking brake bypass: $15 on eBay
Pioneer CD-MC20 (special microphone used to auto-eq): $18 on eBay
In order to integrate the backup cam, you will also need these items which are explained more in the backup cam section below:
12V to 6V DC step down adapter: $7 on Amazon
Dual row PC header pins: price varies depending on quantity purchased. Mine were $7 on Amazon
To replace the USB/AUX adapter wires you will need:
Apple Lighting AV Adapter: $35 or so on eBay (needed if you want to use full functionality of AppRadio mode)
10 foot Lighting cable for iPhone 5+: $8 on Amazon
10 foot HDMI cable for iPhone 5+: $8 on Amazon
Total cost for my install: $888
I haven't completed my install yet, so I will be updating this as I go along, but the first step I did was run the bluetooth mic from the overhead console across the headliner and down the A pillar under the steering wheel.
Removing overhead console and removing factory bluetooth mic: Open the sunglass holder, and remove the 2 screws. Carefully pull down and back to release a clip holding the overhead console in place. Be sure to keep the console level as there are washers on the top that can easily fall out and get lost. Disconnect the plugs to the map lights, bluetooth microphone, and sunroof (if you have it). There are 3 clips holding the bluetooth mic in place. That part was a little tricky to get all 3 unlatched but once you do the mic will just slide out.
Installing Pioneer mic: I used the adhesive that came with the mic and attached it to the side. You may want to consider something a little stronger, but it's easy to remove the console so if the tape gives out down the road I can look into another option then.
And here's how the whole console looks
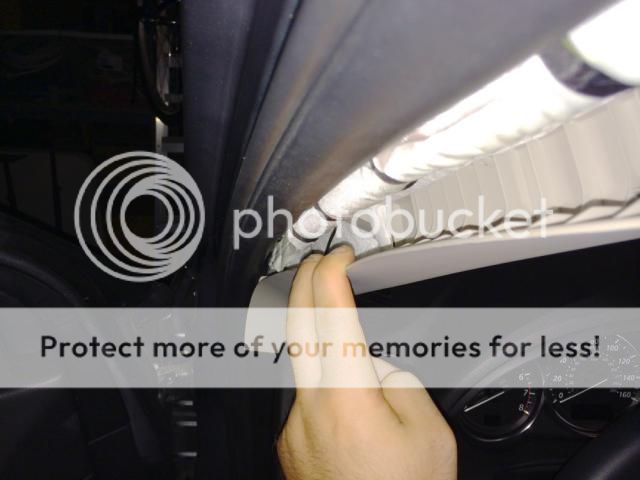
To run the wire, I fed the plug through the headliner. Stick your hand up into the space where the overhead console was and push towards the windshield until you hit the side of the headliner. There is an opening at the base, that you can stick the plug through. Next you want to LOOSTEN the A pillar (trim covering the side going up the left side of the windshield) to do this, grab toward the top of the A pillar, and give it a tug to unclip a couple clips securing it. You will not be able to remove the entire thing as it has a cable securing it. This picture shows about how much space you can work with, and it's more than enough
And here is looking down the side of the pillar
If you look closely you can see a black wire above my hand. That's the mic cable. I should also add you will need something to fish the wire through this. I recommend fish tape, but a clothes hanger should work as well. Next you need to get the wire under the steering wheel. Attach the plug to the fish tape or hanger with electrical tape and stick it down to the right as close as you can get to the bottom of the A pillar. With any luck you should be able to look up under the steering wheel and see the wire. It may take a few tries before the wire finds it's way in there. Once you have the wire under the steering wheel, running it to the radio is easy.
Removing factory radio: Before you remove the radio. Make sure you have all the vehicle settings the way you want (Door Locks, Wipers, Lights, etc) You WILL NOT be able to change these after you pull out the radio, unless you put the factory radio back in, or go to a dealer. Also be sure to unpair any bluetooth devices you have with your radio. The bluetooth module will still be active and will attempt to pair with your device if you don't remove it from the devices list on the radio
That being said, start by removing the long decorative panel that stretches from under the radio to the far right vent. There are a number of clips holding it in. Using a tape wrapped screwdriver or pry tool, gently apply pressure outward to release the clips. Make sure you do this gently or you may break off the plastic. Once you have released all the clips simply pull the decorative panel out. There is a connector attached to the hazard button that you will have to disconnect if you wish to remove the panel entirely.
Next remove the trim ring around the radio by grabbing at the bottom and gently pulling outward to release clips securing the ring in place. Again take caution not to damage the plastic.
I haven't removed my radio just yet as I'm waiting for the dash kit to arrive but here's how these 2 pieces look loose
There are 2 screws and a bolt holding the radio in. The 2 screws are on the left and right sides, and the 10mm hex bolt is on the bottom. Once removed the radio will slide out
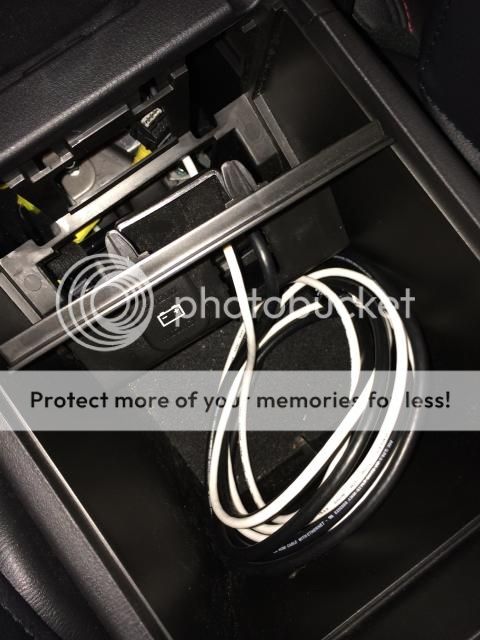
USB/AUX: If you're worried about losing the USB and AUX inputs in the center console. Have no fear, it's a relatively easy process to remove the factory connector and run new wires. First thing you need to do is remove the trim cover for the USB and AUX. On the front inside wall of the console above the USB/AUX you will feel a cutout. Grab it and pull back. you will need to pull it down at an angle to allow the feet to pop out. Should look like this
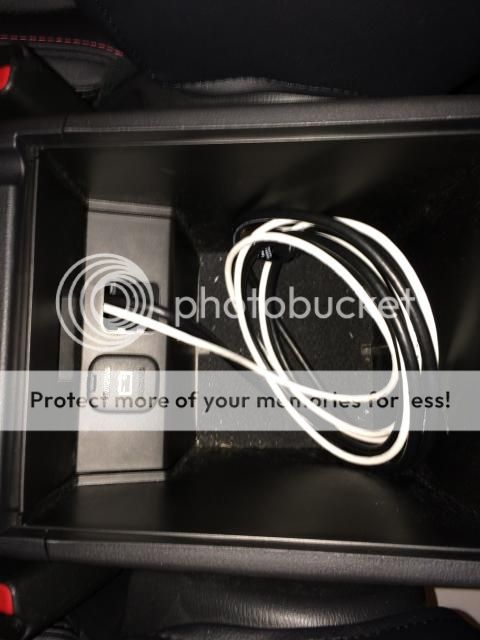
With the panel pulled down, disconnect the 12V accessory connector, and the USB/AUX connector. The panel will come out. The USB/AUX module has 2 clips on each side securing it to the trim. Push them in and the module will come loose from the trim. For my install, I'm just using the hole left to run the wires through. Just be careful that you don't accidentally drop them back in. This is how it looks after
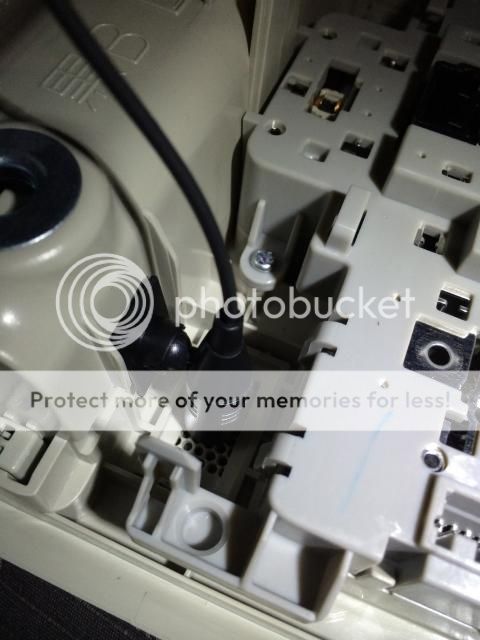
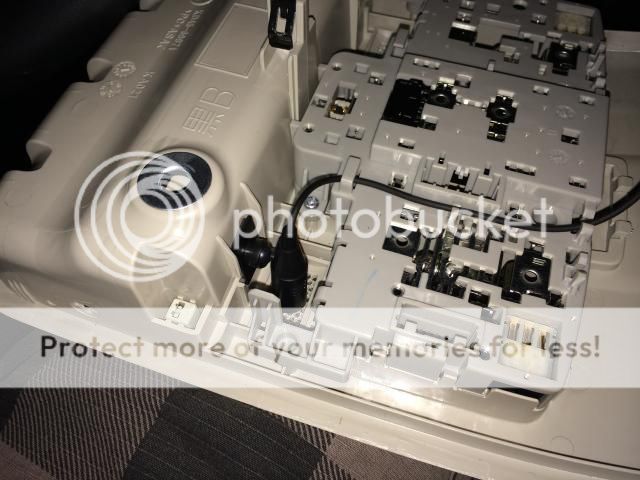
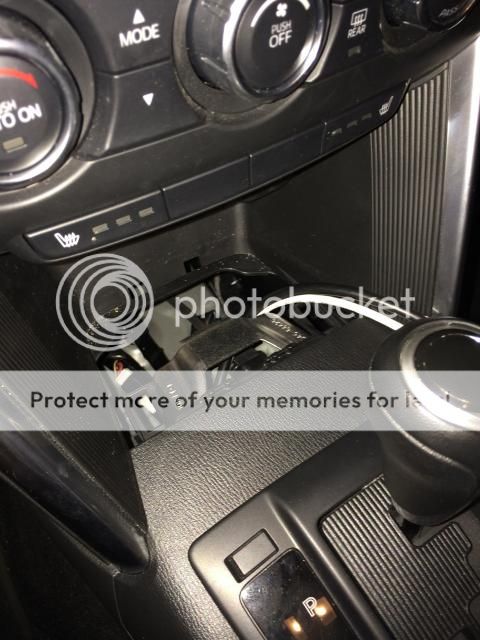
Next you need to remove the front console box. This is simply the padded recess under the A/C controls. Using a tape wrapped screwdriver or pry tool, pry up the back corner (closest to shifter) and work your way across until the box comes loose. It will expose an open cavity of the car where the wires can be fished from the center console. Looks like this
Once the radio is removed, you can route the wires up to the radio cavity. The easiest way is to remove the glove box and the small piece of trim next to the front console. From there you should be able to reach in and grab the cables. Route them along side the bluettoth module then up and into the radio cavity.
For my install purposes I'm running a Lightning and HDMI cable. If you have an iPhone 5 or up you need both plus an Apple Lightning AV Adapter to use AppRadio mode to it's full extent to mirror certain apps on the NEX radio
Wiring and Factory Harness: Because of the steering wheel controls, and the way it's wired with the Bluetooth, you need a pretty advanced wiring harness for this car. It seems everyone, myself included recommends the PAC RP4-MZ11 Harness with steering wheel control module.
IMPORTANT: If you have a Bose system in your CX-5, you have to wire RCAs to the RP4 harness as the Bose amp is designed to take low level input, and the wires from the Pioneer harness would be feeding it high level input. Make sure to connect the RCAs to the RP4 speaker wires and not the pioneer harness.
Thanks to RedBaron for creating a handy chart displaying all the wire connections. I've modified it for use with the Pioneer receivers and have attached it below. Some important wiring to note:
Pioneer purple/white reverse wire connects to the RP4 green reverse +12V wire
For Bose: Make sure to connect the Pioneer blue/white AMP turn on wire to the blue/white RP4 Amp wire or you won't have any sound.
The RP blue wire coming out of the factory harness needs to be connected to the green/white wire coming off the RP4 module harness. This is so the Bluetooth steering wheel button will work.
You will need to splice in to the Red ACC wire, and the black ground wire to hook up a 12V to 6V DC step down adapter for the backup cam
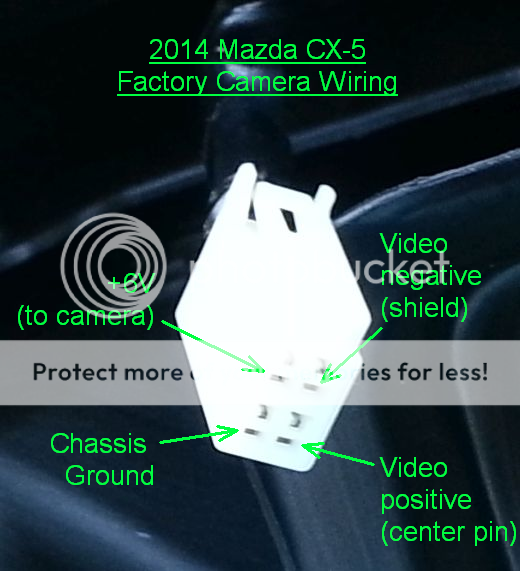
OEM Backup cam integration This will probably be the toughest part of the install, and WILL require you do some very intricate soldering. You are going to need the following...
12V to 6V DC step down converter. $7 on Amazon
https://www.amazon.com/dp/ (commissions earned)
Dual row PC header pins $7 on Amazon or cheaper elsewhere
https://www.amazon.com/dp/ (commissions earned)
A standard RCA Video cable you don't mind destroying. Cut the wire and strip back. The center wire is positive, and the outer wire ring is negative.
Cut the header down to 3 rows (6 pins total). You then need to remove the middle pins. You solder the RCA positive and negative along with the red ACC and ground wires to the header. Make sure that you attach the wires so they match this order. Thanks to RedBaron for posting this picture.
Heat shrink to insulate the wires and you've created your own connector. The backup cam should work now. The connector has 4 larger holes above the smaller ones. Make sure you plug the pins into the smaller holes or you won't get a picture.
I will post more pictures as I continue the install, but for now I hope this helps those of you out there wondering whether or not to make the jump to aftermarket. Most importantly, this is an install that most of you can do, but if you don't feel comfortable doing all this then I would recommend you have it professionally done. I've installed a handful of radios and I was a little unsure about tackling this, but after the research and seeing how easy it really is, at least to run the wires, I think most of you should be fine.
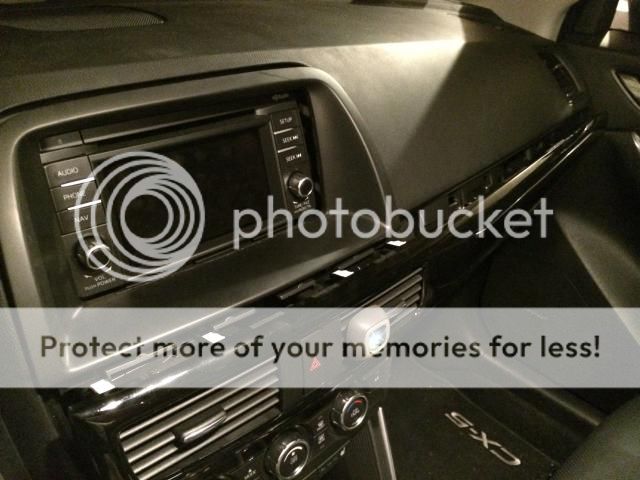
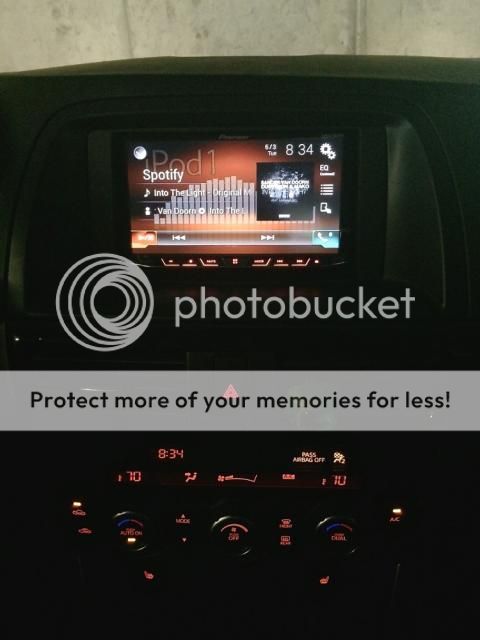
Here's how it looks installed. I have the theme set to give it a OEM look