Guide MS3 front brake conversion

having a hardtime finding junkyard gen2 MS3 front brake carriers. dang, how did you even come across yours, just ebay?

I spent at least 6 months searching for a used MS3 set. It was dumb luck when I came across a junkyard on ebay that wanted only 117 for the calipers with carriers. The guy had NO idea what he was selling! But I may have a lead on another set. if your interested, the guy I bought my MS3 sways from has the set off the same car. lmk and I can text him.

I'm curious, what is your complaint with the mz5's brakes? I find them to have good power and feel/modulation, and I'm fairly critical about these things. A direct comparison to MS3 braking performance is not apples-to-apples - the MS3 is lighter and lower and the physics of the two vehicles says the MS3 has an inherent braking advantage.

The only potential downside I see is that they aren't large (physically - thermal mass) and thus may have issues with overheating and fade with extended hard driving/lapping. I'm planning a fairly large power increase and don't expect to do any work to the brakes other than adding some cooling ducting from the fog light holes and more aggressive pads. If I was doing HPDE's with the car I would have a different opinion though, I think.

I agree that the Mz5 brakes are decent but the larger MS3 rotor size and pad increase swept area, leverage, and as you pointed out, heat dissipation. Other guys on this forum who have done this swap report a significant increase in braking performance. I wouldn't go about the power increases you are planning without seriously considering an MS3 brake swap. But in the end, i'm only guessing and going by here say. When I get it all bolted up and broken in, i'll report back first hand.
 
I agree that the Mz5 brakes are decent but the larger MS3 rotor size and pad increase swept area, leverage, and as you pointed out, heat dissipation. Other guys on this forum who have done this swap report a significant increase in braking performance. I wouldn't go about the power increases you are planning without seriously considering an MS3 brake swap. But in the end, i'm only guessing and going by here say. When I get it all bolted up and broken in, i'll report back first hand.

I'm wonder how much of this is:
1. Placebo effect/confirmation bias.
2. Unaccounted effects of confounding variables such as pad compounds, fresh fluid, maybe the put in new SS lines at the same time.
3. Actual improvements in stopping distance and/or pedal feel/modulation.

Brakes work as a system with pedal gains and chosen MC and caliper bores and dimensions and system pressures and assist and mu and proportioning and weight transfer many other variables, and it is not as simple as just putting in a larger diameter rotor and - voila! - braking distances are shorter and feel and modulation are better. Sometimes maybe, but often not.

Not trying to be argumentative, I promise. I'm very interested to hear what you find when you complete the swap. Do you have any way to objectively measure the results, in addition to your subjective feedback?
 
Last edited:
Marty, I'll take #2 for $500

Especially in my case. I've just finished installing coilovers so the reduction in dive alone has helped braking performance. The good news is i did test drive a couple of times and can at least accurately weigh that difference between stock and MS3. My stock pads are are also Hawk HPS so we remove pads from the equation. The other variables that will really affect my ability to accurately compare performance - the SS line and fresh fluid - absolutely throw things off. Brakes always feel amazing after lines and fresh juice! The true test will be the 80mph dive into an off ramp situation (no kids of course) where they will either prove their worth or just be an excercise in sexy hot pink brakes.

btw, i start paint today!
 
I'm wonder how much of this is:
1. Placebo effect/confirmation bias.
2. Unaccounted effects of confounding variables such as pad compounds, fresh fluid, maybe the put in new SS lines at the same time.
3. Actual improvements in stopping distance and/or pedal feel/modulation.

Brakes work as a system with pedal gains and chosen MC and caliper bores and dimensions and system pressures and assist and mu and proportioning and weight transfer many other variables, and it is not as simple as just putting in a larger diameter rotor and - voila! - braking distances are shorter and feel and modulation are better. Sometimes maybe, but often not.

Not trying to be argumentative, I promise. I'm very interested to hear what you find when you complete the swap. Do you have any way to objectively measure the results, in addition to your subjective feedback?
1) Nope. We'd tell it like it is. Don't forget a lot of Mz3 folks have done this too.
2) Possible. I think anyone who does this upgrade will also upgrade other components so it will be impossible to isolate exactly how much improvement each item contributes.
3) Absolutely. There is without a doubt a noticeable improvement -with all things considered.

You have very valid questions -so did I. MR6 has both cars and he would be a good benchmark. You can look up parts diagram for the MS3 vs Mz5 and compare components. I had sold MT (MS3 brakes) for an auto. The new car just had breaks done by the dealer with OE parts and NOT the value line pads either. It is a tremendous difference and I really miss the MS3 brakes (I also put on new Kumho 4X). I still have my parts, just need time/excuse to do them but hard to make a case when my pads are still new...

http://www.mazdas247.com/forum/show...speed3-Brake-Conversion-on-Mazda-5&highlight=

I guess you won't know until you do/try it. Sounds like where I was at except I needed to do rotors and pads :). If you have the basic understanding and know-how to do this and you need to replace pads AND rotors, there's no reason NOT to upgrade. How far $$ you take it (SS lines, pricey fluid, expensive rotors/pads, SB) is up to you.

I will say it took about ~700 miles for everything to break in and I had to relearn break tip-in. I too though about a proportioning valve and cooling ducts but not sure if they suite my needs. This might interest you. The proportioning valve inters me. Let us know if any of you decide to add this.
http://www.mazdamotorsports.com/pdfs/catalog/08_Brakes.pdf

FWIW, When I stated this reman MS3 calipers were unheard of. Now it seems you can find MS3 reman units for pretty cheap on rockauto!


Of topic. It sounds like you are going for a lot of power. For 1st gen MS3 and Mz5 cars, there are a few little things that improve driveability. I'm not sure these apply to 2nd gen but I suspect it does. Two things Mz5 owners should consider are MS3 cluth slave (larger bore and shorter stroke) and MS3 gas pedal assembly (has a higher resting arc for heel-toe).
 
Last edited:
While clamping it flat will allow me to re-install the Mz5 shield, it will still leave about an inch of the rotor's edge exposed.

I had to go out and look at mine again after looking at your pics. I think my van was just a freak build. My dust shields do not look like yours or other 3 owners that have done the same upgrade. Mine do not have that lip on the outer edge and I bought the van with 12 miles on it so it hasn't been modified by anyone else. I was able to install the MS3 calipers and rotors without having to trim or adjust anything. Dealer checked and the P/N for the dust shield is the same from 06 to 10 models so I guess I just got lucky. Maybe someone in Japan was drunk and gave me the MS3 dust shields by mistake.
 
that's really odd rod ;)

The humidity was insane in the north east today. I almost didn't do it but the wife and kiddies went to a bday party and i brought them inside.

Spanky clean, awaiting paint
5xUPHTO.jpg


x0ZHX54.jpg


I'm mostly pleased with the results. The textured look bothers me a bit but the amount of work necessary to get a glass smooth finish is overkill for calipers anyway. In the end, the finish appears durable and at 6ft, it looks damn near perfect. The gloss is VERY deep. The can comes half empty so that you can mix without worry about spilling. The activator and paint together yield 4oz which was enough for 3 coats with about a 1/4 can remaining. The stuff brushes on with the consistency of water so it gets into corners really well. According to the instructions, the mixture should stay fluid for 4-6 hours. I did it all in about 1.5 hours and the consistency of the paint remained fluid throughout which allowed me to really remain calm and just take my time. The G2 kit is my new go to for caliper painting.

They'll cure overnight and i'll get the new seals and guide pins going tomorrow. I would've completed it all tomorrow but Tirerack (by fault of Stoptech) sent me two right rotors. So i've gotta call on Monday and get the RMA going asap!

ok be honest fellas. Do visions of neon leggings fill ur heads? It's a bit darker than the pictures show..

jVnRrkc.jpg


rSfgqRw.jpg


5Z7QpjY.jpg


Stoptech slotted with MS3 dust shield
XsGPLZz.jpg


YAY mazdaspeed 3 brakes!
80s-Leg-Warmers.jpg
 
Last edited:
MR6, that's great that you'll be using the same pads (compound) before and after. As I said I'm interested to hear exactly how you feel the MS3 rotors and calipers affect things.

Silentnoise, I wonder if any of those ducted backing plates for the rx7 would be easily adaptable to our later model cars, or if Mazda has changed the mounting significantly since then. In an effort to not derail this thread, can you just give me a link or point me in the right direction for more info about the clutch slave and A pedal mods? One of my biggest complaints with the car is a numb cloth pedal, but I'm not sure the slave cylinder mod you mention would be the answer - larger bore (shorter stroke) at the slave cylinder will result in less effort/more throw at the pedal. You would want a larger clutch master cylinder to get a firmer/shorter pedal.
 
Last edited:
So the calipers cured and they look like s***....forget surprising my wife. I'm gonna show her tonight and if she doesn't like it I'm spraying them.

The paint looked perfectly even last night. Look at them now, as if they need another coat (notcool)

kiCcvba.jpg


rDLaZSC.jpg


sJrESJ1.jpg


Not tooooo bad from a distance though. And once covered in brake dust it probably won't be an issue. but G2 is no longer my go to. back to rattle cans...

The pink is REALLY pink in daylight!

hoV6dPQ.jpg


cnX34rO.jpg
 
Last edited:
So the calipers cured and they look like s***....forget surprising my wife. I'm gonna show her tonight and if she doesn't like it I'm spraying them.

The paint looked perfectly even last night. Look at them now, as if they need another coat (notcool)

Sucks to hear it's not working out for you. It does look like it just needs another coat. Did you use it all up? Also, how/what did you prep (clean) the surface? Some areas seem ok, no?


Silentnoise, I wonder if any of those ducted backing plates for the rx7 would be easily adaptable to our later model cars, or if Mazda has changed the mounting significantly since then. In an effort to not derail this thread, can you just give me a link or point me in the right direction for more info about the clutch slave and A pedal mods? One of my biggest complaints with the car is a numb cloth pedal, but I'm not sure the slave cylinder mod you mention would be the answer - larger bore (shorter stroke) at the slave cylinder will result in less effort/more throw at the pedal. You would want a larger clutch master cylinder to get a firmer/shorter pedal.
Sorry, I don't have the links anymore. It's been a while since I swapped cars but I'm pretty sure the source was the Mazda3_forum (that site is forbidden here). Everything that can be done, more than likely has been done by the Mz3 guys/gals.

Pedals - Instead of only the MS3 gas pedal assembly (~$60), I went the alternative and bought a set of MS3 pedal covers ($~35) and added some height to lift the pedal so it is not as recessed when on full brake. I choose the cover route b/c it includes a deal pedal cover :), which I was annoyed that Mazda did not included one, not even a rubber mat.
Clutch slave - I never got to install it but again look towards the Mz3 forum. I figure if you are going for more power, you are likely going to upgrade you clutch. It may/may not benefit much but the MS3's is different. I don’t think anyone investigated into the master cylinder since Mz3/Mz5 were 5sp while the MS3 was 6sp.
Brake master - There was a former member who had a MS3 and Mz5 who help me in my initial pursuit. Visually the MCs are almost identical with slightly differences and are different part numbers. I don't think anyone swapped this in their upgrade but is something consider. My *speculation* is that is has more rear bias to account for the larger front end braking compared to the Mz3. HOWEVER, our car has a slightly larger rear setup than the Mz3/MS3 but uses the Mz3 MC. Question is, would it really be beneficial in our case? I am curious to know.
 
I'm curious, what is your complaint with the mz5's brakes? I find them to have good power and feel/modulation, and I'm fairly critical about these things. A direct comparison to MS3 braking performance is not apples-to-apples - the MS3 is lighter and lower and the physics of the two vehicles says the MS3 has an inherent braking advantage.
sorry, I'm absolutely not doing an apple-apple comparo. the last 2 of my DDs were s2k and a w211 e55. both obviously had front tires 40mm+ wider, a few extra pistons in the case of the e55, summer tires with low UTQ, ad nausea.

the 5's brakes have horrible initial bite, long travel (mind you, the car is fresh), and overall rather sad braking power. i'm sure the hard oe tires have lots to do with that, but the quickest (and lowest cost solution) seems to be finding a pair of junker ms3 calipers/carriers +. obviously most soccer dad/moms in minivans don't need/want the braking power of a sports car and the associated brake dust, but braking is a safety feature to me, on par with air bags. i always thought it's absolutely shoddy (and this isn't particular just to Mazdas) that car mfgs would offer lesser brakes while adding more air bags.

MR6, if you can score me the mz3 set (no rotors necessary), i'd be greatful, and i'll take 'em now. like, today.
 
Sucks to hear it's not working out for you. It does look like it just needs another coat. Did you use it all up? Also, how/what did you prep (clean) the surface? Some areas seem ok, no?

I used paint stripper then brake cleaner and cotton towels. The surface was immaculate to the touch. What really gets me is that the evening before, it all looked PERFECT.
Same caliper. BEFORE:
4l5AuHG.jpg


AFTER....During the curing process it appears to flatten in some areas.
PRewke2.jpg


The finish is still a very nice and strong feeling finish. Unlike the rattle can jobs i've done, this feels a lot like the finish on a BBK. I would give it another coat but the paint has a shelf life. The reactant they have you pour starts the clock. There's no going back. I would use G2 again but next time I'll paint until the can runs dry. And if doing 4 calipers, buy 2 kits...If she likes the color i'll just order another kit and give it a 4th, 5th , 6th,....coat. My replacement rotor won't be in until next week so unfortunately, I have time. :(
 
Last edited:
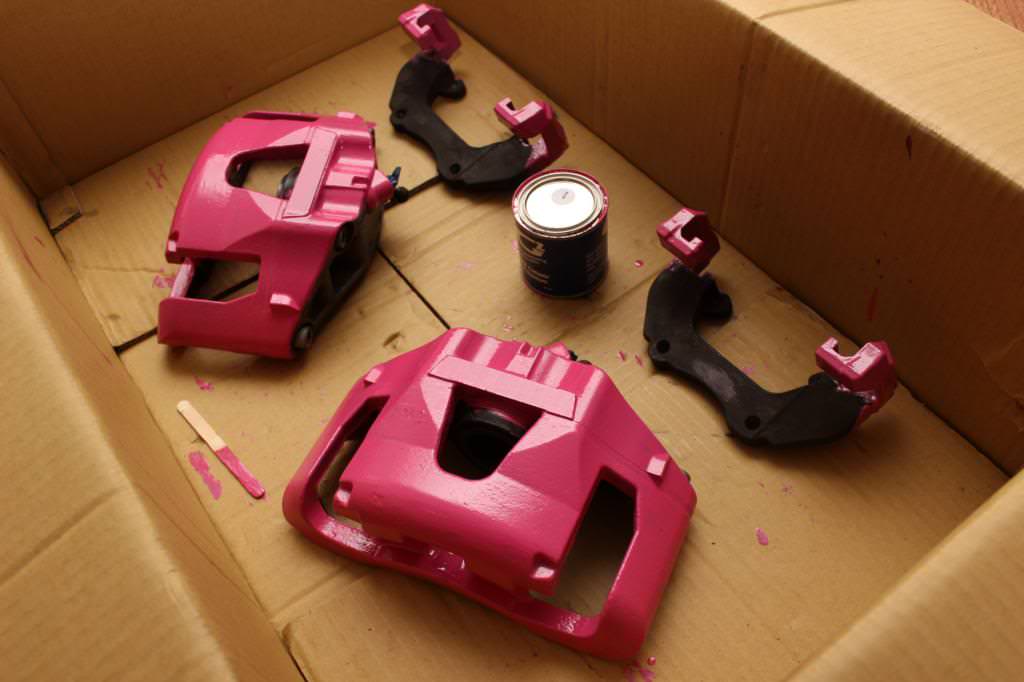
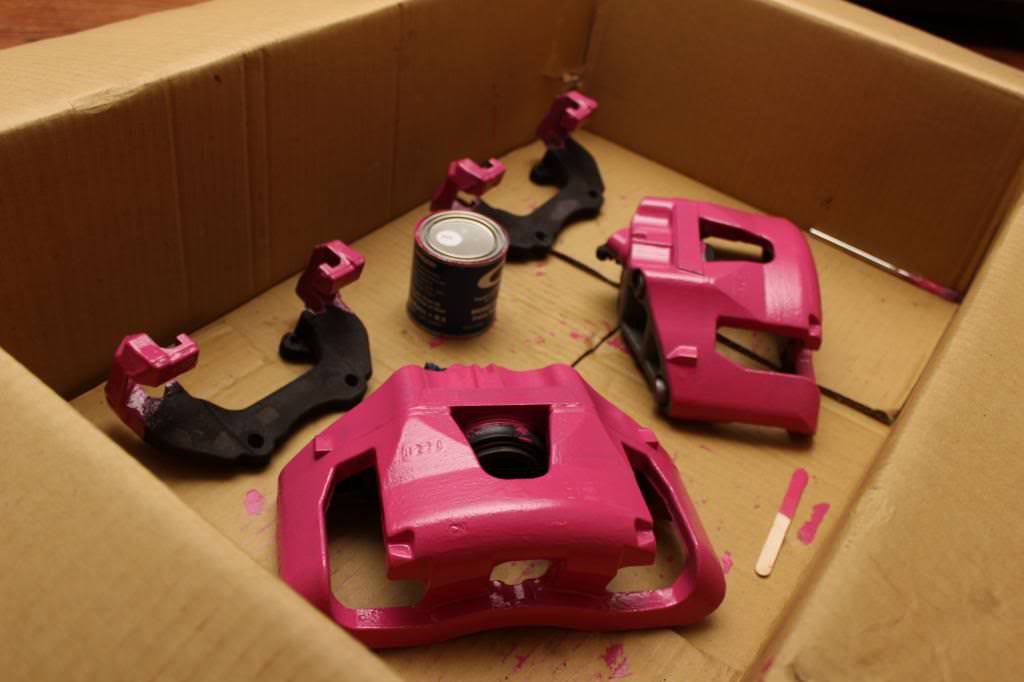
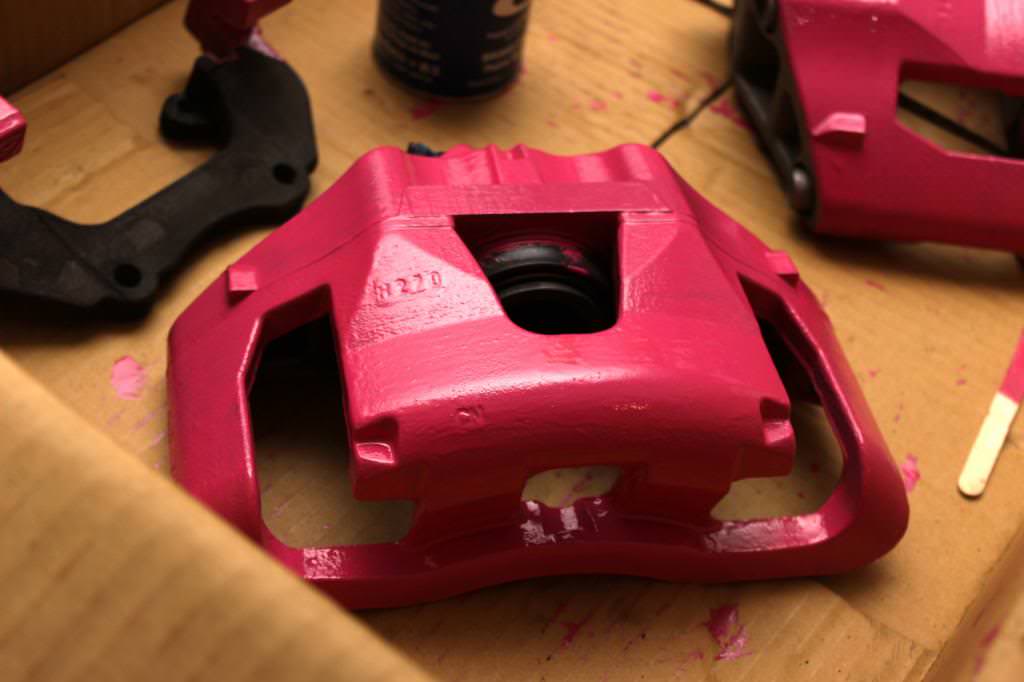
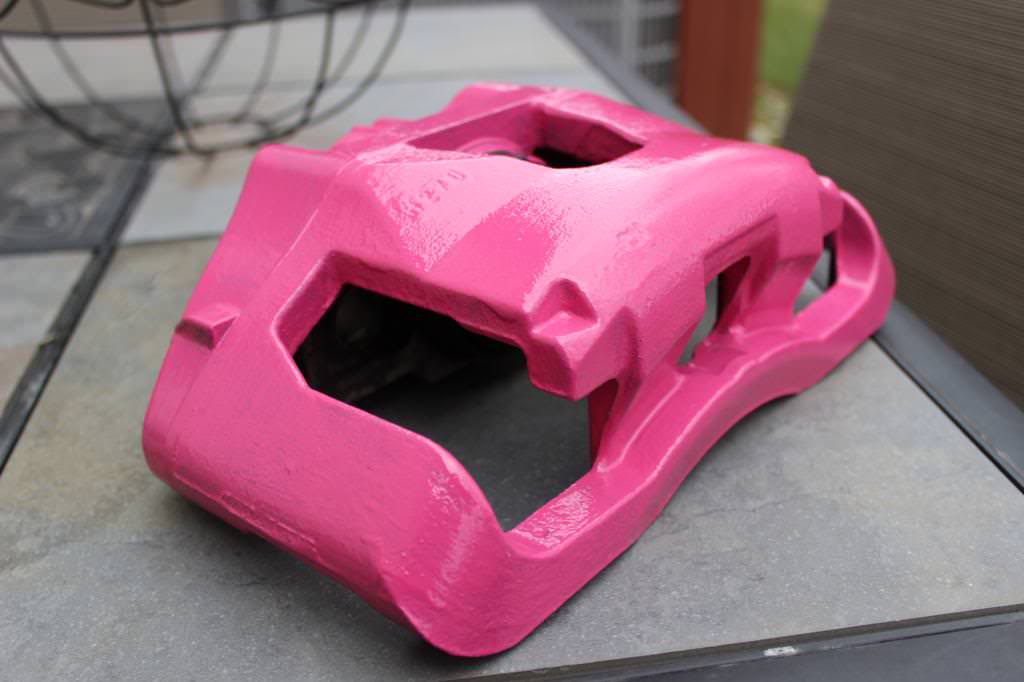
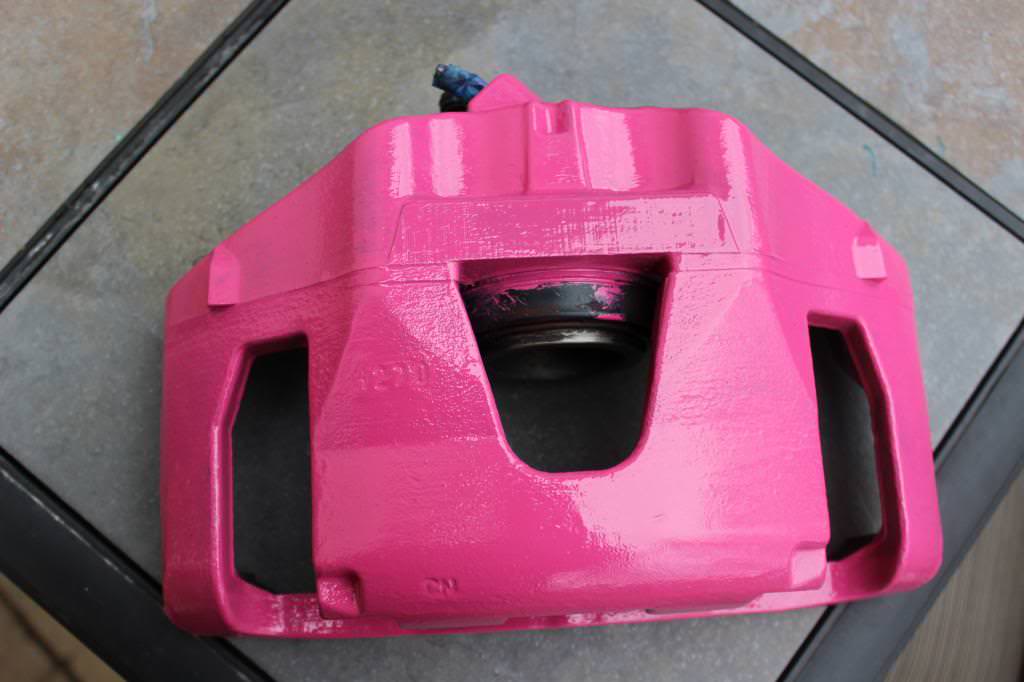
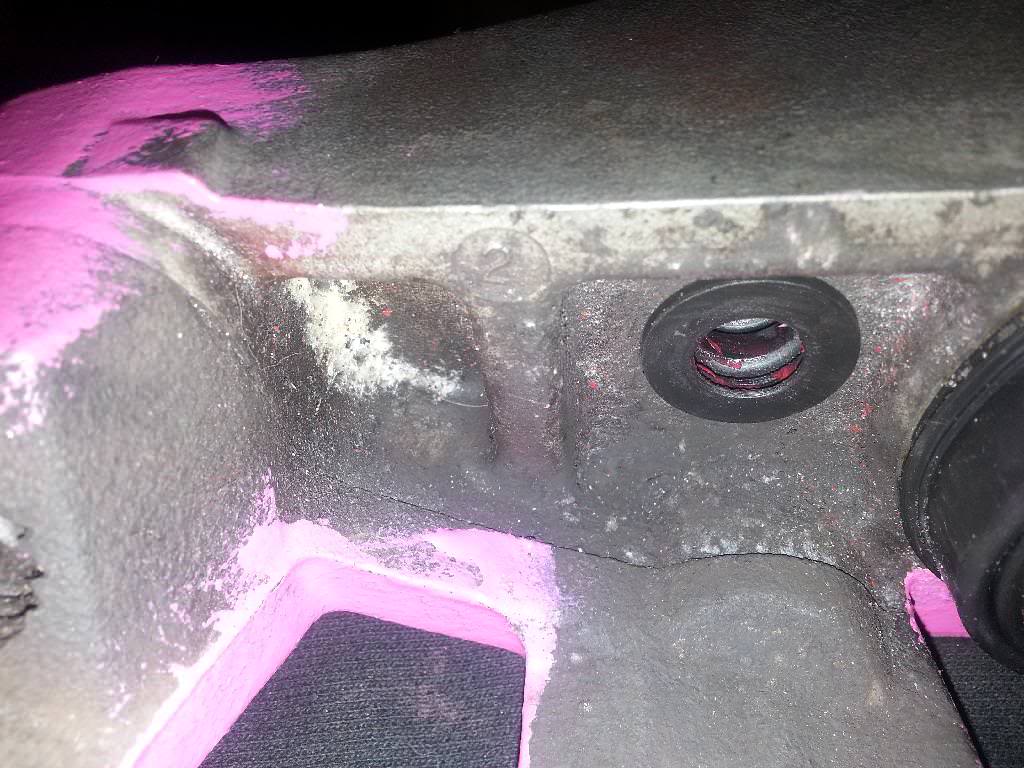
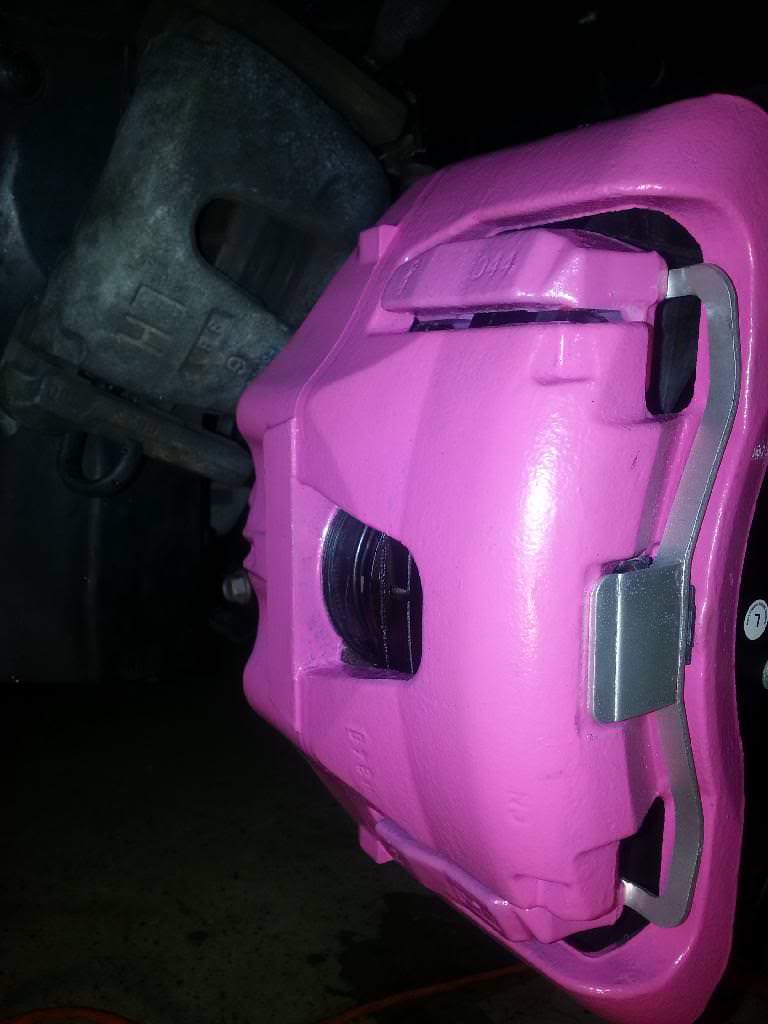
The wife loved the color so pink it is! i didn't show her any of the rough spots since she wears glasses and will never see it anyway. It actually doesn't look at all bad from a distance and with the wheels on won't show at all.

P3n0pPI.jpg


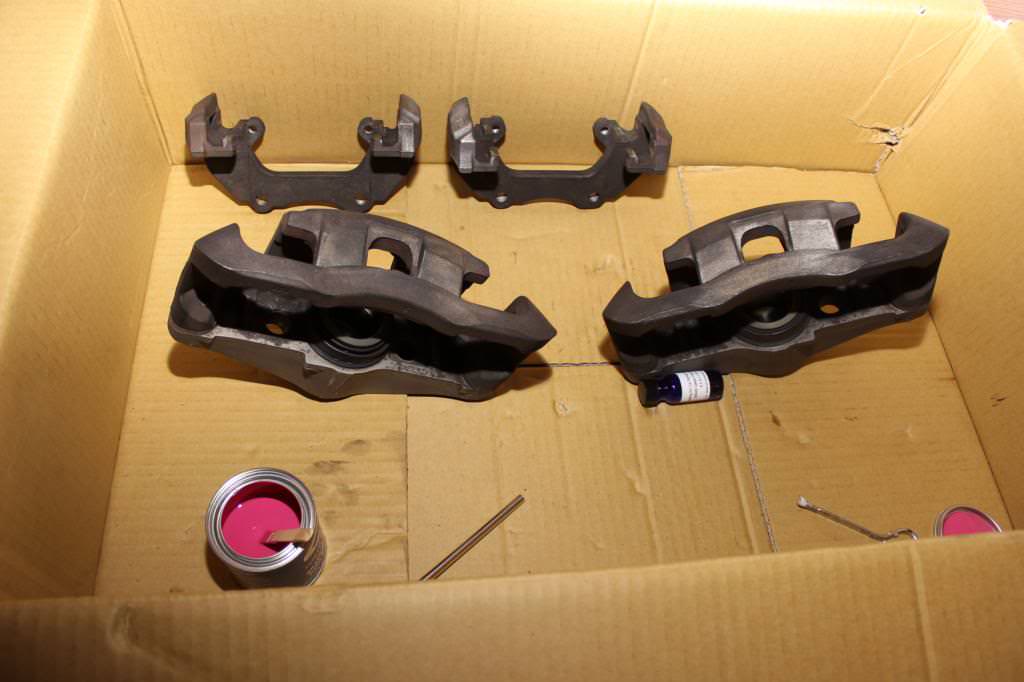
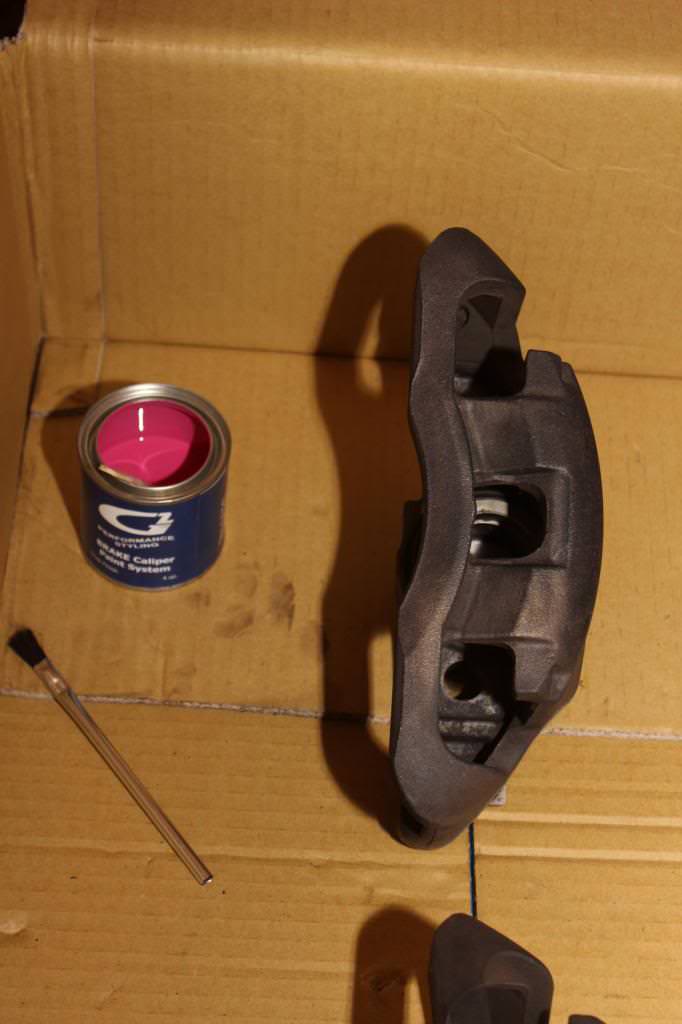
A quick overview of the process and any pitfalls i experienced...

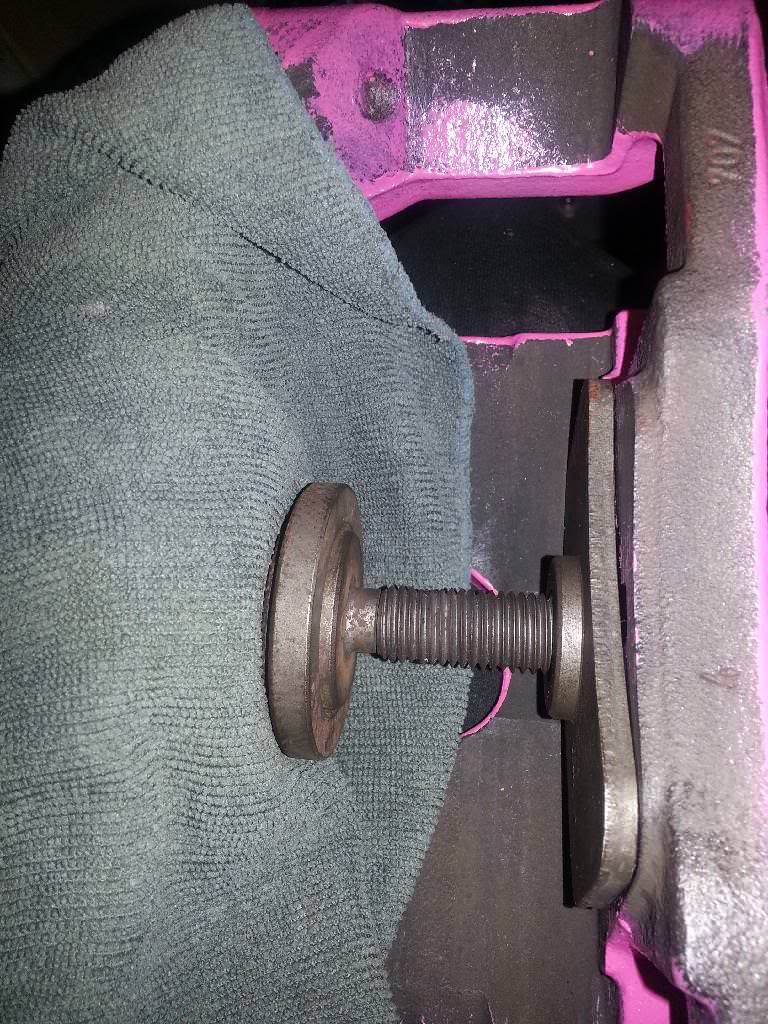
I gave the paint two days to cure, then began the rebuild process. I keep an open bottle of brake fluid for these occasions for cleaning, lubing, etc.. First step was to get the piston out by blowing compressed air throw the brake line holes. Having a 30-gallon air tank makes it easy but i've read that a bicycle pump works as well. Before beginning, wrap any areas the piston may hit with rags. Compressed air has the potential to launch the piston with a decent amount of force if you're not careful. Last thing you want is to have to wait for delivery of a replacement piston.

EbSsWOF.jpg


Do your best to get the rag under the piston. Probably doesn't matter but i wanted the piston to have a clear path:
jcrD2tn.jpg


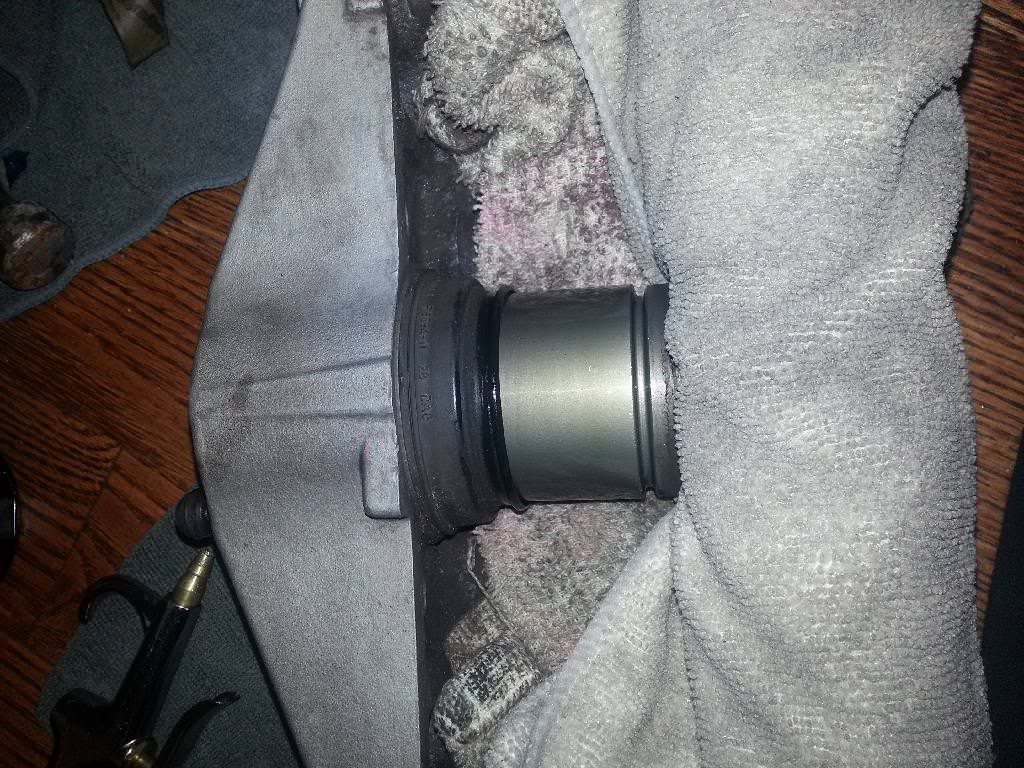
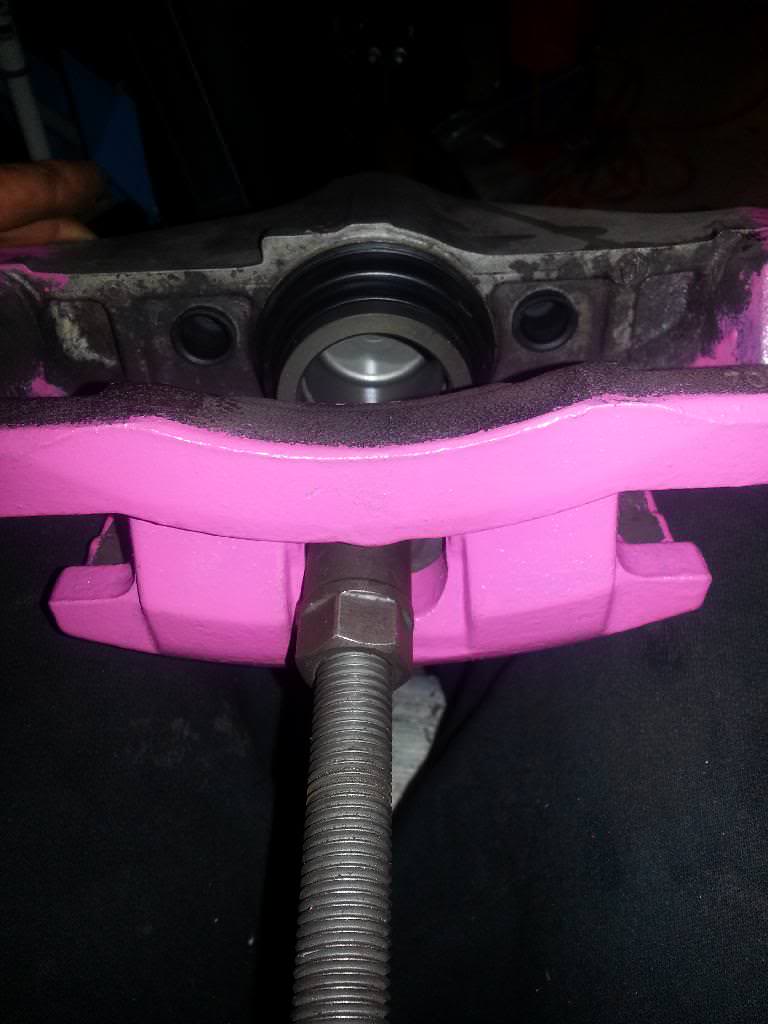
A couple of easy bursts of air and it popped right out. Just tilt it up and out. It's very light and feels like it would scratch easily so place it somewhere safe. I cleaned them with brake fluid then wrapped them in microfiber cloths until it was time to re-install.
G3MHpPE.jpg


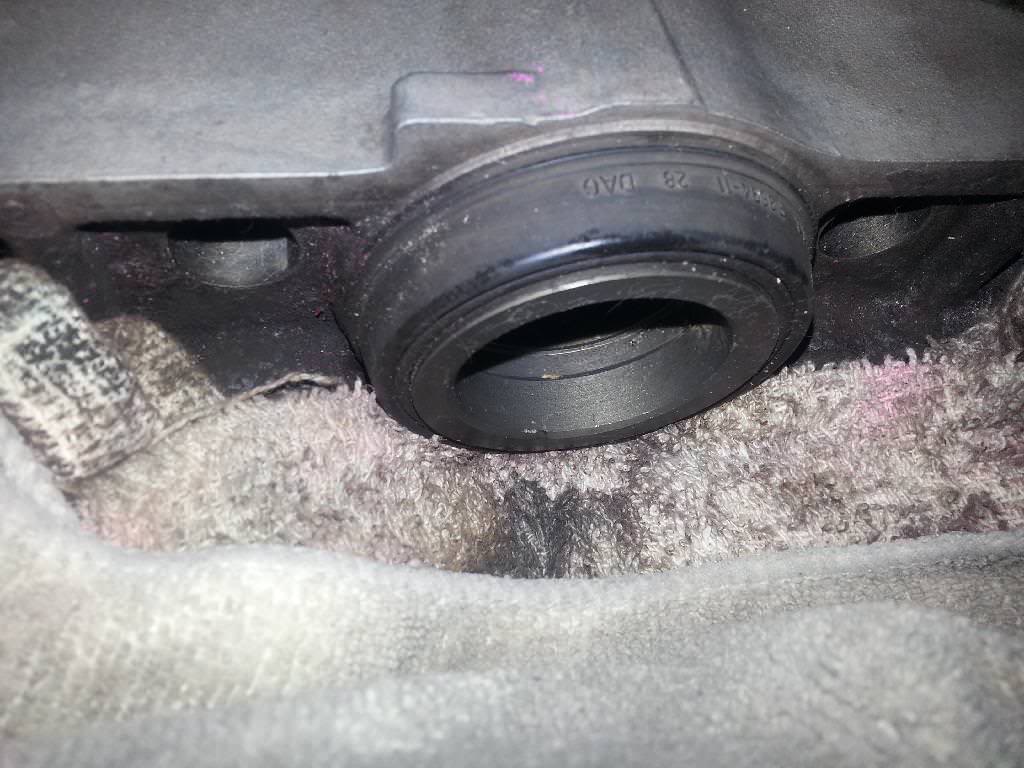
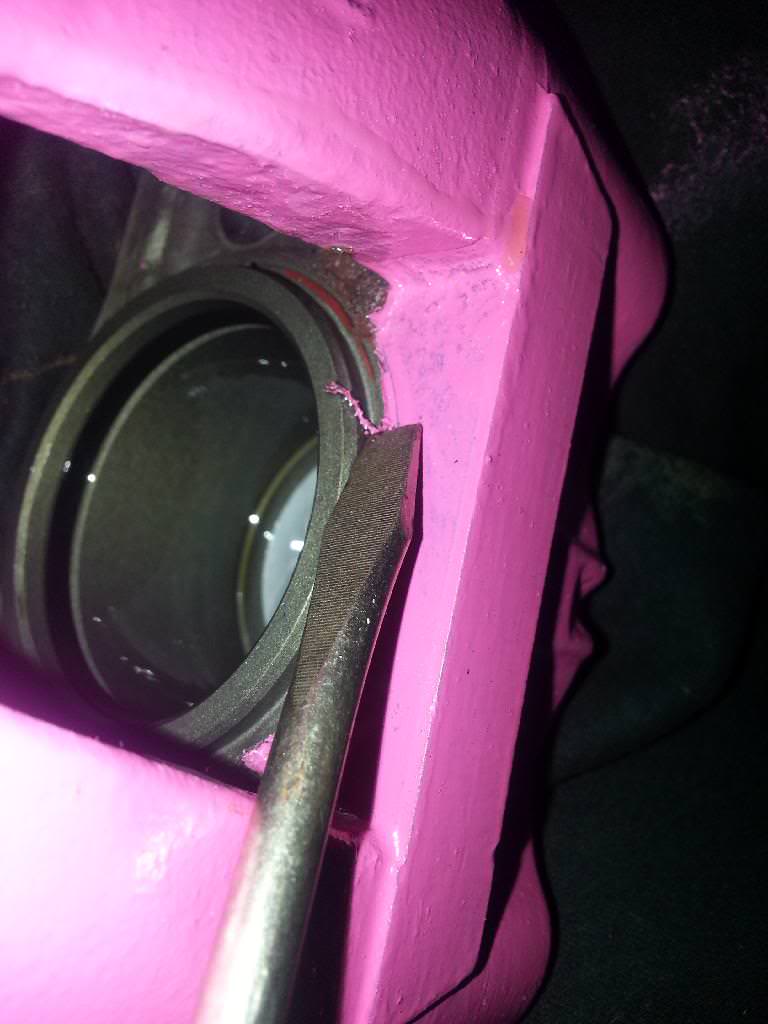
With piston removed, use a flat head screwdriver to GENTLY pry the old boots from the caliper. If you look closely, you'll see that there are a series of notches evenly spaced along the bottom of the boot. I found it easiest to stick the screwdriver in one of those and twist till i got under the boot.
nGfLRyD.jpg


Remove the inner seal with a flathead. It's really easy and requires very little pressure. Again, be gentle and precise. A gouge in the piston bore would likely lead to a leaky piston. Once you get the screwdriver under the seal, work it out the rest of the way by hand. Wet the new one with a bit of brake fluid and just slide it into place.
bL0OFbZ.jpg


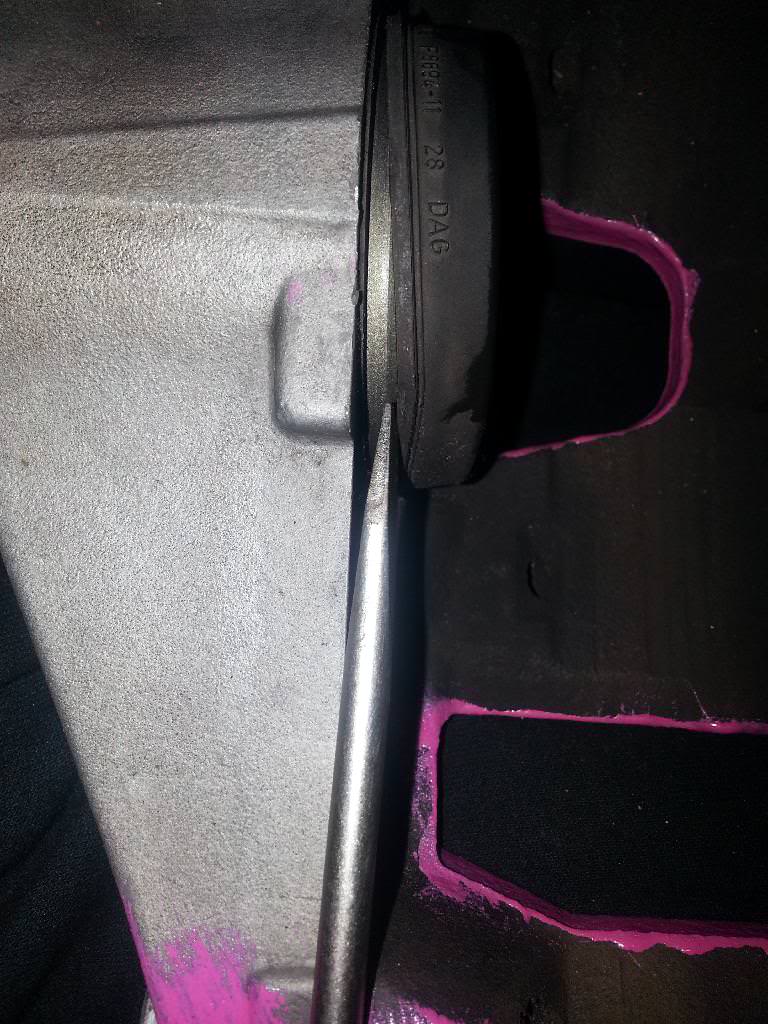
I left the old boots in place while painting to eliminate any chance of paint getting into the piston bore but a tiny bit sneaked by anyway. A screwdriver and a gently touch made quick work of it.
cvMCRs2.jpg


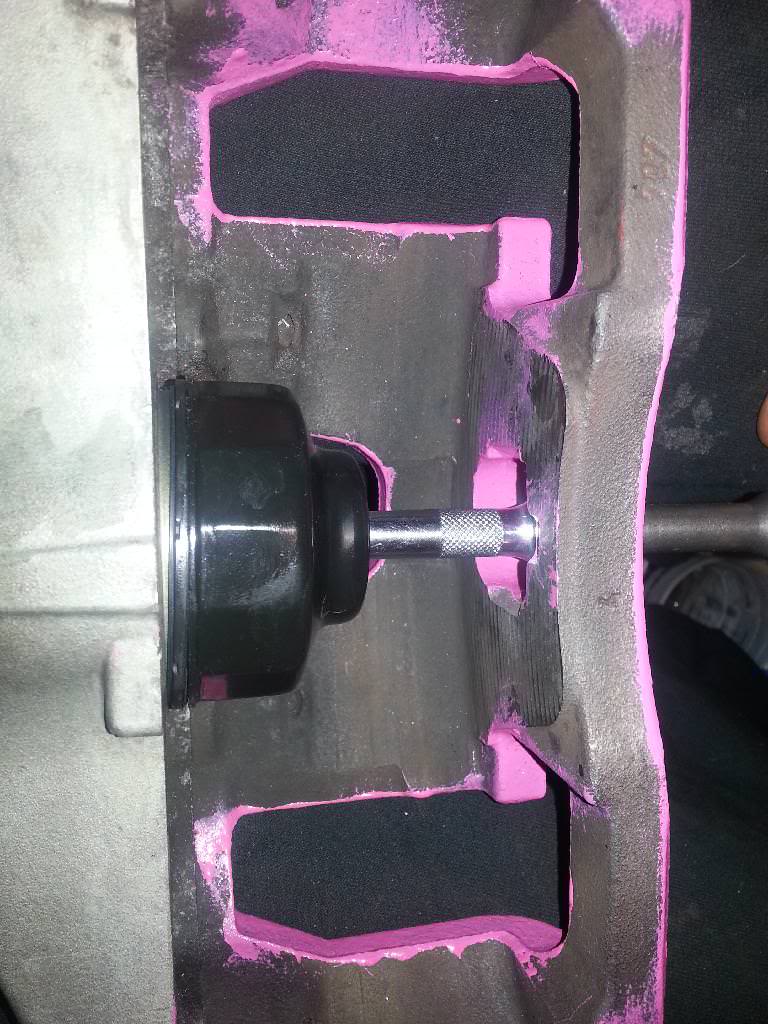
Oh the agony! I spent an hour trying to get the new piston dust boot on. The bottom of the boot contains a metal ring that has ZERO give. Of course the OEM boots are sized with no play. Every time i pushed one side in the other would pop out. I tried all kinds of ways to pull the boot over the opening but it FOUGHT HARD! I googled to death and all the threads i found made it sound sooo easy. I swear those guys must have bought aftermarket because the OEMs were not a slip on affair, AT ALL. It became painfully obvious that i would have to find a way to apply even pressure around the circumference of the base of the boot. But how? I don't have the Mazda tool outlined in the shop manual so i start digging through my tools and by the power of gray skull, one of my oil wrenches is the EXACT size of the boot! Grabbed a hammer and couple of extensions and tapped the boots into place.

Arrz753.jpg


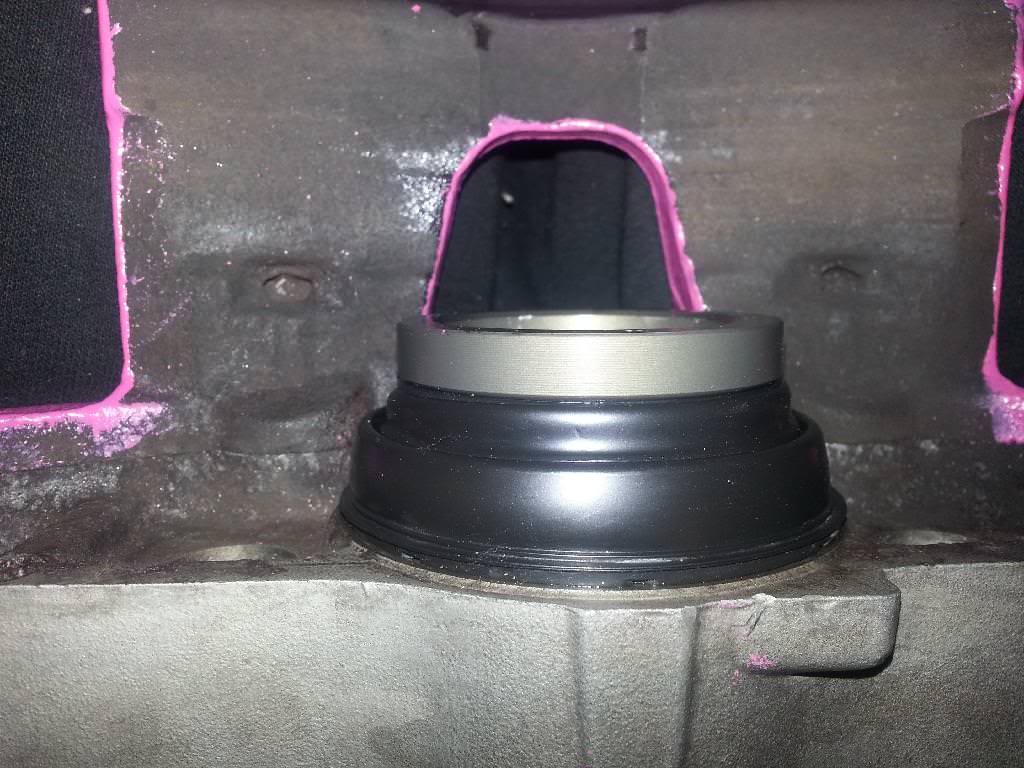
Oh the agony...again! In order to get the piston back in, you must seat the piston on the newly installed boot, hold it with all you got with one hand while shooting compressed air into brake line hole again. Give the piston a light coat of brake fluid for lubrication before you begin.The boot will eventually pop around the piston and then, and only then, will you be able to push the piston through the boot and into the caliper. DO NOT FORCE IT! If the leading edge of the boot is not wrapped around the entire circumference of the piston, it will not go in. If you force it, bye bye boot. Sounds easy but the boot reacts to the air randomly. One side will pop while the other doesn't - over and over and over. Leaning the piston toward the side of the boot that has already popped and feeding it short, quick bursts of air eventually got it to pop. After my knuckles got bruised up from banging against the caliper with every shot of air, i put a rag over the caliper to cushion the blow.

UZXfNcG.jpg


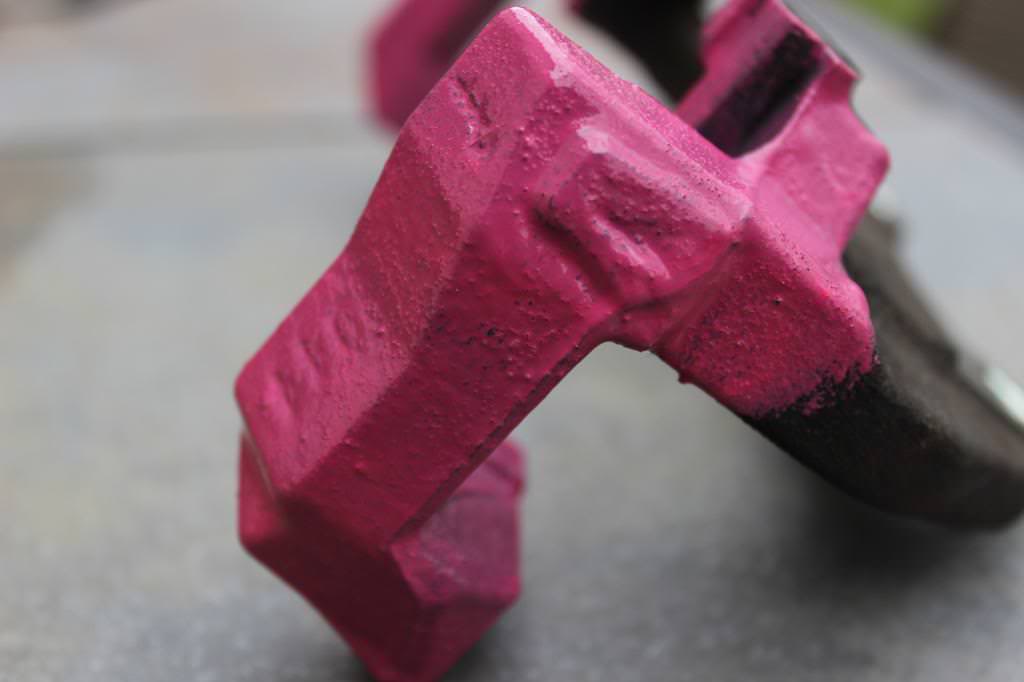
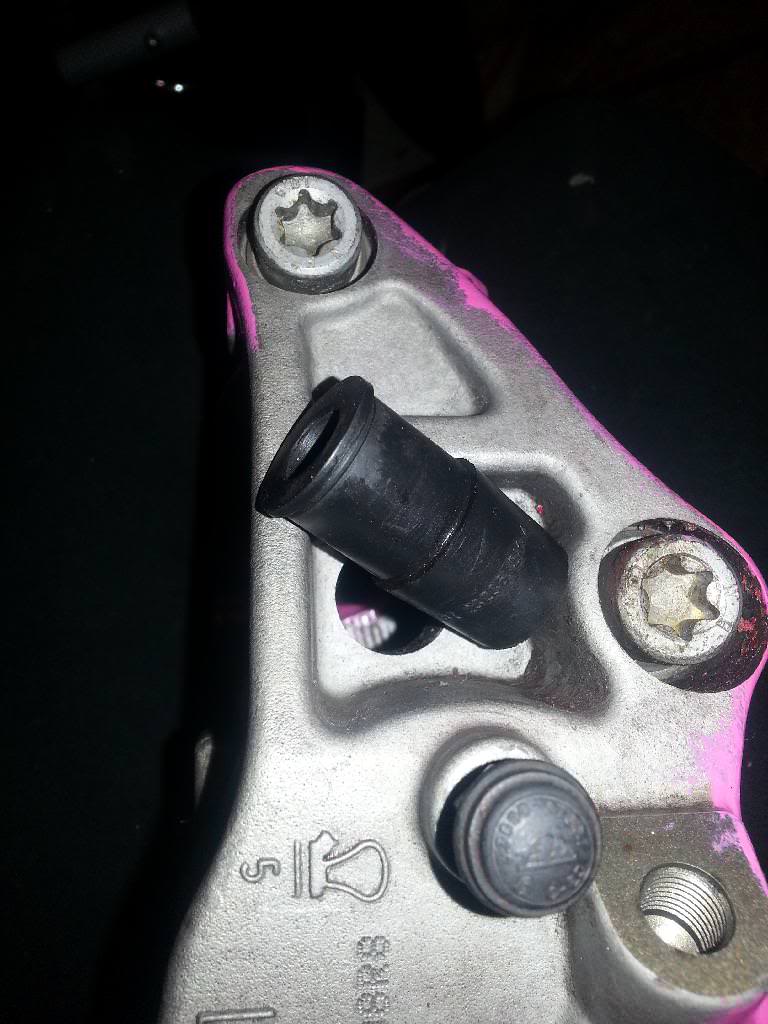
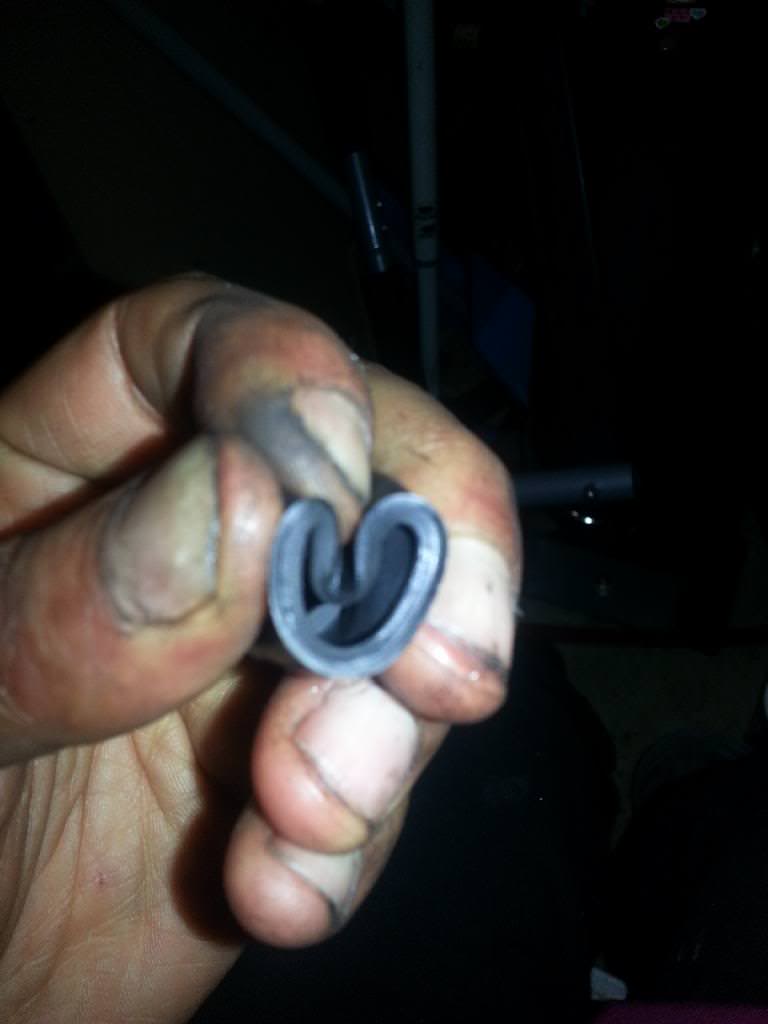
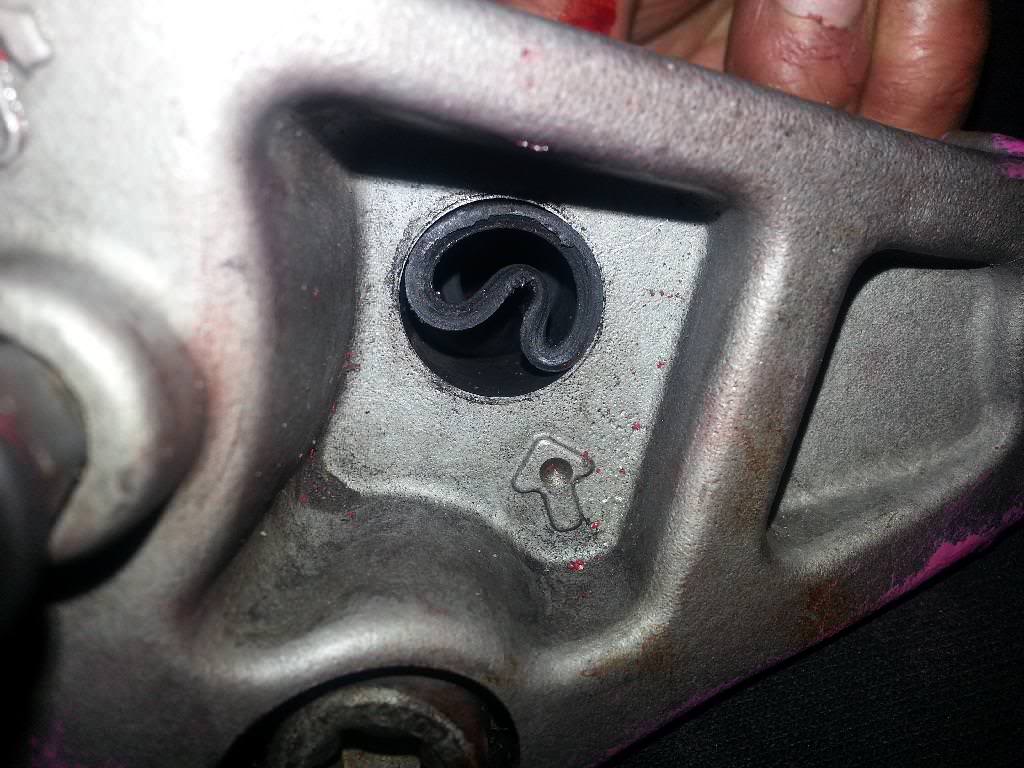
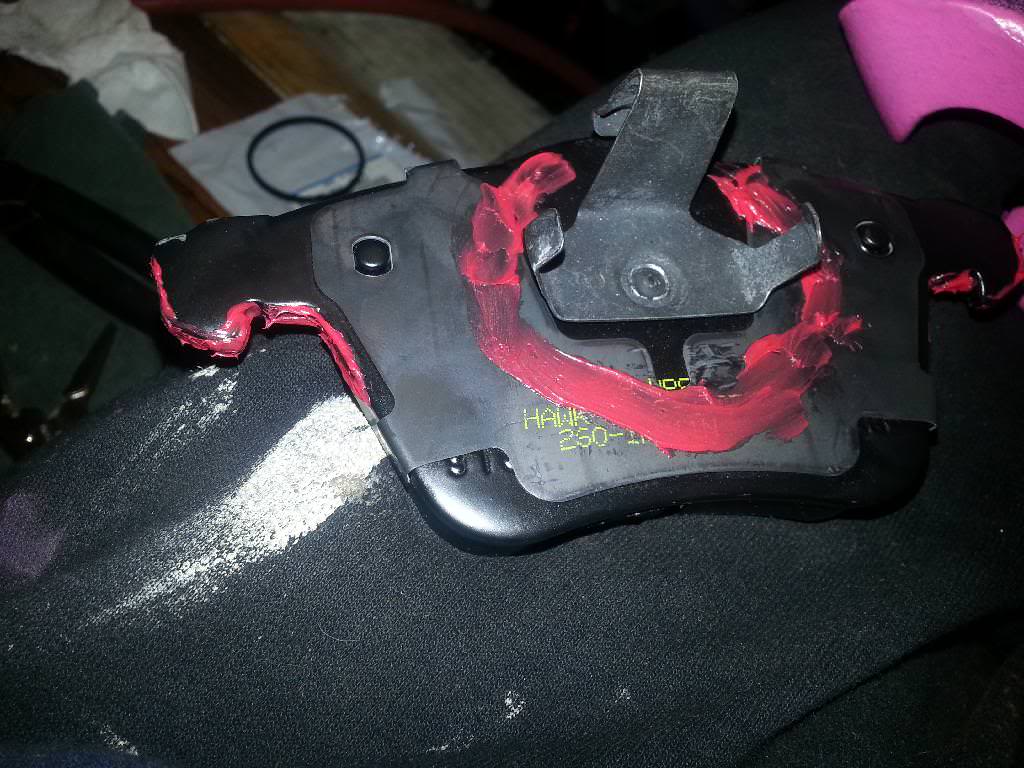
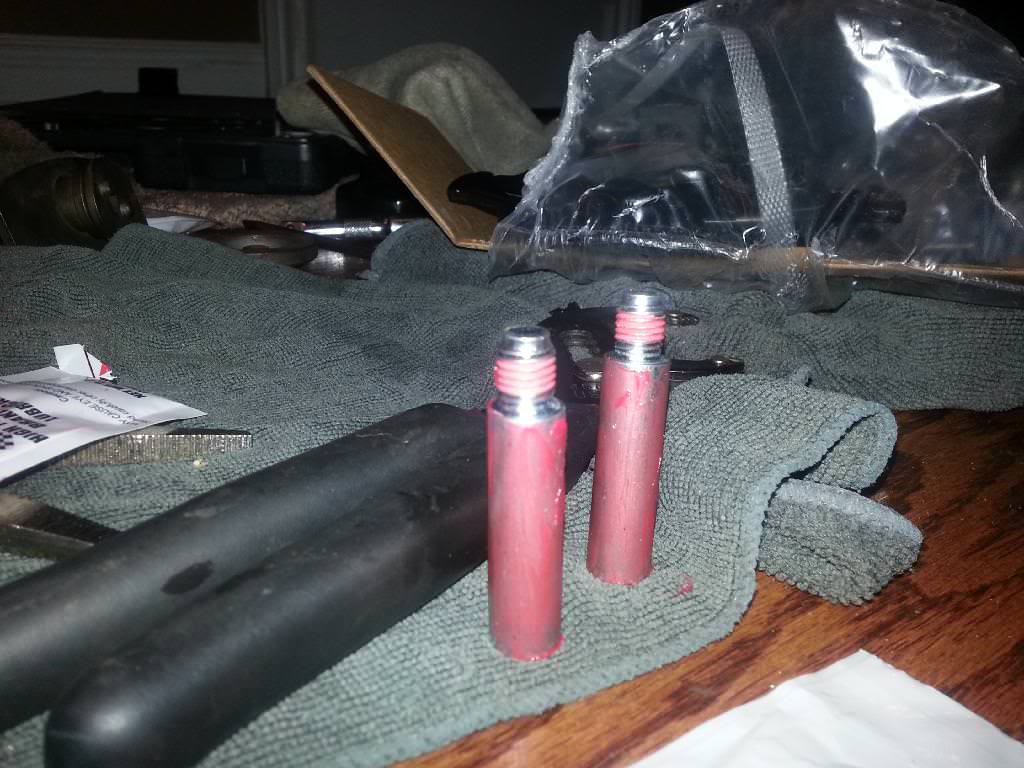
Now the boots for the guide pins. They go right in the hole it is resting on in the pic. The raised lip, as seen on the left side of this pic, goes on the inside of the caliper.
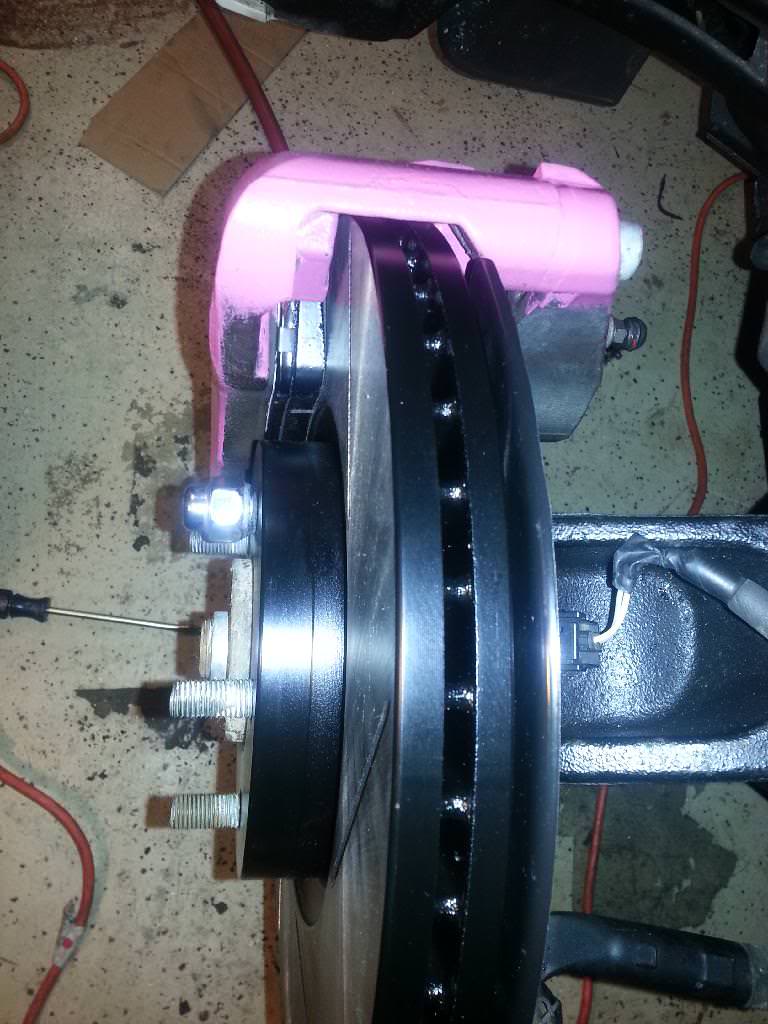
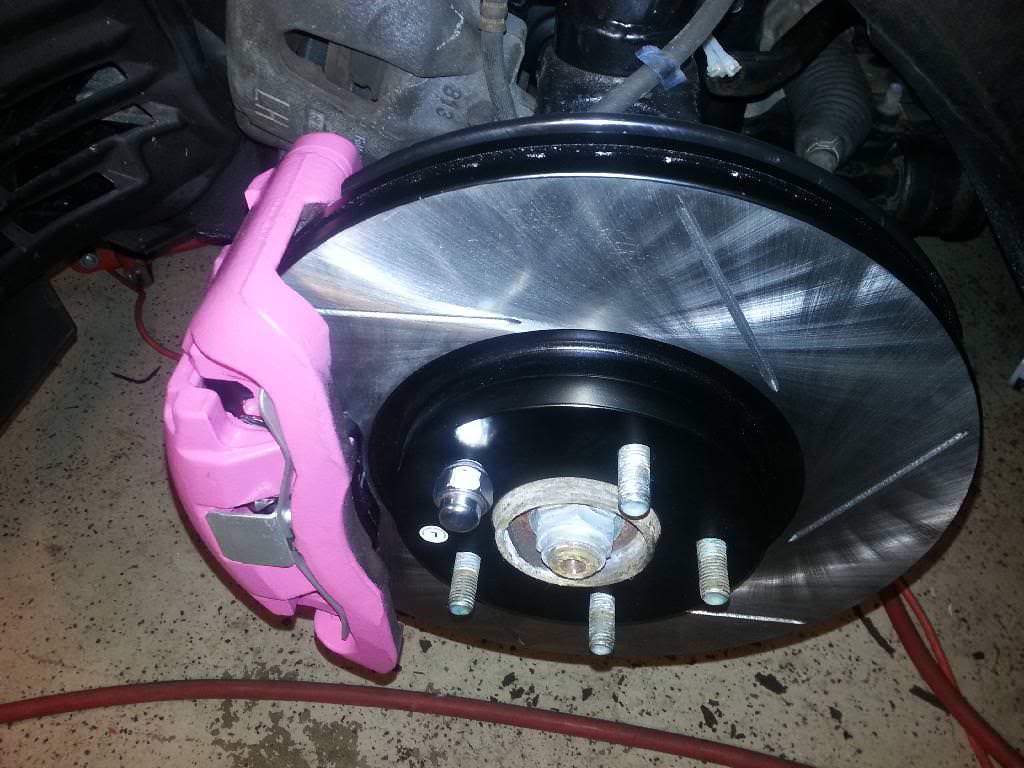
IOKWZw4.jpg
 
Last edited:
I like to bend it like so, start on the inside of the caliper, and shove as far i can reach. Then, with needle nose pliers, i gently pull from the outside while pushing from the inside.
2MtFzJl.jpg


wlIfLft.jpg


Fully seated. View is from the inside of the caliper.
iRlHPiB.jpg


It's finally time for the brake pads. First though, piston must be fully retracted. You can sometimes get away with doing it by hand but i like to use a brake tool to ensure equal pressure across the piston while it moves back. And sometimes they just put up too much of a fight, like this one did. I have the Schwaben kit and it has served me very well for years on a bunch of different cars.
Q3pO9Pa.jpg


wi7xwVE.jpg


sohrMZH.jpg


Hawk pads come with a tube of hi-temp brake lube. Use it wherever the pad meets the caliper and caliper carrier. Keep the braking surface of the pads clean. This is the pad that is inserted into the piston. I squeezed the bracket together just enough to make it easier to press into the piston. The opposing pad is also a press fit affair but much easier.
bMS1Ms4.jpg


wvcpSkP.jpg


Coat the pins with the same hi-temp lube that came with the Hawk pads
EuWG9qc.jpg


The caliper is now fully assembled, guide pins lubed, time to put them on the van. I already had the carriers waiting. The pads stayed in place while i tilted it and placed the whole assembly onto the carrier, over the rotors, with absolute ease. I loved installing these calipers. Then stick the guide pins through the boots in the rear of the caliper and fiddle with the whole thing until the thread on the pins catch the carrier. I have no words for the caliper retaining spring. Brand new ones are a b**** no matter what. Tomorrow i do the SS lines. i need a break....

More shots of the (almost) finished conversion
Sy75J1T.jpg


7tPNFUU.jpg


eHGoZfP.jpg
 
Last edited:
sorry, I'm absolutely not doing an apple-apple comparo. the last 2 of my DDs were s2k and a w211 e55. both obviously had front tires 40mm+ wider, a few extra pistons in the case of the e55, summer tires with low UTQ, ad nausea.

the 5's brakes have horrible initial bite, long travel (mind you, the car is fresh), and overall rather sad braking power. i'm sure the hard oe tires have lots to do with that, but the quickest (and lowest cost solution) seems to be finding a pair of junker ms3 calipers/carriers +. obviously most soccer dad/moms in minivans don't need/want the braking power of a sports car and the associated brake dust, but braking is a safety feature to me, on par with air bags. i always thought it's absolutely shoddy (and this isn't particular just to Mazdas) that car mfgs would offer lesser brakes while adding more air bags.

MR6, if you can score me the mz3 set (no rotors necessary), i'd be greatful, and i'll take 'em now. like, today.

He's still got them. I asked him what he wants. He asks me what you want to spend lol I'm gonna give him ur screen name. Hopefully he'll reach out to you soon.
 
TonyC, seller of the MS3 calipers asks that you text him. I PMd you the number.
 
thanks MR6. Really nice job of documentation above. Srsly, (2thumbs)

were your slotted mz3 rotors cheaper than the OE rotors online?
 
Thanks. I hope the mini write up helps.

I paid 107 from tire rack and 104 from mazdaspeed store. OEM from http://onlinemazdaparts.com/ are just 65. In my experiences with slotted rotors on several different kinds of cars, they've always had greater initial bite than blanks, especially in the rain. cross-drilled on the other hand are pointless ricey nonsense, unless you track....
 
Been real busy but wanted to throw up a quick update. Installed the braided lines on the front (rear was a FAIL) and flushed the fluid. Drove her about 2 miles to bed the brakes a bit then a jingly rattle sound started up front in the suspension i just installed. Turned right around and i'm jacking her up again tonight to figure out WTF is going on. Couldn't really judge the brakes from such a short drive but I'll throw up a more thorough update (hopefully) this weekend.

 
Last edited:
Nice job!

So just to confirm that the ms3 calipers are a direct bolt on the the mz5?

For anyone who wants to find a set of calipers,or any other part for that mater, I wanted to share this awesome resource if you haven't already got it book marked.

http://www.car-part.com/

I've got a set of 2012 calipers with 2k on them heading my way...(cabpatch)
 
Wow, you sure waited a long time to make your first post about advertising a used parts website... (scratch)
 
Back