ZPS Build Thread

Friends car. White with blue on the inside. Everything inside works even though it hasn't ran for the last 6 years. We got it mostly running, but it isn't too happy, but we have a few ideas for what it might be. He also has a really nice White 1.6L Miata.
 
Ok so this Saturday I was able to put the Bilstein coilovers into the car. The first thing I did was to check the shock travel for the front shocks since I know that makes a huge difference in performance. Here is a picture comparing the front shock with the stock shock with my eibachs installed.

182974_10100895089176038_1364981904_n.jpg


I then took the top hat off and put it on the Bilstein without the spring installed. Fully extended from the bottom of the shock to the top hat was right at 20". I then compressed the shock until it hit the bump stop. The length was then 15.75" so it looks like ther eis 4.25" of shock travel in the front before hitting the bump stop which is pretty good for a strut coilover setup. The bump stop felt pretty soft as well which is good.

Here is the stock top hat.

941602_10100895089600188_1416828915_n.jpg


At you can see the point where the shock mounts is about 0.6" below the top of the top hat. I am planning on making a new top hat out of a steep plate which is flat so the top of the shock is 0.6" higher which will give me more travel in the front or allow me to drop the car 0.6" lower. But more on that later. I am also going to move the upper mounting point for the shock back a good bit to get more caster. From what I have seen we only have about 3 degrees of caster and I would like to change it to about 5.

Here is the setup I was running.

182991_10100895089235918_1626321120_n.jpg


It was the stock shock with Eibach lowering springs and the Fat Cat Motorsports bump stop. The zip tie held the stop up. I also had one spacer which helped with bottoming out as well as preventing the bump stop from blowing the seals for the stock shock.
 
Ok so here is a picture of the ARP bolts which I used to mount the shock to the hub. They are M12 X 1.75 X 50. On the stock setup there was about 2 threads sticking out of the nut. The mounting flanges on the Bilsteins are thicker, but the ARP bolts came with a washer on them which I removed for the bilsteins. In this picture you can see that there are 0 threads sticking out, but the flanges on the bilstein shocks were spread apart some. Once you tighten them down there are 2 threads sticking out like I had on the stock setup with the washer so I was good to go.

429845_10100895089186018_1087747544_n.jpg


Here is the Bilstein installed on the car.

379651_10100895089724938_1616683767_n.jpg


The sway bar connection was not connected since I still had the stock shock on the driver side and it was drooping further down so I could not mount the sway bar on this side. Overall I was impressed with the qualify and fit of the coilovers, not like I was surprised since they are German. The only thing I did not like was the camber issue. I slotted the top mounting hold for the shock to get more camber. Just like Corksport mentioned the hub hits the shock though without much camber in the car so I ended up having to slot the bottom hole as well to get back to -2.5 degrees of camber like I had before. This was why I use the ARP bolts so I can torque the down tight and have no slip.

Here is the bolt tight showing the 2 threads sticking out.

970292_10100895089774838_557964140_n.jpg


Here is a picture of the mounts which they include for the ABS line. Really nice way to mount it.

970177_10100895090263858_1791820146_n.jpg
 
Here is a picture of the rear shocks.

931250_10100895090453478_635464592_n.jpg


I was happy to see that the rears are also revalvable. I might send mine in one day to Fat Cat to get them revalved next year along with the fronts. I did not look into the travel in the rear because the rear bump stops are so soft they just slightly add to the spring rate and in the rear of a FWD car I am ok with using the stops since they are soft and don't cause the car to feel unstable when you hit them, even in stock form let along with the stiffer springs.

Here is the rear fully assembled. Yes the rear are progressive, but I am ok with it since they are a good bit stiffer then factory. The rear install is super easy took about 30 minutes to do since I have done it before.

922750_10100895090812758_878633502_n.jpg


Here is getting ready for the alignment.

379718_10100895090458468_1251281858_n.jpg


So the ride height I have in the front is 3/4" lower than the eibachs. I only have it that high because the shock length is about 17 at that height which means I have only about 1.25" left of compression and 3" of droop. Any lower and that would get worse. I don't think that it would cause much of an issue since on the Eibachs I only had about 3/4" of compression and it wasn't an issue. Either way I also had some scraping issues with places around here with the eibach so being 3/4" lower I will scrape even more.

Now going back to what I mentioned about he top hats, moving the shock mount up 0.6" more will give me 1.85" compression and 2.4" of droop. I am pretty happy with that since I am sure we will use 1/4" or more of the bump stop as well.

In the end I am very happy. The ride is basically the same as stock except the steering is more direct since the car doesn't roll as much. The ride is nice and smooth though which is great. The car handles really good. Much more stable than the stock set up. It will still oversteer, and understeer if you provoke it, but it is much more progressive when you hit understeer and oversteer. Because it is so much more progressive you can easily keep it right at the limit. I am very happy with the results.

Also I mention the shock travel in the front and it really isn't an issue, but I am a big suspension guy and I don't like leaving things on the table and the new top hats will be easy for me to make. They are not really needed, the coilovers are great stock.

Now I just need those wheel spacers to arrive at my door.
 
Just for reference, the top of the front fender is 23.25" from the ground and the rear is 24" from the ground right now. I am going to lower the rear 1/4" more this week. The rear looks a little high and once I lower the rear 1/4" more the pinch weld on the bottom will be level with the ground as well.
 
Lots of info. I really like the inverted design on those struts, too bad they need to be modified to get decent camber. Any plans for corner balancing?
 
yea, I am going to wait for everything to settle before I do that.

the modifications are not hard, about 2 minutes with a die grinder and you are done.

Unfortunately there are a few things I need to pay for for our house before I start to do the exhaust, but one of those items is to epoxy the floor in the 2nd garage. Then the real fun can start in there.
 
The knuckle castings are a bit weird on the two and seem to be all over the place. Another 2 I know wasn't able to get close to -2 degrees with the crash bolts on either side without some massaging the metal with a grinder.

Was it the same on both sides of your 2?

-Derrick
 
If you want to mix up the rear springs I believe you can just run a 2.25 ID coilover spring with the bilstein adjuster. The B-Spec adjusters look the same as the street suspension and they are a hypercoil spring with an eibach helper to keep it from rattling around (or falling out) back there.

There is also a way to run 2.5inch springs on the fronts with a little bit of work to the from bearing plate too.

-Derrick
 
No, it was not the same. The driver side took a low more work to get the camber than the passenger side. Strange.

I also just got a tracking number for the spacers so I am guessing that they will be here next week.
 
yea, I might swap the springs in the rear at some point down the road, but it will be a while. I don't think that the rears are that progressive. I might know someone with a spring tester and I might test one since it takes 5 seconds to take the spring out of the rear.
 
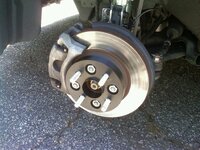
Here is a little teaser. I went home for lunch to get stuff done on the house, but as I was pulling in the UPS guy was pulling out. So since the spacers were there I tried to install them, but the studs are longer than the factory ones so I need deeper lug nuts than factory. Oh well I was close to getting them on. I might be able to get my hands on a set of lug nuts tonight though, we will see.


spacer.jpg
 
Time for pictures!!

Before spacers installed
969061_10100912736051558_1284507190_n.jpg

1005874_10100912736470718_1076485817_n.jpg


After:
1014283_10100912736011638_124379520_n.jpg

7808_10100912736036588_1610740535_n.jpg


Outside:
7258_10100912736670318_763248991_n.jpg

3684_10100912736690278_1038626569_n.jpg


This weekend I might take some better pictures with a real camera. I am also thinking on getting red lug nuts for it. I think the red/black/white combo will look good once I paint the Dunlop on the tire.

Overall the spacers fit really well. The only issue I had was that on one of the studs the first thread was slightly messed up so I had to file it into shape some, but everything else was just fine. Very happy with the result and no vibrations either.
 
Here is an interesting picture I just took. From the front you can really see how wide the car is now. Also looks so good with the camber as well.

DSC_0353.JPG
 
Back