
You are using an out of date browser. It may not display this or other websites correctly.
You should upgrade or use an alternative browser.
You should upgrade or use an alternative browser.
The CX-5 LED Lighting Thread
- Thread starter SayNoToPistons
- Start date
NelsonLewis
Banned
- :
- 16.5 CX-5 GT AWD w/Tech BRMica
Installed the same cheap eBay kit as you last week. Highly impressed so far. Great little addition...All interior lights in 2017 CX-5 are the same as 1st-gen's as Mazda didn't make any changes for those. So basically you need five 30/31mm Festoon LEDs for map/dome/cargo lights、two 29mm 2,800K "warm white" Festoon T6 fuse type LEDs for vanity mirror、and two 194/168 type LEDs for license plate. You can always pay more for name brand LEDs but they normally don't use the latest LED chips. I have cheap eBay LED kit installed for 17 months and so far so good. Not all eBay LED kits are the same. You've to check the specs and reputation!
Pipemajor
Hoot Mon!
- :
- Minnesota
- :
- 2017 CX-5 GT AWD
All interior lights in 2017 CX-5 are the same as 1st-gen's as Mazda didn't make any changes for those. So basically you need five 30/31mm Festoon LEDs for map/dome/cargo lights、two 29mm 2,800K "warm white" Festoon T6 fuse type LEDs for vanity mirror、and two 194/168 type LEDs for license plate. You can always pay more for name brand LEDs but they normally don't use the latest LED chips. I have cheap eBay LED kit installed for 17 months and so far so good. Not all eBay LED kits are the same. You've to check the specs and reputation!
These are the ones I ordered from VLEDS for the interior festoons. They gave you a choice between 5K and 6K color temperature bulbs. I chose 6K since I had a black interior. The 6K bulbs gave a pretty 'cold' feel to the lighting quality. If I were to do it again I'd probably go with the 5K. I did choose 6K for the rear license bulbs and was pretty happy with those. Ran everything for 35 months and not a single failure although VLEDS indicates the one I have linked are on closeout.
The fade feature Mazda uses when the interior lights go out does cause the LEDs to dim then flicker before going out.
- :
- Plano, Texas, USA
Yep Mazda at least did an easy LED upgrade on backup lights for new CX-5. I wish they had done LED upgrade on more complicated turn signals!Anyone wonder about the 'tiny' backup lights on the 2017s? Fear not, they are LED and very bright.
I did the unthinkable and ordered a bulk buy of inexpensive ones off ebay. Enough to do both the new CX-5 and replace the other cheap ones I currently have in my 3. Those ones were found in my spare parts bin and they were insta-swapped in (also bought from ebay for my last car and never put in). No issues with even the ones currently in my 3, but they're a little less powerful than the ones I've ordered for the new car.
Oddly enough, interior LEDs were one of the first things my wife noticed lacking in the new one on the test drive (her previous car had factory interior LED lighting) and she specifically asked me to "fix" it for her LOL.
Hard to turn down enough bulbs to do 2 cars for <$10. Just have to wait for them to arrive sometime between now and the next 2-4 ish weeks.
2017 CX5 Touring - need help with getting access to the license plate lights. I checked the manual and it says just wedge under the lens and firmly lift them off. Now, perhaps it's just me, but I'm scared as hell I'm going to break these lenses off or snap the arms off them. Has anyone done this for the 2017 version yet and can you verify that you simply wedged something under it (what did you use) and popped it off. The 2016 and prior look a little different from the current one and I'm just not sure about snapping it off without breaking it. Looking for suggestions.
The lens are easy to take off. insert a small flat scredriver into the *sides* of the lens. There is a small indent post there. Spread the back support a bit and they will pop off. The bulbs are harder to get out as it's difficult to grab the bulb and pull it.
I did wedge the same small screwdirver in the middle of the bulb and they finally popped out. Thought I was gonna break the bulbs.
i used 194 LED's from superbright. Oh and it's on a 2014.
Pipemajor
Hoot Mon!
- :
- Minnesota
- :
- 2017 CX-5 GT AWD
2017 CX5 Touring - need help with getting access to the license plate lights. I checked the manual and it says just wedge under the lens and firmly lift them off. Now, perhaps it's just me, but I'm scared as hell I'm going to break these lenses off or snap the arms off them. Has anyone done this for the 2017 version yet and can you verify that you simply wedged something under it (what did you use) and popped it off. The 2016 and prior look a little different from the current one and I'm just not sure about snapping it off without breaking it. Looking for suggestions.
I too, had a go at getting the lenses for the license plate lights off. My '15 had a pliable translucent lens which would easily pop off. The '17 uses a rigid clear plastic lens which doesn't seem to budge when prying it with a flat bladed screwdriver without fear of cracking the lens. I've studied the drawing in the manual but it's little help. Can't easily see how those black plastic ears inside the slot engage the clear plastic. Shaped like a V.
Someone smarter than me is going to have to figure it out.
EDIT: Issue resolved. Please see this post
Last edited:
- :
- San Antonio, Texas
- :
- '15 CX-5 Miata AWD
Love the new 5730 t10 leds. Mind you look how much lights hitting the ground. $10 better than the $20 phillips I installed on my 3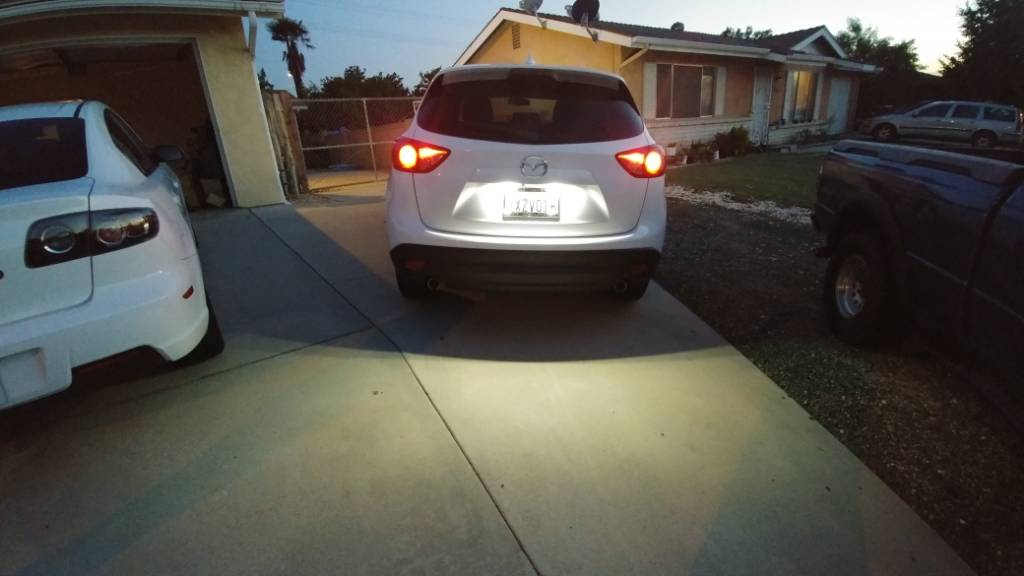
Sent from my VS988 using Tapatalk
Nice
Pipemajor
Hoot Mon!
- :
- Minnesota
- :
- 2017 CX-5 GT AWD
Ok, mystery solved. For the 2nd gen CX-5, the trick is to use a wide enough flat blade screwdriver - I used one with a 9/32" wide tip. Insert it into the slot on either side of the clear plastic housing and adjust the vertical angle until it's seated fully into the socket. Gently pry toward the center so that the blade expands the base away and it should let go.
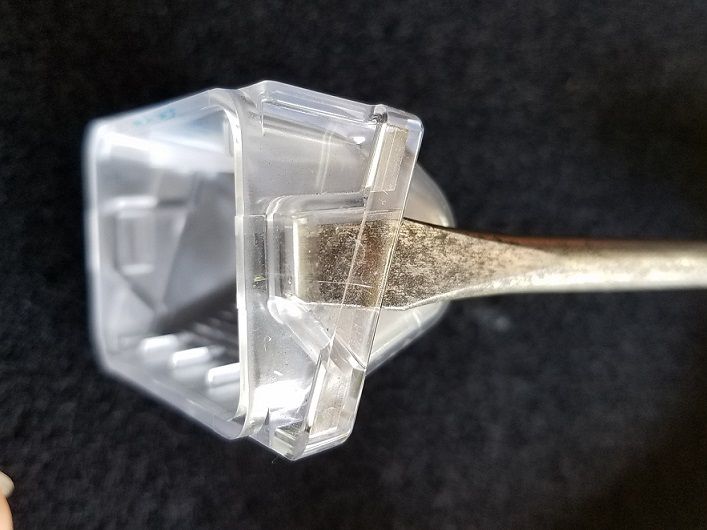

Notice the base has 2 retaining posts with a significant wedge-shaped key. I guess Mazda wanted to make sure they wouldn't fall off on their own.
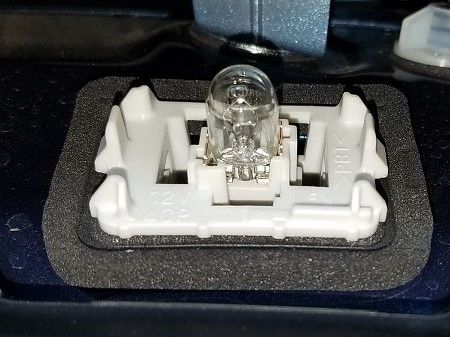

I took a comparison shot with the stock W5W bulb against a VLEDS 194 6K bulb which I believe is this one.

I had retrofitted my 2015 with RED VLEDS 194 bulbs on the rear side marker and the small rear light on the cargo door and I'm sure these LEDs were a bit brighter and more saturated ruby red than the stock Mazda LED tail lights on the 2017. It may be that my license plate bulbs might be a bit too bright and overwhelm the factory red LED combo tail/stop lights. If so, then I may look at getting the longer life (and a bit dimmer) 194 bulbs from VLEDS.
IMPORTANT! When installing LED bulbs, be sure to TEST it before reassembling everything. If the bulb does not light, reinsert it the other way and it should work.
EDIT: I am clueless why my attachments aren't showing inline or my public album-linked photos don't show up. I used to be able to display .jpg attachments as a picture within the post...
Notice the base has 2 retaining posts with a significant wedge-shaped key. I guess Mazda wanted to make sure they wouldn't fall off on their own.
I took a comparison shot with the stock W5W bulb against a VLEDS 194 6K bulb which I believe is this one.
I had retrofitted my 2015 with RED VLEDS 194 bulbs on the rear side marker and the small rear light on the cargo door and I'm sure these LEDs were a bit brighter and more saturated ruby red than the stock Mazda LED tail lights on the 2017. It may be that my license plate bulbs might be a bit too bright and overwhelm the factory red LED combo tail/stop lights. If so, then I may look at getting the longer life (and a bit dimmer) 194 bulbs from VLEDS.
IMPORTANT! When installing LED bulbs, be sure to TEST it before reassembling everything. If the bulb does not light, reinsert it the other way and it should work.
EDIT: I am clueless why my attachments aren't showing inline or my public album-linked photos don't show up. I used to be able to display .jpg attachments as a picture within the post...
Last edited:
Thanks for these instructions! I have had the new vleds on order since early April, but they have been pushed back to late May now. I got 5 of the long-life 31mm 3175 and 2 of the long life 14 led 194's.
Have you found any leds for the vanity mirrors that aren't so overpowering?
Have you found any leds for the vanity mirrors that aren't so overpowering?
Pipemajor
Hoot Mon!
- :
- Minnesota
- :
- 2017 CX-5 GT AWD
Sorry but I deleted my earlier post since neither my attachments nor linked album photos appeared in the post.
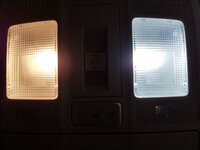
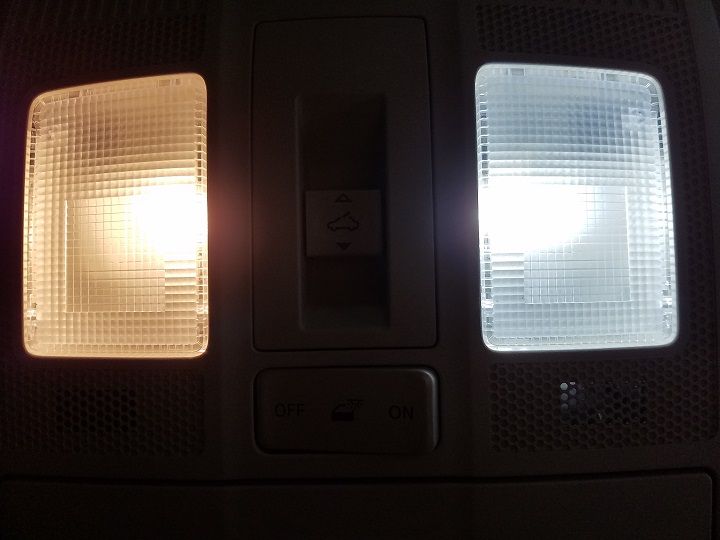
Once again, I replaced the stock interior festoon bulbs (left) with VLEDs 31mm 5K Long Life #3175 LEDs (right) which are being discontinued and offered at 50% off the list price. You need 5 bulbs - a pair for the front seats, a pair for the rear seats and a bulb for the rear cargo compartment. The factory festoons are 29mm but 31mm festoons fit just fine and you get more choices.
I use a small piece of 1/16" soft balsa to protect the surrounding plastic. Using a small flat bladed screwdriver, insert the blade between the front edge of the clear lens and the plastic housing. There is a left and right clip on the front edge so pry one side then the other.
I originally had the high power 6K LEDs in my 2015 but with a black interior, the effect was a little too cold. The 5K bulbs match up with the DRLs, etc.
Attachments
Last edited:
Sorry but I deleted my earlier post since neither my attachments nor linked album photos appeared in the post.
Once again, I replaced the stock interior festoon bulbs (left) with VLEDs 31mm 5K Long Life #3175 LEDs (right) which are being discontinued and offered at 50% off the list price. You need 5 bulbs - a pair for the front seats, a pair for the rear seats and a bulb for the rear cargo compartment. The factory festoons are 29mm but 31mm festoons fit just fine and you get more choices.
I use a small piece of 1/16" soft balsa to protect the surrounding plastic. Using a small flat bladed screwdriver, insert the blade between the front edge of the clear lens and the plastic housing. There is a left and right clip on the front edge so pry one side then the other.
I originally had the high power 6K LEDs in my 2015 but with a black interior, the effect was a little too cold. The 5K bulbs match up with the DRLs, etc.
Daft question - do you disconnect the battery before installing or is that overkill?
Sent from my iPad using Tapatalk
Pipemajor
Hoot Mon!
- :
- Minnesota
- :
- 2017 CX-5 GT AWD
Daft question - do you disconnect the battery before installing or is that overkill?
Sent from my iPad using Tapatalk
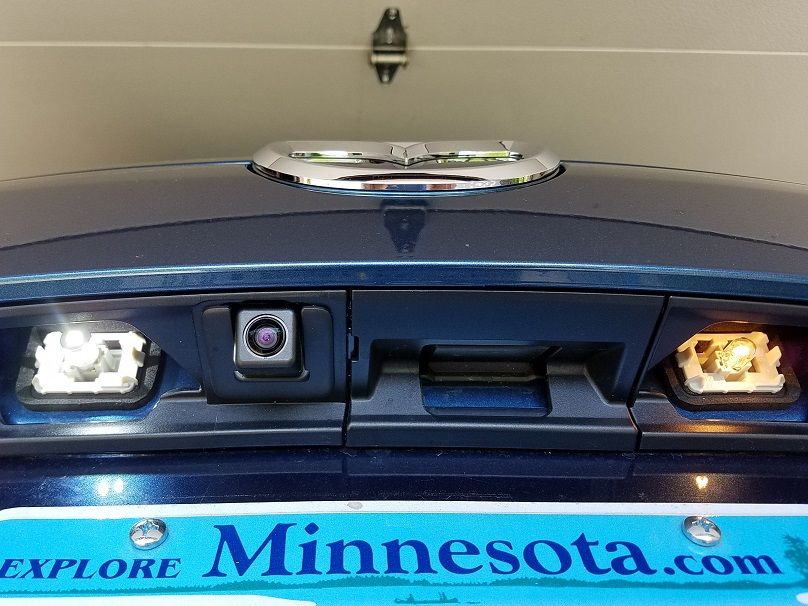
Seems like overkill on the Gen2 CX-5. On the Gen1, the rear cargo light is on the driver side, the whole fixture popped out and supposedly there was a risk of shorting it out. I never disconnected my battery when I did the retrofits on my Gen1.
Gen2 has the rear light in the hatch door. When popping off the lens, only the lens comes off - just as they do in the overheads.
Only real risk is damaging the surrounding plastic. Study which side to pry and you should be OK. If you can find one of those plastic prybars such as VLEDS sells, so much the better. Just like halogen headlight bulbs, best to avoid touching the glass bulb with your bare fingers.
Thanks Major.
I ordered some of the new VLED bulbs which have yet to hit the shelves, based in part on your recommendation. I went for the 5k bulbs as I prefer a more neutral white. Seems odd that Mazda didn't install LEDs in the interior...but it gives me a project.
Sent from my iPad using Tapatalk
- :
- Mazda CX-5 Touring w/bose-tech
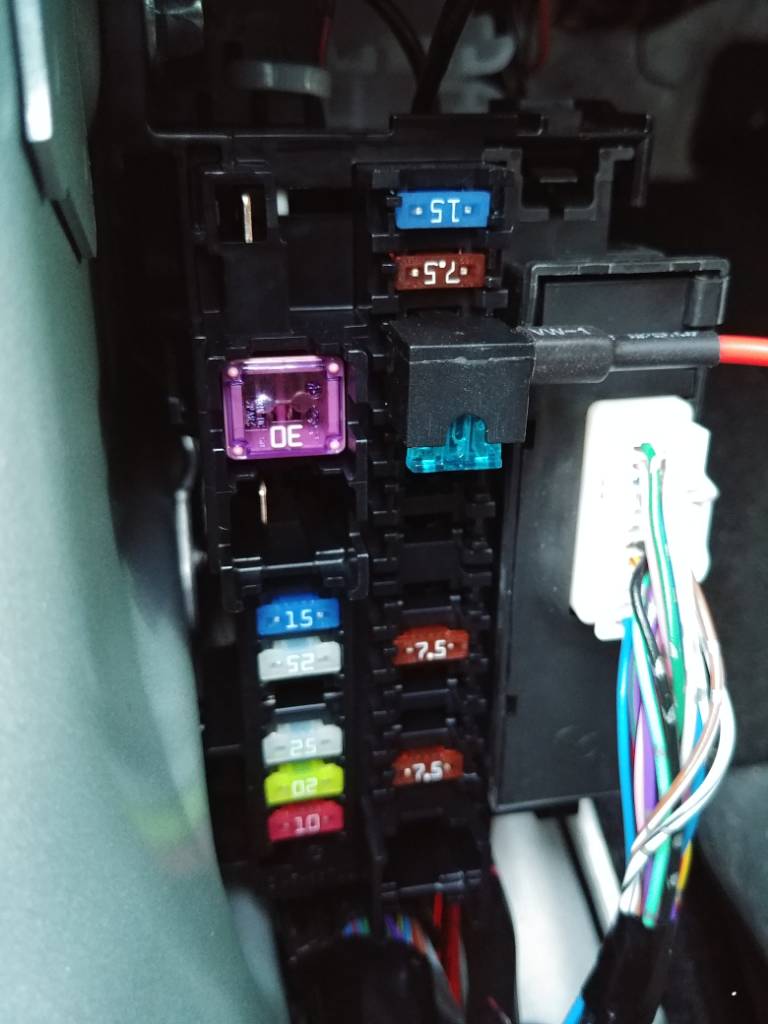
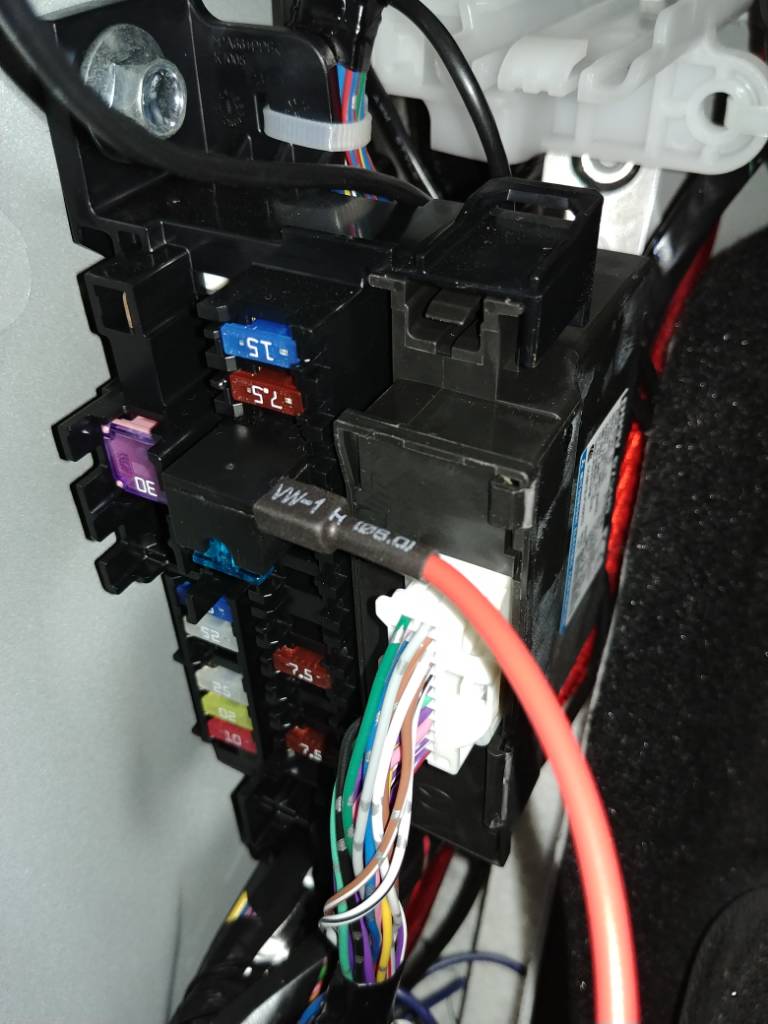
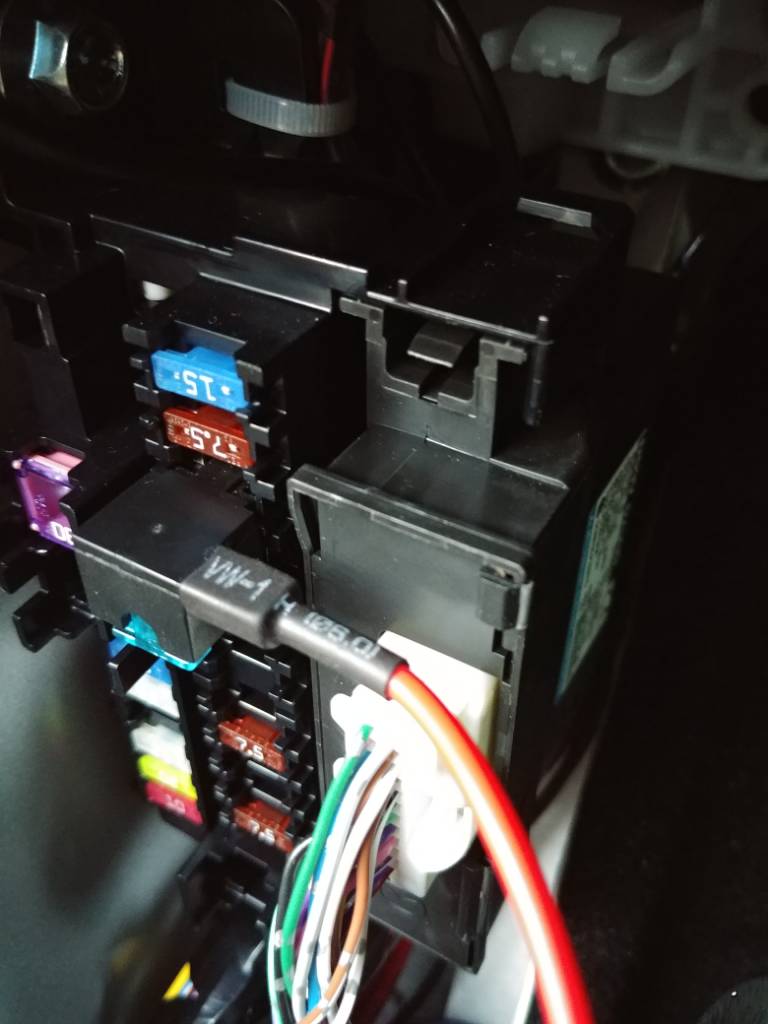
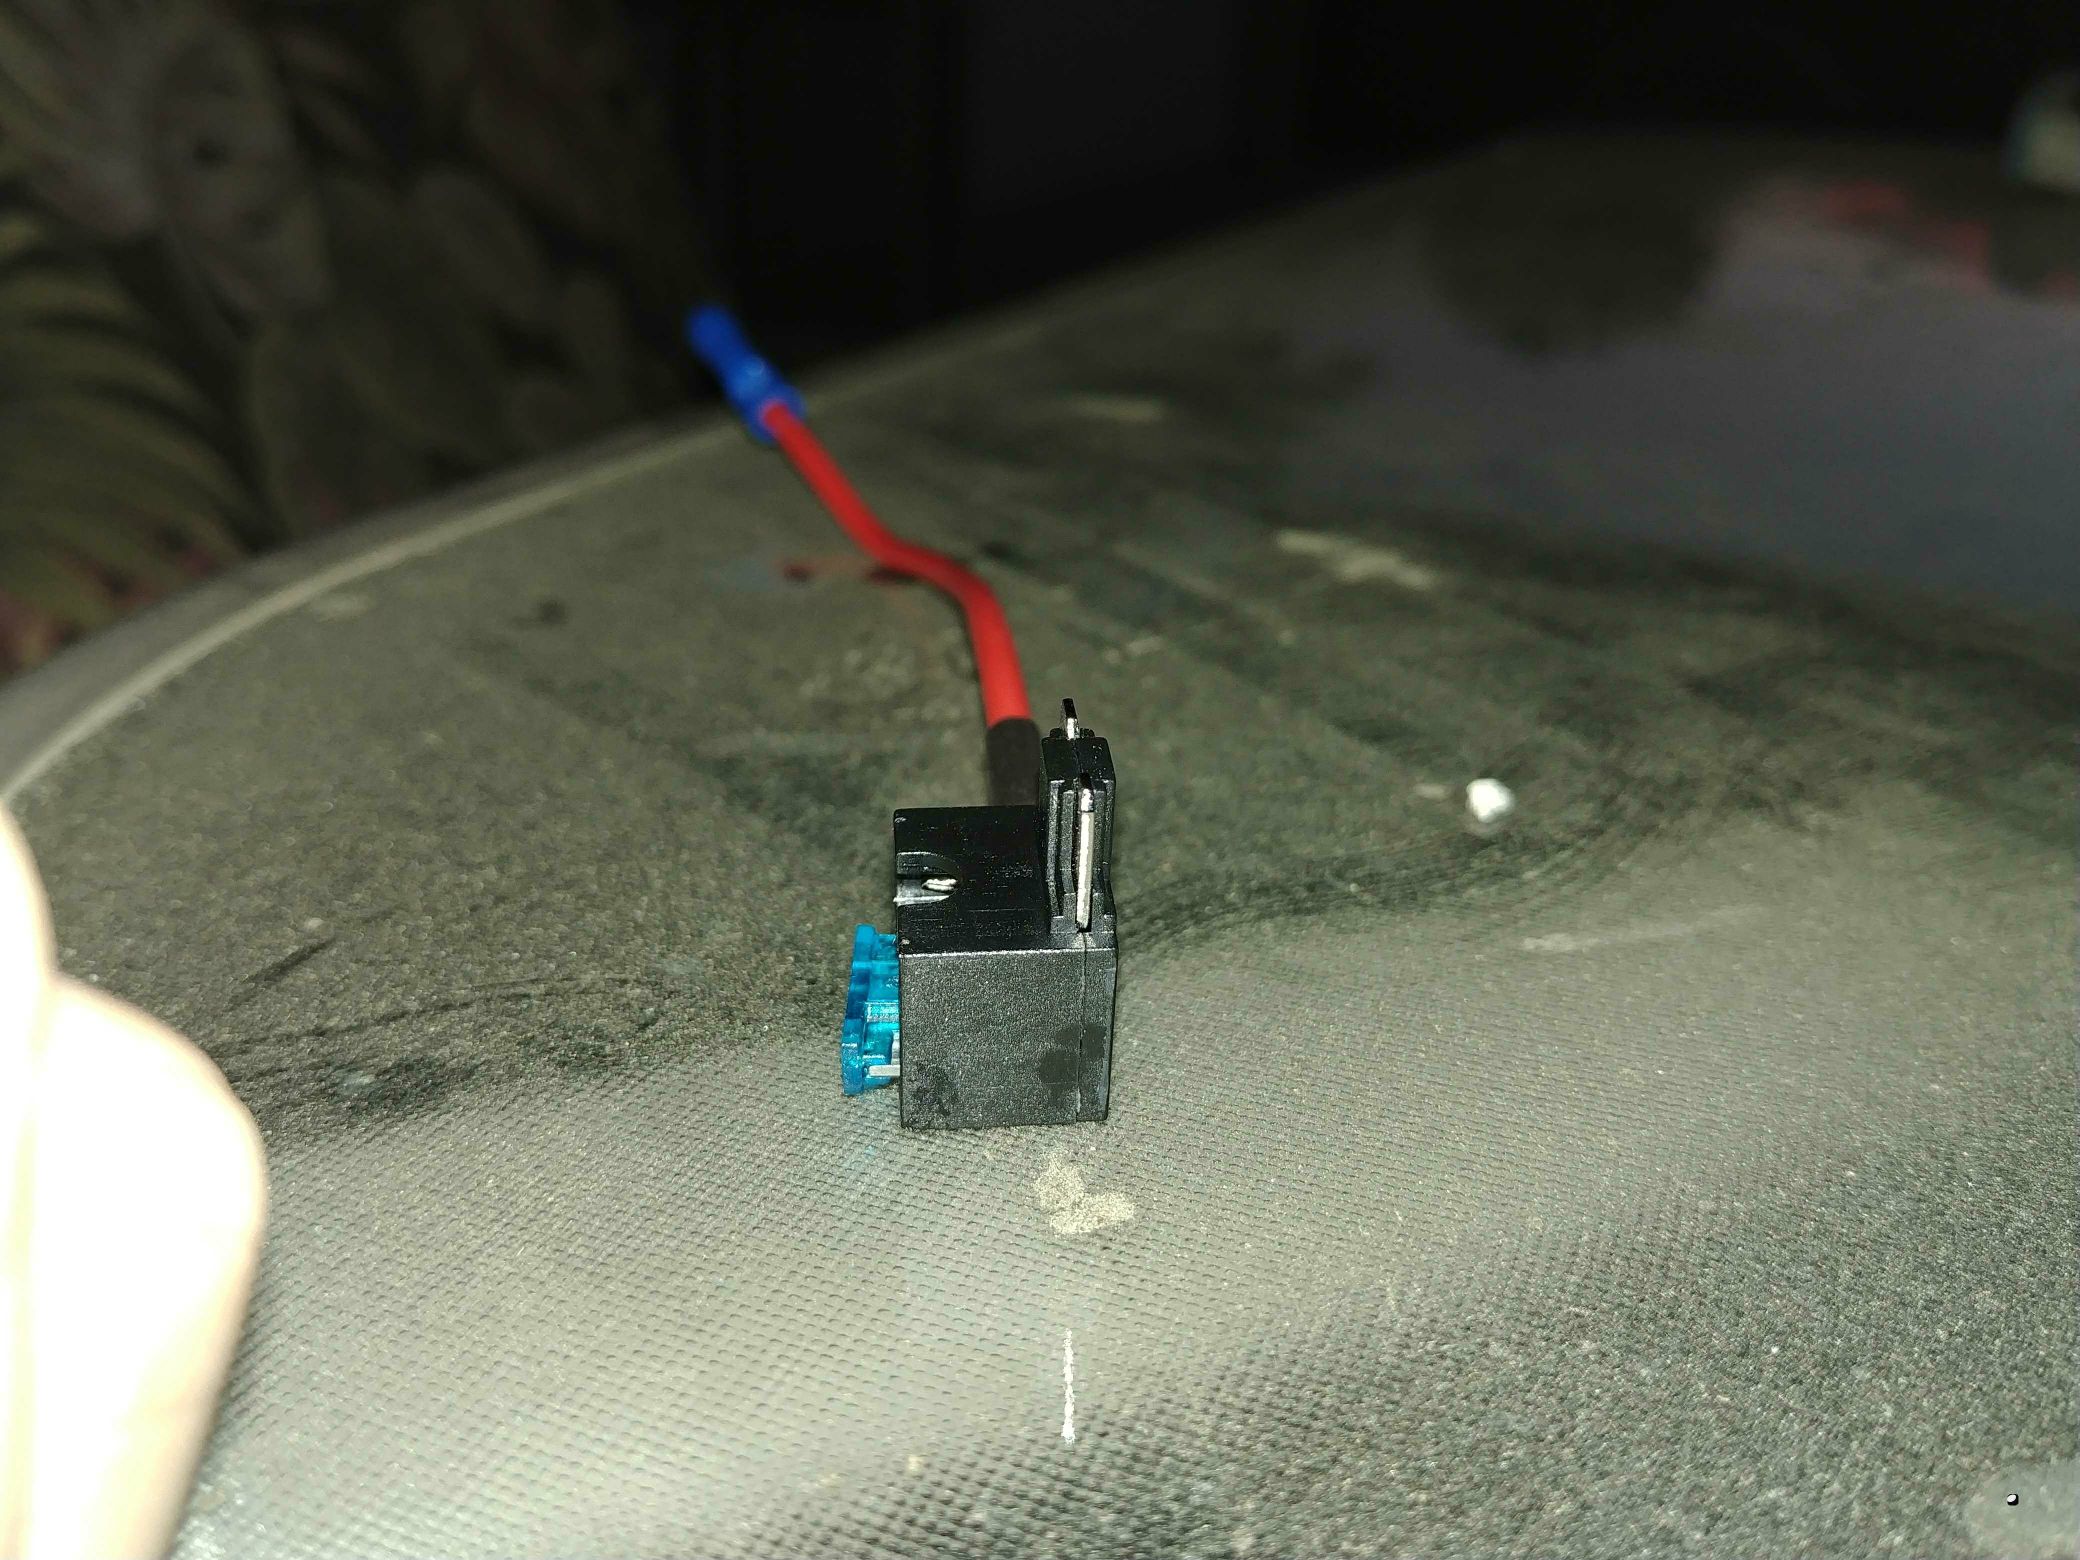
looks like the cavity was too deep for the prongs on the adapter, because of the box on side with the plug harness in it, you'd need one thats the same width as a standard minifuse and with a wire that comes off in a different direction (from the long sides or straight out)
But there's nothing made that would do that. That I've seen. And I've seen a were up where a guy installs a radar detector like this with the same product.looks like the cavity was too deep for the prongs on the adapter, because of the box on side with the plug harness in it, you'd need one thats the same width as a standard minifuse and with a wire that comes off in a different direction (from the long sides or straight out)
Sent from my VS988 using Tapatalk
- :
- Mazda CX-5 Touring w/bose-tech
then you'll have to pick a different spot to tap off of that will let you fit the adapter in there, or be sol?But there's nothing made that would do that. That I've seen. And I've seen a were up where a guy installs a radar detector like this with the same product.
Sent from my VS988 using Tapatalk
here's what i found after a few minutes of googling

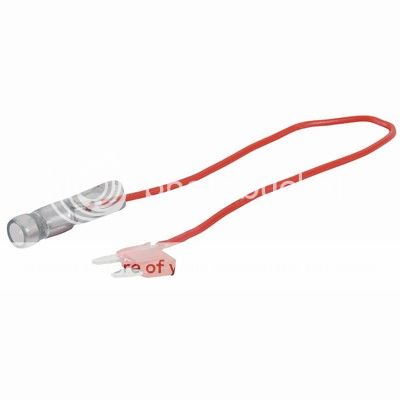
https://www.kimballmidwest.com/All-Products/Electrical/Fuses/ATM-Pigtail-Fuses/
