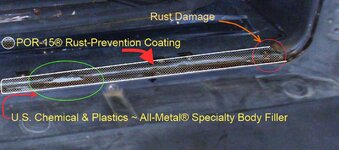
Looks wicked sharp man. This is a guy who's doin' it right people, so take note. Gotta say so far you've executed a very well done real world build! Congrates. Ya know its not one of those mommy/daddy funded builds or the credit-card-charge-it-now-bankrupt-later deals either. Mint bro, +1 on being a MightyCarMod fan too, that show is totally awesome. Anyways figured I'd share some knowledge on bodywork, since that is my trade. Rust is pretty much inevitable in certain regions of the world more so in the northern coastal areas of N. America, but also in Rainy & humid spots too. I read mention of POR-15, that stuff works! If your dealing with surface rust or even small cancerous spots where the metal has
pitted or pin holed, 1st wash area w/ mild detergent the wipe down with wax/decrease remover, next using a 90* Air Die Grinder with a 3M roloc wire brush on the rusted area in a crosscutting pattern back and forth motion (a small pencil grinder or dremel for the tight or hard to get at spots). Next clean the repair spot. ****you must use Metal-Ready before applying
POR-15 brush on the POR-15 over the affected area Thin, covering coats are best. Dry time is between 1.5-5hrs depending on humidity. POR-PATCH
,POR-15 Epoxy Putty, Straightline, and Restogrip are fillers/bondo that POR-15 states as compatible, though I've used ALL-Metal filler with no problems. then sand down, feather-edge the filler spray with Sealer Primer << important because you've got down to bare metal. Then lay down your basecoat, mid-coat(if required) then your top/clearcoat!
POR-15 is a high performance coating designed for application directly on rusted or seasoned metal surfaces. POR-15 is non-porous and seals and protects many surfaces from water, chemicals, salt, and other corrosive contaminants. POR-15 is an effective anti-corrosive and rust preventive coating that offers superior chemical resistance due to its dense, cross-linked molecular composition and non-porous attributes.
The secret lies in POR-15's curing process. Most paints dry through evaporation, but POR-15 dries faster when moisture is present. It has the opposite chemistry of ordinary paints. Now add to that POR-15's incredible hardness, toughness, and flexibility and you have a coating that is practically indestructible. POR-15 is great for auto restoration, and protecting valuable equipment against rust and corrosion.

