
Alright guys, where to begin, I’ve been gathering bits and pieces of information on the install and parts gathering for an ATX to MTX transmission swap for the last year, and in doing so, I noticed how there is no thread completely dedicated to this task (There is one great thread but it is not as comprehensive as this one will hopefully be). So for all you guys wanting to get rid of your slush box, hopefully this thread will facilitate you in doing so and be the end all thread for this topic. While I have not completed the swap at the moment, I will be doing so in the next few weeks after my sister’s wedding. I’ll try to take as many pictures as I can in the process but for now to tide you over, here’s the official parts list with pictures. I’ll try to explain each part the best I know how. Oh yeah, this swap is going on a 2002 Mazda Protg LX 2.0 L so I cannot guarantee this will work with other Proteges with that tiptronic or whatever it is lol… Some websites that might be useful to you guys are:
http://www.mazdaspd.com/manuals.html (diagrams and torque numbers)
http://www.mazdaspeeddevelopment.com/pages/cats/protegepubs2.html (Parts numbers for various things)
HOW-TO IS ON PAGE 2
Parts:
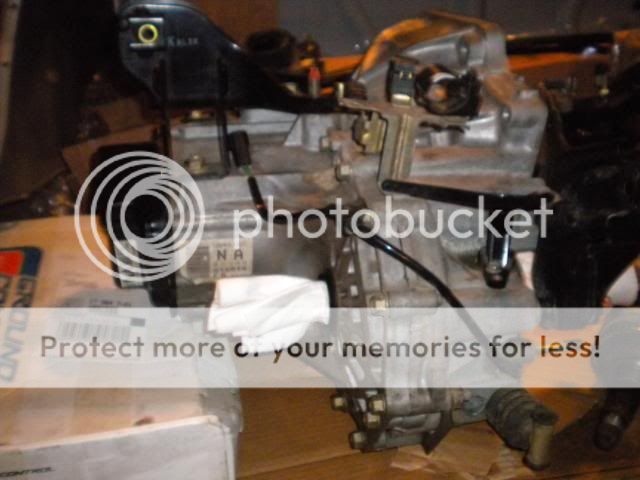
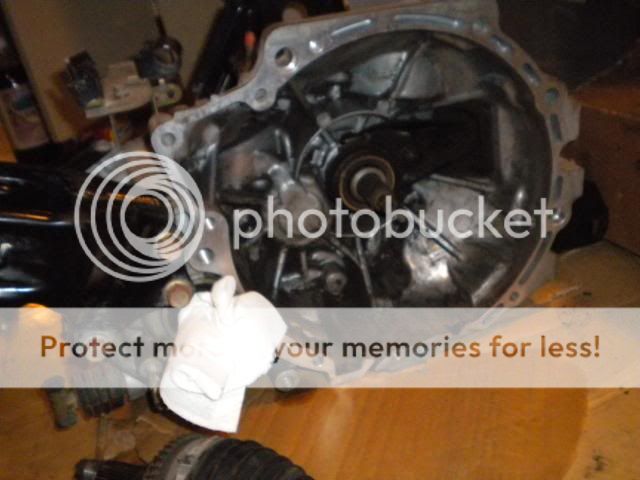
TRANSMISSION
Mazda Protg G15M-R transmission: I chose to go with a MSP transmission with LSD for this swap. Any manual transmission from a 2001 to 2003 protg should be good. I know there are other transmissions that can be used as long as the bell housing mates with the FS-DE motor. For those who want to go that route, you are on your own because I don’t know or care to figure out what will work haha.. But there are some issues you may have to deal with for the transmission you choose. For example, if you get a transmission from an ABS car and do not have ABS, you will have to change the dummy plug on the transmission to a speed sensor to make the speedo / odometer work. If you go the route of the MSP transmission with LSD like I did with my car, you not only have to replace the dummy plug with the speed sensor but also open the transmission and insert a speedo gear. I will show pics and parts numbers for those two pieces in the OPTIONAL section of the parts list.
CLUTCH / FLYWHEEL
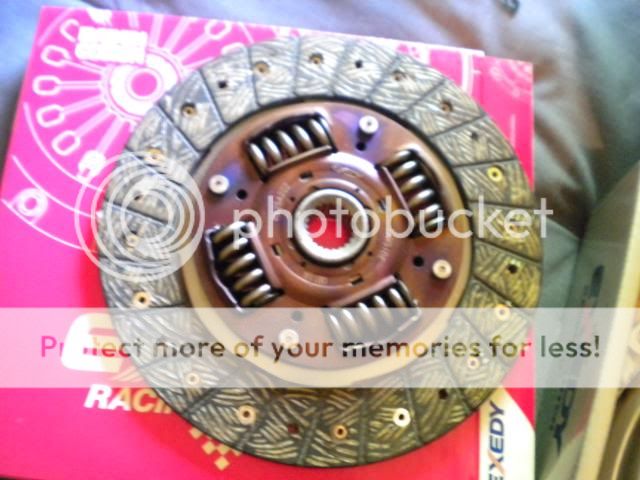
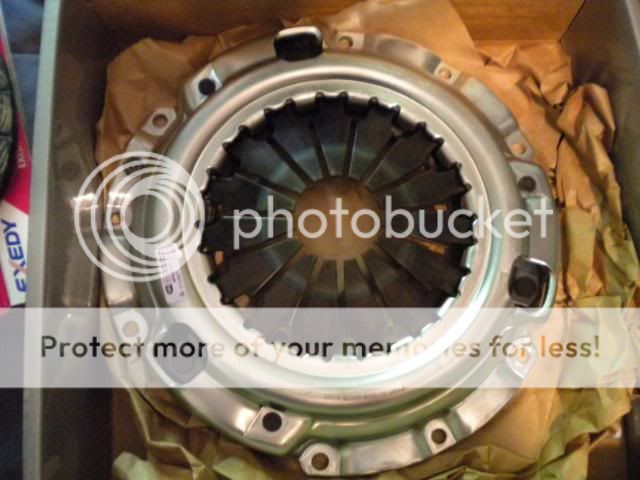
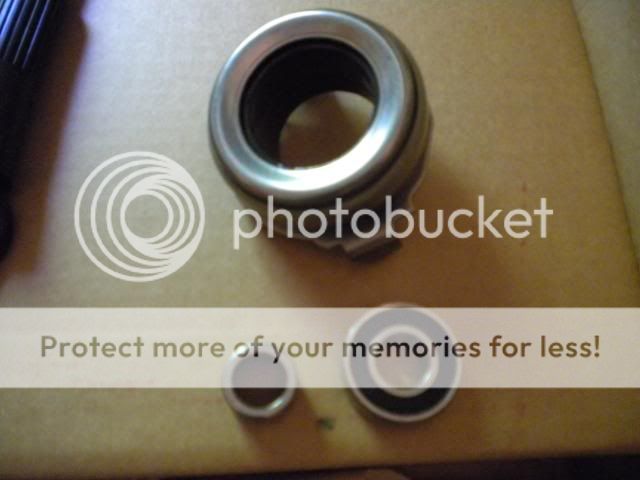
Clutch kit (clutch disk, pilot bearing, pressure plate, release bearing, clutch alignment tool): Obviously with the MTX, you need a clutch and its best to go spend the money and buy new. I got an Exedy Stage 1 kit and it included everything needed to install a clutch.

Flywheel: I went the new route and got a lightweight Fidanza flywheel, it’s only 7 pounds and I haven’t heard a bad thing about it yet. I know others go the route of the MSP flywheel as its lighter than the stock flywheel of a regular protg.
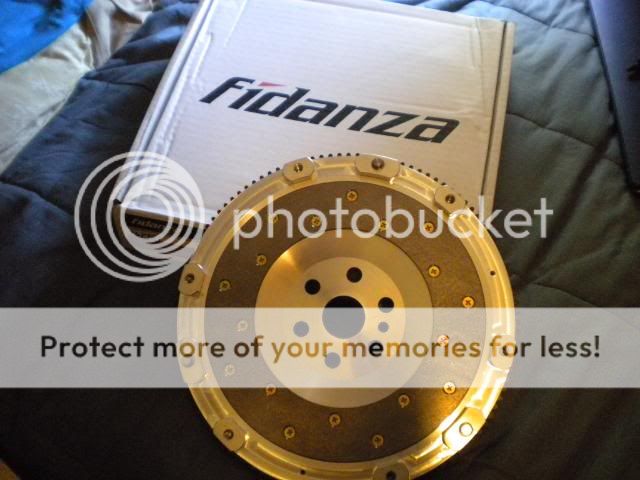
Pressure plate to flywheel bolts and washers: My Fidanza came with the 6 bolts and washers to mount the pressure plate with the flywheel. If yours doesn’t, the 6 bolt’s part number is 9YA00-0804 and the 6 washer’s part number are 99971-0800.
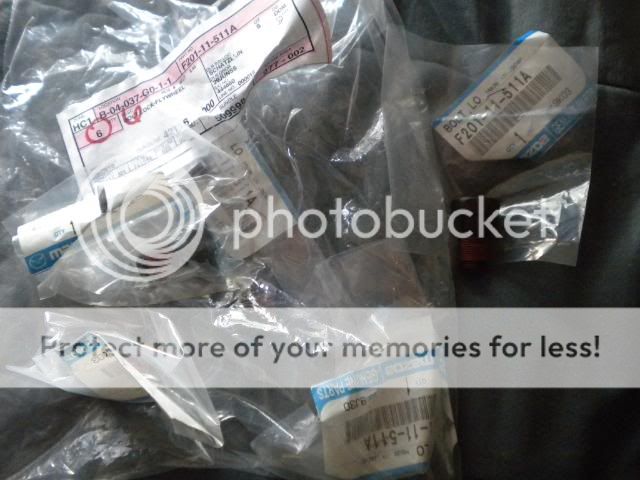
Flywheel bolts: New bolts (6 total) to mount the flywheel to the motor are recommended. Their part number is F201-11-511A.
Clutch release fork: Its possible you may have already purchased a transmission with this installed, if not you need it as it engages and disengages the clutch in the transmission.
ELECTRONICS
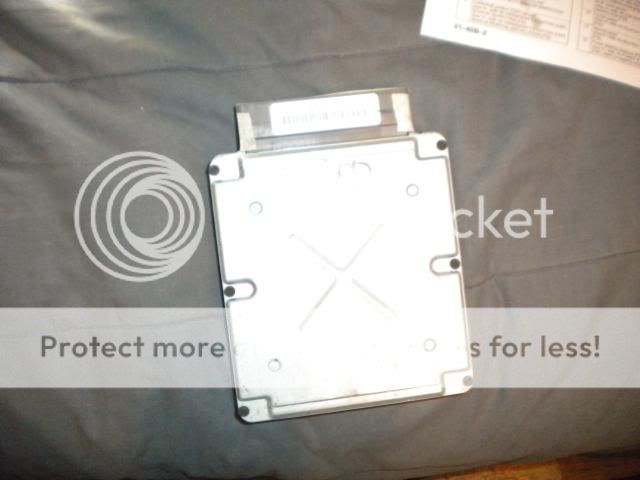
5 speed ECU: If you want as little trouble as possible, get a 5 speed ECU. You have two major options, a normal 5 speed ECU or an MP3 ECU. The MP3 ECU gives you a better torque curve then the normal ECU and a slight increase in hp I believe. A MSP ECU is not an option unless your car is turboed. It doesn’t matter if the ECU came from an ABS car or not.
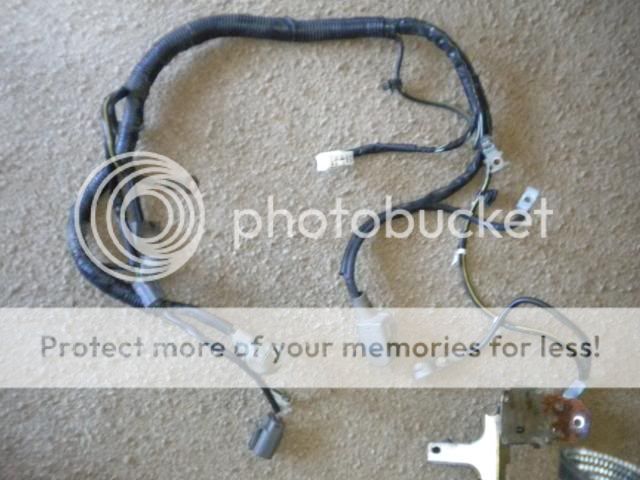
5 Speed Engine harness: You want to gather a complete 5 speed engine harness with all its connectors. The harness is composed of connectors in the engine bay as well as in the cabin, and goes all the way to the back of the car to the fuel pump. You do not need a dash harness for this swap. There are several different engine harnesses available though so choose carefully. Cars with ABS have a module that attaches to some ABS pump so stay clear if you do not have ABS, as it might cause a CEL. MSP harnesses do not have cruise control. MP3 harnesses do not have VTCS or cruise control.
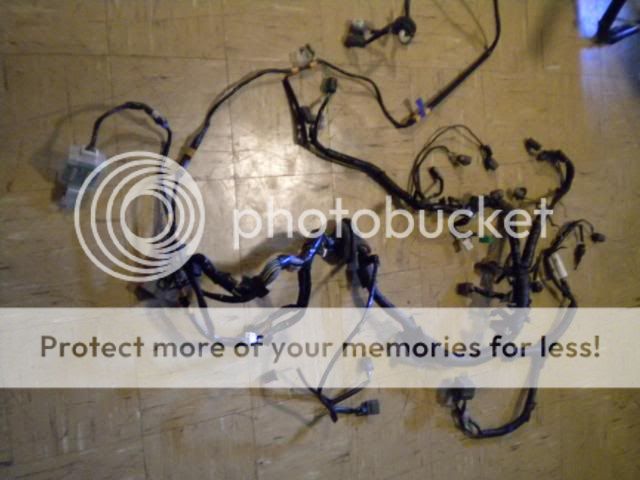
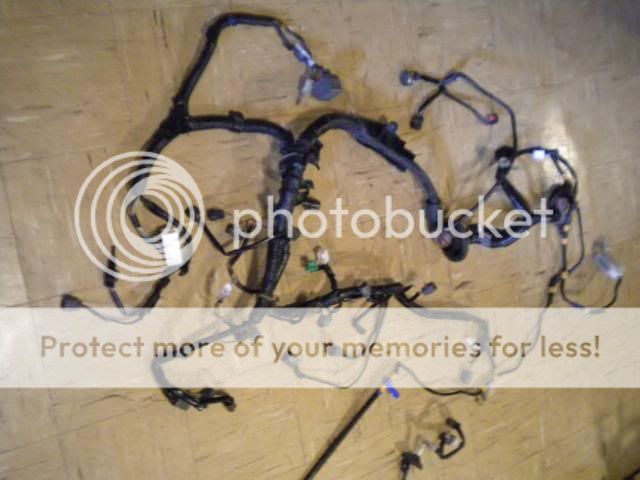
5 speed starter harness: This is an important harness to get. It’s separate from the engine harness, and contains connectors for the alternator, starter and battery. Most importantly, it contains the connector that goes to the speed sensor on the MTX transmission.
5 Speed Starter: The two starters are different, with the five speed being three bolt and the auto being two bolt. I also read somewhere the Auto is more powerful then the MTX starter.

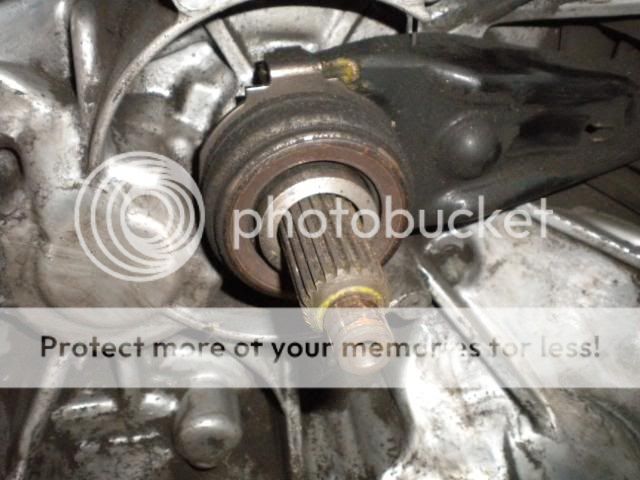
AXLES
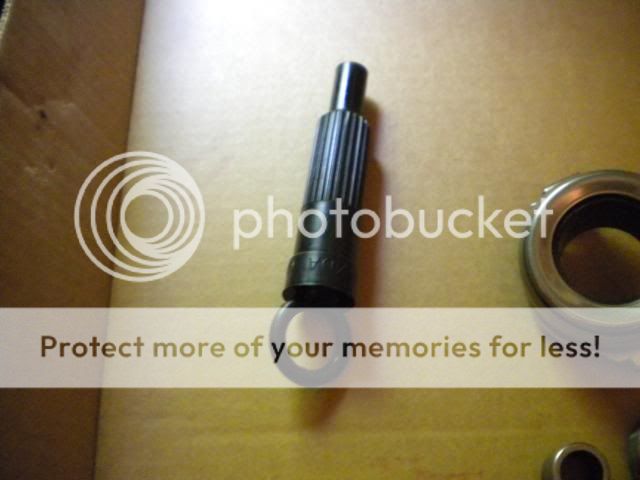
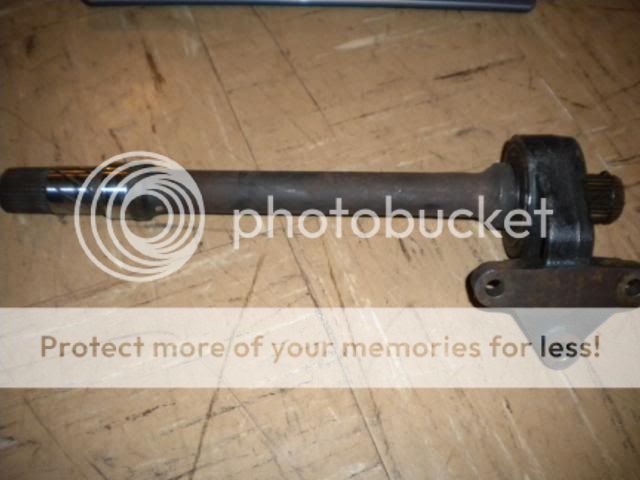
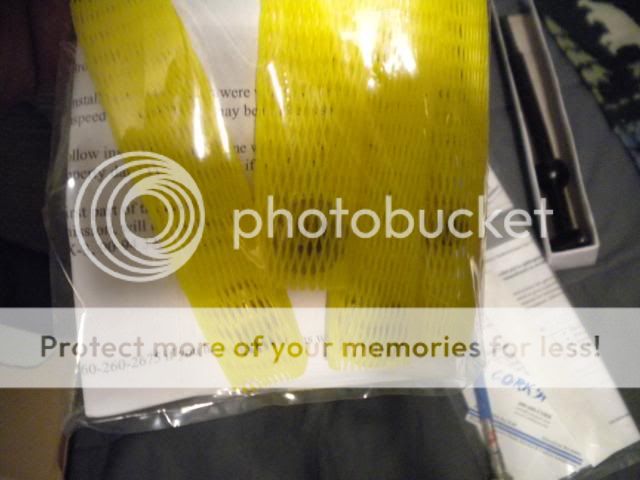
5 Speed driver and passenger axles with joint shaft: The five speed axles are a different length than the autos. If you need new axle clips, their part number is G054-25-421. I was able to get MSP axles at a decent price, and they are 2 mm thicker than stock axles.


PEDALS
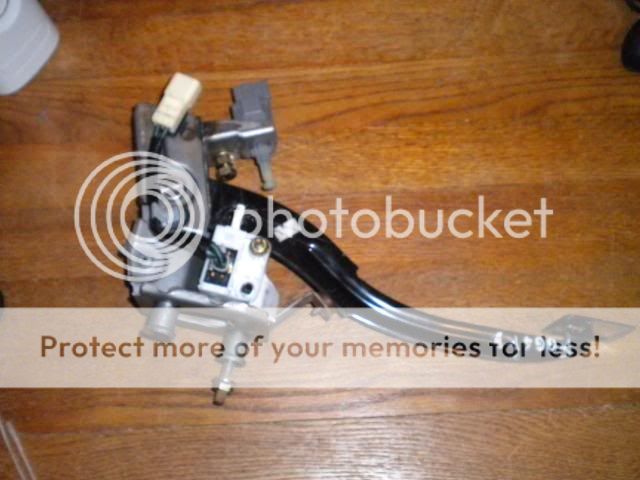
Clutch pedal: Obviously you need the clutch pedal, make sure to have the clutch switch (plunger like sensor on front of pedal), clutch cut switch (sensor on side of pedal) and the rod actuator attached to the actual pedal that goes into the clutch master cylinder.
Brake pedal: Not necessary but beats having the huge auto brake pedal near the clutch.

MOTOR MOUNTS / BRACKETS
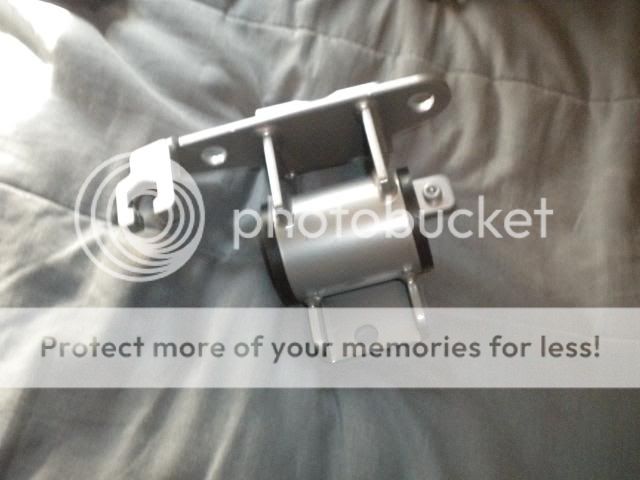
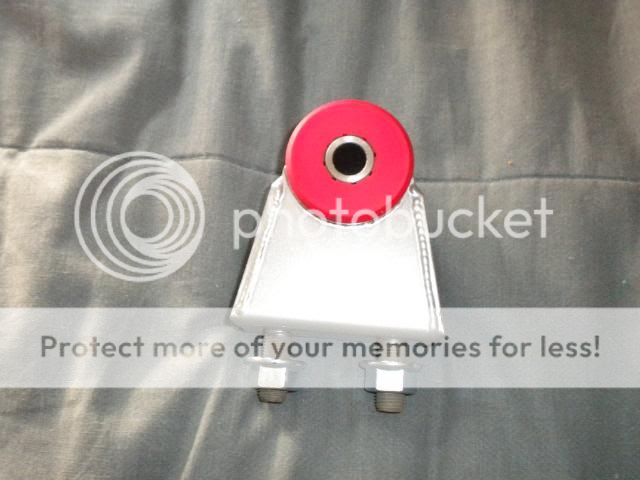
Transmission mount: The only motor mount different from the auto is the transmission mount.
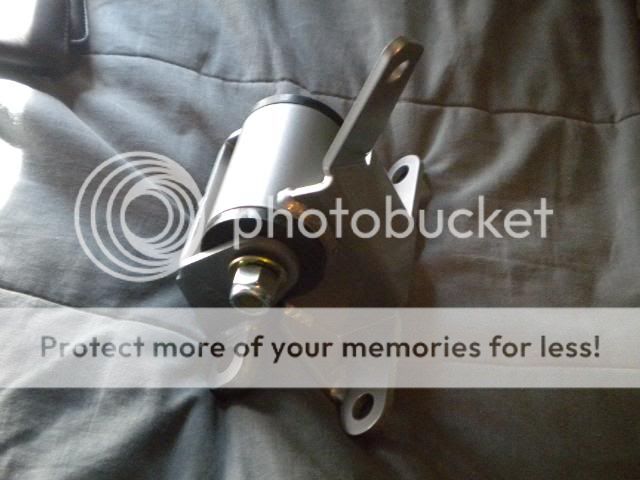
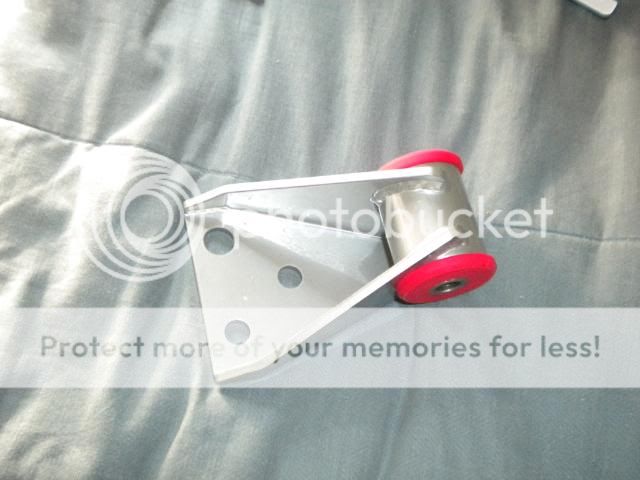
Rear Motor Mount Bracket: The rear bracket is different from the auto.
SHIFTING MECHANISM
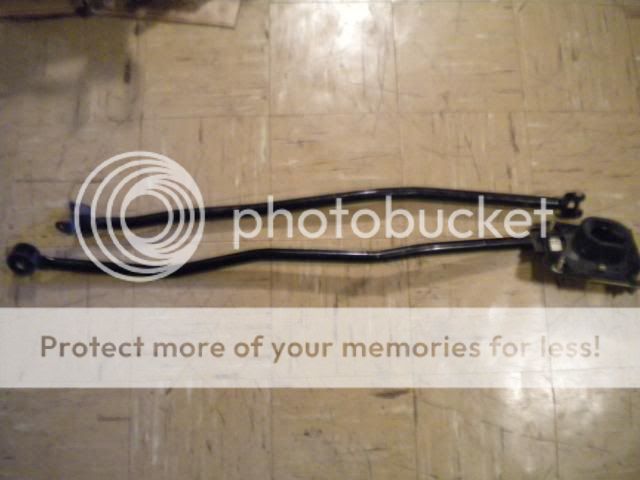
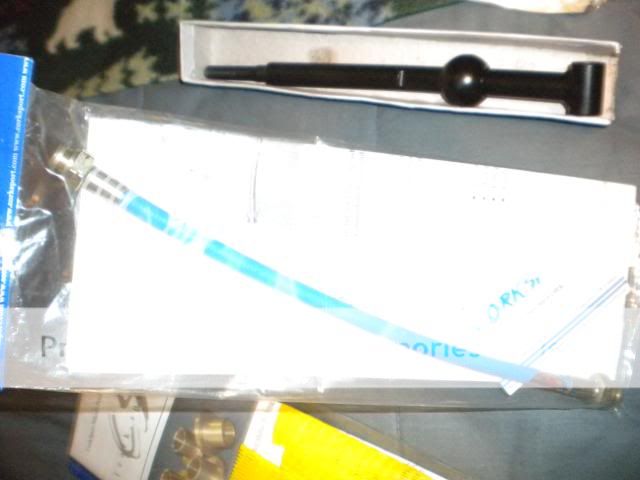
Linkage bars: You need the linkage bars that go between the shifter and the transmission. Be sure to get all the little nuts and bolts that go in between.
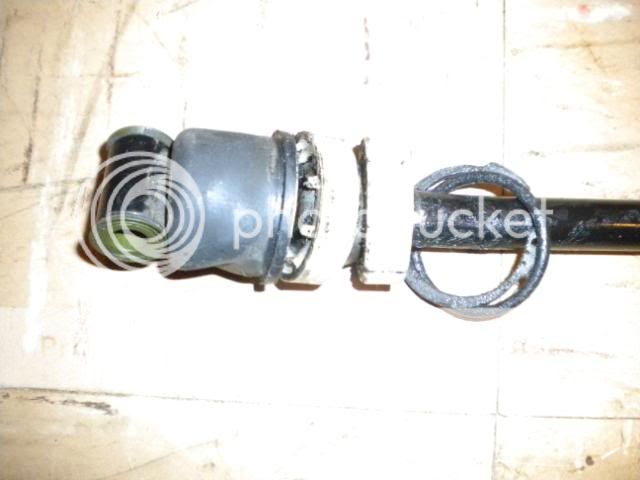
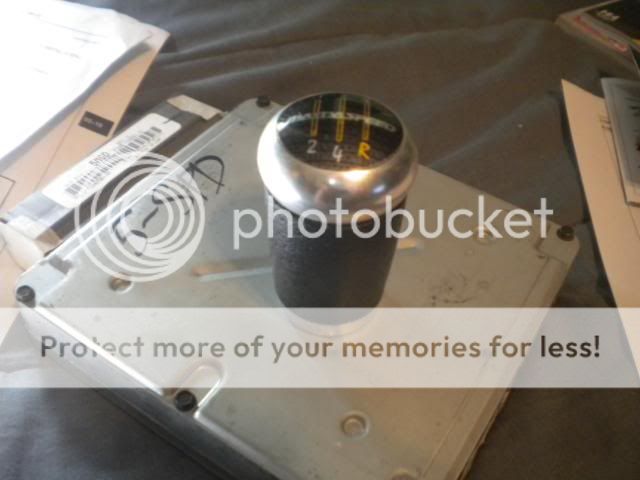
Shifter: You have many options here. You can go stock, but most upgrade to the MSP shifter or some other short shifter. I went with Corksport. Make sure to have the dust shield, the bottom and top white plastic pivot piece, the o-ring and snap ring.
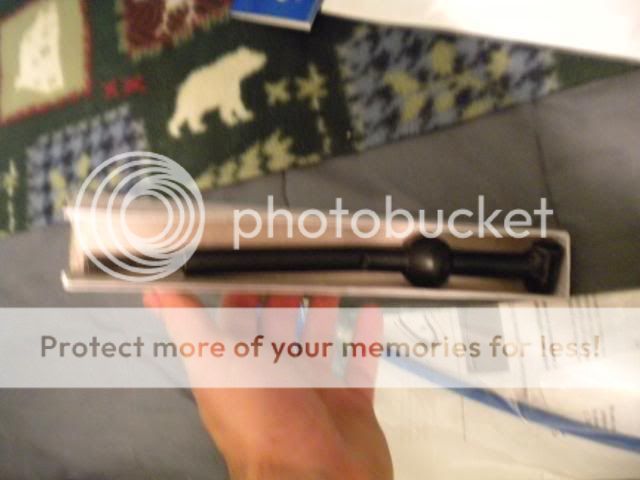
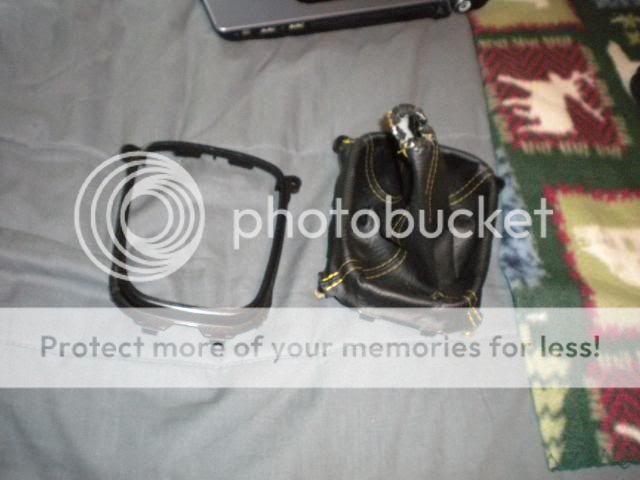
Shift knob and boot: Go for whatever you want lol.. You might also want to look for the plastic piece that the shift knobs attach too.
CYLINDERS
Clutch Master Cylinder with rubber hose + clutch master cylinder gasket: The clutch master cylinder bolts on to the back of the pedal, and a rubber hose attaches it to the master cylinder. The part number to the gasket is H001-41-443.
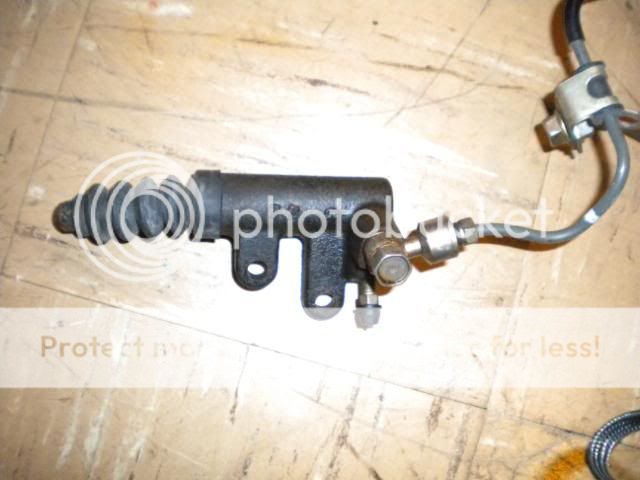
Clutch Slave Cylinder: The slave cylinder bolts to the front of the transmission.
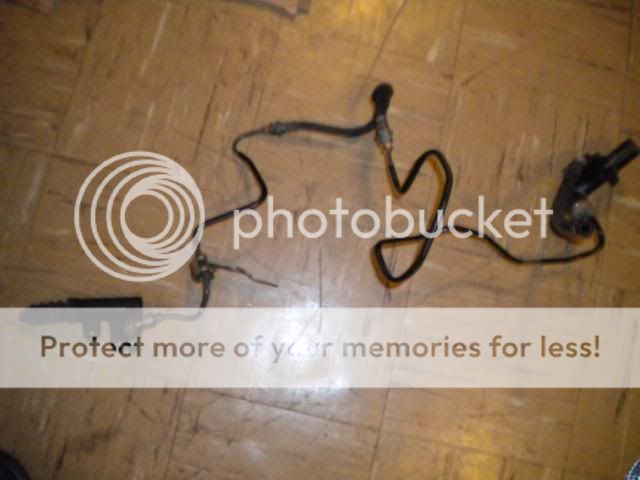
Metal piping between two cylinders plus clutch line: Connects everything. Two clips hold the clutch lines down and their part numbers are GA5R-43-635 and 0136-43-635.

MISCELLANEOUS
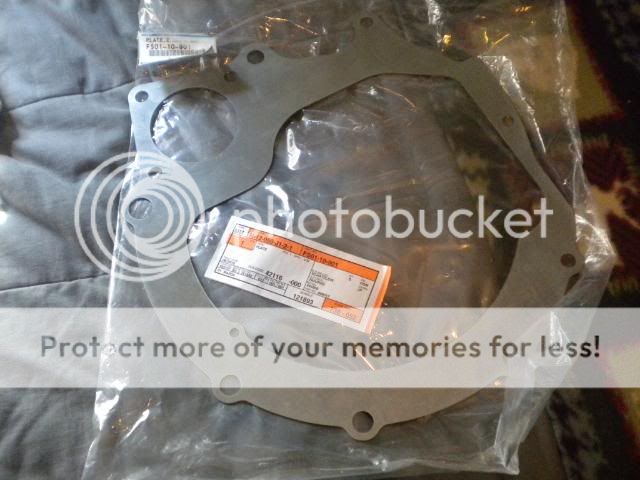
Metal plate between flywheel and motor: There’s a metal plate that goes between the motor and flywheel which is different than that of the auto because of the differences in starters. Its part number is FS01-10-901.
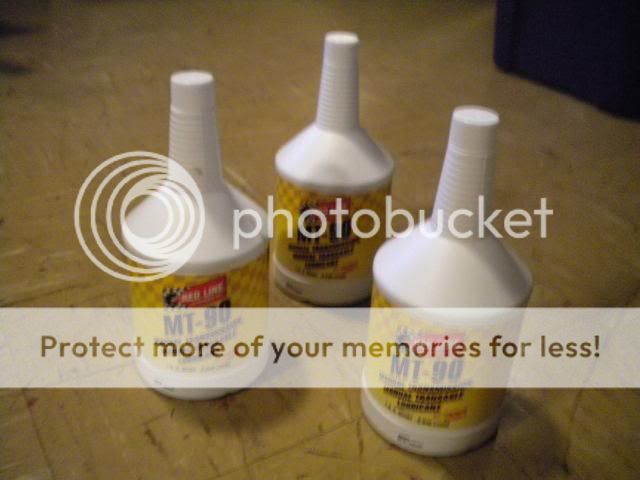
3 quarts transmission fluid: I read Redline MT90 75w90 GL-4 is very popular with our cars so that’s what I am going with.
OPTIONAL
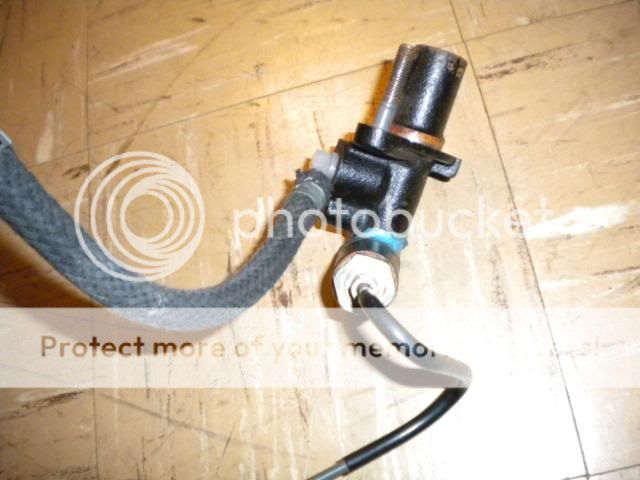
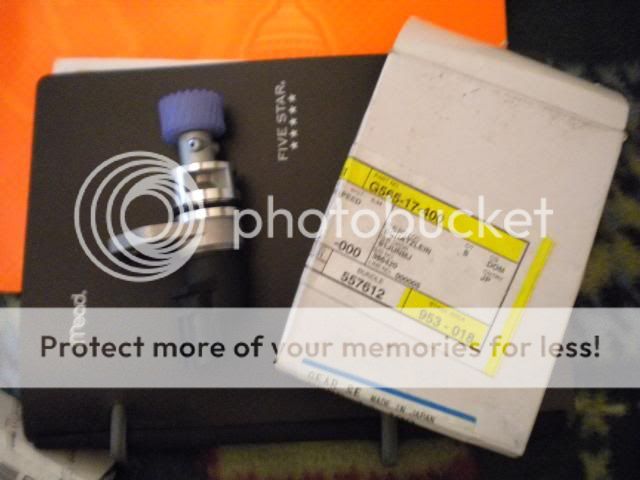
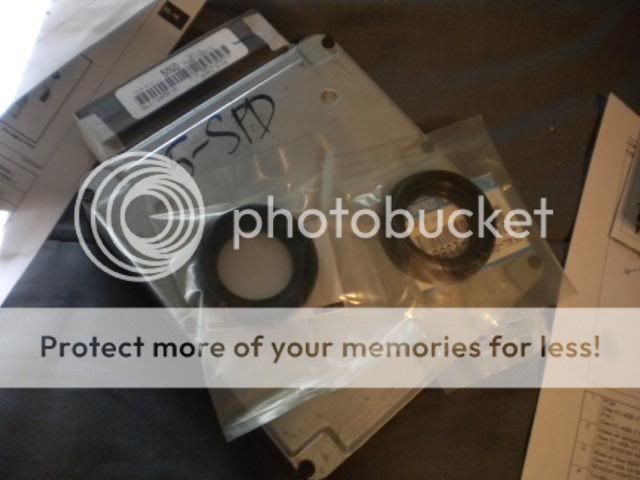
Speed sensor: If you have a transmission from an ABS car but don’t have ABS, you’ll need this sensor. The part number is G565-17-400.
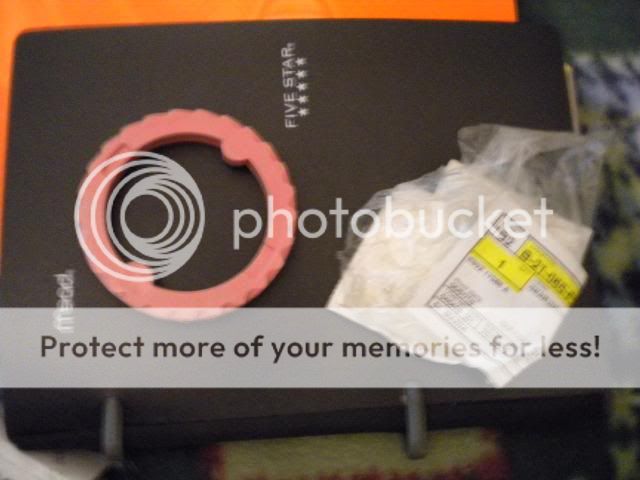
Speedo gear: If you went the route of a transmission with LSD which doesn’t have the pink speedo gear, you need to add it. Its part number is G501-17-341A.
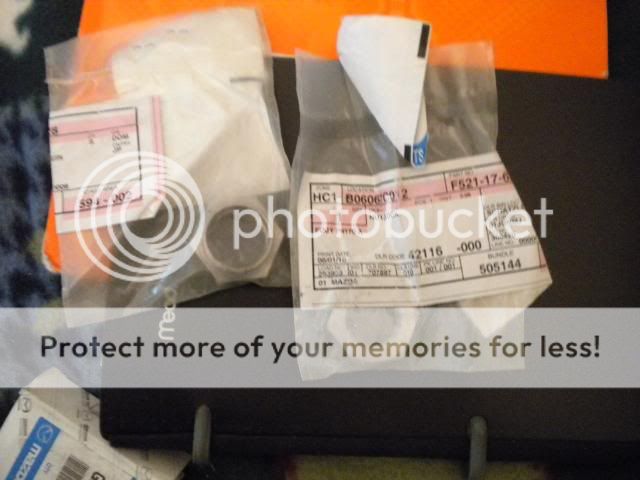
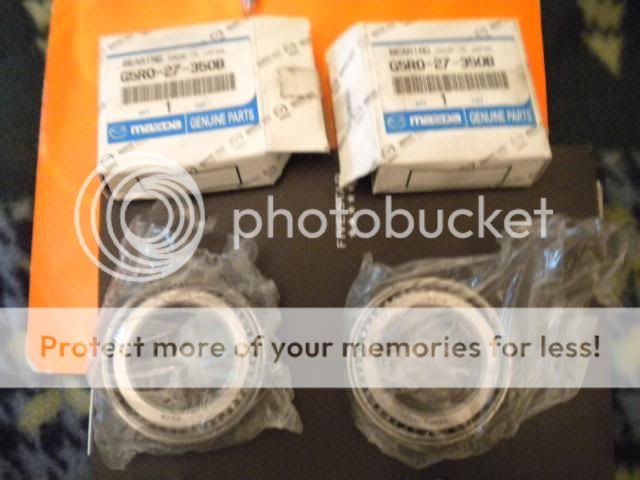
LSD Bearings, Oil seals, and Lock nuts: If you are going to have your transmission cracked open to add the speedo gear, you should get new LSD bearings, oil seals, and lock nuts. The bearings part numbers are G5R0-27-350B, the oil seals part number is F003-27-238B and the lock nuts are F521-17-628 and F521-17-628A. It’s also recommended you weld the LSD and have any worn transmission components replaced at the same time.
Shifter bushings: With everything out and easily accessible, you might as well look for polyurethane bushings and what not. I went with Corksport bronze oil bushings and Corksport polyurethane shifter bushings.

Stainless steel clutch line: Once again an easy upgrade if you want to get it.
Upgraded motor mounts: With three motor mounts needing removing to get the transmission off, this provides a perfect opportunity to upgrade your motor mounts to solid mounts or inserts. I went with an AWR full motor mount set, but AWR and Corksport both make inserts that provide a cheaper upgrade.
http://www.mazdaspd.com/manuals.html (diagrams and torque numbers)
http://www.mazdaspeeddevelopment.com/pages/cats/protegepubs2.html (Parts numbers for various things)
HOW-TO IS ON PAGE 2
Parts:
TRANSMISSION
Mazda Protg G15M-R transmission: I chose to go with a MSP transmission with LSD for this swap. Any manual transmission from a 2001 to 2003 protg should be good. I know there are other transmissions that can be used as long as the bell housing mates with the FS-DE motor. For those who want to go that route, you are on your own because I don’t know or care to figure out what will work haha.. But there are some issues you may have to deal with for the transmission you choose. For example, if you get a transmission from an ABS car and do not have ABS, you will have to change the dummy plug on the transmission to a speed sensor to make the speedo / odometer work. If you go the route of the MSP transmission with LSD like I did with my car, you not only have to replace the dummy plug with the speed sensor but also open the transmission and insert a speedo gear. I will show pics and parts numbers for those two pieces in the OPTIONAL section of the parts list.
CLUTCH / FLYWHEEL
Clutch kit (clutch disk, pilot bearing, pressure plate, release bearing, clutch alignment tool): Obviously with the MTX, you need a clutch and its best to go spend the money and buy new. I got an Exedy Stage 1 kit and it included everything needed to install a clutch.
Flywheel: I went the new route and got a lightweight Fidanza flywheel, it’s only 7 pounds and I haven’t heard a bad thing about it yet. I know others go the route of the MSP flywheel as its lighter than the stock flywheel of a regular protg.
Pressure plate to flywheel bolts and washers: My Fidanza came with the 6 bolts and washers to mount the pressure plate with the flywheel. If yours doesn’t, the 6 bolt’s part number is 9YA00-0804 and the 6 washer’s part number are 99971-0800.
Flywheel bolts: New bolts (6 total) to mount the flywheel to the motor are recommended. Their part number is F201-11-511A.
Clutch release fork: Its possible you may have already purchased a transmission with this installed, if not you need it as it engages and disengages the clutch in the transmission.
ELECTRONICS
5 speed ECU: If you want as little trouble as possible, get a 5 speed ECU. You have two major options, a normal 5 speed ECU or an MP3 ECU. The MP3 ECU gives you a better torque curve then the normal ECU and a slight increase in hp I believe. A MSP ECU is not an option unless your car is turboed. It doesn’t matter if the ECU came from an ABS car or not.
5 Speed Engine harness: You want to gather a complete 5 speed engine harness with all its connectors. The harness is composed of connectors in the engine bay as well as in the cabin, and goes all the way to the back of the car to the fuel pump. You do not need a dash harness for this swap. There are several different engine harnesses available though so choose carefully. Cars with ABS have a module that attaches to some ABS pump so stay clear if you do not have ABS, as it might cause a CEL. MSP harnesses do not have cruise control. MP3 harnesses do not have VTCS or cruise control.
5 speed starter harness: This is an important harness to get. It’s separate from the engine harness, and contains connectors for the alternator, starter and battery. Most importantly, it contains the connector that goes to the speed sensor on the MTX transmission.
5 Speed Starter: The two starters are different, with the five speed being three bolt and the auto being two bolt. I also read somewhere the Auto is more powerful then the MTX starter.
AXLES
5 Speed driver and passenger axles with joint shaft: The five speed axles are a different length than the autos. If you need new axle clips, their part number is G054-25-421. I was able to get MSP axles at a decent price, and they are 2 mm thicker than stock axles.
PEDALS
Clutch pedal: Obviously you need the clutch pedal, make sure to have the clutch switch (plunger like sensor on front of pedal), clutch cut switch (sensor on side of pedal) and the rod actuator attached to the actual pedal that goes into the clutch master cylinder.
Brake pedal: Not necessary but beats having the huge auto brake pedal near the clutch.
MOTOR MOUNTS / BRACKETS
Transmission mount: The only motor mount different from the auto is the transmission mount.
Rear Motor Mount Bracket: The rear bracket is different from the auto.
SHIFTING MECHANISM
Linkage bars: You need the linkage bars that go between the shifter and the transmission. Be sure to get all the little nuts and bolts that go in between.
Shifter: You have many options here. You can go stock, but most upgrade to the MSP shifter or some other short shifter. I went with Corksport. Make sure to have the dust shield, the bottom and top white plastic pivot piece, the o-ring and snap ring.
Shift knob and boot: Go for whatever you want lol.. You might also want to look for the plastic piece that the shift knobs attach too.
CYLINDERS
Clutch Master Cylinder with rubber hose + clutch master cylinder gasket: The clutch master cylinder bolts on to the back of the pedal, and a rubber hose attaches it to the master cylinder. The part number to the gasket is H001-41-443.
Clutch Slave Cylinder: The slave cylinder bolts to the front of the transmission.
Metal piping between two cylinders plus clutch line: Connects everything. Two clips hold the clutch lines down and their part numbers are GA5R-43-635 and 0136-43-635.
MISCELLANEOUS
Metal plate between flywheel and motor: There’s a metal plate that goes between the motor and flywheel which is different than that of the auto because of the differences in starters. Its part number is FS01-10-901.
3 quarts transmission fluid: I read Redline MT90 75w90 GL-4 is very popular with our cars so that’s what I am going with.
OPTIONAL
Speed sensor: If you have a transmission from an ABS car but don’t have ABS, you’ll need this sensor. The part number is G565-17-400.
Speedo gear: If you went the route of a transmission with LSD which doesn’t have the pink speedo gear, you need to add it. Its part number is G501-17-341A.
LSD Bearings, Oil seals, and Lock nuts: If you are going to have your transmission cracked open to add the speedo gear, you should get new LSD bearings, oil seals, and lock nuts. The bearings part numbers are G5R0-27-350B, the oil seals part number is F003-27-238B and the lock nuts are F521-17-628 and F521-17-628A. It’s also recommended you weld the LSD and have any worn transmission components replaced at the same time.
Shifter bushings: With everything out and easily accessible, you might as well look for polyurethane bushings and what not. I went with Corksport bronze oil bushings and Corksport polyurethane shifter bushings.
Stainless steel clutch line: Once again an easy upgrade if you want to get it.
Upgraded motor mounts: With three motor mounts needing removing to get the transmission off, this provides a perfect opportunity to upgrade your motor mounts to solid mounts or inserts. I went with an AWR full motor mount set, but AWR and Corksport both make inserts that provide a cheaper upgrade.
Last edited:
") )
)