HOW TO: Replace Valve Cover Gasket

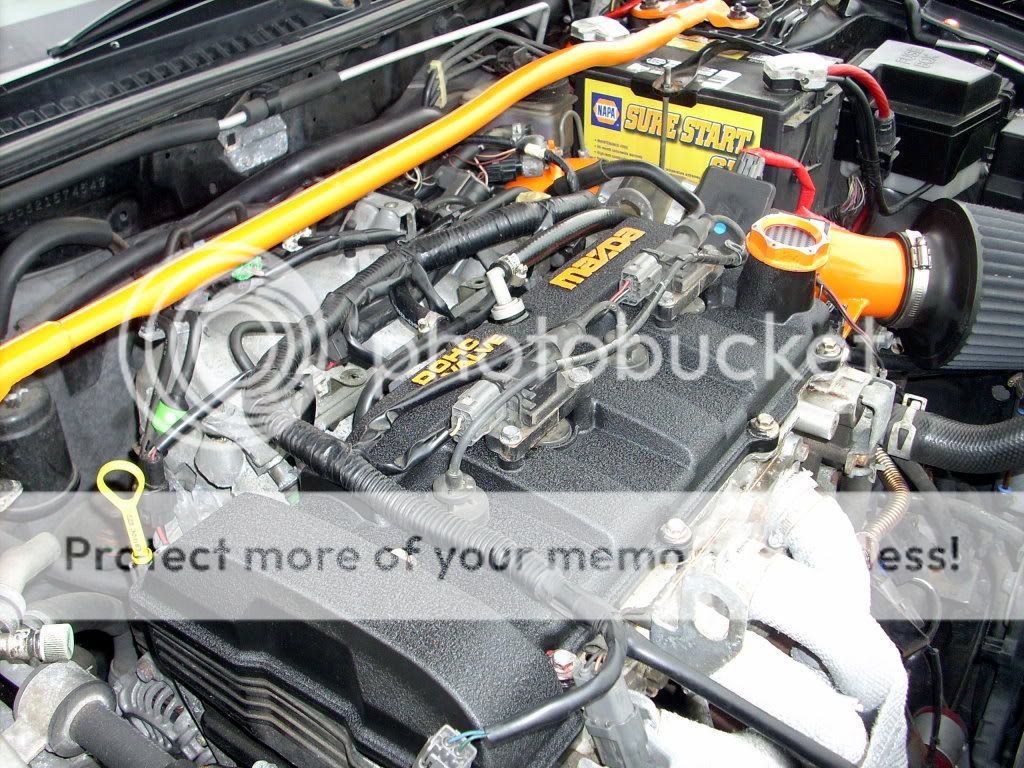
Hey everyone. I'm new here, but wanted to thank you in advance, Sleezer for the awesome pics with the arrows. I'm going to give this a go on my Mazda Protege5 next week while I'm off work for Christmas. I am a girl who doesn't know much about cars, but I enjoy learning. So far, I've done simple things like headlight repairs and sanding off the rust and fixing the paint job on my car (Which I love doing). I've also learned how to change the brakes and I got new calipers which I painted red. (Simple I know, but I'm proud of myself). :) The red doesn't look good though, it always has kind of an orange hue to it, so I really like your black cover with red letters and bolts. Very sharp! Hopefully all will go well for me (cross your fingers) and I can happily put this on my list of things I've done.
 
Thanks, its a pretty straight forward project.

Oh and the valve cover has changed, wrinkle black an orange.

DSCI0260.jpg
 
That looks awesome! Great job! I'm glad you changed the paint, because now I don't feel so guilty about painting mine the same. I tried with solid red, but it looked soooooo tacky, I had to go with black. Thank you for your help! It really helped me get through this! Thank you!


backincar.jpg
 
I have a question about painting. What is needed to paint? Did you sand it down first? and if so, with what grit? In getting the two tone look, like on the MAZDA wording, did you just spray it down first and then with a brush go over the words in a different color? Use any primer or clearcoat before and after the paint?
 
With mine I take a wire cup brush and cordless drill to clean up and etch the surface. Then sprayed on the wrinkle paint following the proper procedure. If you are doing gloss you will need to start with a rough sandpaper then work to fine to make sure the surface is smooth so the finish comes out right, that or find a high temp filler primer if it exists. And no Ive never used clear-coat on a VC. Use high temp engine enamel or my new. fav wrinkle.
 
Thanks for the info, i actually read that I shouldnt use primer because it may crack the paint after it is on it.

But about the lettering you did, did you first spray the lettering red, wait for it to dry.. then mask it off and use like a box cutter to cut away excess tape and then spray it black?
 
Tried that once. Was a pain and didnt work right. Last time I sprayed a bunch of the paint out on a piece of cardboard and used a sponge to sponge the lettering on
 
Well for my first valve cover job and spray, here are the results.. It does look a hell out a lot better than previous, but I am not 100% happy with the job, but for the most part, it works. The 16 still has some masking tape stuck in it that i forgot to take out (it is out now!). I wanted to shoot the cover below it but 2 out of the 4 bolts are not coming out and kinda stripped now too. lol. Thanks for the tutorial bro. By the way, I sequence in tightening the bolts back is reversed in anyone doesnt figure it out or know.

mazdavc0a.jpg


mazdavc1.jpg


mazdavc2.jpg
 
That's looks fresh man.i'm thinking about doing this some time.probably should have done it when I changed the gasket lol
 
Can you get the valve cover gasket at any auto parts store or is the OEM one needed? And does anyone have the part number for the gasket?
 
This may be a stupid question, but since I have never changed a valve cover gasket I have to ask; how does the gasket stay attached to the cover while you are re-installing it (groove, fits over lip, etc.). It might be obvious when I take it off. :)
 
There are grooves it sits in but you need to take your time when replacing the cover. There is a chance the gasket can fall out of the grooves in which case you simply reseat the gasket and try again. I got it on the first try and my replacement gasket was looser than the OEM one
 
Mission Accomplished

^ Thanks. I was successful.
P1020010.JPG

P1020014.JPG


Has anyone else has their air intake box turn grey like that?
 
Awesome job man!

And they grey looks like oxidation, happens to plastics over time. Solve you problem by getting a SRI or CAI ;)
 
Bumping an old thread but just wanted to say thanks for posting this ages ago. I found it via Google search and for someone who normally doesn't prefer to work on his own car after reading your instruction I decided to give it a shot.

I ordered up a FEL-PRO gasket (which also came with new sleeves for all the hardware) Part # VS50574R from Rock Auto. A job that probably takes some of you a half hour took me an hour and a half but was satisfying to do and even factoring in my cost of time I think I beat the 225 dollar estimate I was quoted the last time I got an oil change and they had recommended it due to the oil that was starting to seep.

Thanks again!
 
Back