
Blue 5 Zoomer
Member
- :
- 2006 Mazda5 Touring
Well, I must have gotten really lucky because my driver's side took less time than the passenger side. I did the passenger side first so I had the learning curve there.
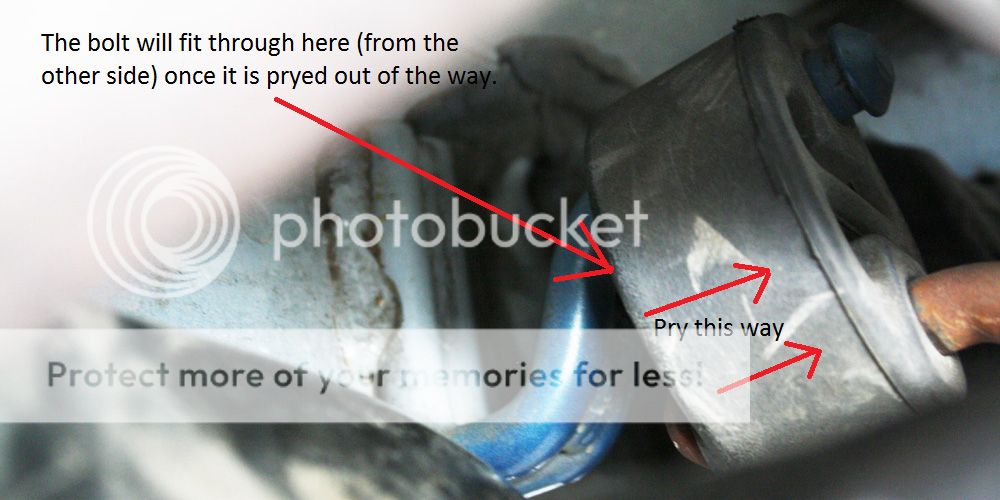
I looked at the clearance between the the bolt and exhaust bracket and figured I'd have to take the subframe loose but noticed the rubber exhaust bracket had some play. I stuck a tire iron up in there to pry the rubber part of the muffler bracket out of the way and the bolt came right out. Reinstalling was even easier.
Here is what my muffler bracket looks like from the back. If yours is similar, you may not need to take the subframe loose or cut the bolt.
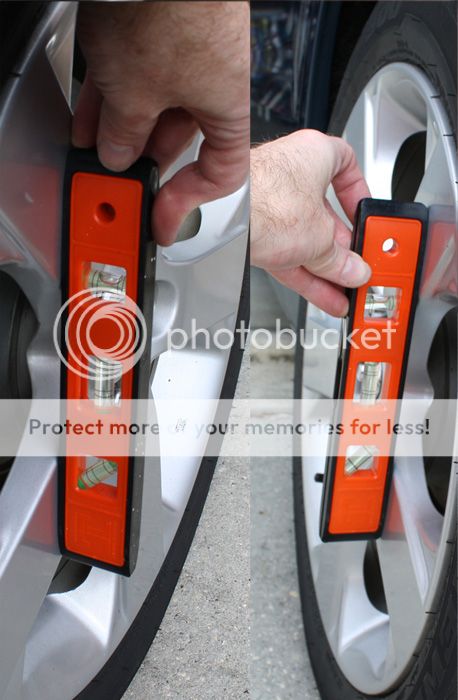
Here are the crude alignments I did using a level. I had to do 4 complete 360 degree turns adjusting from stock on the driver's side and 6 on the passenger side. The bubbles indicate a very slight negative camber now, probably .1 to .2 degrees if I had to guess.
Oh, and a tip for the DIY'ers, the 4 bolts unbolt. The 4 nuts are welded and do not move. It was first thing this morning, what can I say...
I looked at the clearance between the the bolt and exhaust bracket and figured I'd have to take the subframe loose but noticed the rubber exhaust bracket had some play. I stuck a tire iron up in there to pry the rubber part of the muffler bracket out of the way and the bolt came right out. Reinstalling was even easier.
Here is what my muffler bracket looks like from the back. If yours is similar, you may not need to take the subframe loose or cut the bolt.
Here are the crude alignments I did using a level. I had to do 4 complete 360 degree turns adjusting from stock on the driver's side and 6 on the passenger side. The bubbles indicate a very slight negative camber now, probably .1 to .2 degrees if I had to guess.
Oh, and a tip for the DIY'ers, the 4 bolts unbolt. The 4 nuts are welded and do not move. It was first thing this morning, what can I say...


