
You are using an out of date browser. It may not display this or other websites correctly.
You should upgrade or use an alternative browser.
You should upgrade or use an alternative browser.
How-to: Make & install your own Mud flaps / guards for less than $5
- Thread starter khoi
- Start date
flomulgator
Member
- :
- Mazdaspeed 3 Sport
Instructions for rears
Okay so now that it is heading into winter and there are mushy leaves on the ground and soon to be sand on the road I decided to do this. The fronts I did almost like the OP, the only thing I changed is I raised the drill holes a half inch (to drop the flap height to 3.5"....personal preference) and added about an inch of material on the "outside" of the mudflap so they stick out of the car a little bit. I did this so that they would look a bit more like the Rally Armor flaps and protect the sides better. I think there may be a subtle difference here, as my car (and Rally Armor's) is a Speed 3 and the OP's is a regular 3, which has a different tire width. My Xice Xi2 tires I just got have actually have a wider shoulder and thus tread width than the stock RE050's too, even though they are the same size. Point is, it really felt necessary to have at least that much extra material to cover the wheel spray in a straight line. I added a little 60 degree cut on the top corner of the material that is sticking out just like rally armor, makes it look good.
Now for the rears. For god's sake take off the rear wheels! I just jacked it up a bit and it was a huge pain. Taking the effort to take the wheel off will make everything else easier. That being said it is possible to do it with the wheel on and the rear jacked up, just harder.
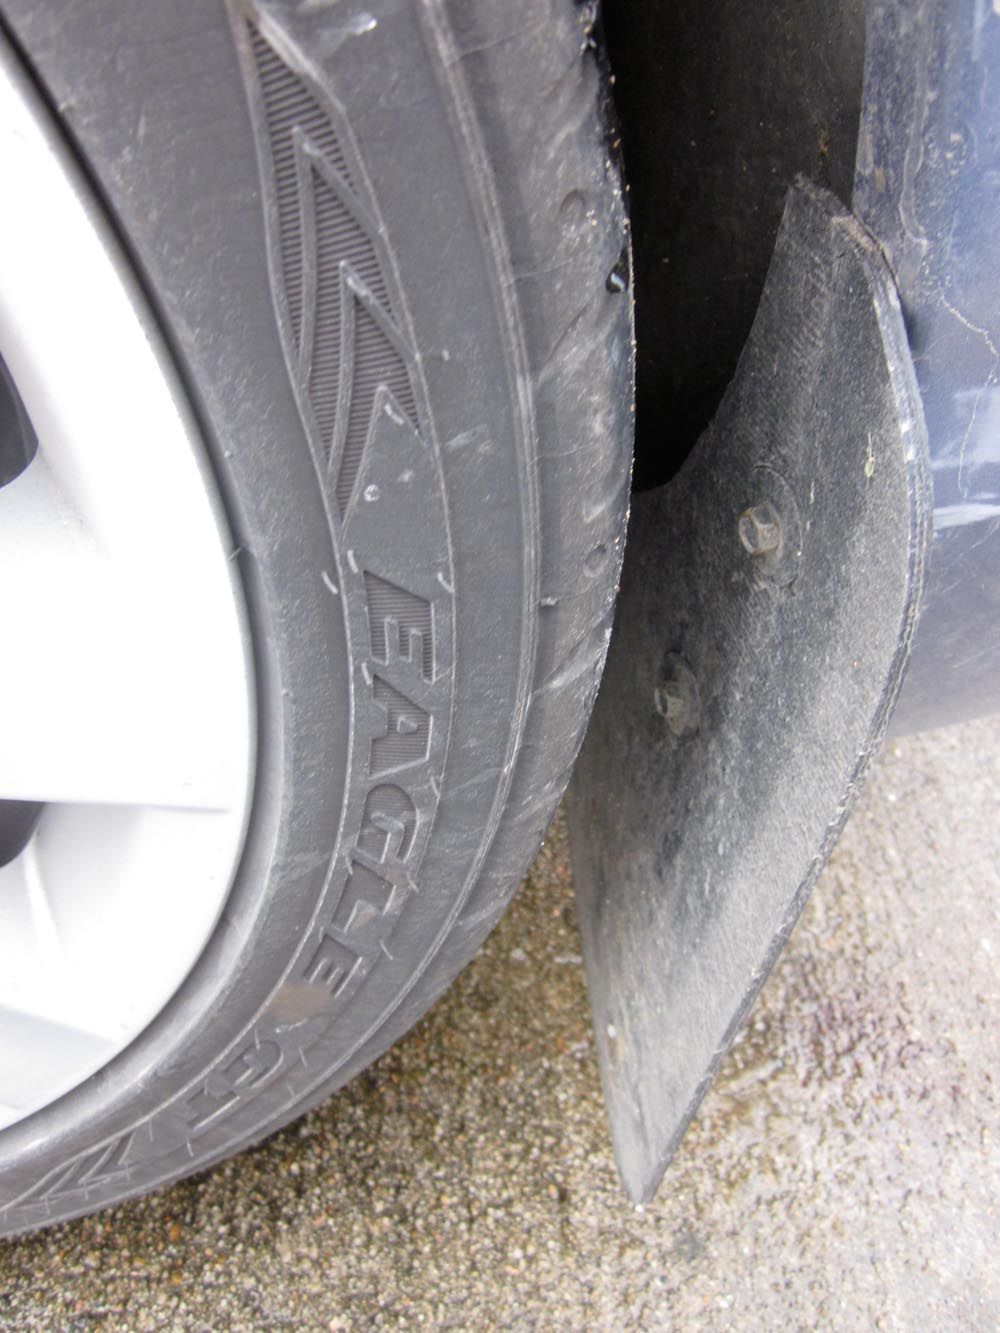
So first, the shape. The mudflap in the rear is the same total height, but due to the shape of the rear bumper add 2" to the "bottom height" of the flap before you start the curve to the top. There will be two holes to drill, I just positioned it carefully and guesstimatingly marked the holes by hand, redrilling a bit as necessary.
The holes are two rivets. With the rear jacked, use the 3/16" drill bit from earlier and carefully screw into the rivets. If you've never done this before the technique is moderate to high drill speed, LIGHT pressure. This will allow the drill to slowly seat and bite into the metal. Too much pressure or too low of a speed and the drill can "walk" off the rivet and onto your fender well paint. This is more true if you have the drill at an angle because the wheel is on. After drilling a bit the rivets will pop apart.
With the rivets off, reach behind the painted part and pull out the black plastic flap behind it so that it is out in front. Pull off any rivet backings, and then drill out the small plastic holes with a 1/4" drill bit. Replace the plastic behind the trim.
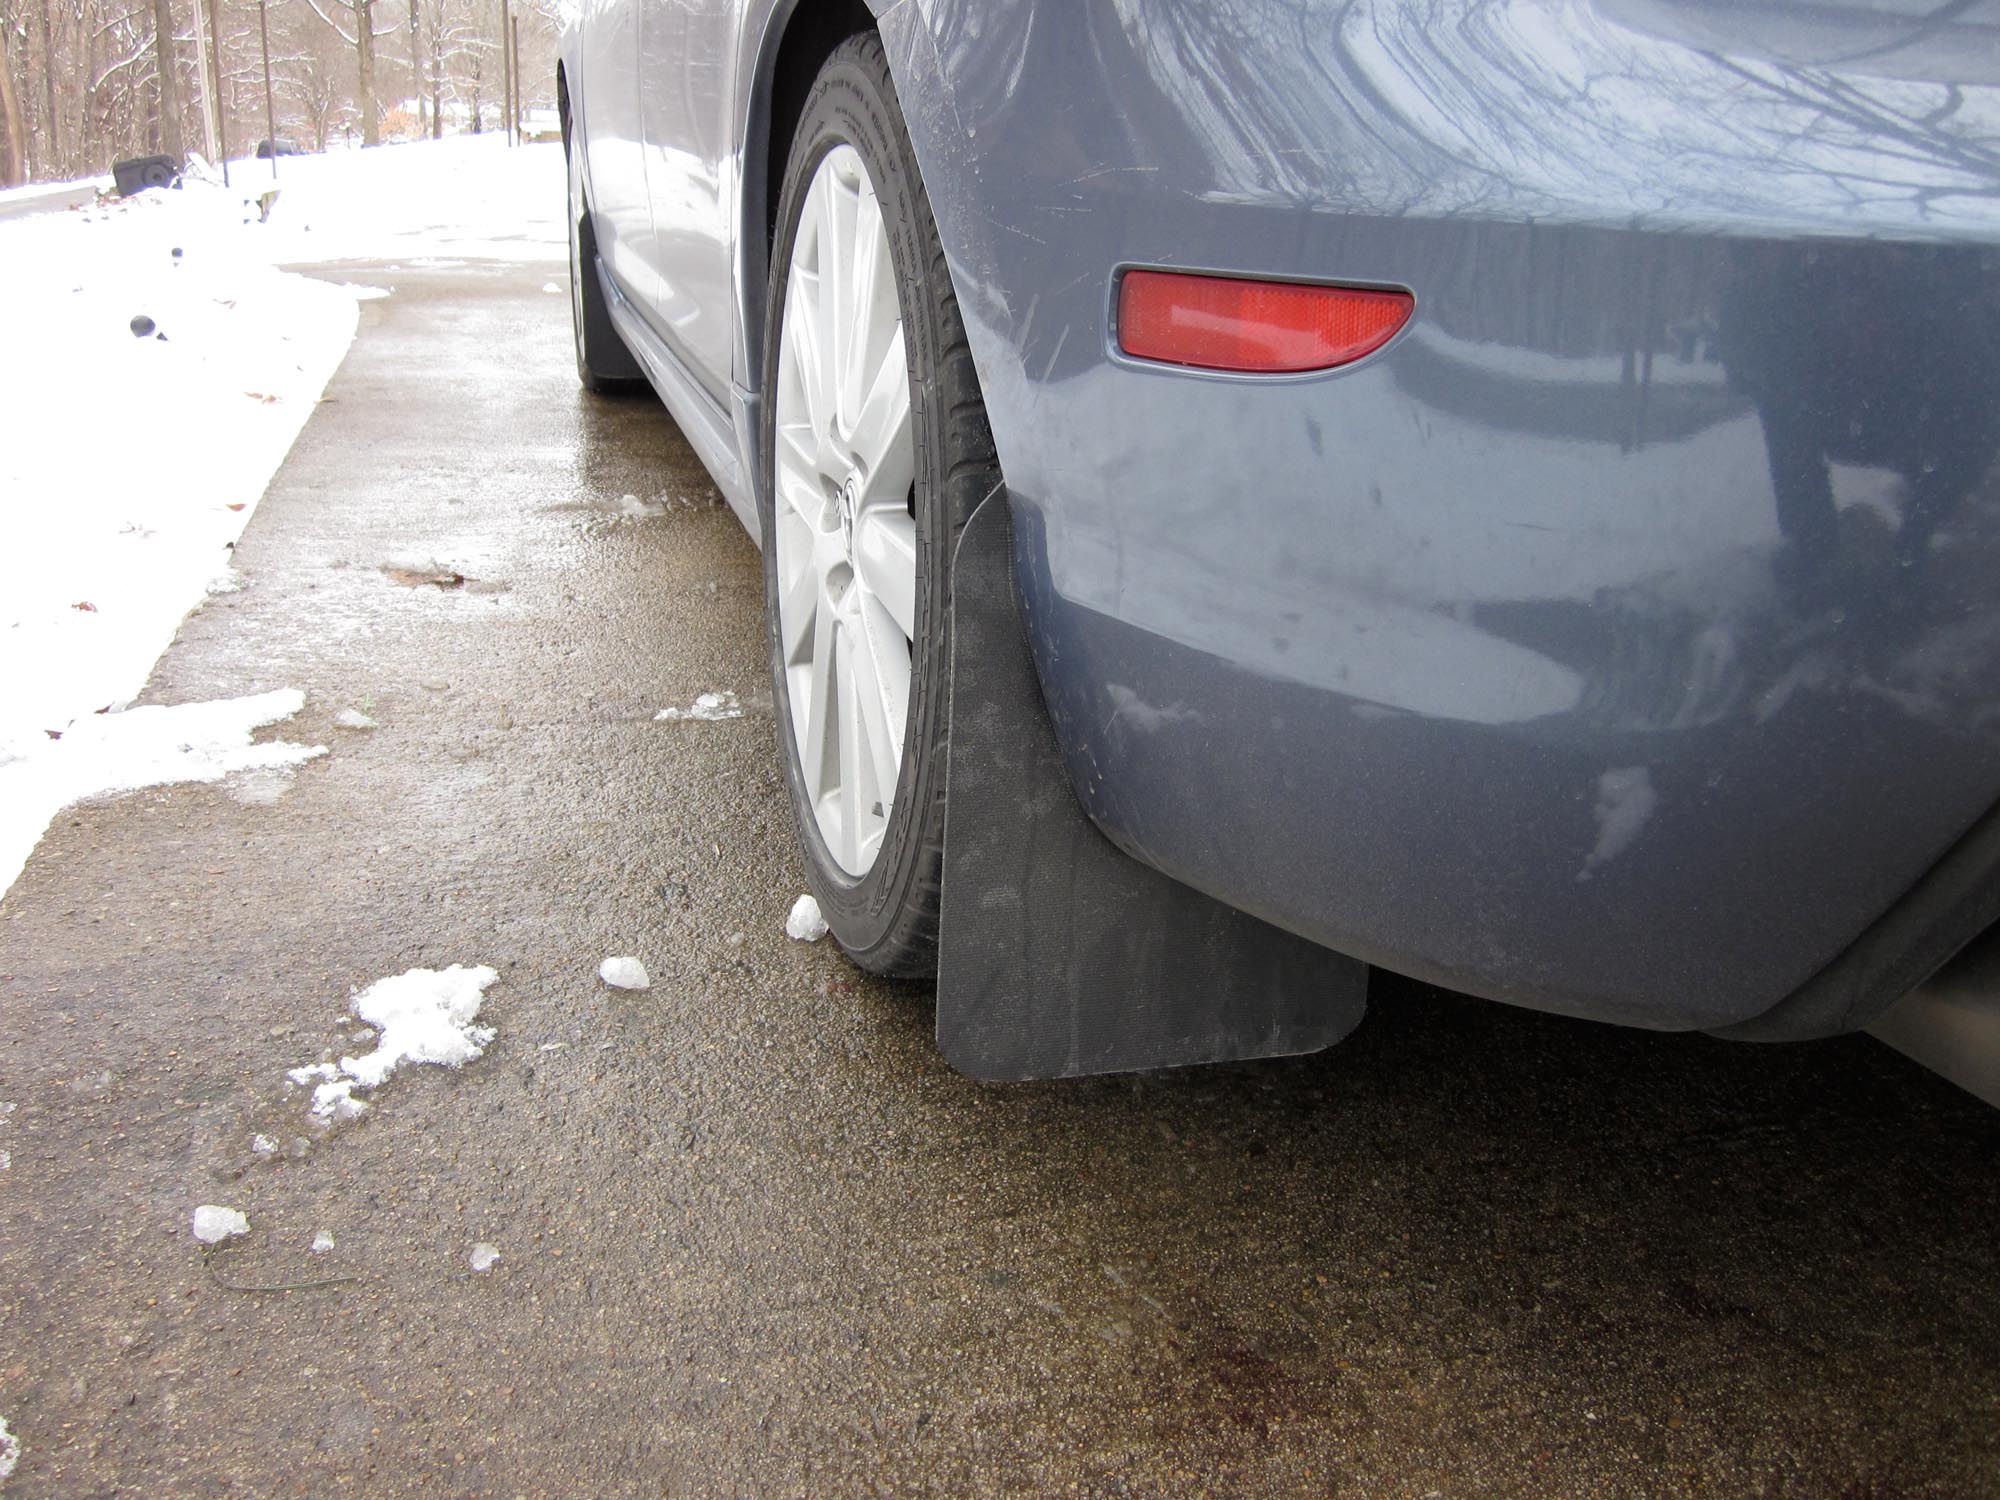
Use two 12-14, 1 1/2" plastic anchors for each flap. These are the next size smaller than the OP's front screw setup and come in a blue bin at Home Depot. As with the fronts, check for level, and I went with 3.5" off the ground. I also had about the same amount of extra material off the sides. One thing to note here is that the rear bumper is curving a bit inwards at this point, so my flaps aren't quite pointed perpendicular to the direction of travel. Rally Armor solved this buy using a bracket on the lower hole which re-aims the lower portion of the flap. I didn't make one but kinda want to, if anyone does let us know your design.
Some things to consider: I used a dremel cutting bit to smooth out the rough edges after cutting the trash cans with shears. Oh and of course it too 2 trash cans. 28 quarts is barely big enough, so I used all templates "upside down" with the bottom of the trash can being the top of the mudflap. Finding a large trash can might be helpful and economical. As for price, Things are a little more expensive here, so between 2 trash cans and the extra screws I ended up spending like $16 on all 4. Compare that to Rally Armor's cheap flaps for $40 (pre-shipping) that come with the brackets and some extra screws. Rally Armor is by no means a rip off considering how much more labor is involved in sculpting the flaps, but I actually kinda enjoyed that and $16 < $40. If I can ever afford the proper Urethane RA flaps I will probably get those eventually, but my car is protected and doesn't look kludged at all for now.
Finally, if there is enough interest in a template for the rear mudflap I can probably take mine off and make one.
Okay so now that it is heading into winter and there are mushy leaves on the ground and soon to be sand on the road I decided to do this. The fronts I did almost like the OP, the only thing I changed is I raised the drill holes a half inch (to drop the flap height to 3.5"....personal preference) and added about an inch of material on the "outside" of the mudflap so they stick out of the car a little bit. I did this so that they would look a bit more like the Rally Armor flaps and protect the sides better. I think there may be a subtle difference here, as my car (and Rally Armor's) is a Speed 3 and the OP's is a regular 3, which has a different tire width. My Xice Xi2 tires I just got have actually have a wider shoulder and thus tread width than the stock RE050's too, even though they are the same size. Point is, it really felt necessary to have at least that much extra material to cover the wheel spray in a straight line. I added a little 60 degree cut on the top corner of the material that is sticking out just like rally armor, makes it look good.
Now for the rears. For god's sake take off the rear wheels! I just jacked it up a bit and it was a huge pain. Taking the effort to take the wheel off will make everything else easier. That being said it is possible to do it with the wheel on and the rear jacked up, just harder.
So first, the shape. The mudflap in the rear is the same total height, but due to the shape of the rear bumper add 2" to the "bottom height" of the flap before you start the curve to the top. There will be two holes to drill, I just positioned it carefully and guesstimatingly marked the holes by hand, redrilling a bit as necessary.
The holes are two rivets. With the rear jacked, use the 3/16" drill bit from earlier and carefully screw into the rivets. If you've never done this before the technique is moderate to high drill speed, LIGHT pressure. This will allow the drill to slowly seat and bite into the metal. Too much pressure or too low of a speed and the drill can "walk" off the rivet and onto your fender well paint. This is more true if you have the drill at an angle because the wheel is on. After drilling a bit the rivets will pop apart.
With the rivets off, reach behind the painted part and pull out the black plastic flap behind it so that it is out in front. Pull off any rivet backings, and then drill out the small plastic holes with a 1/4" drill bit. Replace the plastic behind the trim.
Use two 12-14, 1 1/2" plastic anchors for each flap. These are the next size smaller than the OP's front screw setup and come in a blue bin at Home Depot. As with the fronts, check for level, and I went with 3.5" off the ground. I also had about the same amount of extra material off the sides. One thing to note here is that the rear bumper is curving a bit inwards at this point, so my flaps aren't quite pointed perpendicular to the direction of travel. Rally Armor solved this buy using a bracket on the lower hole which re-aims the lower portion of the flap. I didn't make one but kinda want to, if anyone does let us know your design.
Some things to consider: I used a dremel cutting bit to smooth out the rough edges after cutting the trash cans with shears. Oh and of course it too 2 trash cans. 28 quarts is barely big enough, so I used all templates "upside down" with the bottom of the trash can being the top of the mudflap. Finding a large trash can might be helpful and economical. As for price, Things are a little more expensive here, so between 2 trash cans and the extra screws I ended up spending like $16 on all 4. Compare that to Rally Armor's cheap flaps for $40 (pre-shipping) that come with the brackets and some extra screws. Rally Armor is by no means a rip off considering how much more labor is involved in sculpting the flaps, but I actually kinda enjoyed that and $16 < $40. If I can ever afford the proper Urethane RA flaps I will probably get those eventually, but my car is protected and doesn't look kludged at all for now.
Finally, if there is enough interest in a template for the rear mudflap I can probably take mine off and make one.
Just started the project on my 2011 sport. I was not willing to spend $130 on mud flaps. Even if Polyurethane is expensive, why would i need it on my car if trash can material will work? Nevertheless, the stencil still works on the new body style but the holes are pretty far off. It wasn't a problem to find the new ones and the project so far seems straightforward. Will post pictures when done.
Pics


Pics
Last edited:
L3vzoomzooom
Member
- :
- 2007 MZ3 Sedan
Nice write up.
hey, i did this but changed the shape to be a bit more like RA. i also made mine out of conveyor belt i bought tractor supply co. it cost me $20 but will last forever. it is 1/8" thick and has a woven core with burly rubber on both sides. i felt it was worth finding a good material that would last me a few years and hold it's shape well. they've been on for 2 weeks now and still look new..


Last edited:
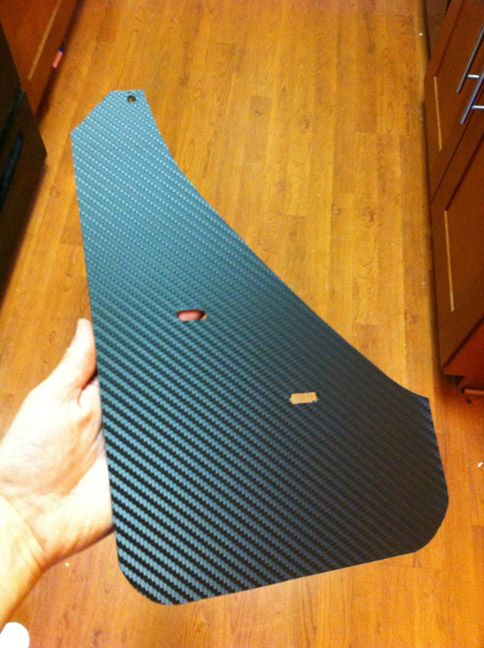
tddvrrn, those look good. I ended up going the trash can route though I kinda wish I found a flatter material. Overall though I think they came out good for $5. My question is, would it be worth clear coating the side that faces the wheel to protect the cheap plastic? More importantly, is it worth applying some carbon fiber vinyl to the opposite side that everyone actually sees to give them a little more oomph in the looks department?

Attachments

I don't think you need to clear coat the sides. My mud flaps have been on the car for over 3 years and they are still fine.
I think the carbon fiber vinyl would look awesome, but I'm not sure how long they will last being exposed to all the elements.
I think the carbon fiber vinyl would look awesome, but I'm not sure how long they will last being exposed to all the elements.
tddvrrn, those look good. I ended up going the trash can route though I kinda wish I found a flatter material. Overall though I think they came out good for $5. My question is, would it be worth clear coating the side that faces the wheel to protect the cheap plastic? More importantly, is it worth applying some carbon fiber vinyl to the opposite side that everyone actually sees to give them a little more oomph in the looks department?
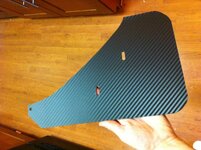
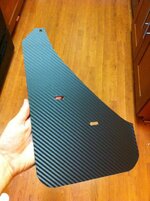
Just did the fronts and I think they look great. Remazda, no offense but I think the red is a little more goofy than Carbon Fiber, just my opinion (shady). Like khoi pointed out, my only concern is how well the vinyl will hold up to the elements. This 3M stuff has so far held up better than paint on my badges so I'm confident that it'll hold. If not, there is an adhesive 3M suggests so maybe I'll use that for the backs just in case. I was losing light so I'll do the backs another day. Great write up, OP! This has saved me a butt load of money I can put towards another mod.

Attachments
That looks awesome. Now I want to do it to my car too
I'm glad that I took the time to write up the tutorial on making these mud flaps two years ago. It seems to have saved money for lots of people")
Thanks, I really dig the look. I'll let you know how the vinyl holds up. I might also rough up the rears a bit more before applying it to them.
Just did the fronts and I think they look great. Remazda, no offense but I think the red is a little more goofy than Carbon Fiber, just my opinion (shady). Like khoi pointed out, my only concern is how well the vinyl will hold up to the elements. This 3M stuff has so far held up better than paint on my badges so I'm confident that it'll hold. If not, there is an adhesive 3M suggests so maybe I'll use that for the backs just in case. I was losing light so I'll do the backs another day. Great write up, OP! This has saved me a butt load of money I can put towards another mod.
otakonx - they look great! way more techno than mine.. nice rims by the way.
khoi - 3 years on trash can mudflaps? amazing! i'd like to see pics of how they're holding up, if ya please.
otakonx - they look great! way more techno than mine.. nice rims by the way.
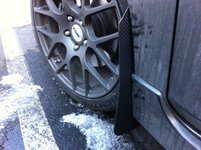
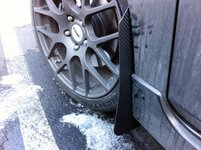
Thanks, I can't wait to get the back ones on. They're put on a little different from the previous gen. It looks like there isn't any rivets and all I need to do is drill into the plastic fender liner. I love my TSW wheels, just wish it wasn't winter so I could enjoy them a little more. I'm afraid to take the car through an auto wash now too!
Just a quick update on how these have held up with the past day of snow/slush/sleet/whatever else falls from the sky in Jersey. First, I'm amazed how much these things stop from getting on the sides of the car. There was virtually no signs of crap being flung up the sides of the car like I'd usually see. Everything was caked on the flaps, which I made sure to kick free before I went inside for the night. So day 1, no signs of curly or bubbling from the vinyl and the $10 flaps are doing their job amazingly. Once again, OP F$%&ING brilliant write up and thanks tddvrrn for suggesting the DIY route in the first place!
khoi - 3 years on trash can mudflaps? amazing! i'd like to see pics of how they're holding up, if ya please.
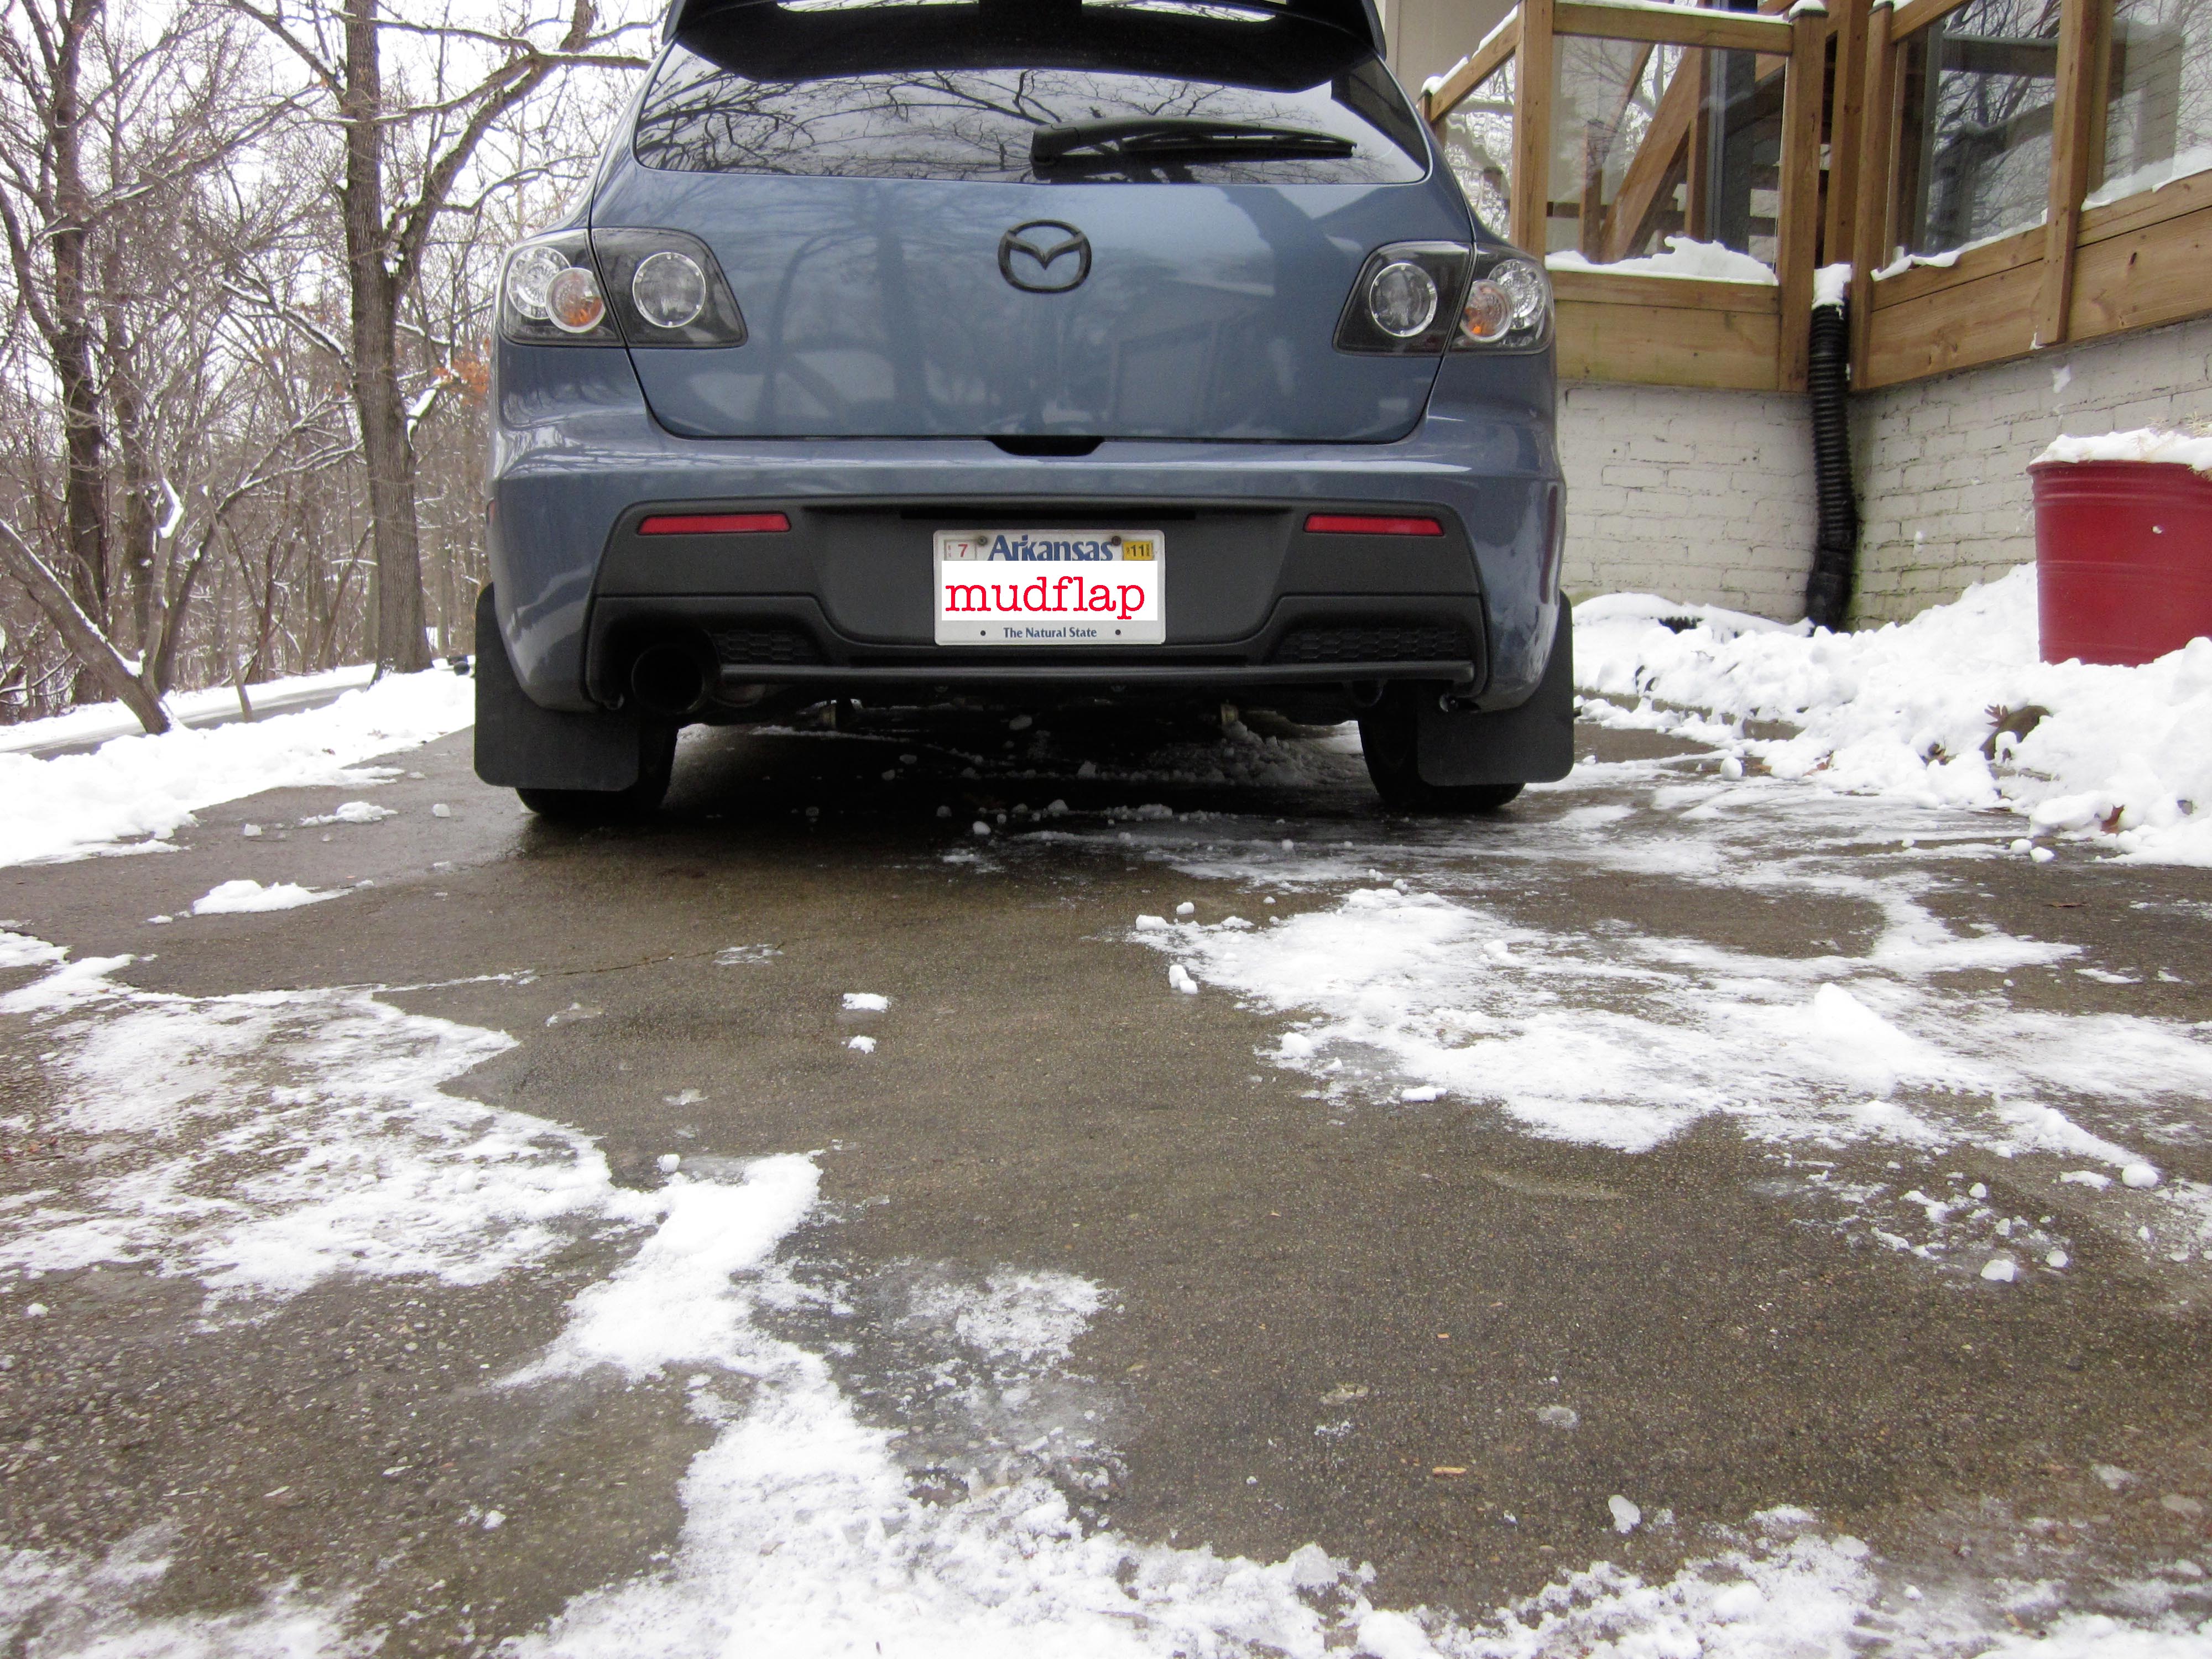
It's dark and raining, but here is the picture of the 3+ years thrash can mud flaps. They are still in good shape after all of these years

Instead of a garbage can, can I use an old air dam to cut it out of?
It all depends on how flexible and easy it is to cut the material. You want something that is tough but also a little bit flexible. If it is not flexible enough it will just crack over time from exposure to the elements and the wind constantly bending it when you drive.
The reason why I used a waste basket was because I could buy one for $4. It was cheap and has all the properties that I needed.
The mud flaps are almost 5 years old now and they are still working great