Hi Folks,
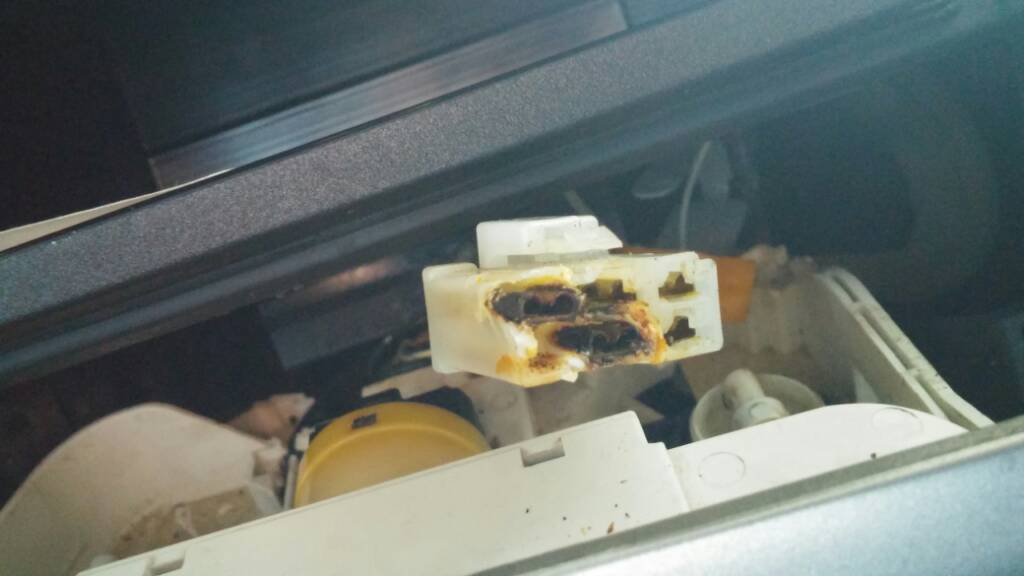
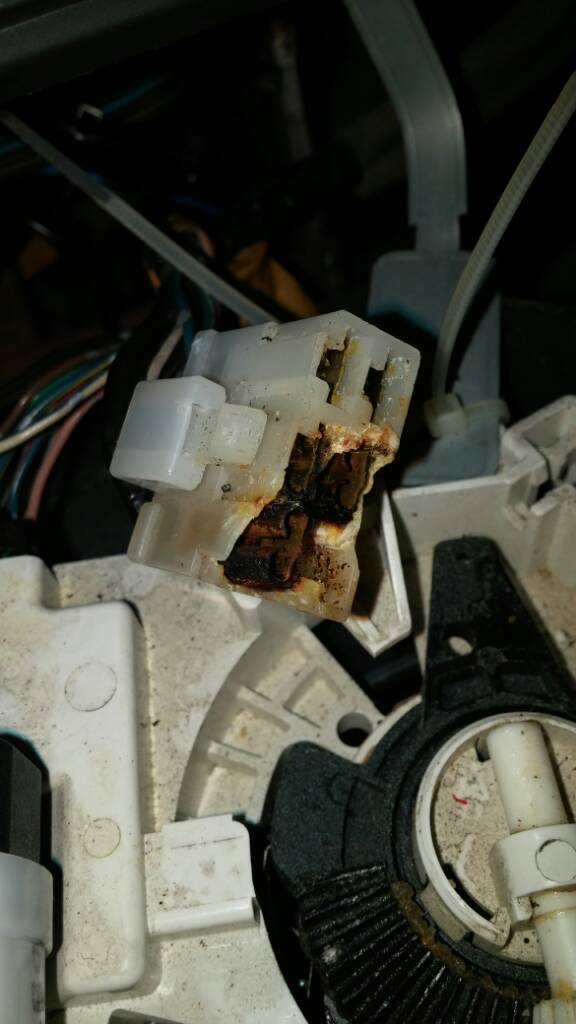
I've had a P5 for a little over a year now with this issue. At first it flickered on 2, then 2 quit working completely. This didn't bother me much, so I didn't really bother trying to fix it. Then 3, and finally 4. Down here in the south it gets HOT in the summer and having a car where the AC only works on position 1 just doesn't fly. I tried to check connections and the connectors, blower resistor, etc to no avail. Everything checked out to spec. After looking at the wiring diagram discovered that the blower motor seems to get its power through the fan speed switch so i checked that next. Most of you folks do have the right idea that it IS a connection/high resistance problem, however what i found is that the connection issue is not the source, but a side effect of the root cause of the actual issue, which appears to be the fan switch itself. This is why many of you have found that pinching the contacts will offer temporary fix but not always a permanent fix. Here is what I did and it's working perfectly ever since.
I will say that I think there's several different actual issues here, this seems to be a pretty poorly designed system. But this may help some of you. Even if your AC is working fine and nothing is melted, i would really recommend checking this and doing it at the first sign of issue to prevent having to repair melted connectors.
First, remove the AC control panel from the dash. This has been covered so I won't go into detail here.
1. Then Remove all 3 selector switches. They just pop off. (pic1)
2. Remove the face of the AC control head by carefully prying up the 4 black locking tabs, 2 on the top and 2 on the bottom. (pic2)
3. Once that is off, remove the 2 screws holding on the orange plastic panel behind the face. (pic3)
4. This will expose the little plastic nut holding on the fan selector switch and allow access to it. Be careful, this may be brittle and break easily.
5. Remove the fan switch by unscrewing this plastic nut. Then take the back cover off of the fan switch by carefully prying under the 3 little plastic tabs holding it on. (pic5)
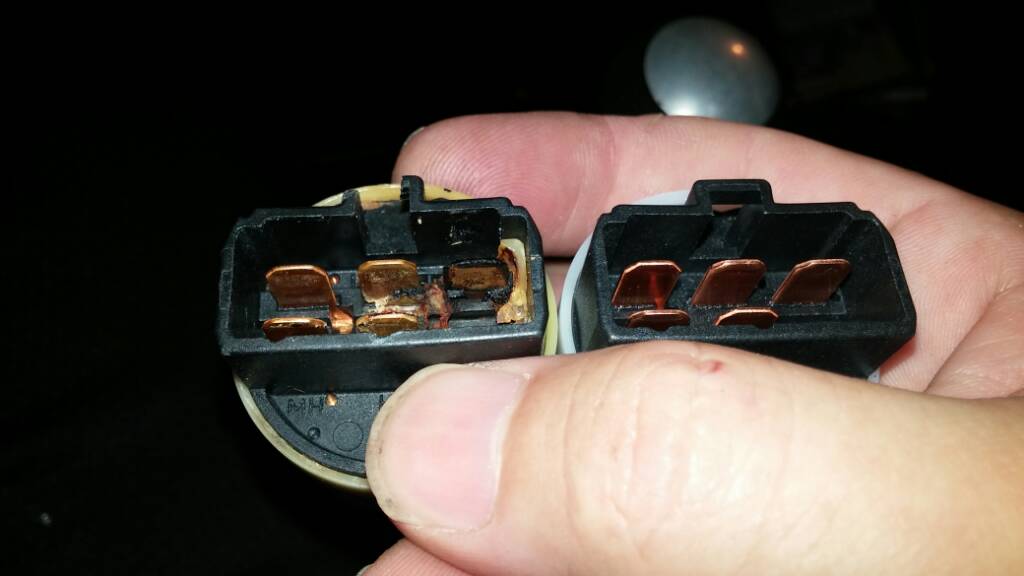
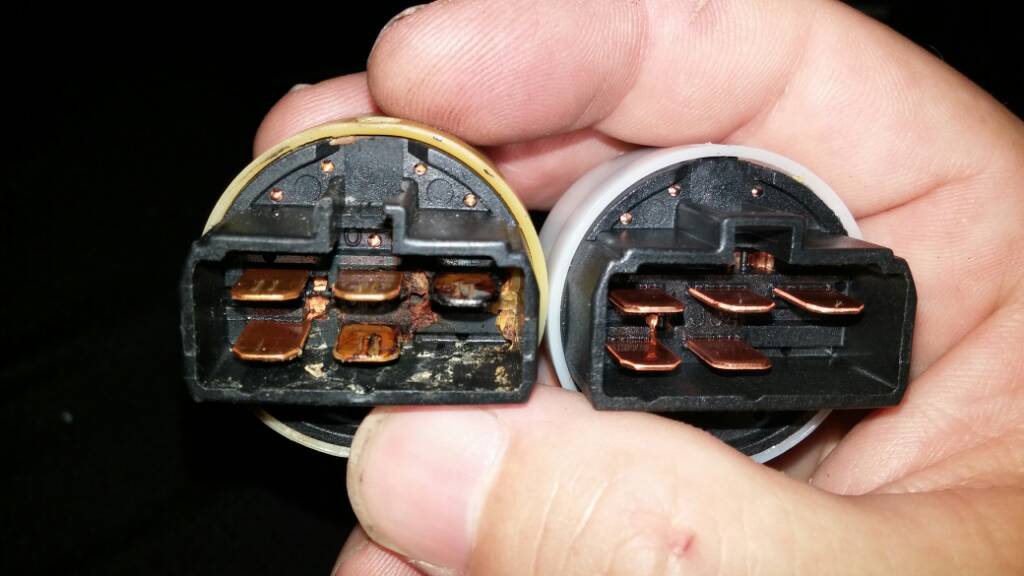
6. This will expose the copper contacts. Be careful, there are 2 springs behind the copper plate that may fall out. Also on the back side of it (by the stalk where the knob attaches) there is another spring and a detent ball. Be careful not to lose any of these parts, they're important!
7. My contacts were covered with black dirt/debris/gunk from years of use. Use a bit of emory cloth or something similar to clean all of the contacts so they are nice and shiny and clean again. Do this for both the side on the stalk (held up by the springs) and the side with the connector contacts. (pic6)
8. Once all of the contacts are nice and clean and shiny, apply a bit of fresh dielectric grease and reassemble in reverse order.
Enjoy the cold AC in the hot summer heat
")
Took me all of about 20 minutes to do, start to finish. I believe this to be the root cause of the issue (at least for me), creating the excessive heat/resistance that is actually CAUSING the connector to melt and the contact to become weak in the connector contacts. This is why smashing the connector terminals a bit may improve it short term, it is getting more voltage to the switch. However, as time goes on it will eventually fail again because the actual failure point has not been addressed.
View attachment 213971
View attachment 213972
View attachment 213973
View attachment 213975
View attachment 213976