
Hi everyone. As most of you all know, I've already had installed my CAI and it sounds great.
The outcome of the power increase wasn't what I expected however it doesn't really matter to me what the
numbers are at this point. Besides, it was hot as balls that morning, maybe should wait till it gets a bit cooler
then re-dyno for better numbers? Like in ideal weather conditions. Anyways, here we go on the installation of the CBE.
Make sure you have these tools handy:
*Please be careful when working under your car, and make sure it's properly secured so that it won't fall on
you when you're underneath it!!!*
- Nice even work surface, like a leveled drive way, or a garage. (don't want that car rolling
down hill and crushing you when you're under the car untorqueing those bolts!) :shock:
- Ipod and portable speakers (never know when you'll need some tunes to keep you goin!)
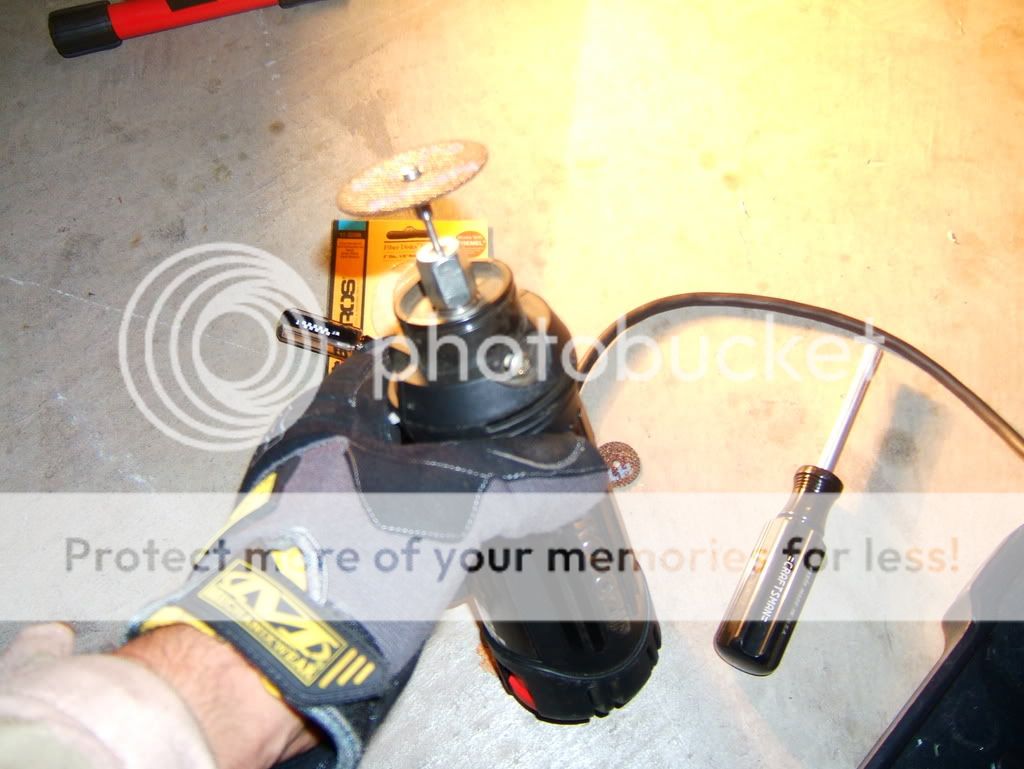
- RotoZip w/metal cutting grind wheels (hack saw will work, only it'll take forever).
- Extension cable for more reach with the RotoZip.
- Good socket set with ratchet. (you'll need a couple of sockets from this set ranging from 14mm to a 9/16 socket.
Make sure you have a set of deep sockets in your socket set.
- Jack and Jack stands
- Wheel chocks
Not needed,but recommended:
- Locktite
- flame retardant cover alls (you'll see why in bit)
- protective glasses/goggles (want anything falling in your eye? didn't think so :wink: )
- mechanix gloves (incase your exhaust system is still hot, or so when you're
untorqueing bolts, you won't bruise/cut a knuckle against all those metal surfaces!)
- Flat head screw driver
- Spray on copper gasket (bought at local automotive store 5 bux plus tax)
Here we go folks:
First you'll need to turn on some tunes with your handy dandy Ipod, and portable speakers as shown below. 8)
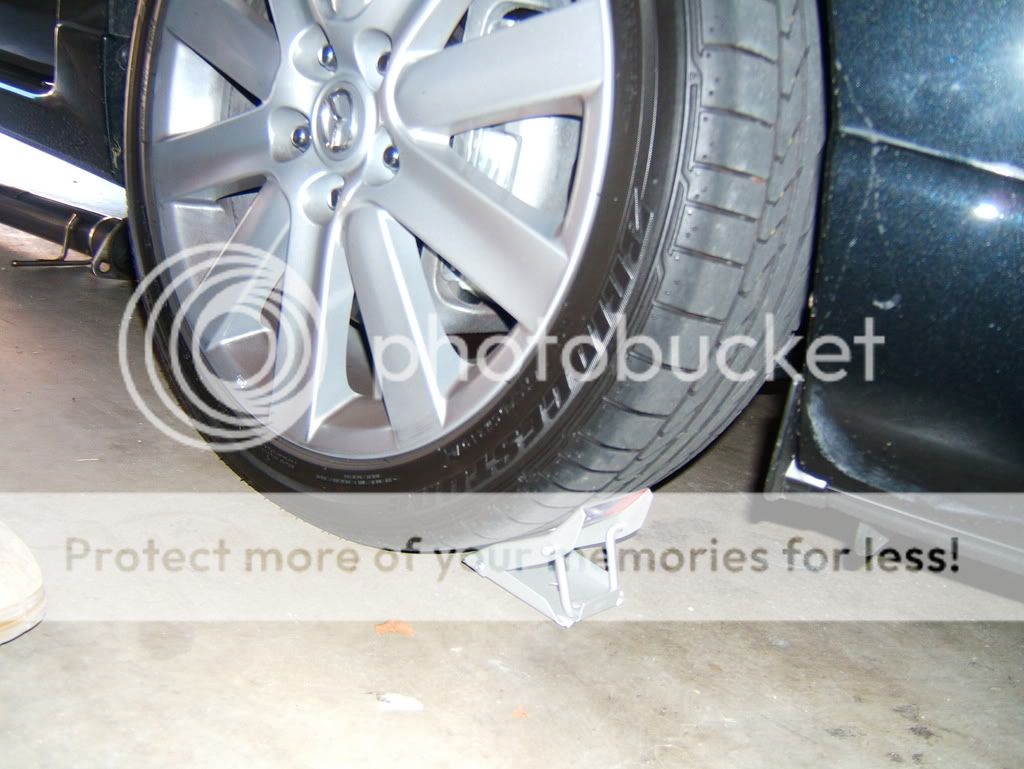
Next go ahead and chock the front wheels.
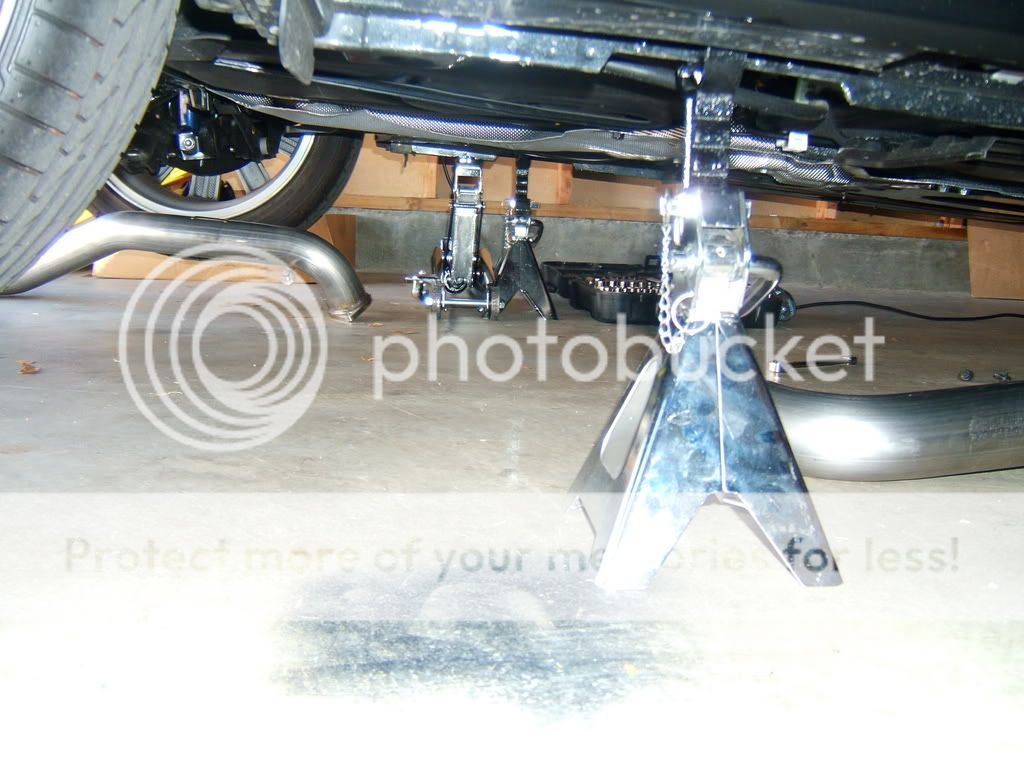
Jack up your car, and put the load on your jack stands. Be careful to make sure the support
is on the rails that jut out like rails. That'll hold the weight of the vehicle. Don't put the weight
on the actual side skirt of the car, it'll probably come up.... (wink)
Here's a sneak peek:
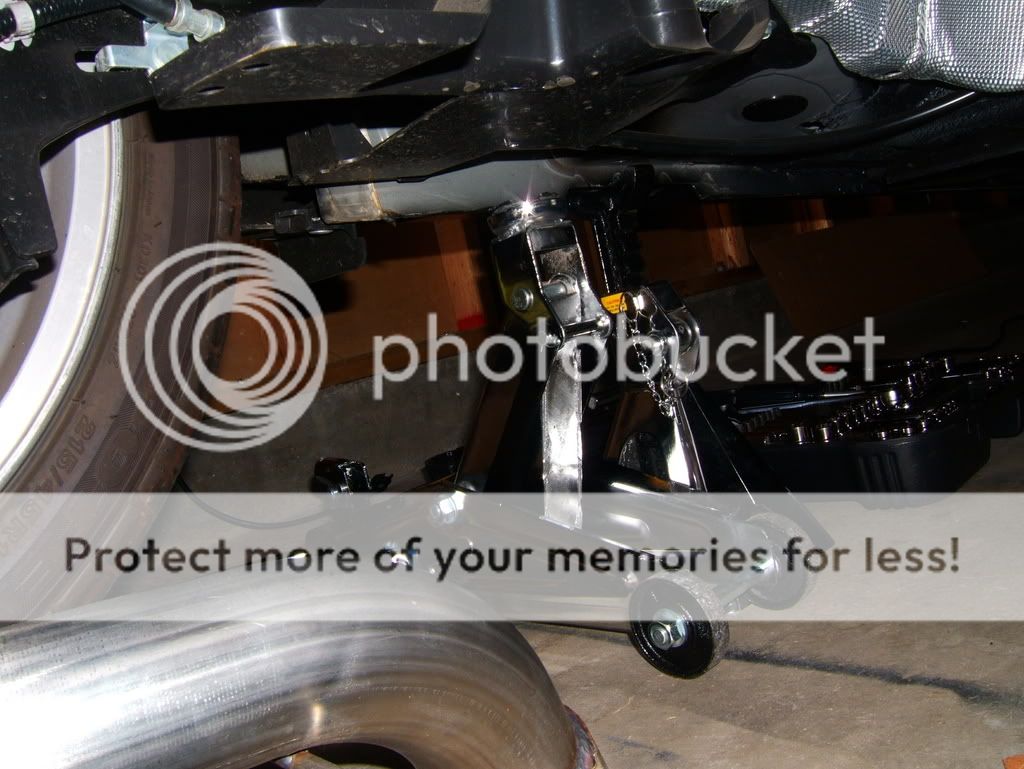
Once you get both sides of the vehicle jacked up, and secured; you'll need to crawl under
the car, (on your back for better view and less strain on your neck) and look for this panel under the car.
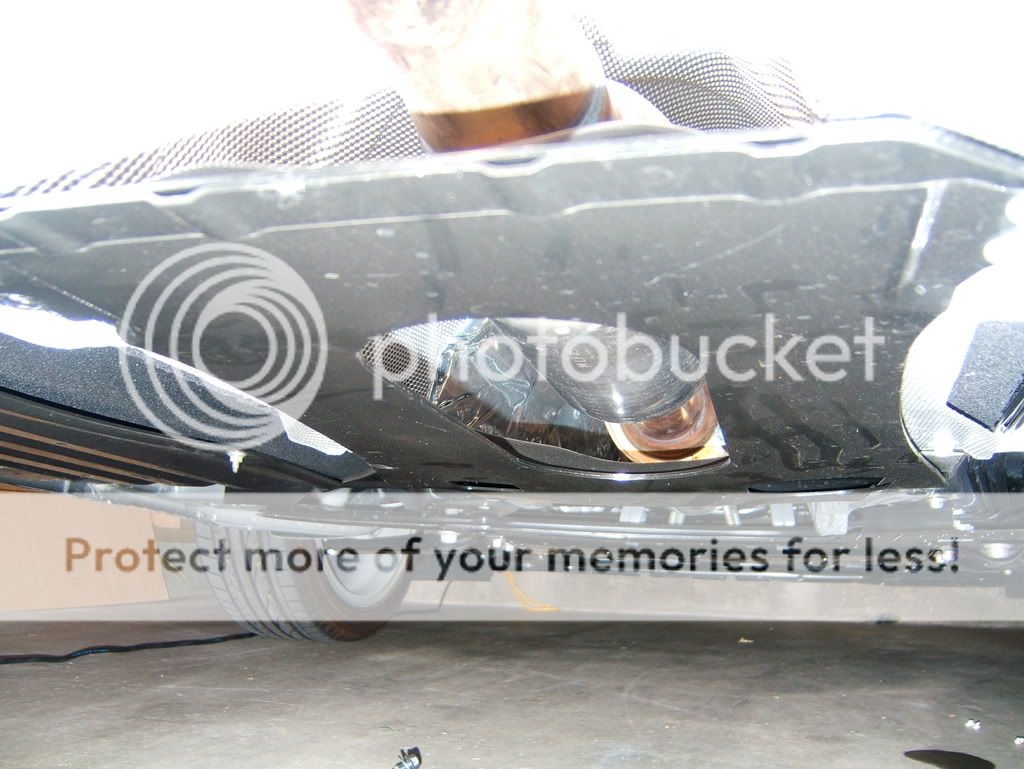
You'll be undoing EIGHT (8) bolts that look like this.
Undo these bolts and take off this plate. Be-carefull, it's sorta heavy, about 5-8 lbs, its
not much when you're standing up, but when you're lying on your back, and have to set it
aside as if you're doing a flat bench fly's, it'll fall quick. So handle it with care.
Here I used a closed end ratcheting wrench. These are handy, and if you can get a set, get one.
You'll see why when you use them in tight spaces.
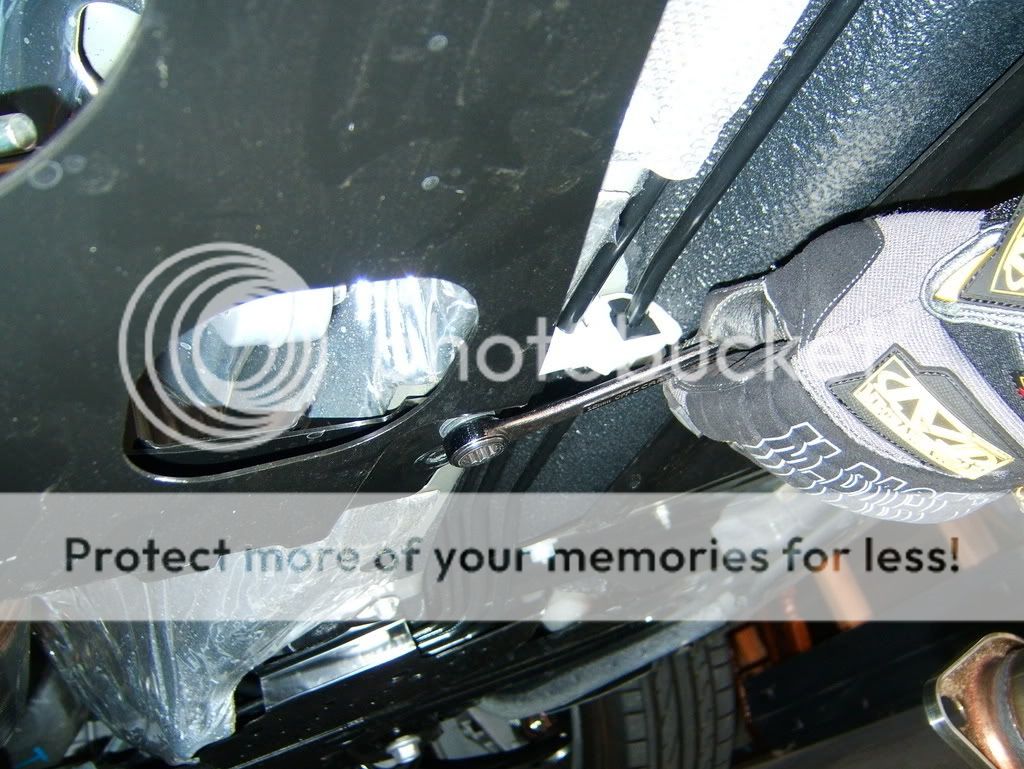
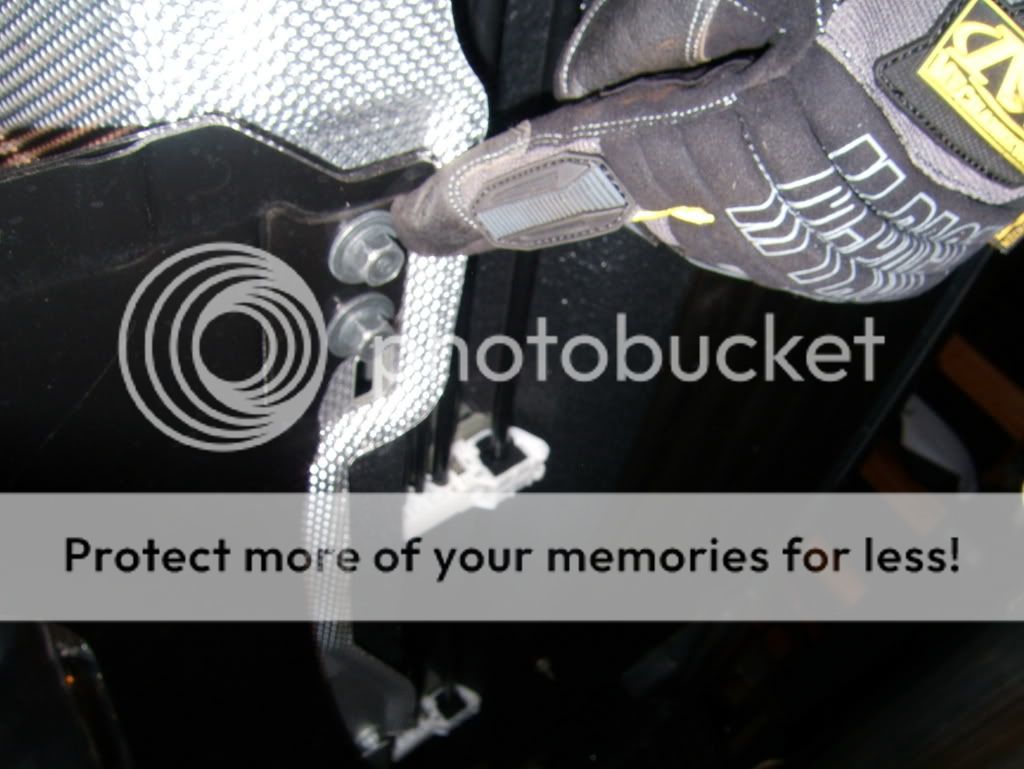
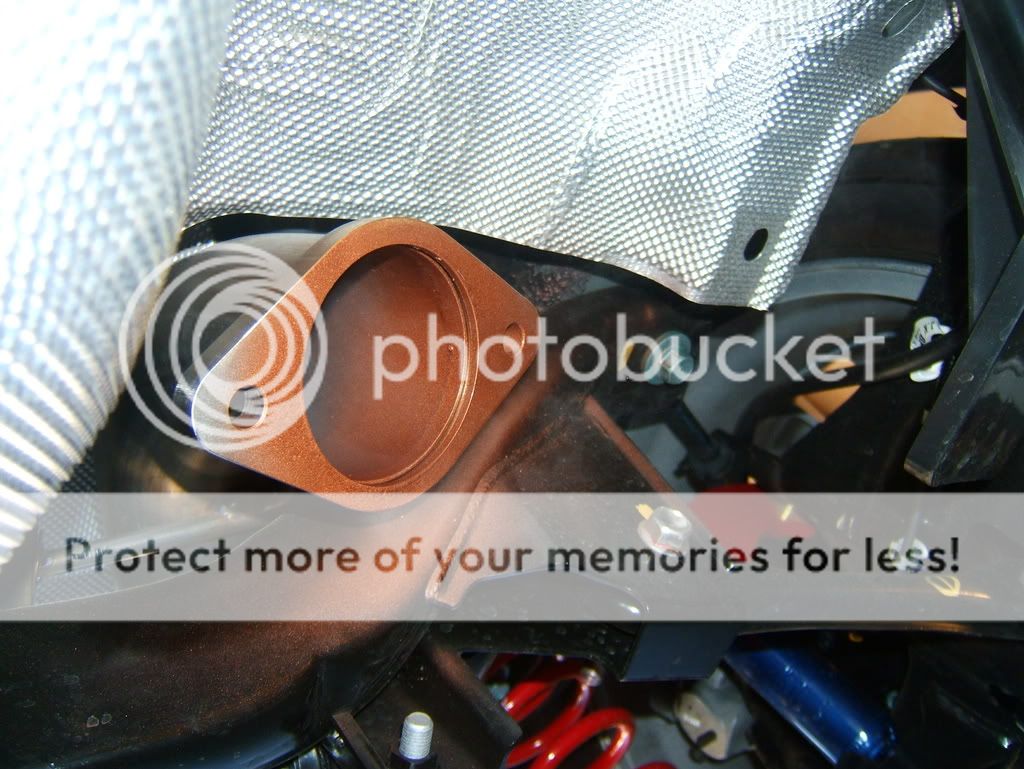
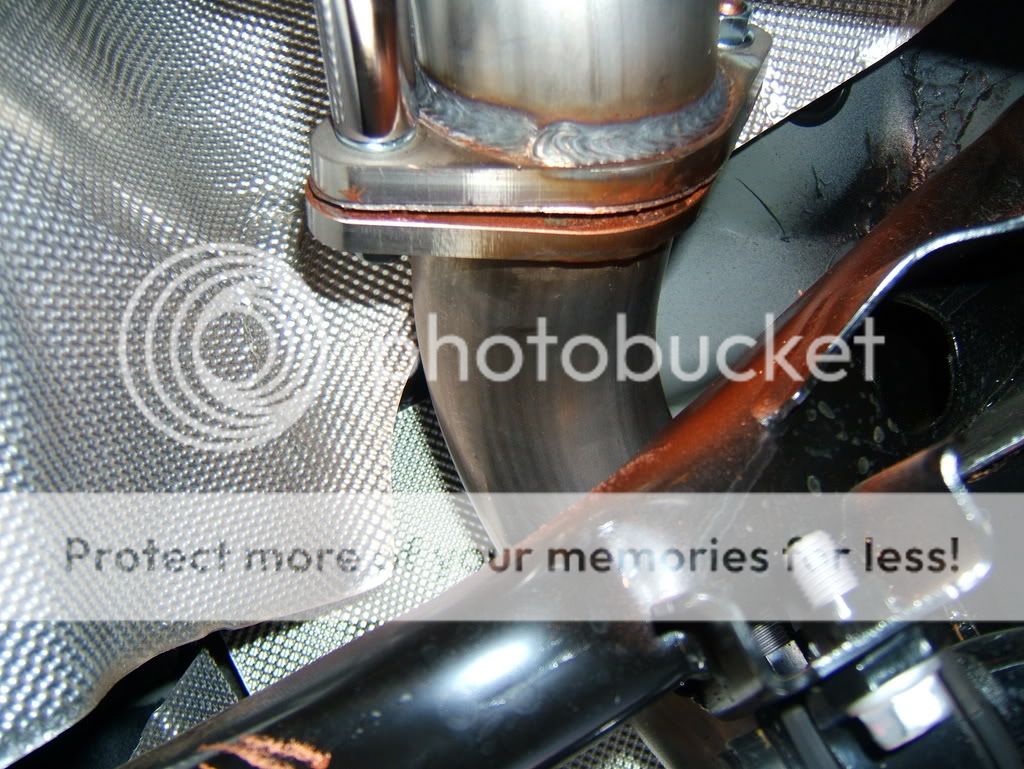
Now you'll have access to these bolts that hold the rear portion of the stock exhaust to the secondary
catalyc convertor. Undo both of these, and set them aside, you'll use the bolts and springs again for the new CBE.
Here is where you'll need to use some oomph to get these bolts loose. The gloves and the closed end wrench
helped here a lot. TRUST me.
Once you do the easiest part of the unbolting, just leave the piping there in its rubber hanger for support.
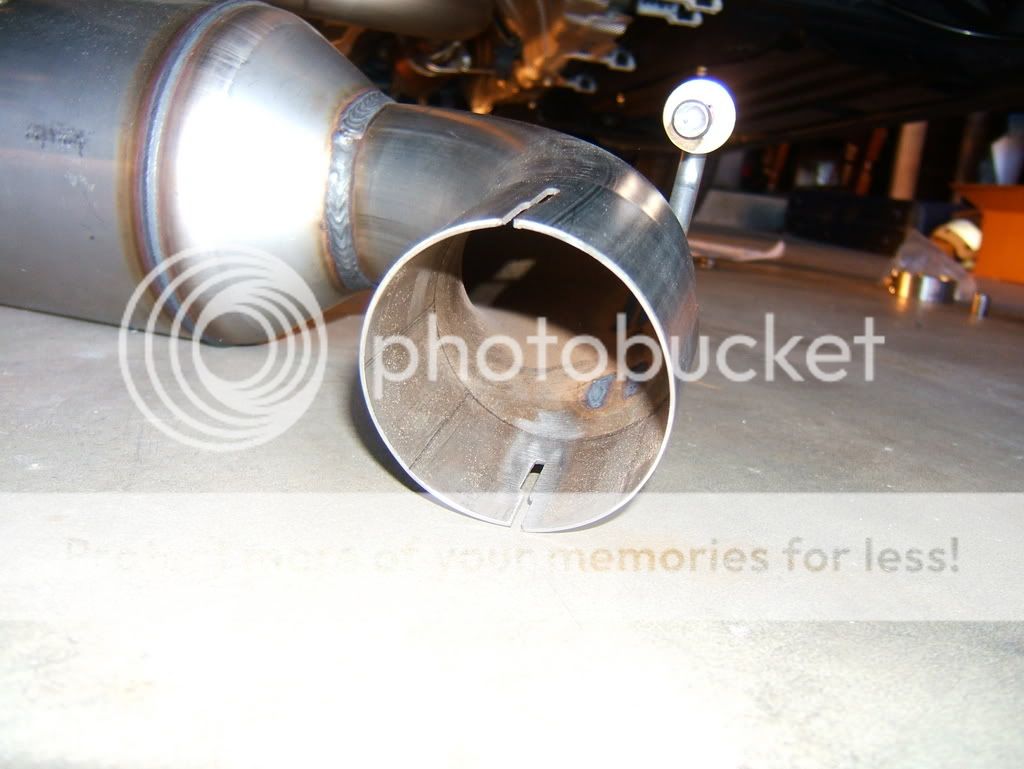
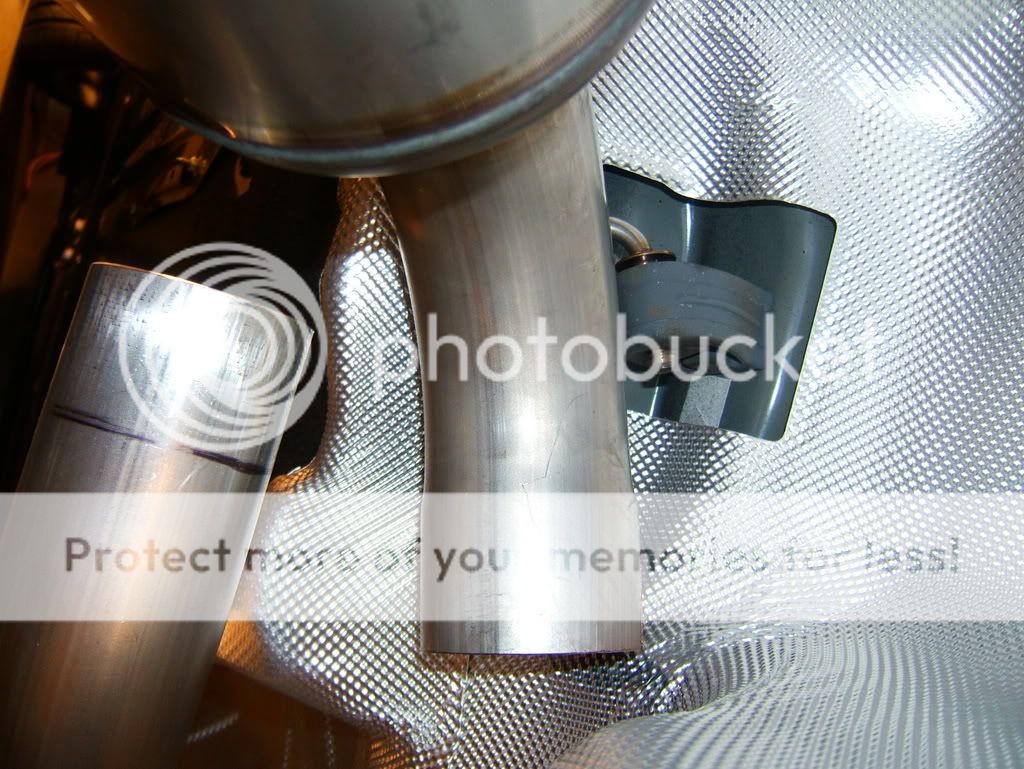
The next step will require you to cut the exhaust at an elbow bend just after the first resonator/muffler.
Here you'll need the rotozip, and your extension cord for that extra reach. Oh and the grind wheel for this step.
Here you'll definitly want some eye and glove protection. 8)
Here is the location where you'll be making the cut. It's made here becuase you'll have to
manuever the butt end of the exhaust out towards the back of the vehicle. Snaking it out through the rear suspension.
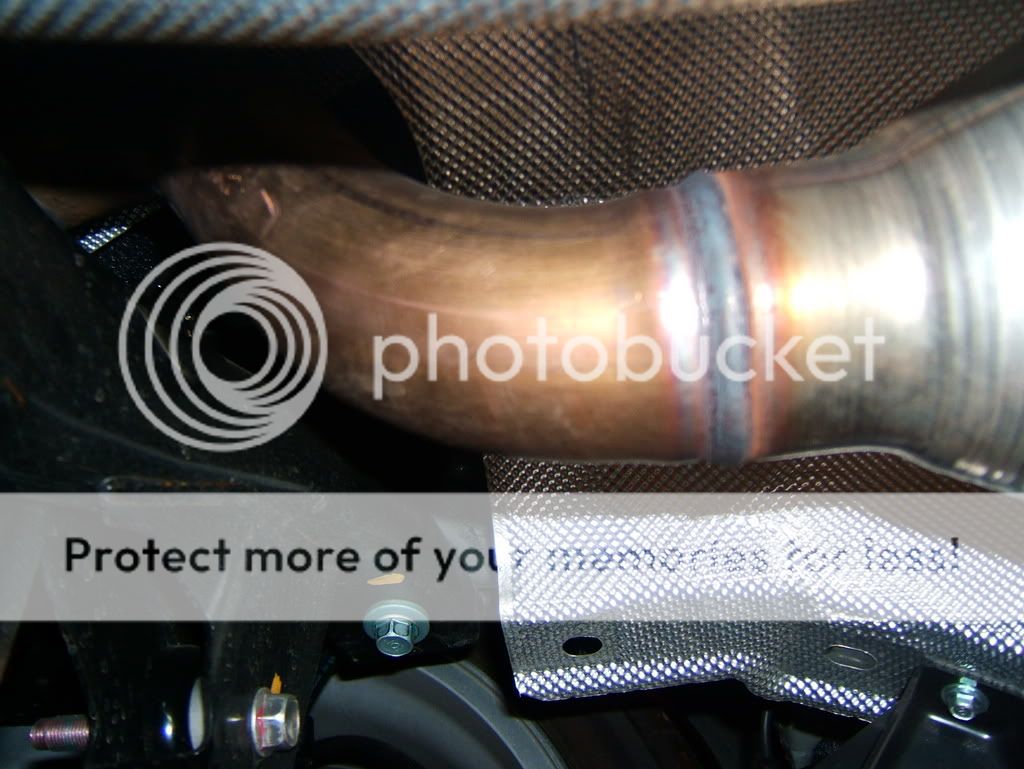
Here is the finished product after 5 minutes or so of cutting.
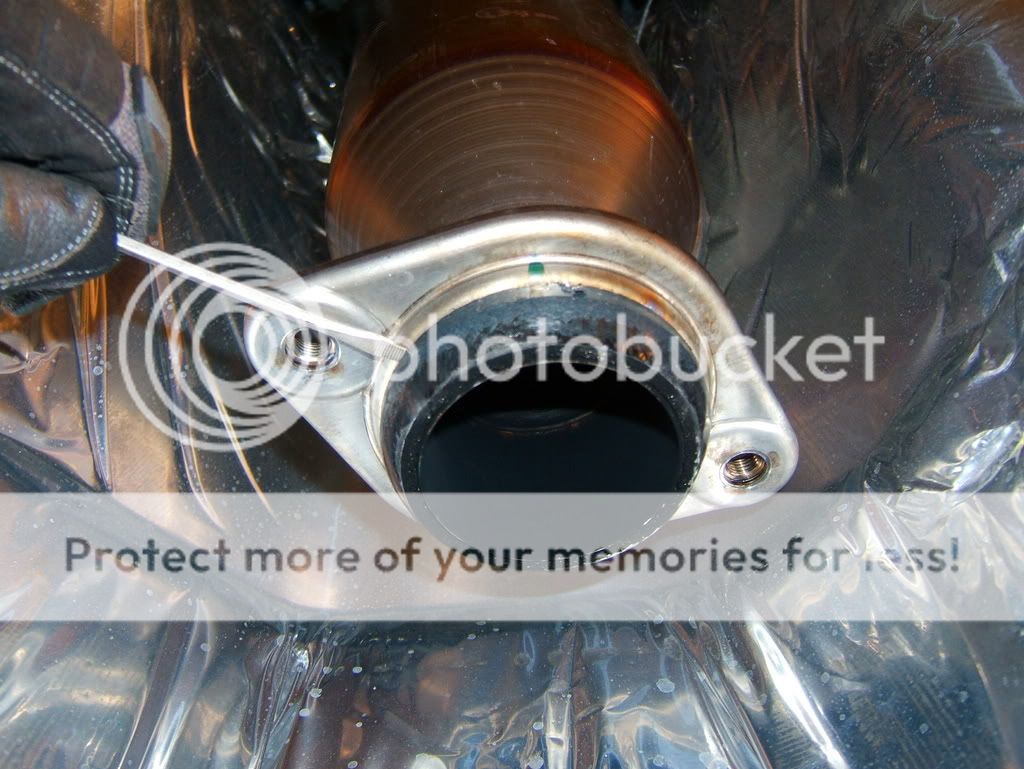
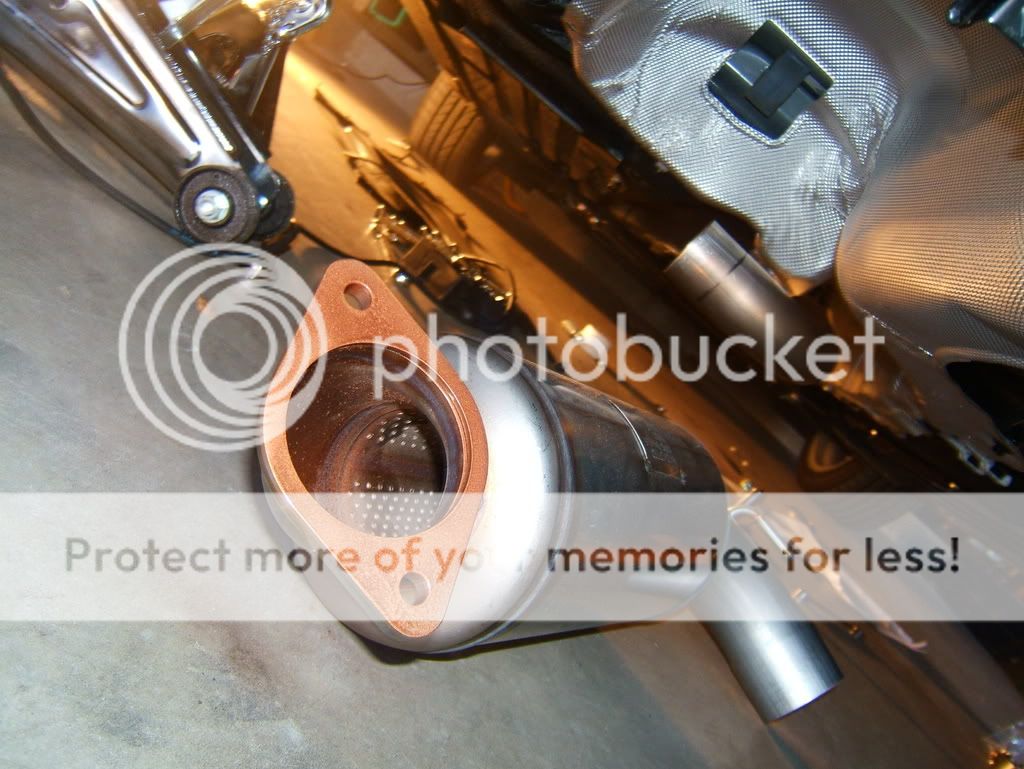
You'll need to take your flat head screw driver and take this DONUT gasket off of the secondary cat and
install the new one that came with the MazdaSpeed exhaust. It'll take some effort, but it comes off.")
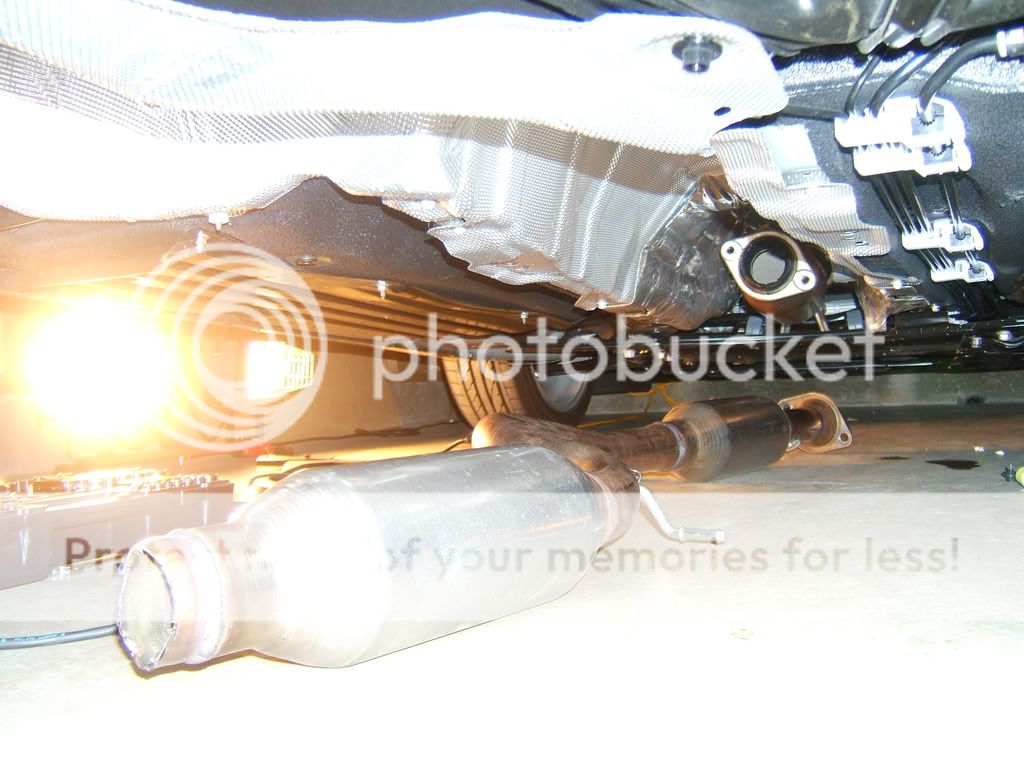
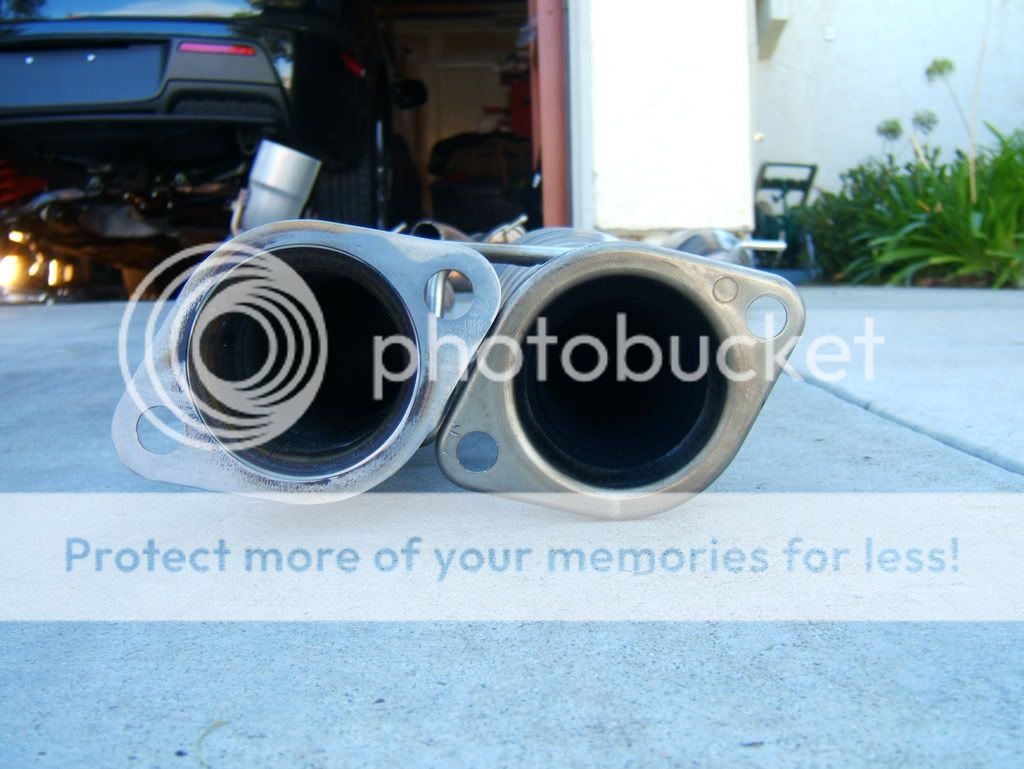
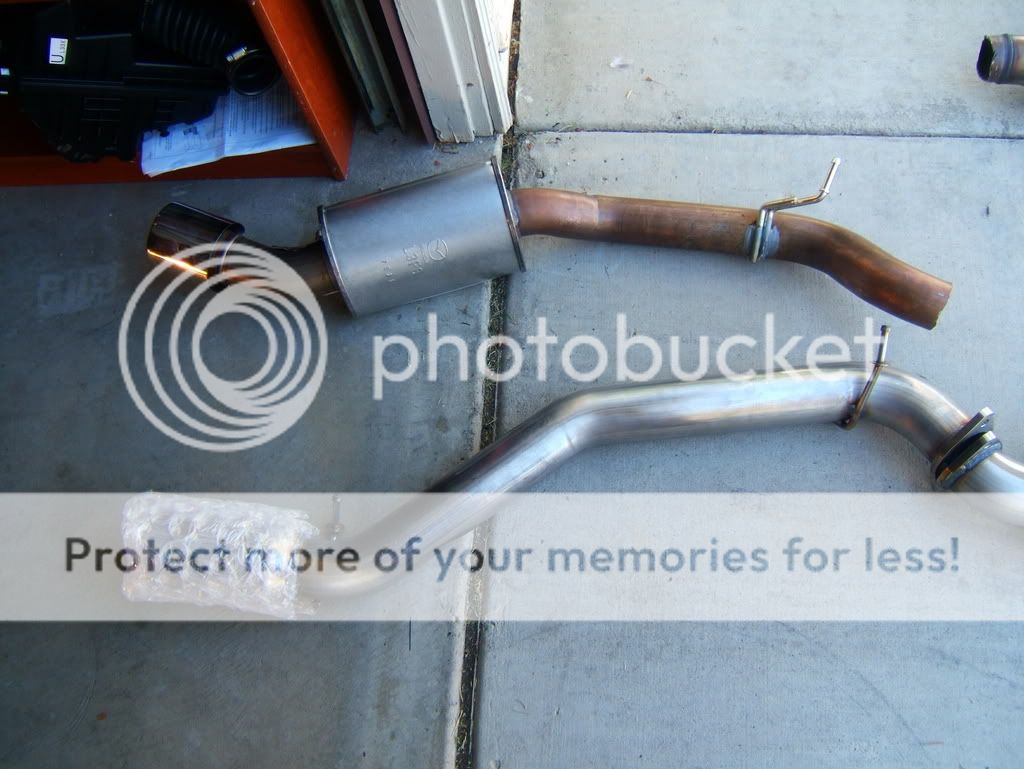
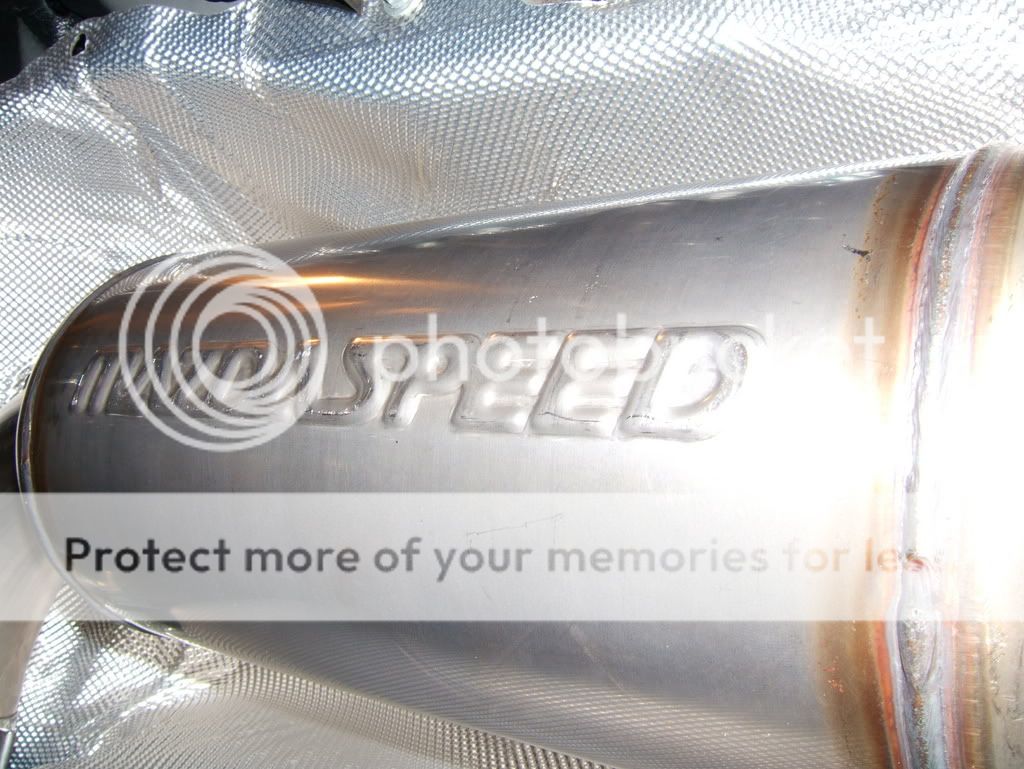
Here is what the stock exhaust looks like with the Speed exhaust side by side.

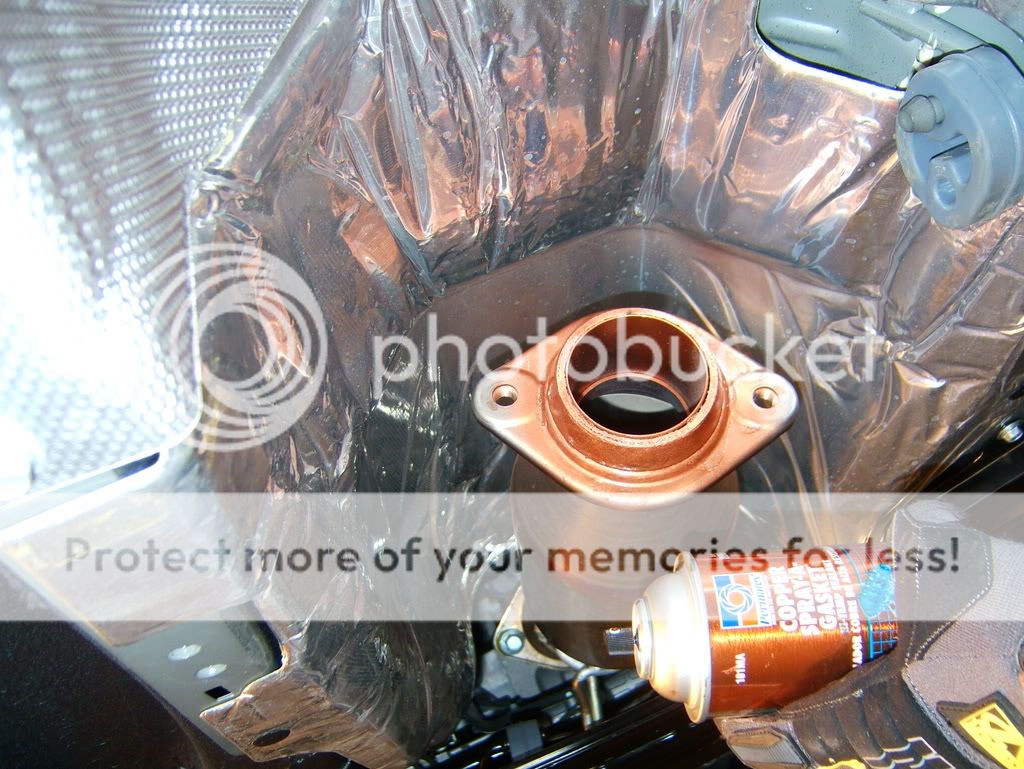
Here is the gasket spray that was mentioned in the not needed but recommended part of the listing.
Spray it on, and be sure to coat the flanges and all gaskets really good. It'll help make a good seal to keep the parts
from leaking exhaust gases. (Be sure you have a safe breathing distance when using this product.
Note: I coated the flange on the CAT as well as another coating over the new DONUT gasket for added measure of sealant.
Put a coating of the copper spray gasket here as well:
Here with the gasket that came with the system for the rear portion of the exhaust,
again with spray on gasket:

On the flangs for the new exhaust system, if you're concerned about the over spray,
use news paper or something, I'm not worried about it at all, so no worries.
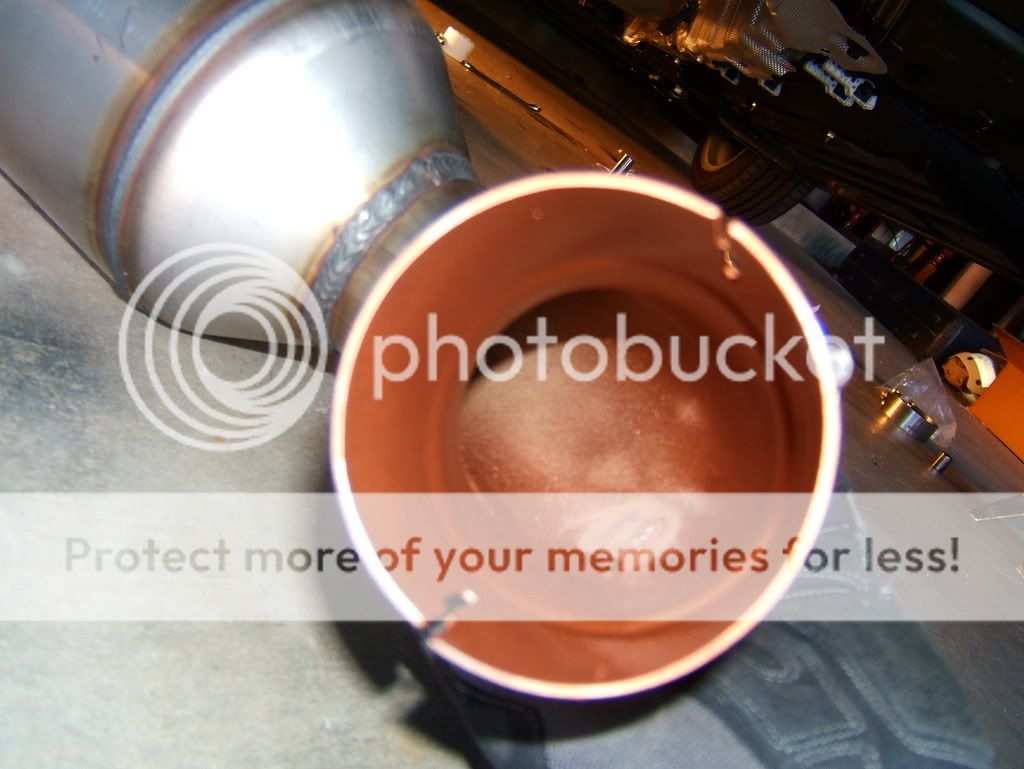
I even sprayed some inside the pipe where the muffler joins with the forward portion of the exhaust,
that way when you clamp it down, it won't leak. At least that's the idea anyways.
before
after
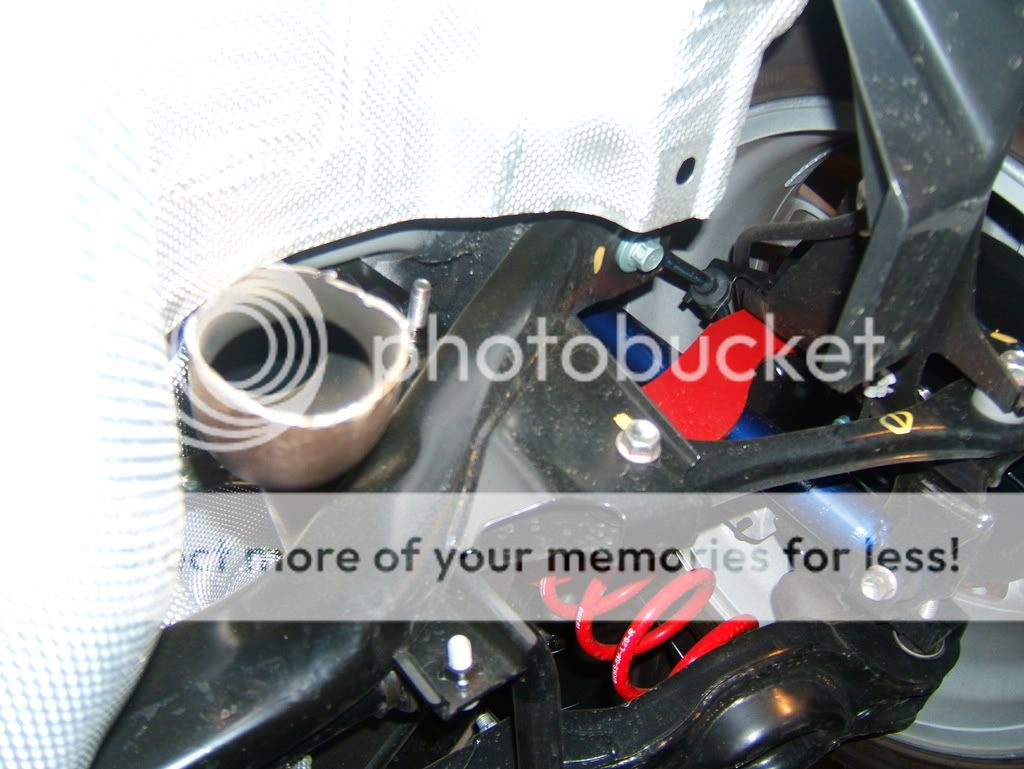
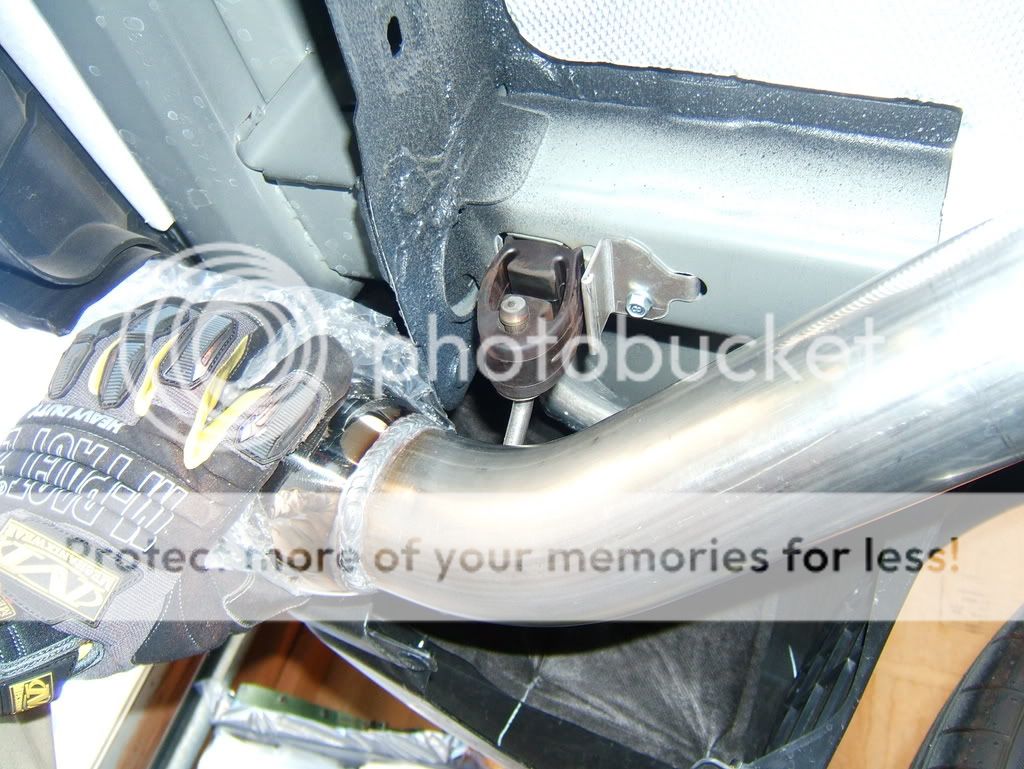
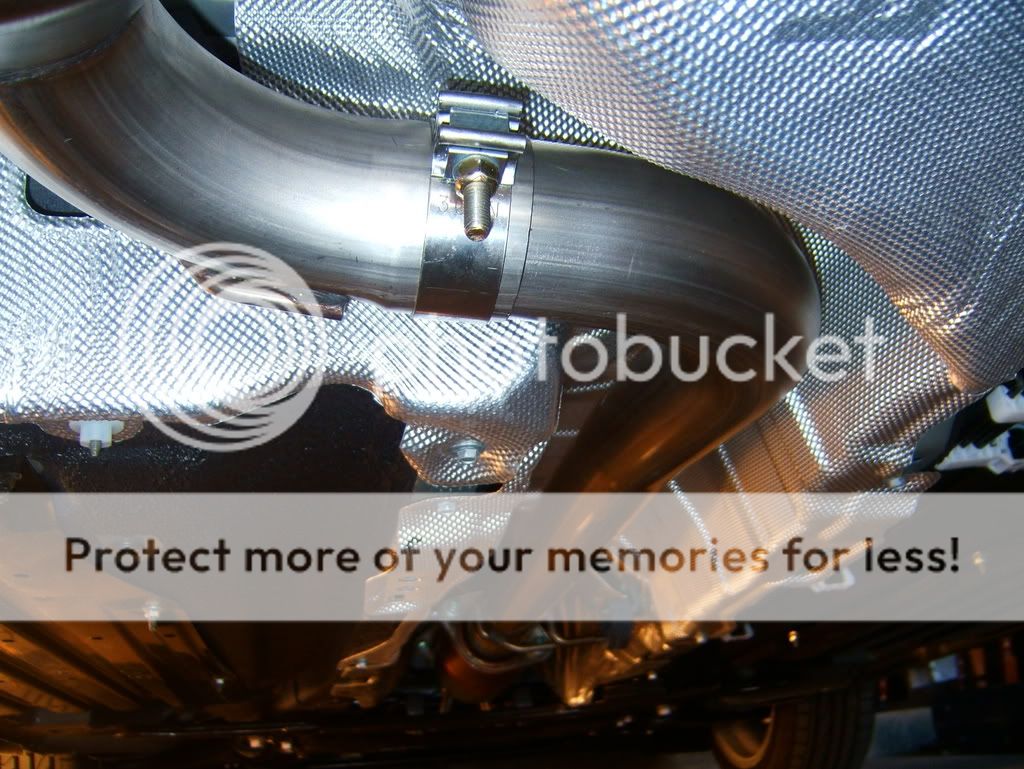
Here are shots of where the rubber hangers are to hang the new system in place.
I forgot to take a pic, but the first hanger is just after the secondary CAT.
Hang the forward piece of the system there.
Next hang the muffler portion at this rubber piece.
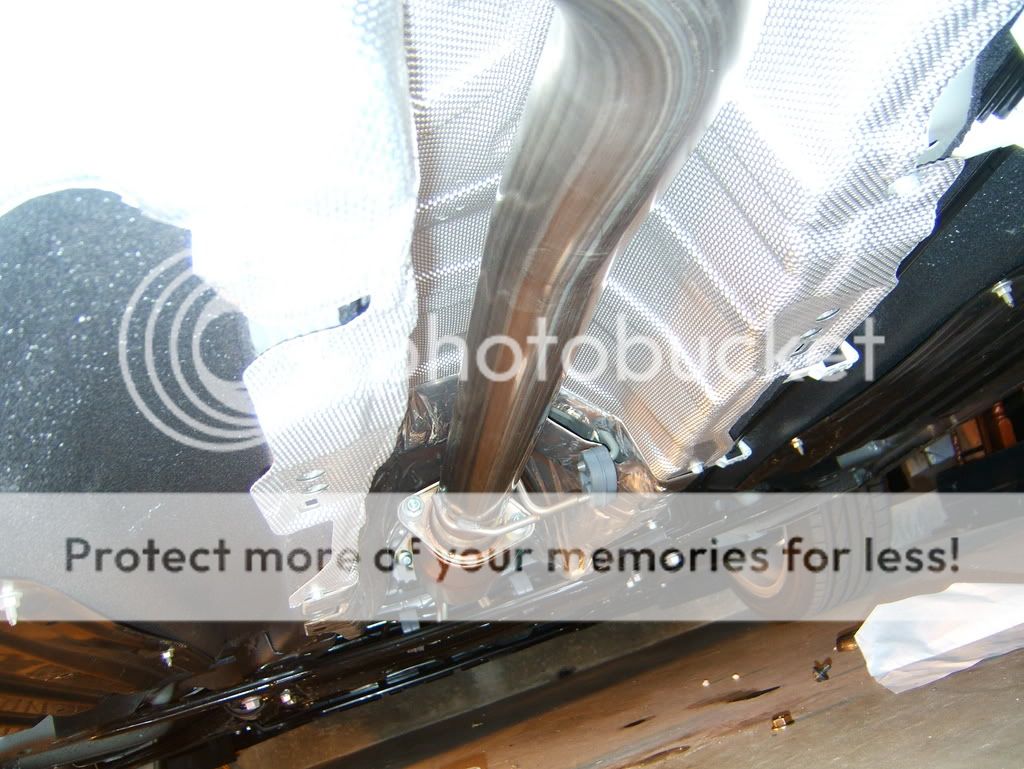
Here is the one for the forward part of the rear assembly.
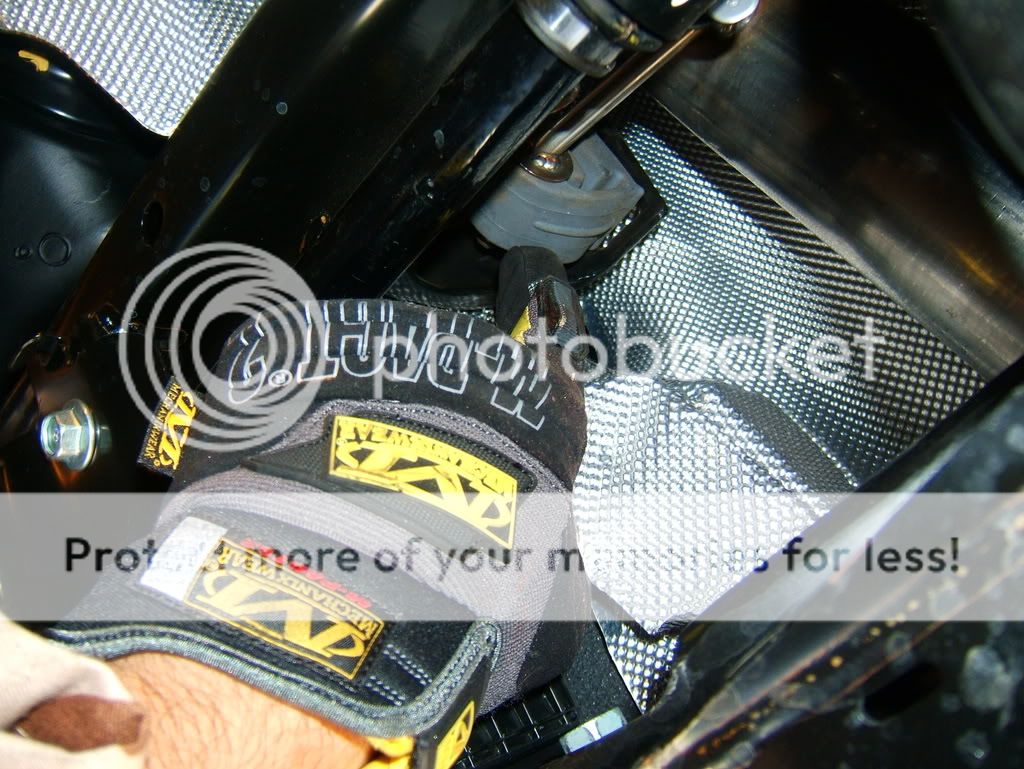
and the last rubber hanger where the tip hangs.
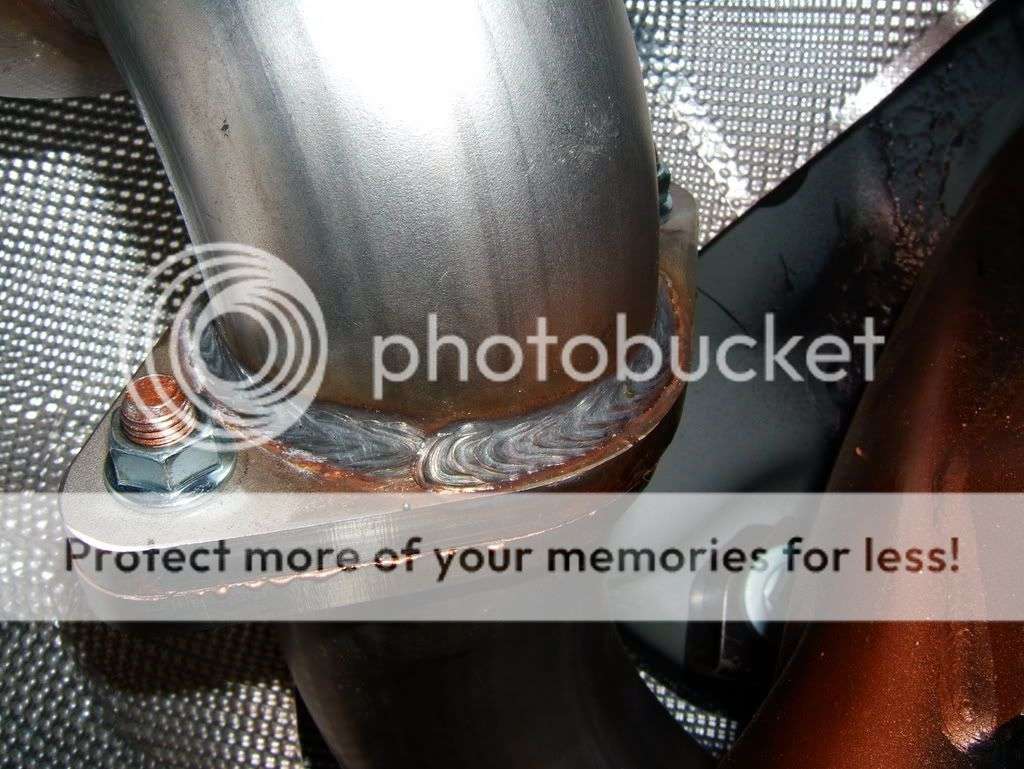
Here you'll start bolting up, and piecing together the parts. Make sure to keep all
bolts and connections only snug enough to where you have some play in the parts.
That way when you need to re-position something on
the piping, it won't leave you wondering why it isn't lining up correctly.
Once you have everything put togther and lined up correctly, tighten everything down.
Now I know they had on there a certain tq spec, but everything on there was tight when
you took it off. I just tightened it as tight as I could get it. Like, Tight as a tiga. (wink)
Put locktite on all the bolts before bolting up for extra tightening measure.
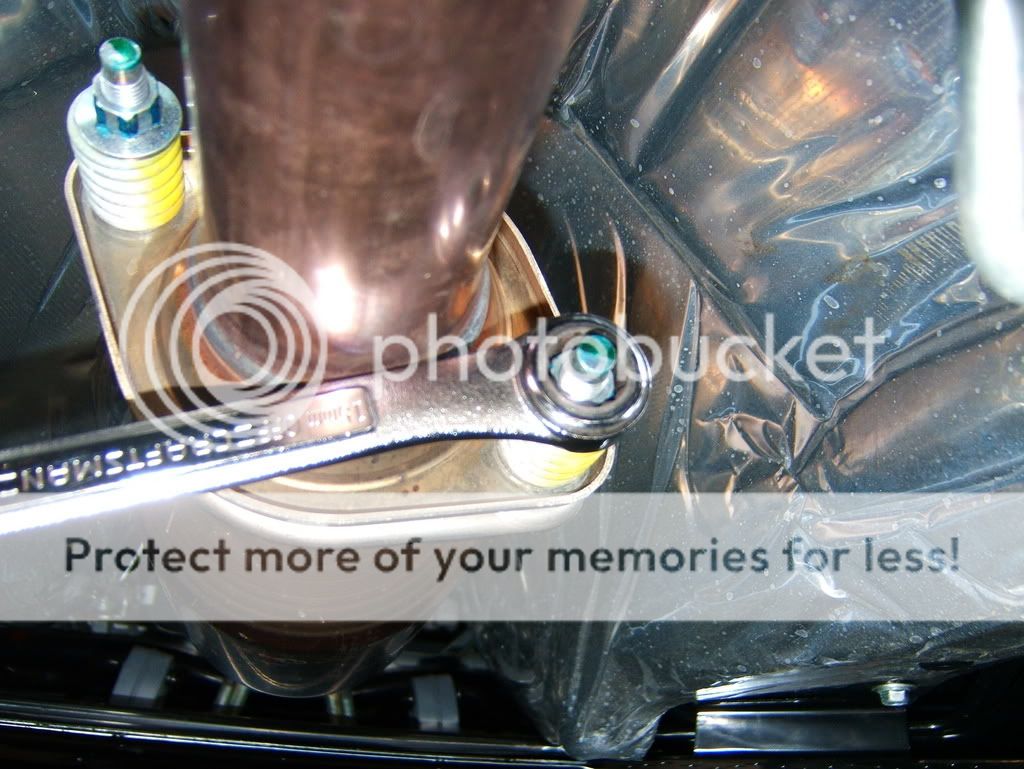
For the rear bolts, you'll need a wrench for the nut and a socket wrench for the bolt.
Hold the nut in place with the wrench that way it won't keep spinning on you when you try to tighten
up the bolts. Snug down one side, then the next. Snug them evenly as you go down.
4 turns for one side, then 4 turns for the other side and repeat. (just an example, you can
go as many turns as you want.) That way when you get them tight, the compression will be
evenly distributed on the entire flange once you go to seal the deal.
SEE?! (wink)

Here is what you should end up with once done.
The new tip:
The directions said to turn the car on, and place a rag to muffle the exhale of the gases.
This is so you can hear for leaks in the system before taking it off the jacks. If you hear nothing,
then you're good, if you hear something, locate the spot where the leak is coming from, and re-tighten.
Again, Check everything for tightness, and make sure everything is good to go before taking your car off the ramp.
Put that plate back under that car, and snug down those bolts. Clean up after yourself.
Here is the sound of the exhaust, sounds real good!

It took about an hour and a half getting this done. I'm sure it'll go much quicker if I didn't take
my sweet time to take pictures. This was fun to do, and I hope this will help you all when it comes
down to you all installing your own Cat Back Exhaust. I'm sure this is the same way for any other
CBE install on the Speed 3. If you have any questions, or extra tips, please post away!! Have fun,
and be safe when working under your car!!
-J
The outcome of the power increase wasn't what I expected however it doesn't really matter to me what the
numbers are at this point. Besides, it was hot as balls that morning, maybe should wait till it gets a bit cooler
then re-dyno for better numbers? Like in ideal weather conditions. Anyways, here we go on the installation of the CBE.
Make sure you have these tools handy:
*Please be careful when working under your car, and make sure it's properly secured so that it won't fall on
you when you're underneath it!!!*
- Nice even work surface, like a leveled drive way, or a garage. (don't want that car rolling
down hill and crushing you when you're under the car untorqueing those bolts!) :shock:
- Ipod and portable speakers (never know when you'll need some tunes to keep you goin!)
- RotoZip w/metal cutting grind wheels (hack saw will work, only it'll take forever).
- Extension cable for more reach with the RotoZip.
- Good socket set with ratchet. (you'll need a couple of sockets from this set ranging from 14mm to a 9/16 socket.
Make sure you have a set of deep sockets in your socket set.
- Jack and Jack stands
- Wheel chocks
Not needed,but recommended:
- Locktite
- flame retardant cover alls (you'll see why in bit)
- protective glasses/goggles (want anything falling in your eye? didn't think so :wink: )
- mechanix gloves (incase your exhaust system is still hot, or so when you're
untorqueing bolts, you won't bruise/cut a knuckle against all those metal surfaces!)
- Flat head screw driver
- Spray on copper gasket (bought at local automotive store 5 bux plus tax)
Here we go folks:
First you'll need to turn on some tunes with your handy dandy Ipod, and portable speakers as shown below. 8)
Next go ahead and chock the front wheels.
Jack up your car, and put the load on your jack stands. Be careful to make sure the support
is on the rails that jut out like rails. That'll hold the weight of the vehicle. Don't put the weight
on the actual side skirt of the car, it'll probably come up.... (wink)
Here's a sneak peek:
Once you get both sides of the vehicle jacked up, and secured; you'll need to crawl under
the car, (on your back for better view and less strain on your neck) and look for this panel under the car.
You'll be undoing EIGHT (8) bolts that look like this.
Undo these bolts and take off this plate. Be-carefull, it's sorta heavy, about 5-8 lbs, its
not much when you're standing up, but when you're lying on your back, and have to set it
aside as if you're doing a flat bench fly's, it'll fall quick. So handle it with care.
Here I used a closed end ratcheting wrench. These are handy, and if you can get a set, get one.
You'll see why when you use them in tight spaces.
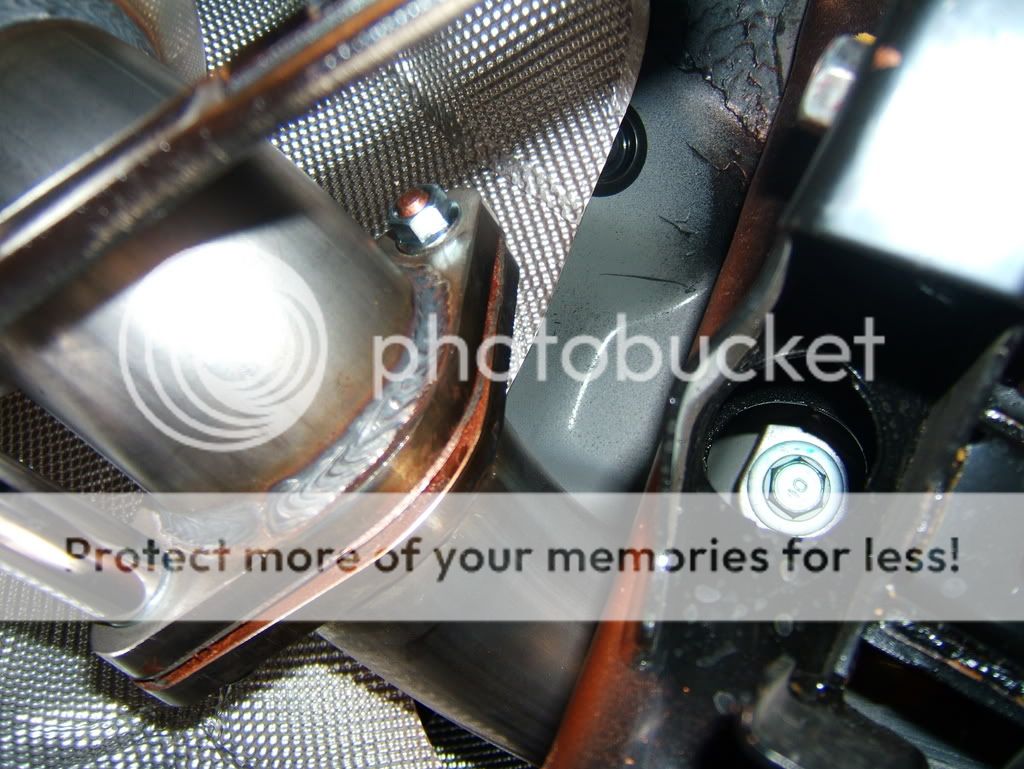
Now you'll have access to these bolts that hold the rear portion of the stock exhaust to the secondary
catalyc convertor. Undo both of these, and set them aside, you'll use the bolts and springs again for the new CBE.
Here is where you'll need to use some oomph to get these bolts loose. The gloves and the closed end wrench
helped here a lot. TRUST me.
Once you do the easiest part of the unbolting, just leave the piping there in its rubber hanger for support.
The next step will require you to cut the exhaust at an elbow bend just after the first resonator/muffler.
Here you'll need the rotozip, and your extension cord for that extra reach. Oh and the grind wheel for this step.
Here you'll definitly want some eye and glove protection. 8)
Here is the location where you'll be making the cut. It's made here becuase you'll have to
manuever the butt end of the exhaust out towards the back of the vehicle. Snaking it out through the rear suspension.
Here is the finished product after 5 minutes or so of cutting.
You'll need to take your flat head screw driver and take this DONUT gasket off of the secondary cat and
install the new one that came with the MazdaSpeed exhaust. It'll take some effort, but it comes off.
Here is what the stock exhaust looks like with the Speed exhaust side by side.
Here is the gasket spray that was mentioned in the not needed but recommended part of the listing.
Spray it on, and be sure to coat the flanges and all gaskets really good. It'll help make a good seal to keep the parts
from leaking exhaust gases. (Be sure you have a safe breathing distance when using this product.
Note: I coated the flange on the CAT as well as another coating over the new DONUT gasket for added measure of sealant.
Put a coating of the copper spray gasket here as well:
Here with the gasket that came with the system for the rear portion of the exhaust,
again with spray on gasket:
On the flangs for the new exhaust system, if you're concerned about the over spray,
use news paper or something, I'm not worried about it at all, so no worries.
I even sprayed some inside the pipe where the muffler joins with the forward portion of the exhaust,
that way when you clamp it down, it won't leak. At least that's the idea anyways.
before
after
Here are shots of where the rubber hangers are to hang the new system in place.
I forgot to take a pic, but the first hanger is just after the secondary CAT.
Hang the forward piece of the system there.
Next hang the muffler portion at this rubber piece.
Here is the one for the forward part of the rear assembly.
and the last rubber hanger where the tip hangs.
Here you'll start bolting up, and piecing together the parts. Make sure to keep all
bolts and connections only snug enough to where you have some play in the parts.
That way when you need to re-position something on
the piping, it won't leave you wondering why it isn't lining up correctly.
Once you have everything put togther and lined up correctly, tighten everything down.
Now I know they had on there a certain tq spec, but everything on there was tight when
you took it off. I just tightened it as tight as I could get it. Like, Tight as a tiga. (wink)
Put locktite on all the bolts before bolting up for extra tightening measure.
For the rear bolts, you'll need a wrench for the nut and a socket wrench for the bolt.
Hold the nut in place with the wrench that way it won't keep spinning on you when you try to tighten
up the bolts. Snug down one side, then the next. Snug them evenly as you go down.
4 turns for one side, then 4 turns for the other side and repeat. (just an example, you can
go as many turns as you want.) That way when you get them tight, the compression will be
evenly distributed on the entire flange once you go to seal the deal.
SEE?! (wink)
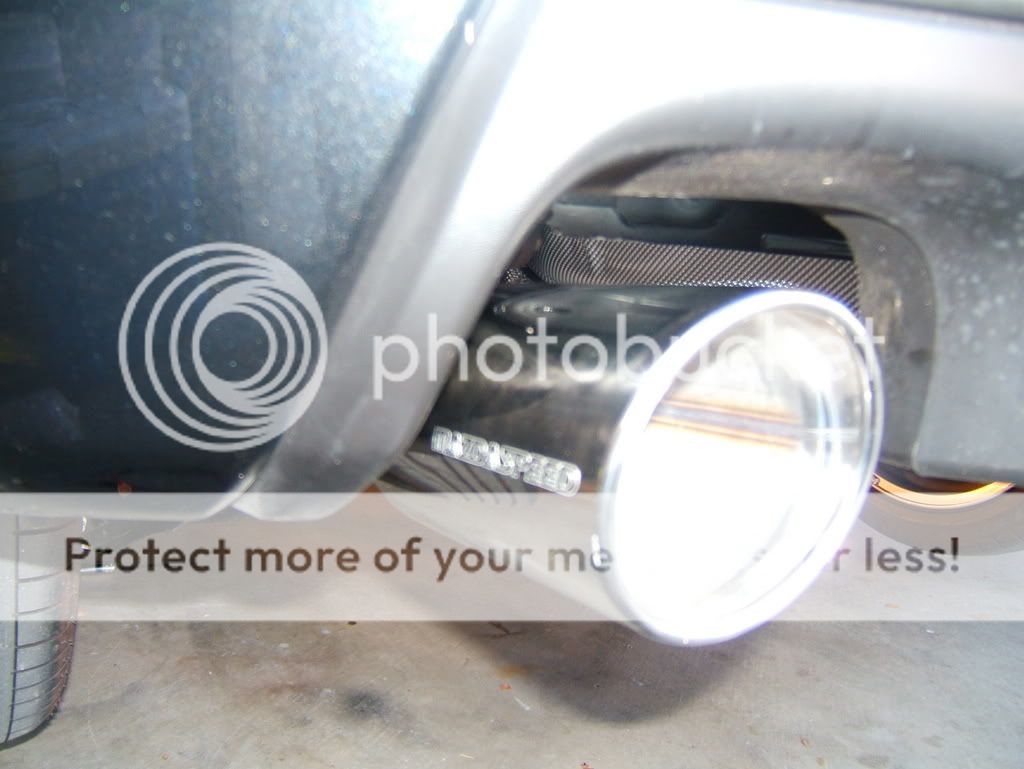
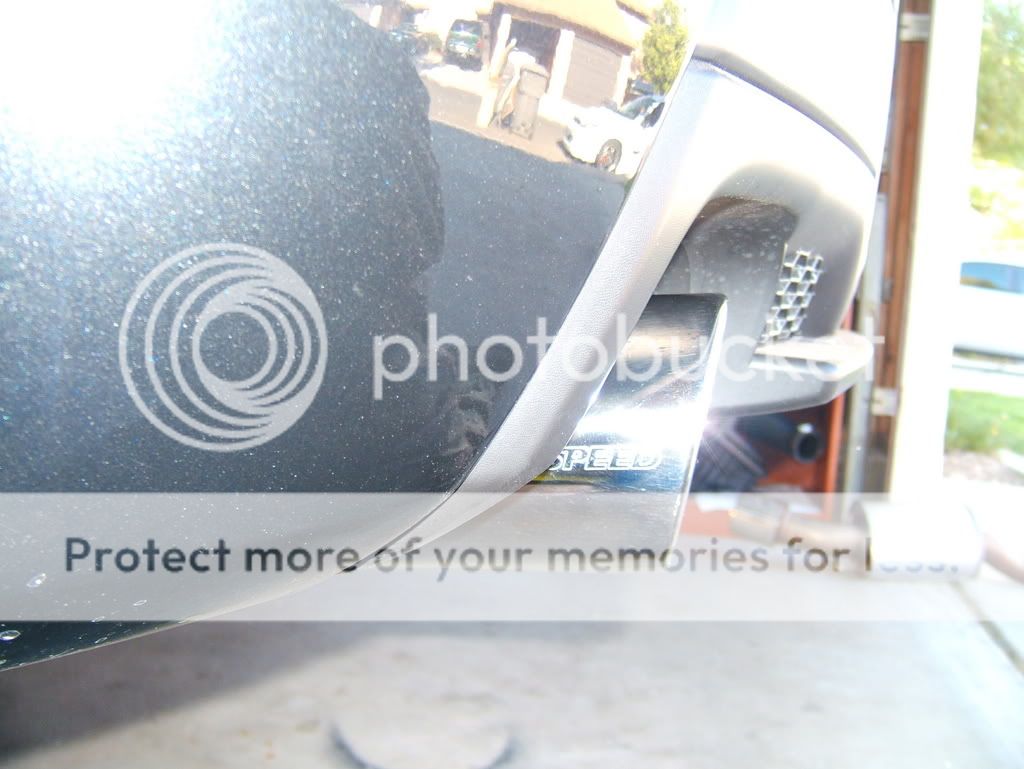
Here is what you should end up with once done.
The new tip:
The directions said to turn the car on, and place a rag to muffle the exhale of the gases.
This is so you can hear for leaks in the system before taking it off the jacks. If you hear nothing,
then you're good, if you hear something, locate the spot where the leak is coming from, and re-tighten.
Again, Check everything for tightness, and make sure everything is good to go before taking your car off the ramp.
Put that plate back under that car, and snug down those bolts. Clean up after yourself.
Here is the sound of the exhaust, sounds real good!
It took about an hour and a half getting this done. I'm sure it'll go much quicker if I didn't take
my sweet time to take pictures. This was fun to do, and I hope this will help you all when it comes
down to you all installing your own Cat Back Exhaust. I'm sure this is the same way for any other
CBE install on the Speed 3. If you have any questions, or extra tips, please post away!! Have fun,
and be safe when working under your car!!
-J
Last edited: