
You are using an out of date browser. It may not display this or other websites correctly.
You should upgrade or use an alternative browser.
You should upgrade or use an alternative browser.
What have you done to your Miata today?
- Thread starter Antoine
- Start date
- :
- 92 & 16 Meyatas
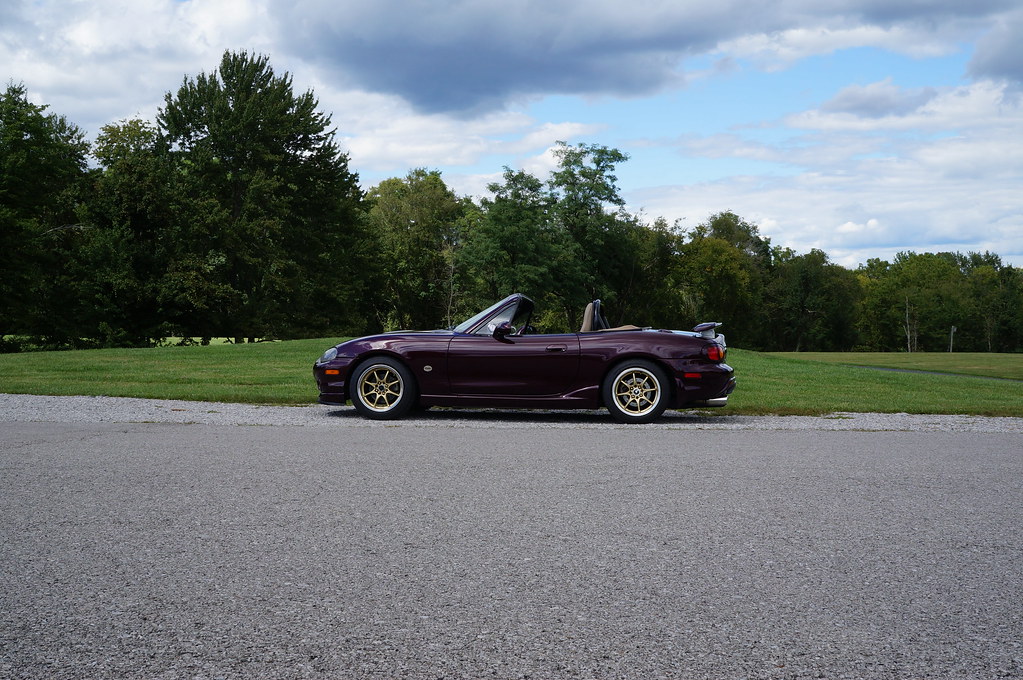
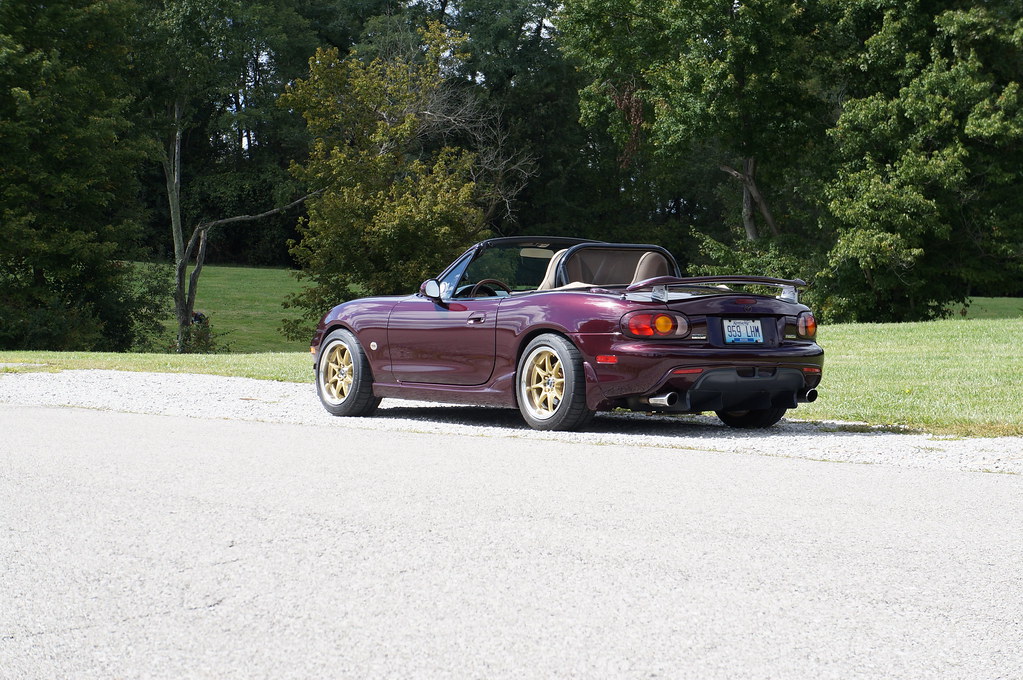
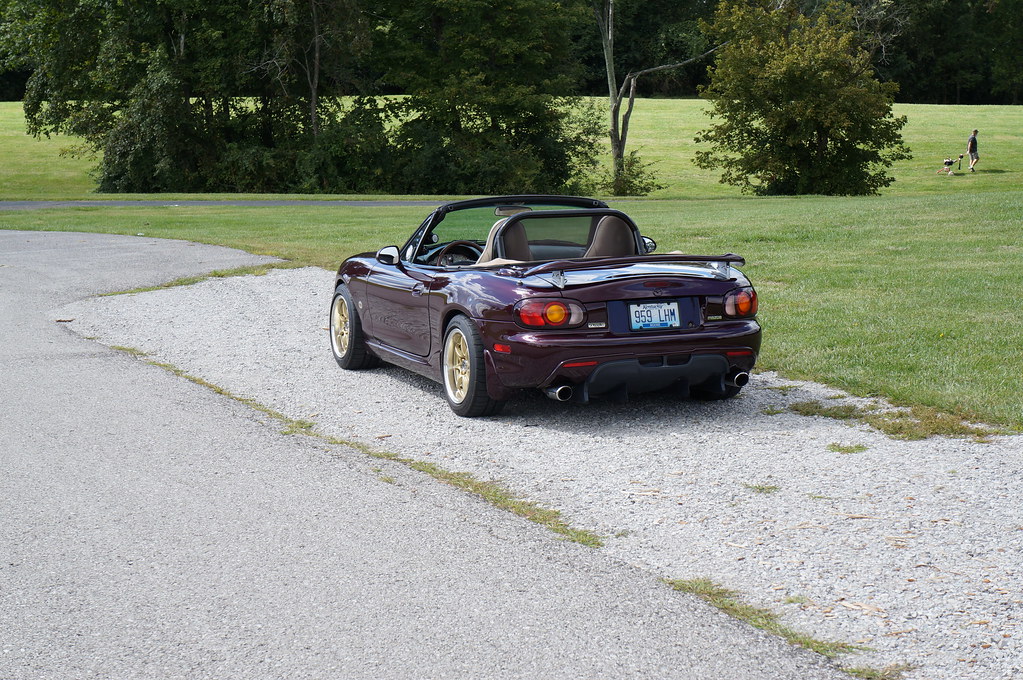
Some shots from today:
Nice!


- :
- 92 & 16 Meyatas
Nice work brotha!
Maff, if you decide you need something to do this winter, you let me know... ill send you down another rack to tinker with LOL
Just want it depowered? Let's do it. It's not a difficult job at all if you've got the tools, and I've got the tools
 . It's time consuming, but it's not hard.
USPS delivered (literally) yesterday, despite the Tropical Storm. With the kids home and our power intermittent (so many chain saws running near by), I figured I'd go play with the parts in the shop.
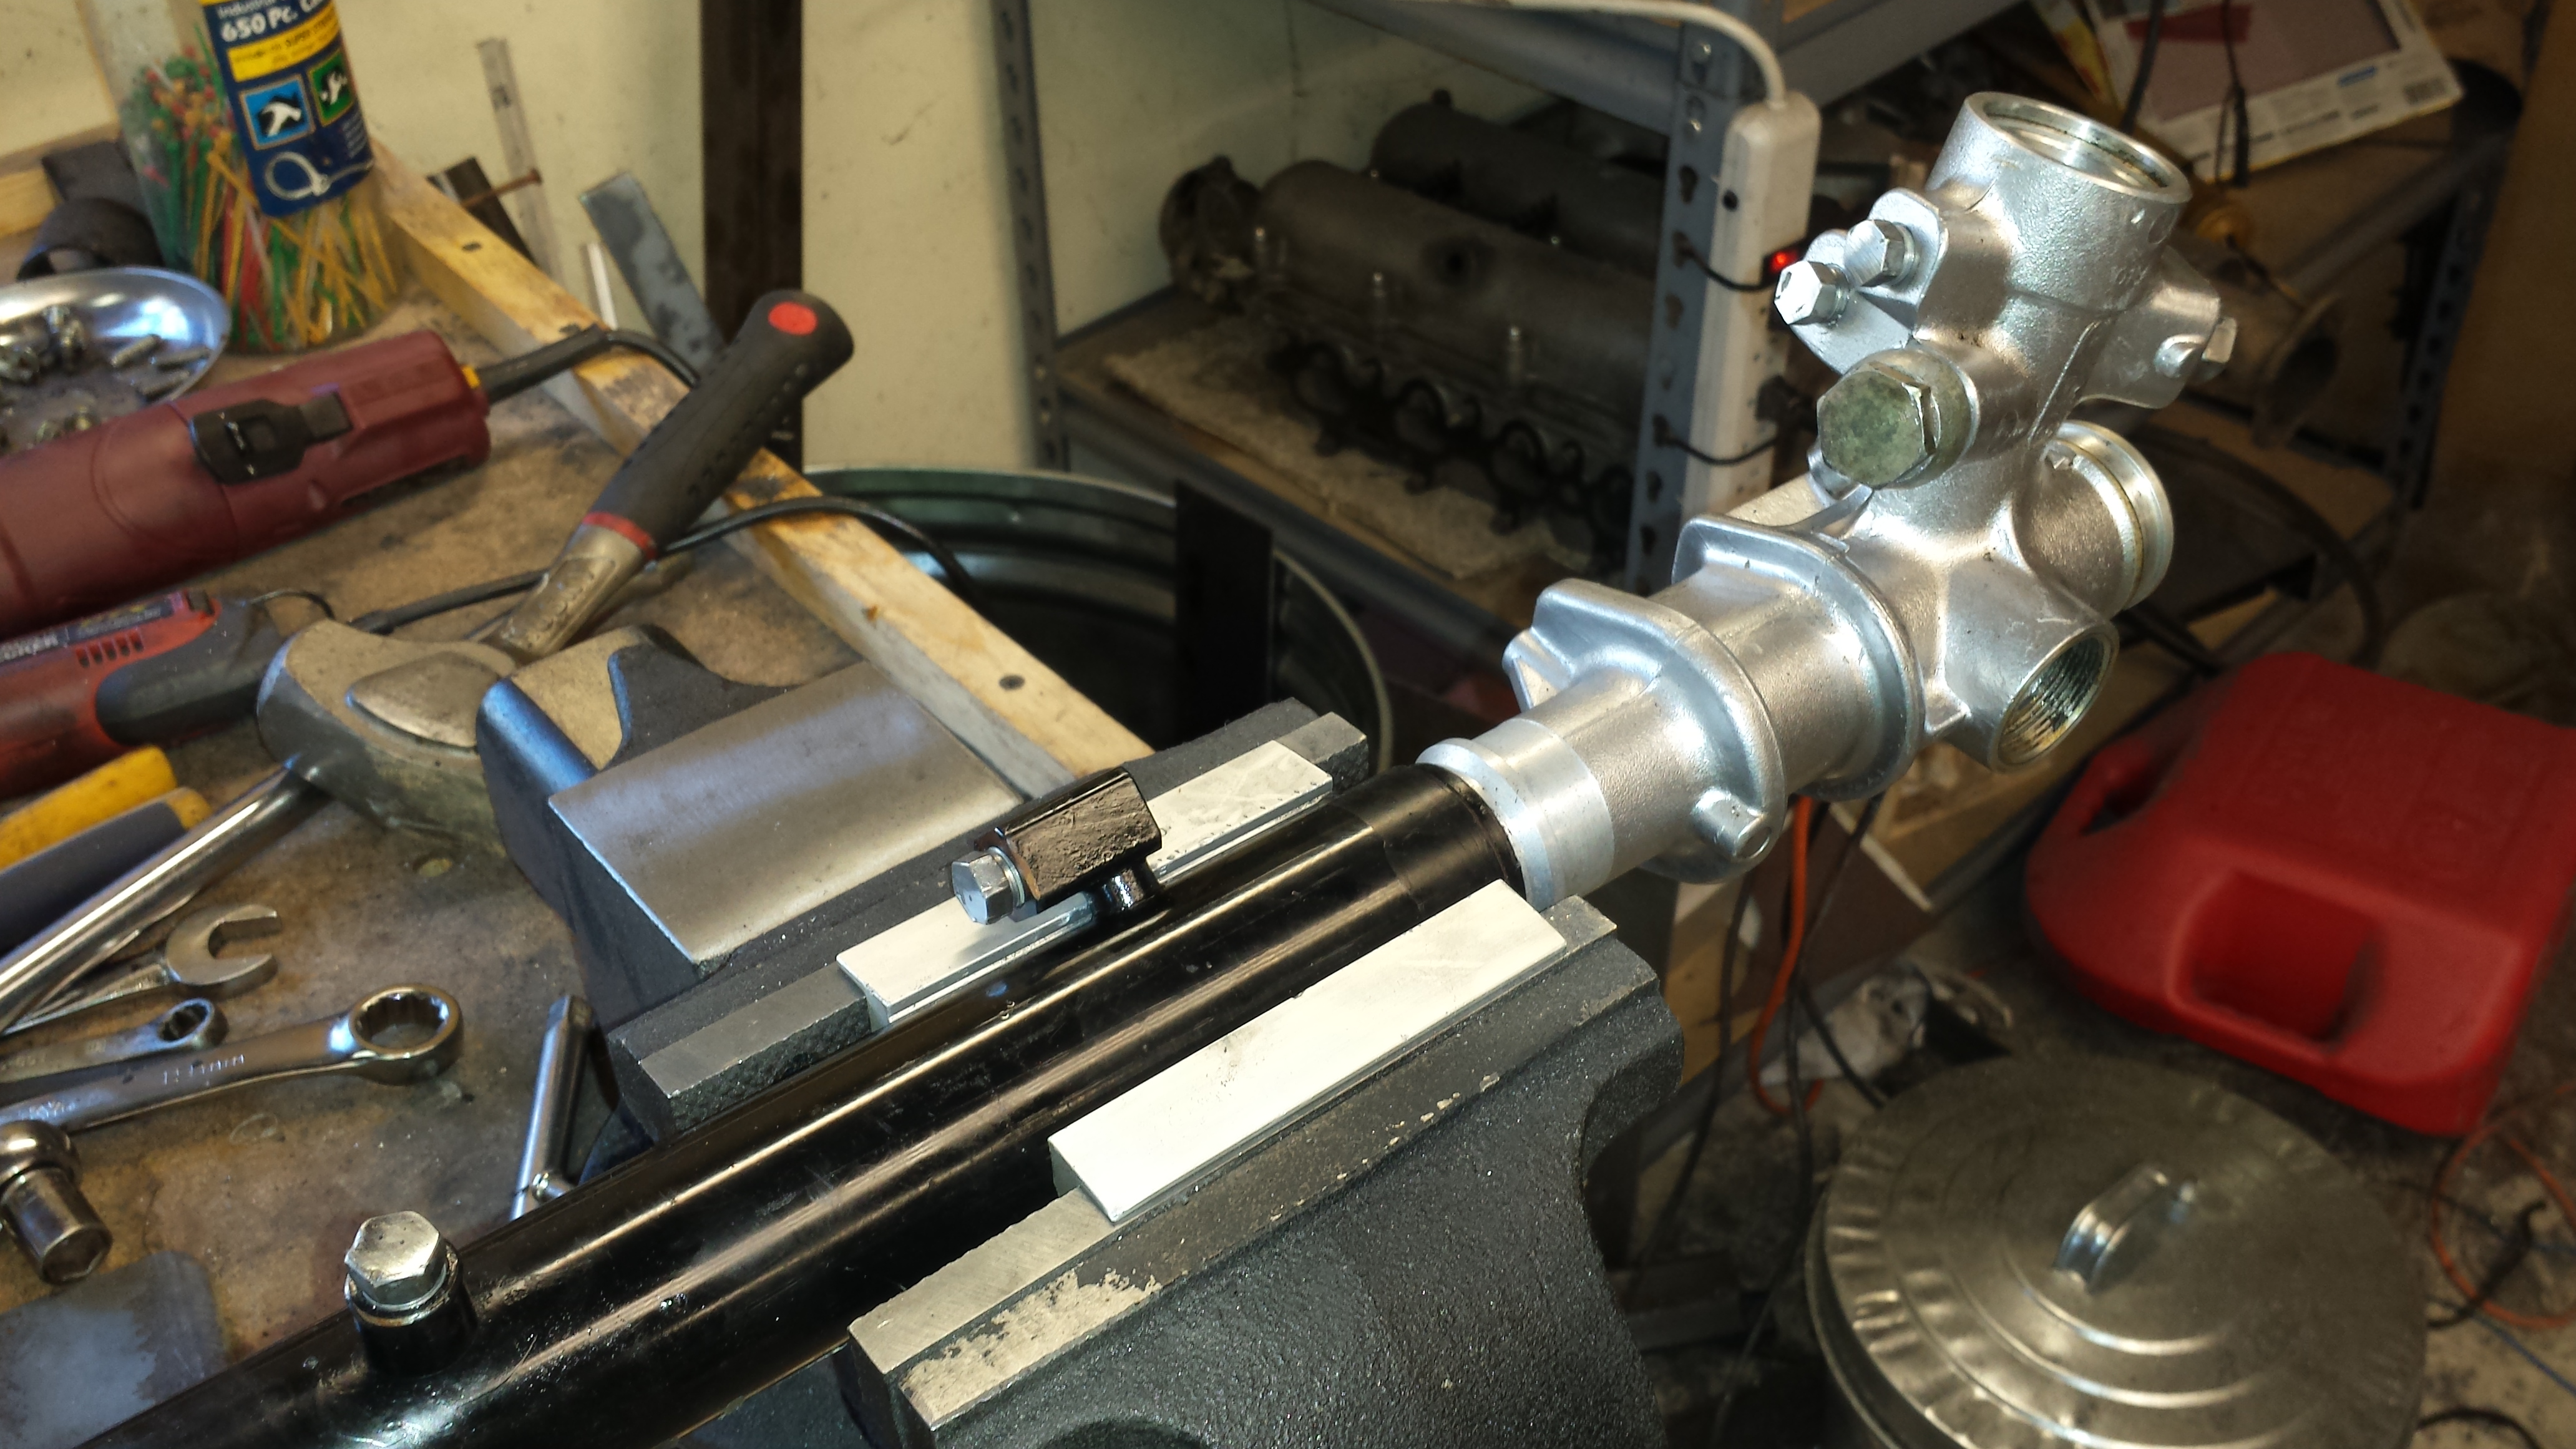
Doing it this way means the tilt function goes out the window (moment of silence...) but it's going to make it a lot simpler. And the angle of the Miata wheel is fine so I'm not really torn up about it. I'll just need to be careful to get the angle close-ish to stock, but it should work great.

Roughly where the cut will need to be. There's about an inch of depth in the non-splined area of the adapter, so the weld will be on the fully cylindrical section:

Artist's rendition:
Doing it this way means the tilt function goes out the window (moment of silence...) but it's going to make it a lot simpler. And the angle of the Miata wheel is fine so I'm not really torn up about it. I'll just need to be careful to get the angle close-ish to stock, but it should work great.
Roughly where the cut will need to be. There's about an inch of depth in the non-splined area of the adapter, so the weld will be on the fully cylindrical section:
Artist's rendition:
Last edited:
Reassembled and reinstalled shocks after they've been massaged by Koni.

Installed 1/2" steering rack risers for bumpsteer correction:

Back when I first ran 13s several years ago, for my first couple events I ran the car WAY too low. The rack hasn't been messed with since then, apparently, because I found that the lowest point on the car at that point was the steering rack bolts. Got to play with the new cordless angle grinder so I could knock the burr on the bolt that this caused when it self-clearanced and get the bolt out without boogering the captive nut in the subframe. It wouldn't have been the end of the world as it's easily accessible for repair, but the best kind of repair is the kind you never have to make IMO.

Then I set up some "parallels" to take more accurate measurements on the steering columns now that I have a better idea on how it's all going to go together so I can get a proper length for the spacer I need to make. The dimension isn't SUPER critical, 1/8" here or there won't make a massive difference, but, you know, better is better.
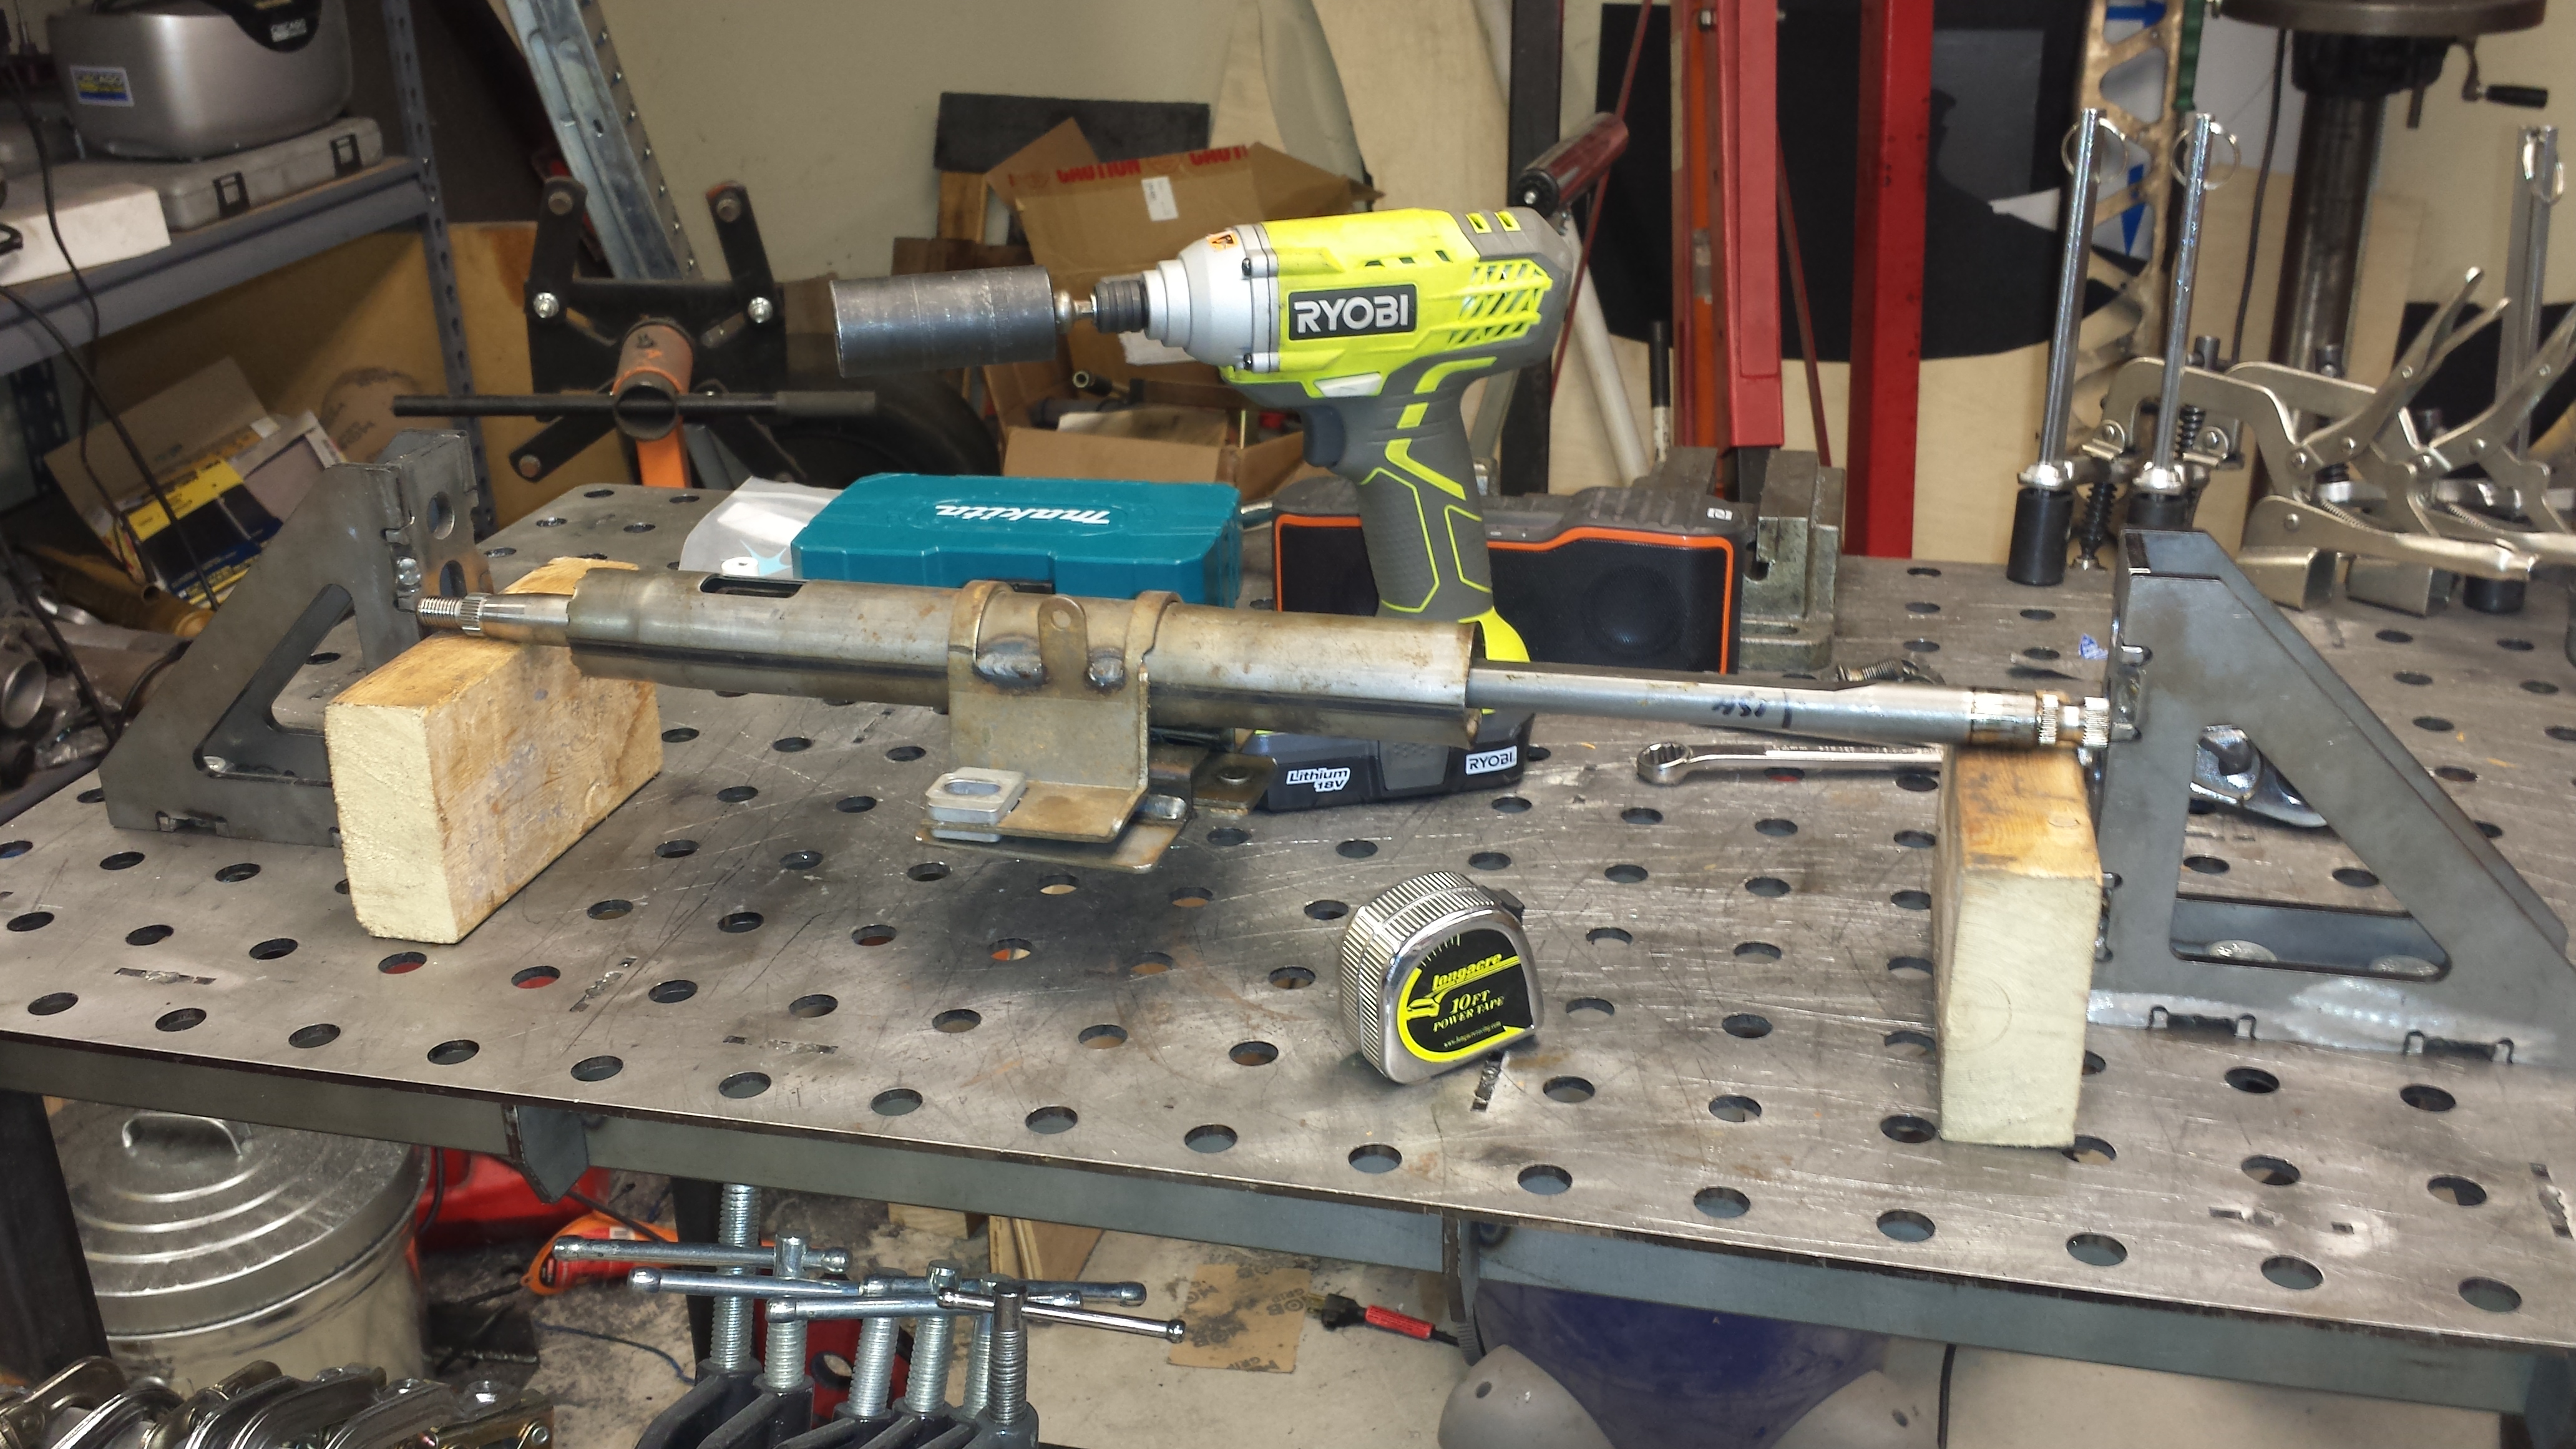
Hard to see because there's a ratchet in the background, but the GM column is 3-7/16" shorter than the Miata column.
Installed 1/2" steering rack risers for bumpsteer correction:
Back when I first ran 13s several years ago, for my first couple events I ran the car WAY too low. The rack hasn't been messed with since then, apparently, because I found that the lowest point on the car at that point was the steering rack bolts. Got to play with the new cordless angle grinder so I could knock the burr on the bolt that this caused when it self-clearanced and get the bolt out without boogering the captive nut in the subframe. It wouldn't have been the end of the world as it's easily accessible for repair, but the best kind of repair is the kind you never have to make IMO.
Then I set up some "parallels" to take more accurate measurements on the steering columns now that I have a better idea on how it's all going to go together so I can get a proper length for the spacer I need to make. The dimension isn't SUPER critical, 1/8" here or there won't make a massive difference, but, you know, better is better.
Hard to see because there's a ratchet in the background, but the GM column is 3-7/16" shorter than the Miata column.
Maff, did my heart good to see someone else monopolizing posting duties.
Time has come for me to head back to work. While out at the local cars & coffee yesterday, when I left I had some stuttering. It cleared up though. Then the exhaust was really loud. When I got home crawled underneath to find one of the bolts connecting the header outlet to the rest of the system had backed off. Tightened that up and it was fine. Then later yesterday when I went to run an errand, I again had stuttering when she was cold. First thing this morning I pulled the spark plugs and found coolant in cylinder 4 (again). Looks like the wife won't be driving her while I'm gone this time.
Time has come for me to head back to work. While out at the local cars & coffee yesterday, when I left I had some stuttering. It cleared up though. Then the exhaust was really loud. When I got home crawled underneath to find one of the bolts connecting the header outlet to the rest of the system had backed off. Tightened that up and it was fine. Then later yesterday when I went to run an errand, I again had stuttering when she was cold. First thing this morning I pulled the spark plugs and found coolant in cylinder 4 (again). Looks like the wife won't be driving her while I'm gone this time.
Beat up on some V8 iron today on a power course, which was fun.
Super fun course, and a fun event spent mostly tuning in the new shocks. The last couple of runs were MONEY on the setup. So much more composed, but a course that only had about 4 real corners didn't really favor the Miata over the C7 Vette that pipped me by .022 for FTD overall
(it doesn't hurt that Steve can WHEEL that thing. He's got...a LOT more national level trophies than I do lol)
Blue Santa stopped by today
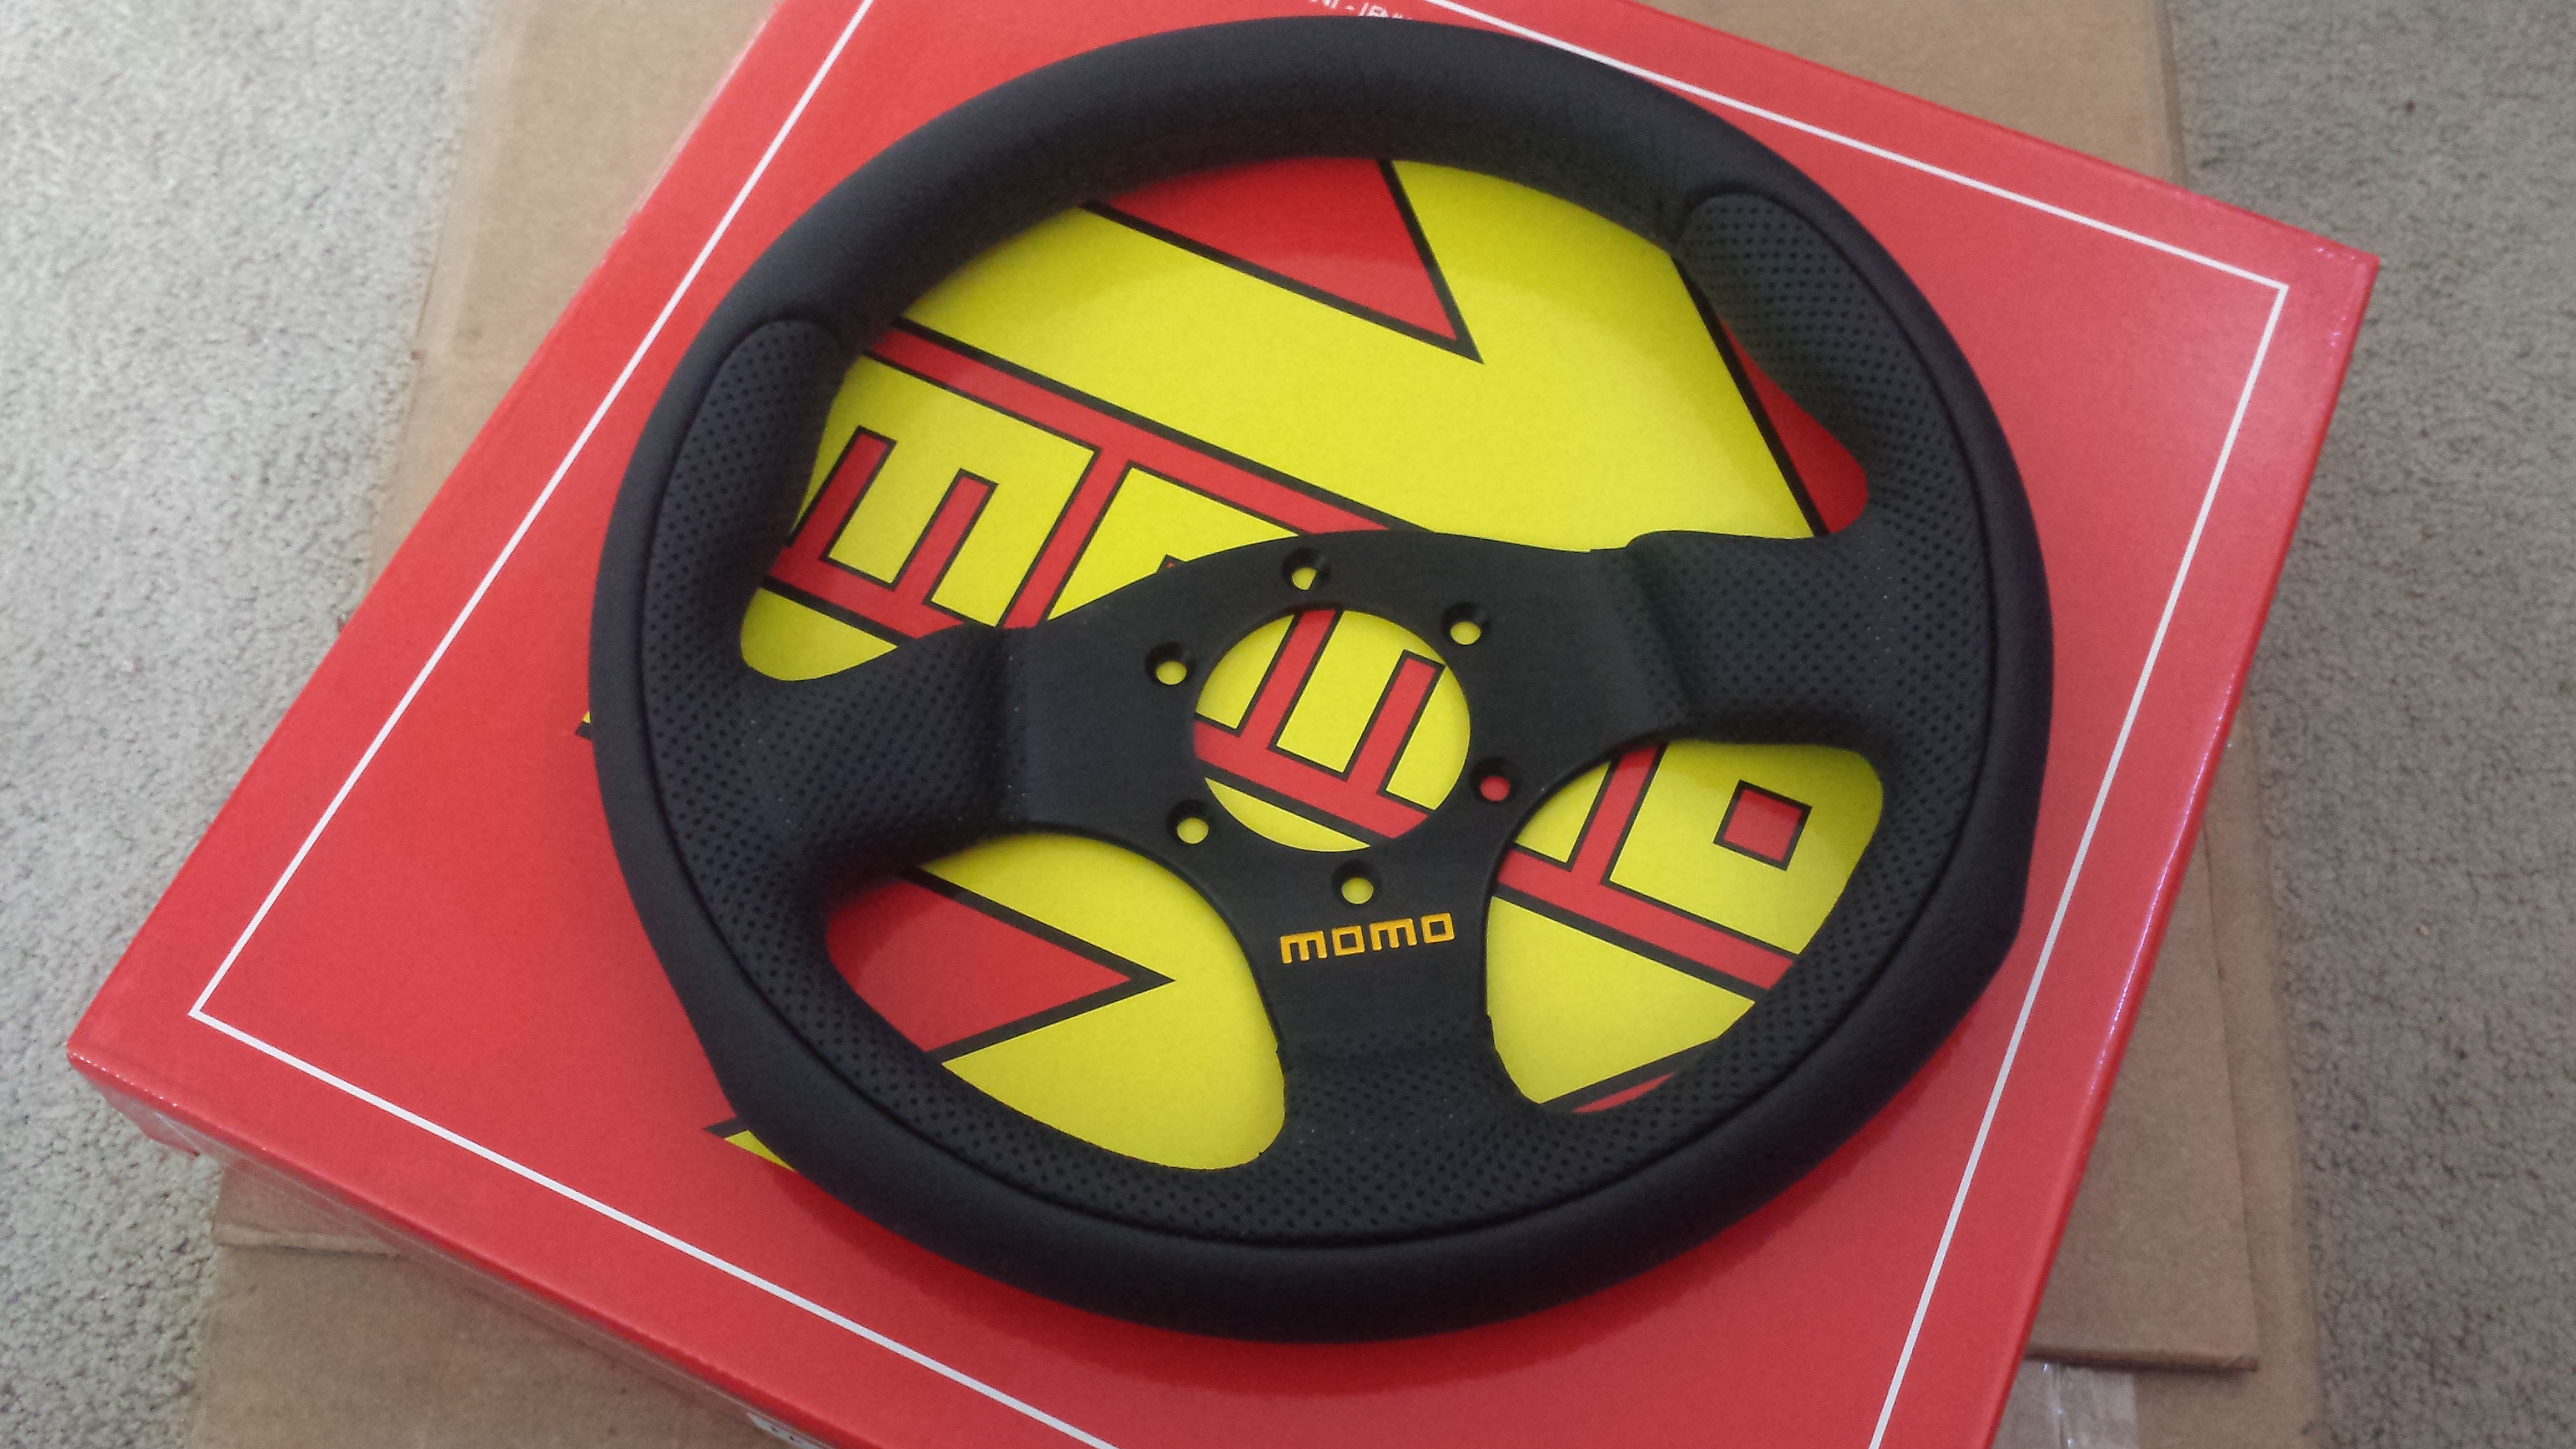
With the EPS and the quicker rack, I wanted to go with a smaller wheel to minimize the distance my hands need to travel for each input. I have a 350mm / 14"-ish wheel on there now, and every inch of that (hur hur) is necessary to turn the manual rack on big rubber. This is a 280mm / 11" wheel, which is an almost 25% reduction in circumference. The smaller wheel and faster rack will make a significant reduction in the distance my hands need to travel for an equivalent input to the tires. Which means I'm probably going to WAY over-turn and over correct for the first little while once the new setup goes on, but that's a training issue, and means that WHEN I want to turn in faster (which is quite a lot with the fully manual setup), I'll be able to.
With the EPS and the quicker rack, I wanted to go with a smaller wheel to minimize the distance my hands need to travel for each input. I have a 350mm / 14"-ish wheel on there now, and every inch of that (hur hur) is necessary to turn the manual rack on big rubber. This is a 280mm / 11" wheel, which is an almost 25% reduction in circumference. The smaller wheel and faster rack will make a significant reduction in the distance my hands need to travel for an equivalent input to the tires. Which means I'm probably going to WAY over-turn and over correct for the first little while once the new setup goes on, but that's a training issue, and means that WHEN I want to turn in faster (which is quite a lot with the fully manual setup), I'll be able to.
Last edited:

- :
- 2003 Mazdaspeed Protege 1660, 2004 Winning Blue RX8, 2005 Mazda6
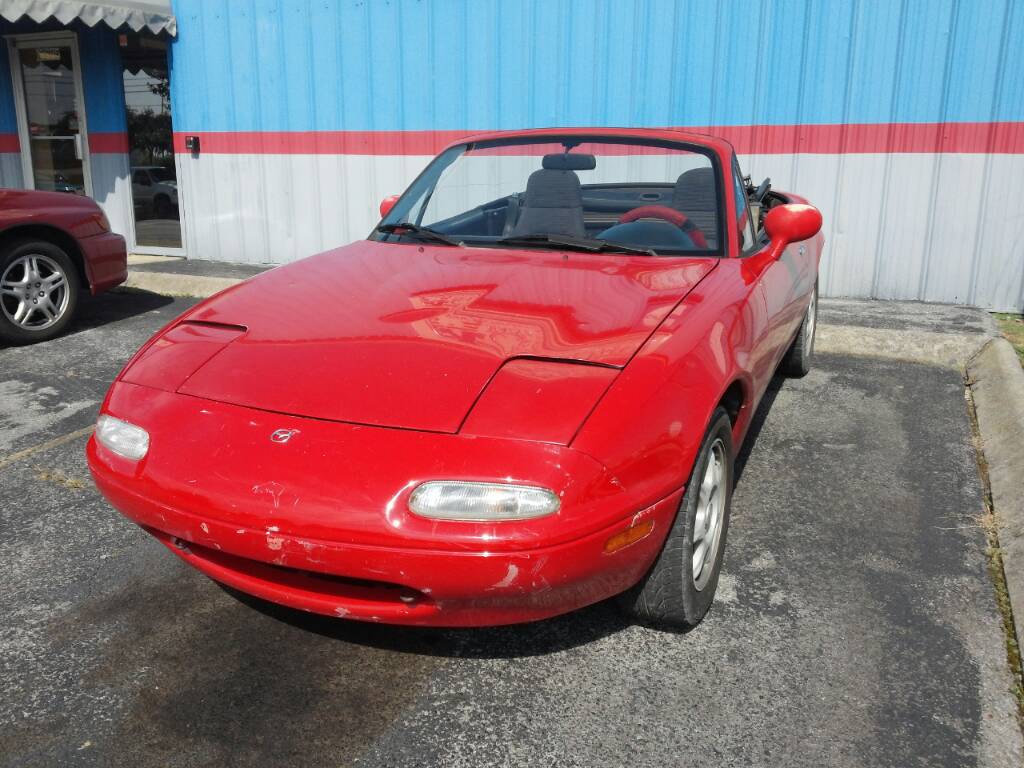
Ive been driving the car for a week or so.
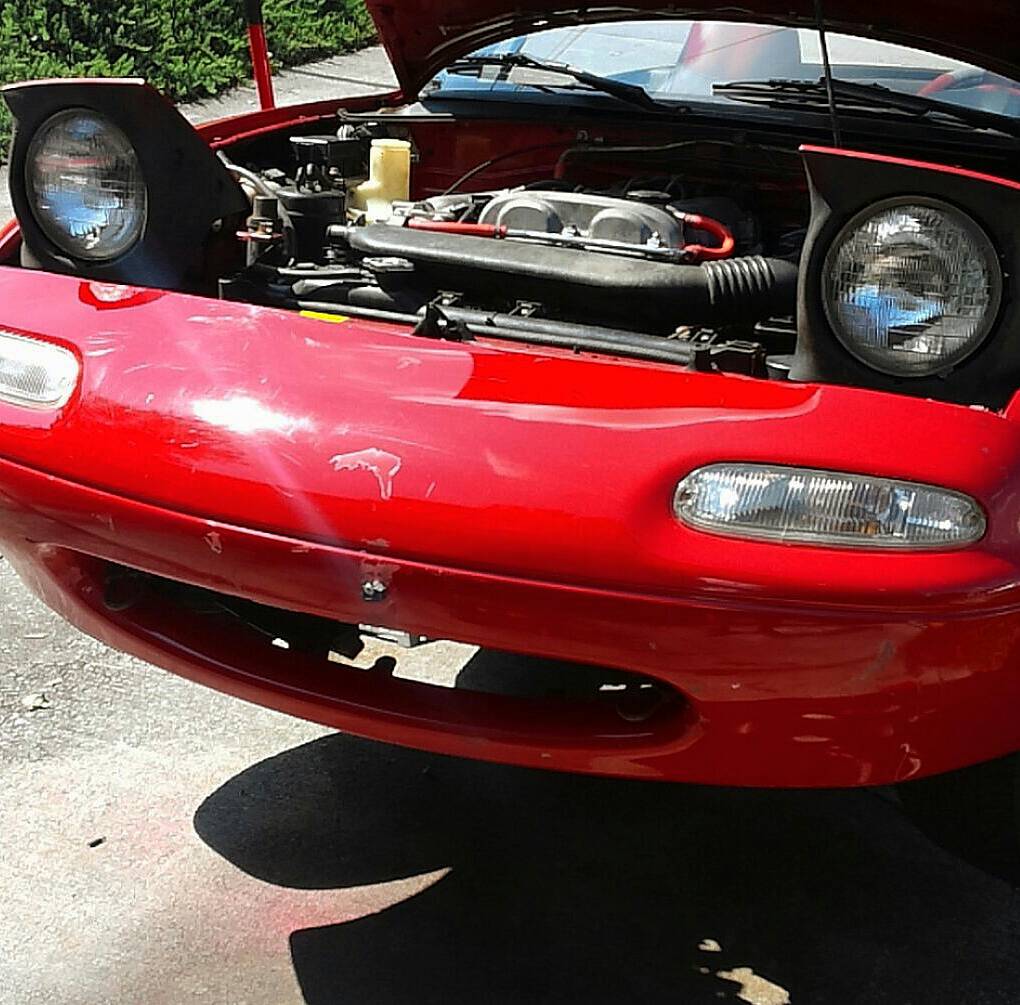
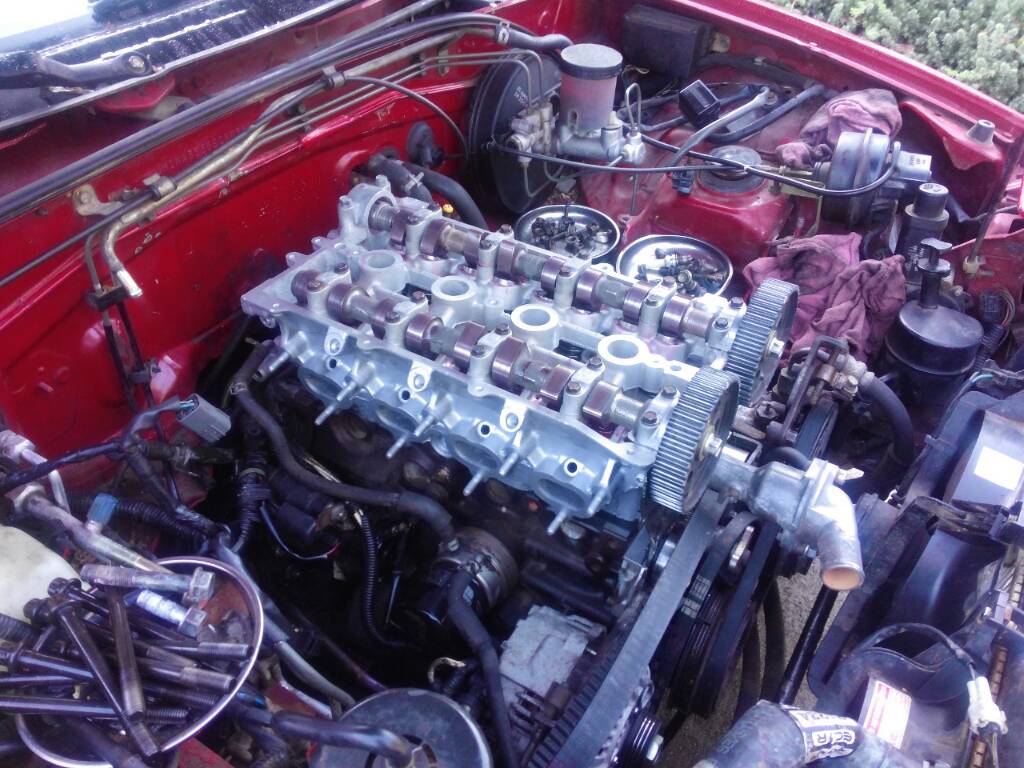
Ended up purchasing a remanufactured head for it.
At this point, total cost is $789 which includes the initial purchase price of $50.
Other than fixing an exhaust leak and the A/C relay and connector end, the car is doing great.
Ended up purchasing a remanufactured head for it.
At this point, total cost is $789 which includes the initial purchase price of $50.
Other than fixing an exhaust leak and the A/C relay and connector end, the car is doing great.
Hell yeah, that's a score at that price! (cheers)
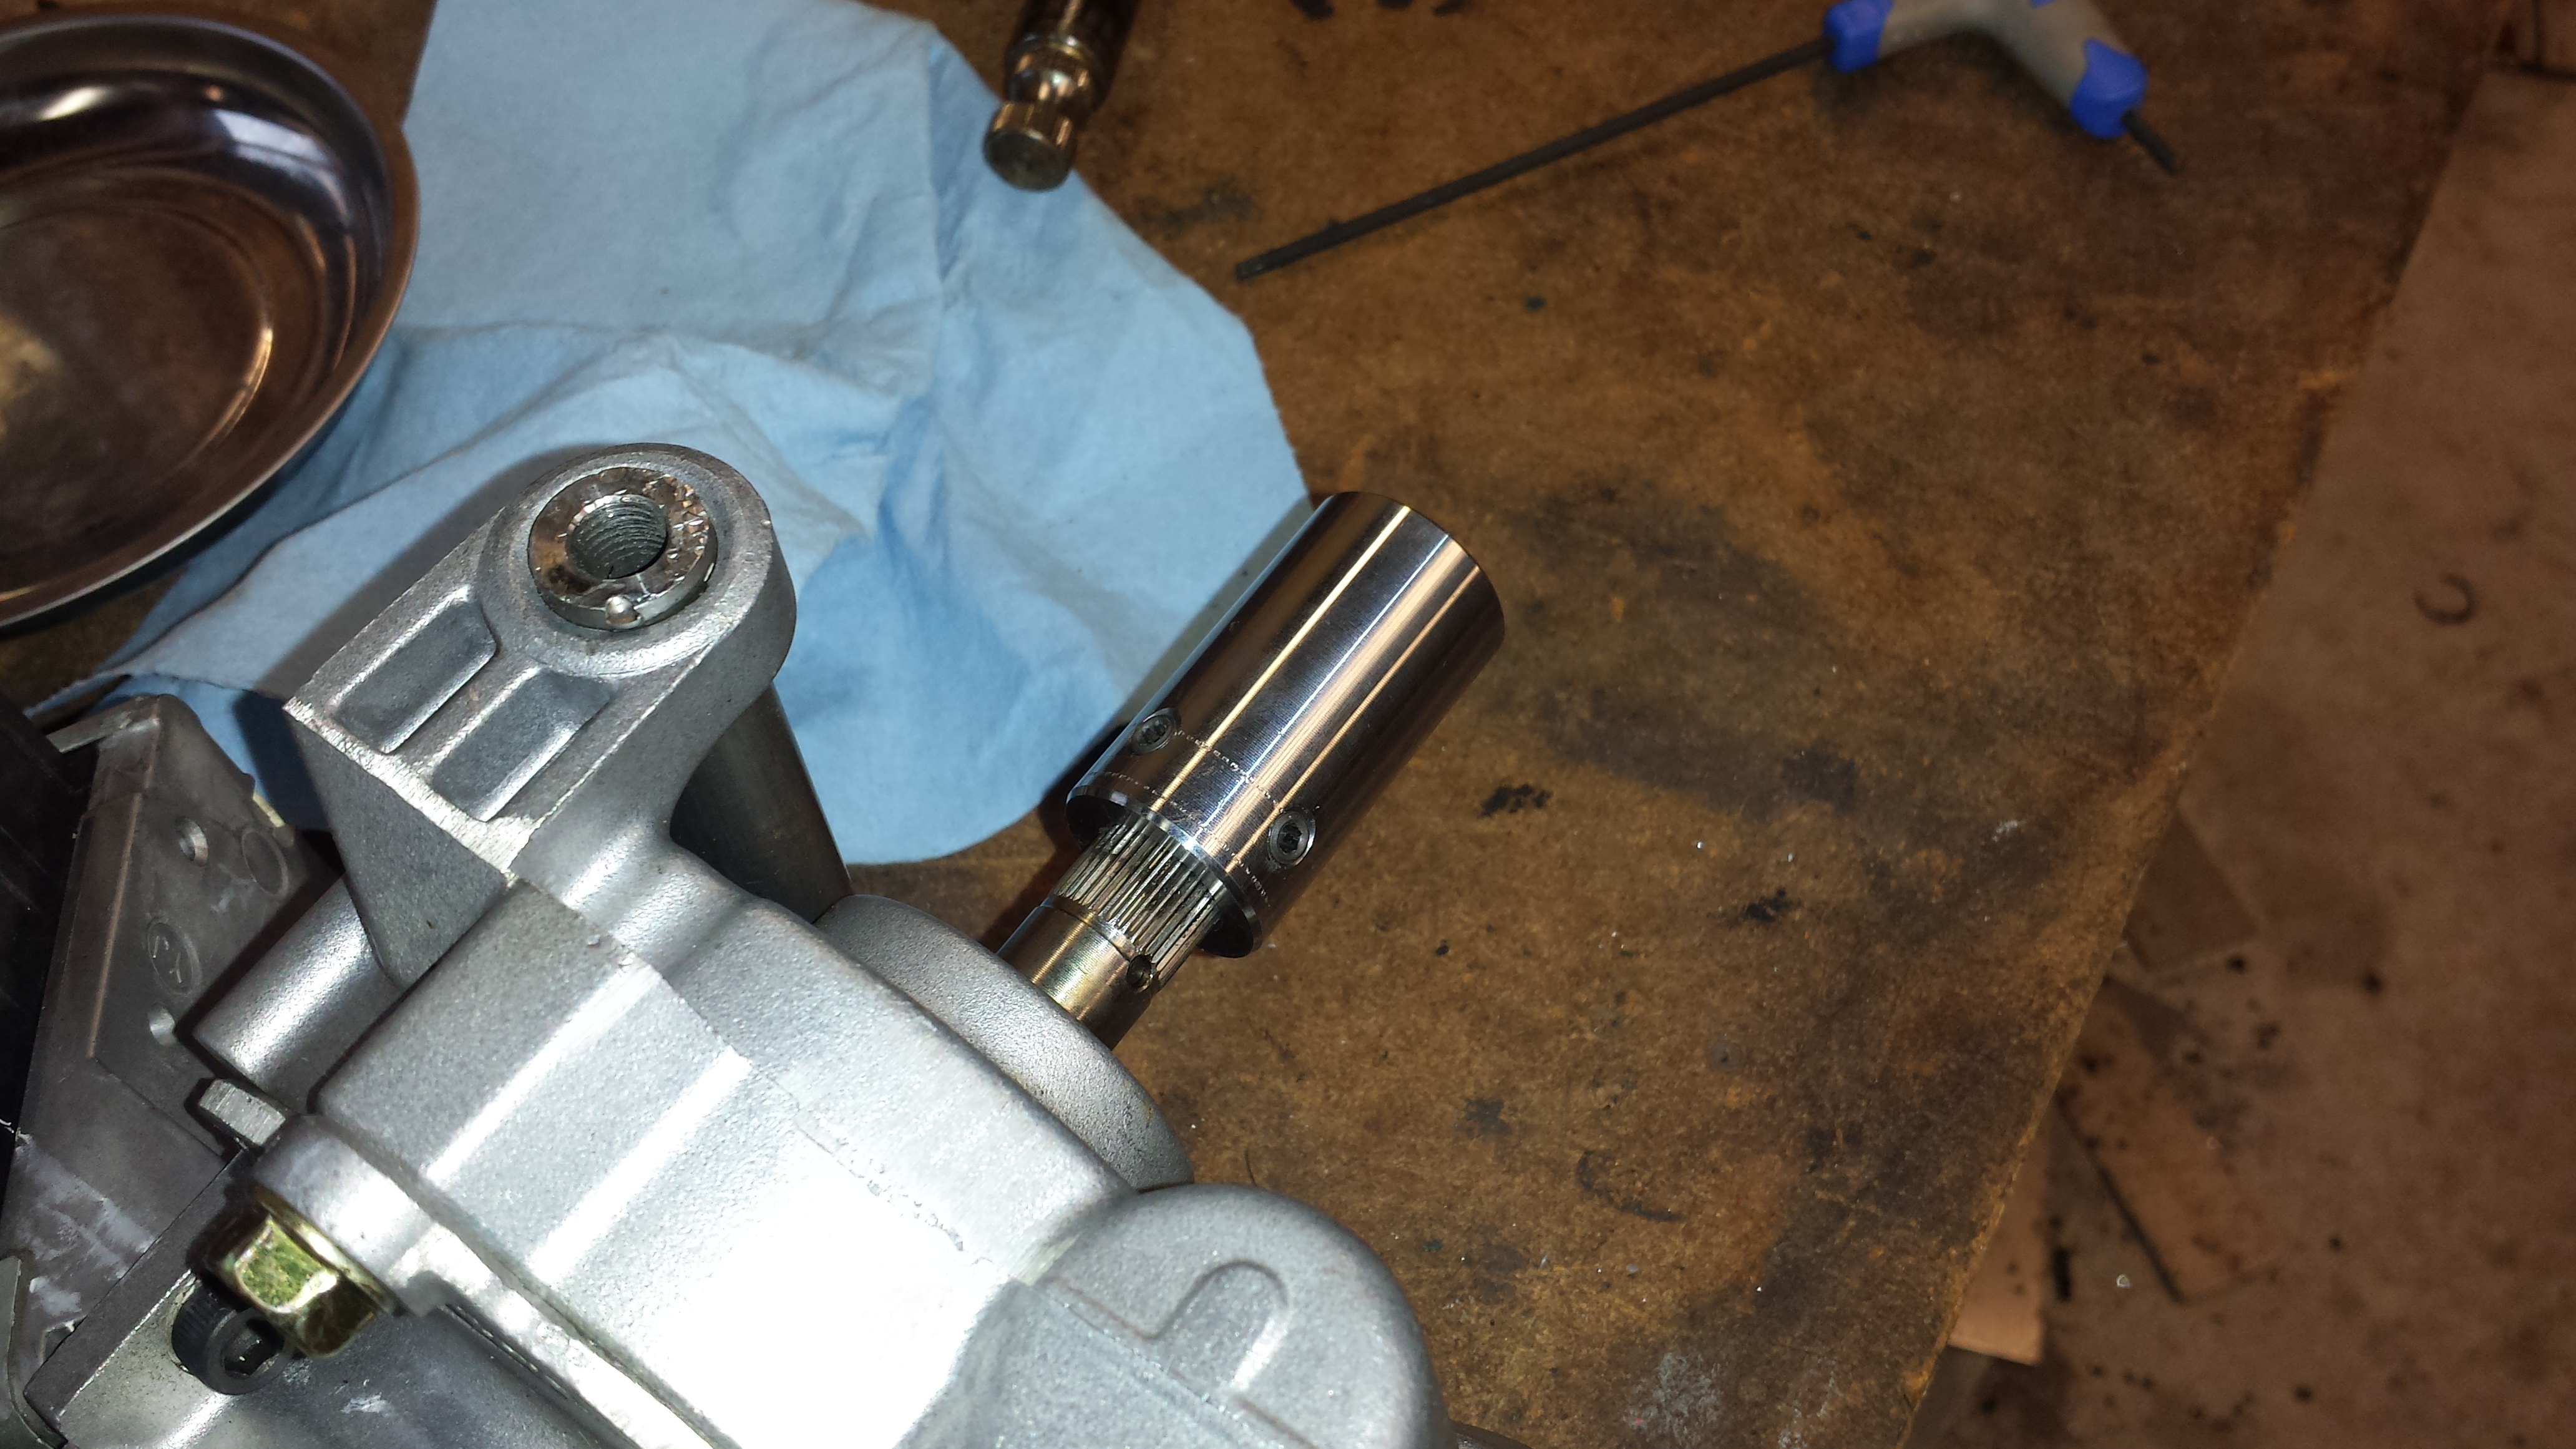
I took the parts that needed to be welded "real gud" to a buddy's shop today, as I don't have a TIG machine. With the fine splines and gears I didn't want to take any chances with spatter.
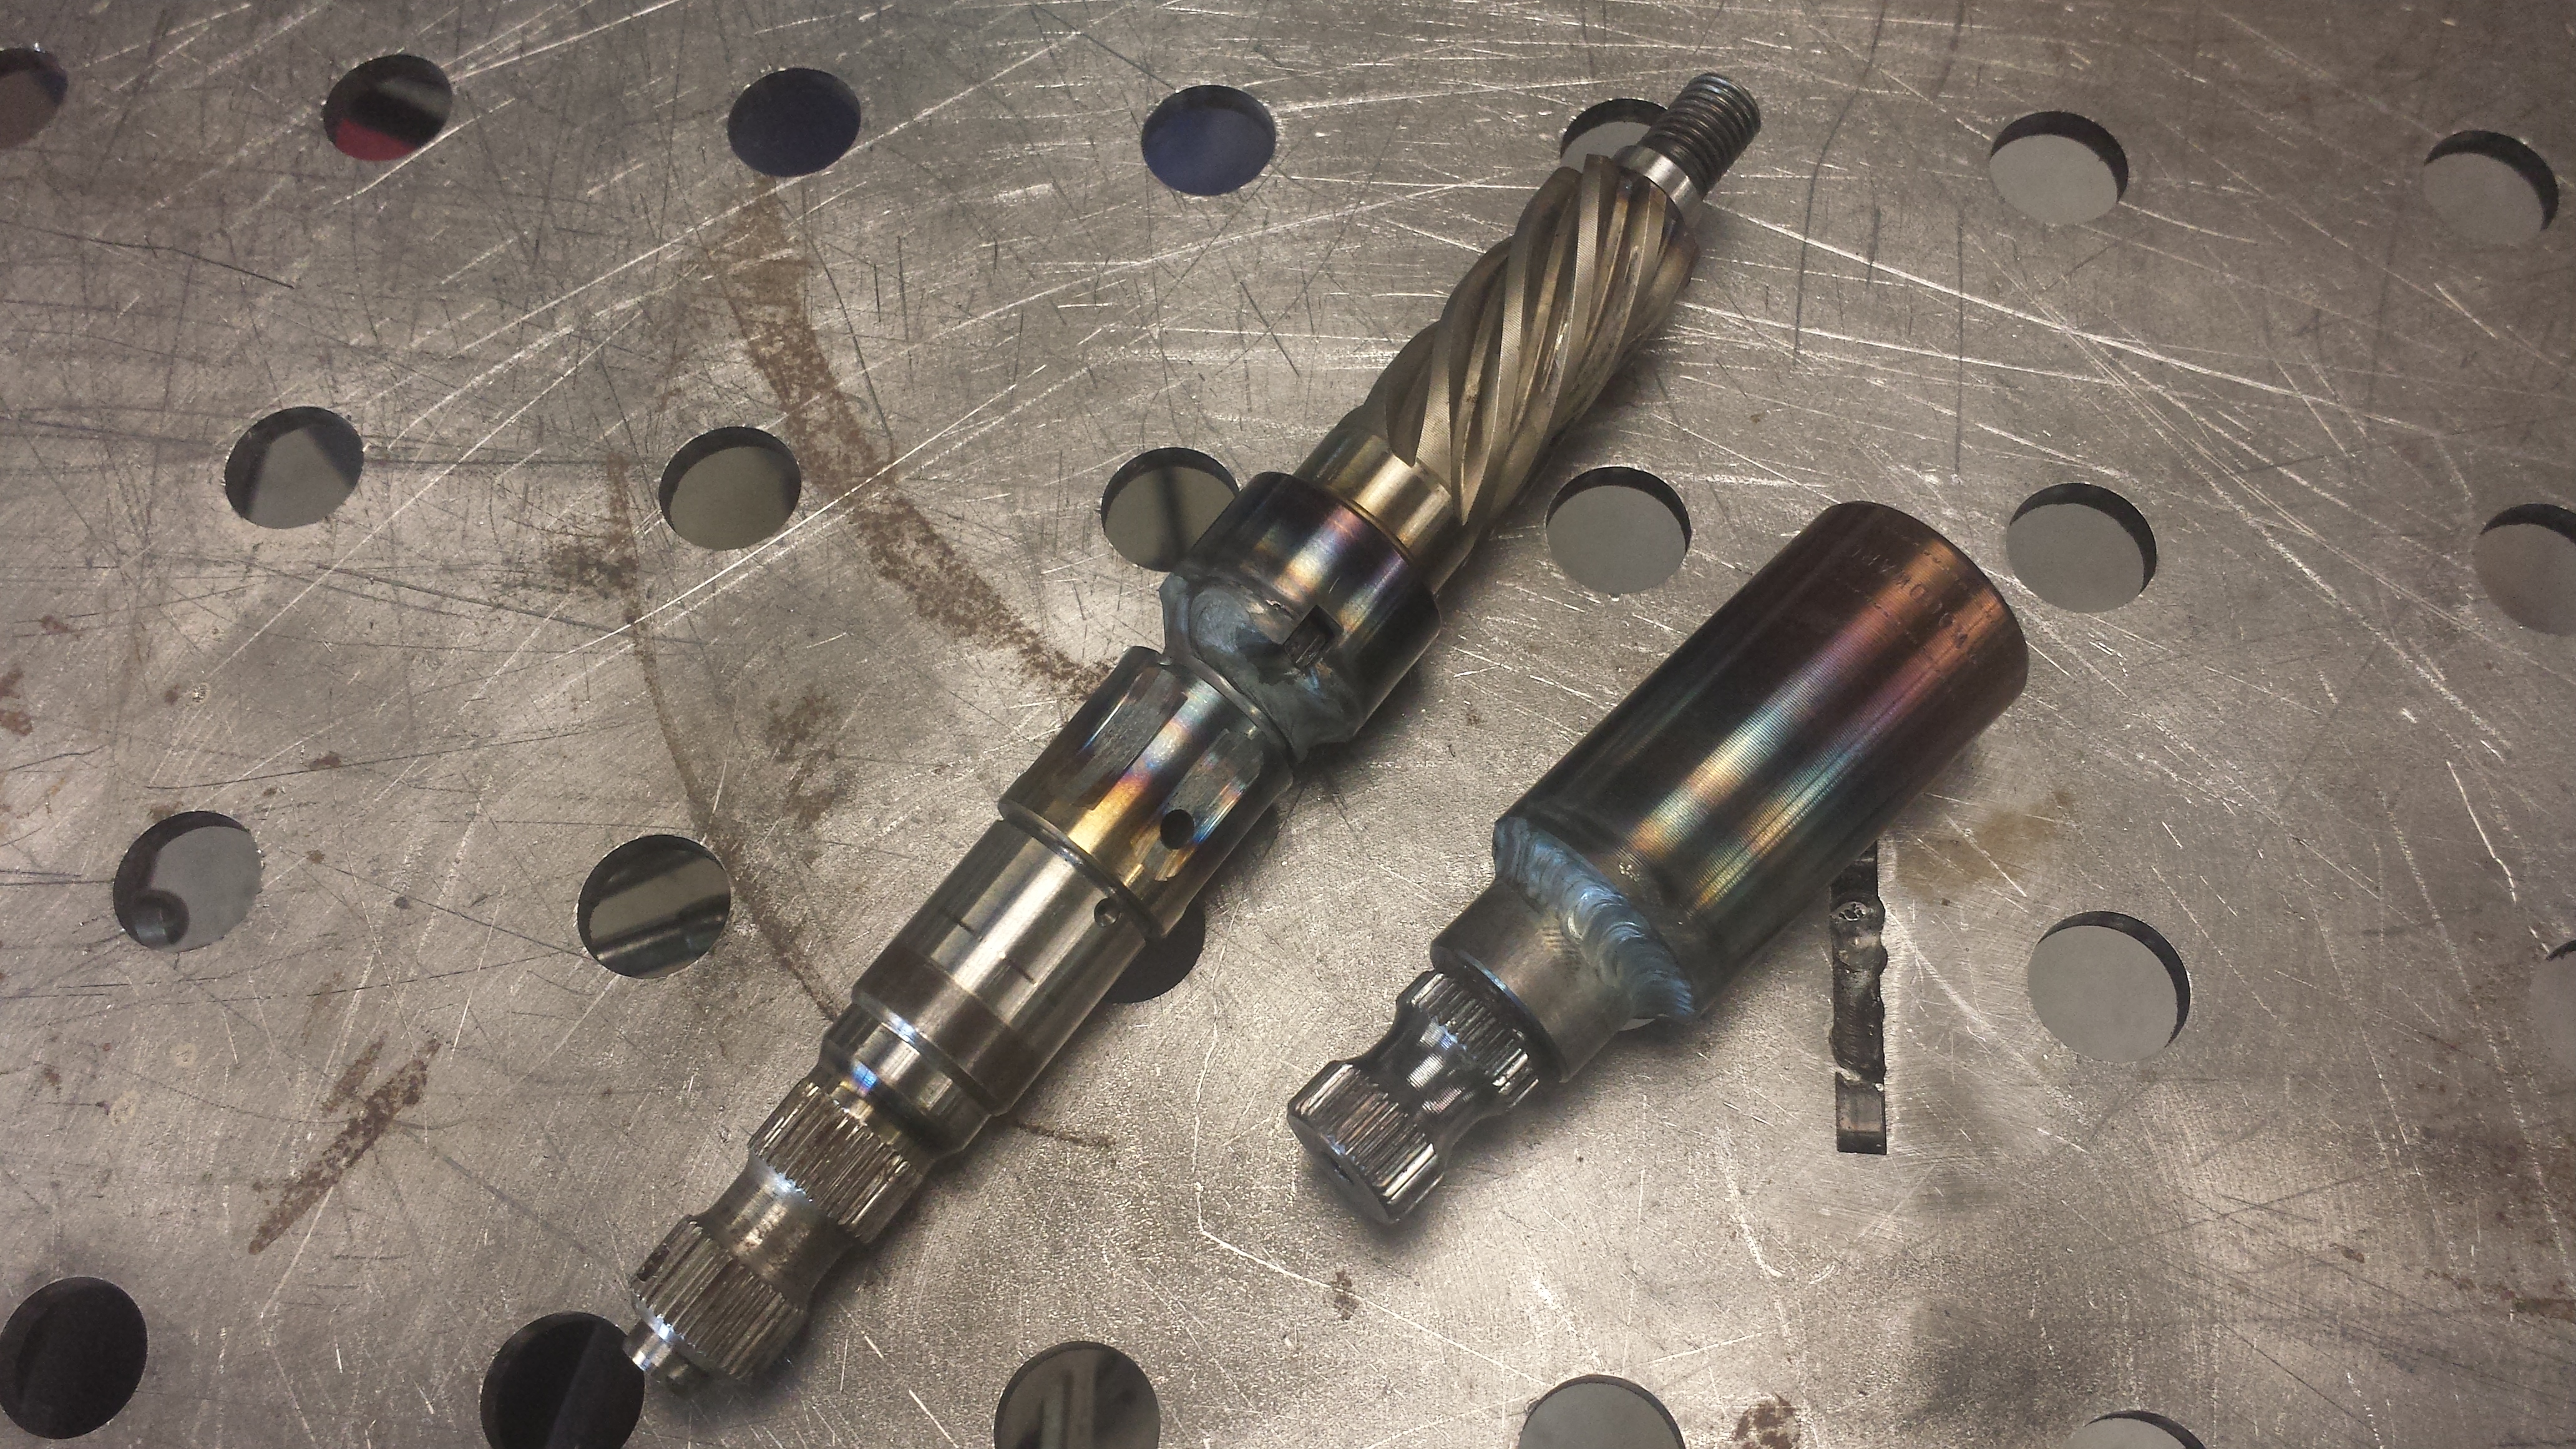
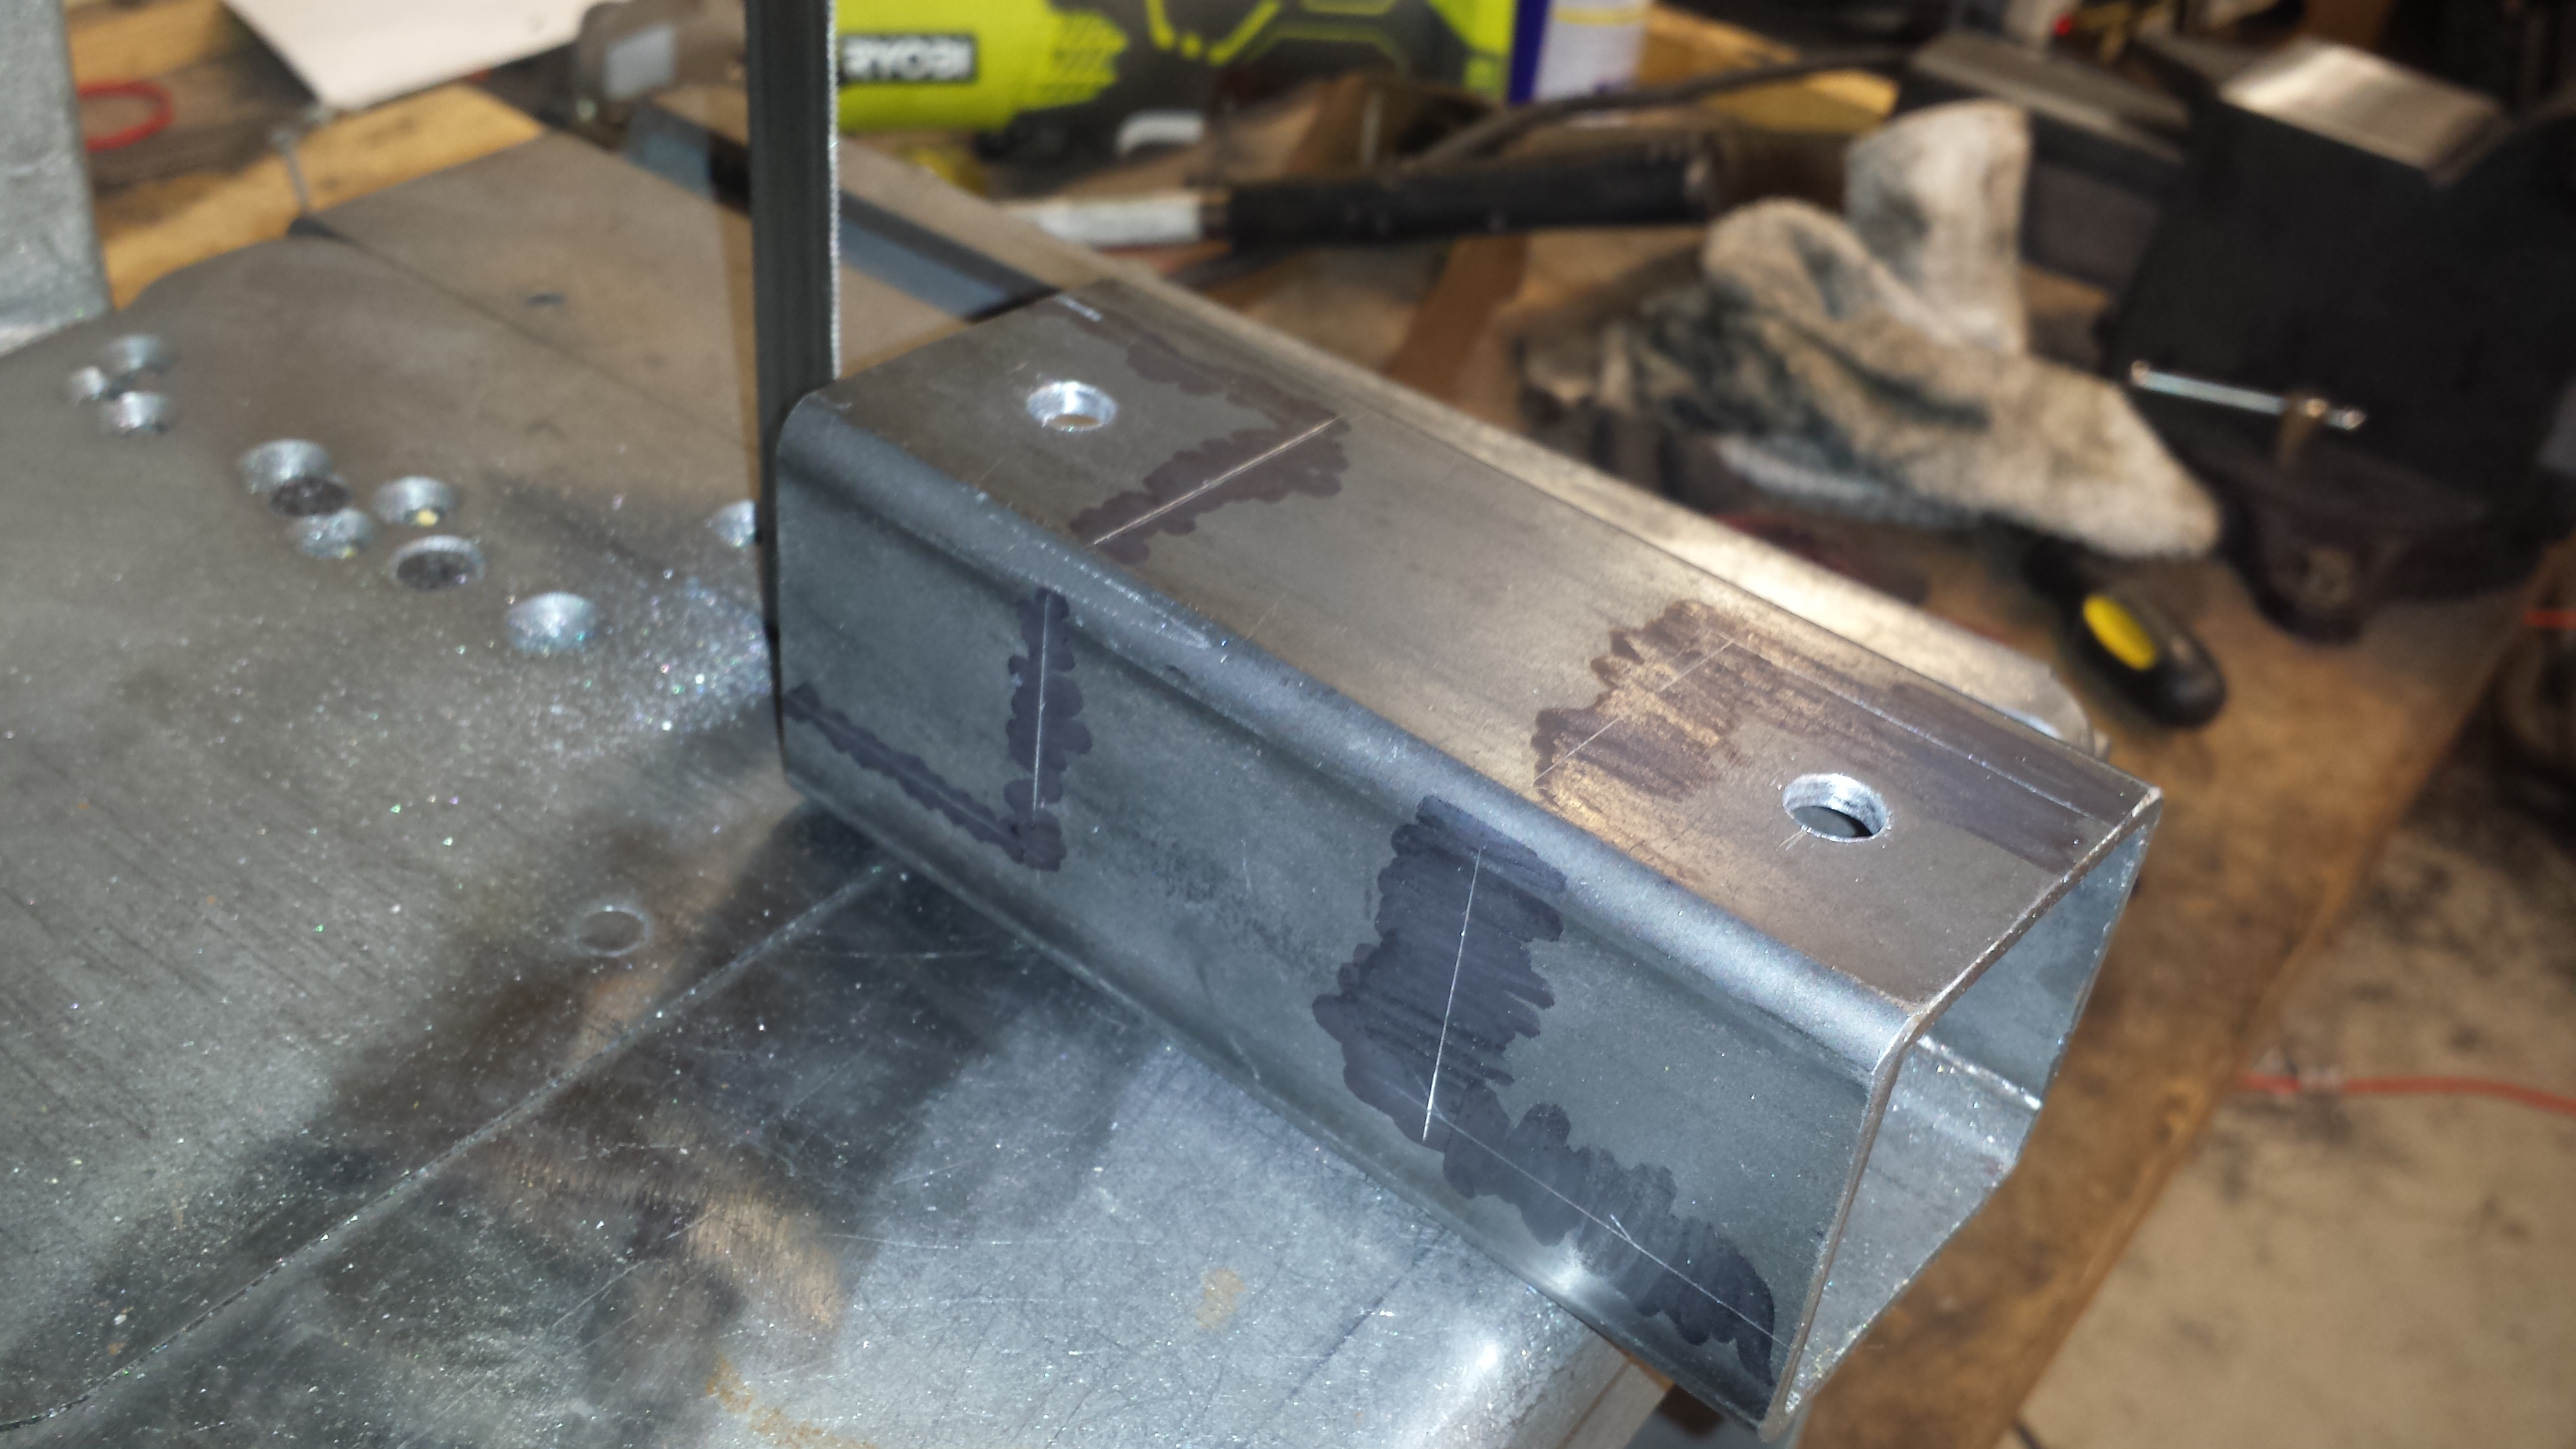
The adapter on the right (above) is really the only thing you need (in addition to fabbing mounts to the dash bar & firewall) if you want to adapt this into the factory Miata steering system if you're ok with foregoing the tilt function, which I am. I can tweak the location with the mounts if necessary, but there's nothing really wrong with a stock-ish location.

I took the parts that needed to be welded "real gud" to a buddy's shop today, as I don't have a TIG machine. With the fine splines and gears I didn't want to take any chances with spatter.
The adapter on the right (above) is really the only thing you need (in addition to fabbing mounts to the dash bar & firewall) if you want to adapt this into the factory Miata steering system if you're ok with foregoing the tilt function, which I am. I can tweak the location with the mounts if necessary, but there's nothing really wrong with a stock-ish location.
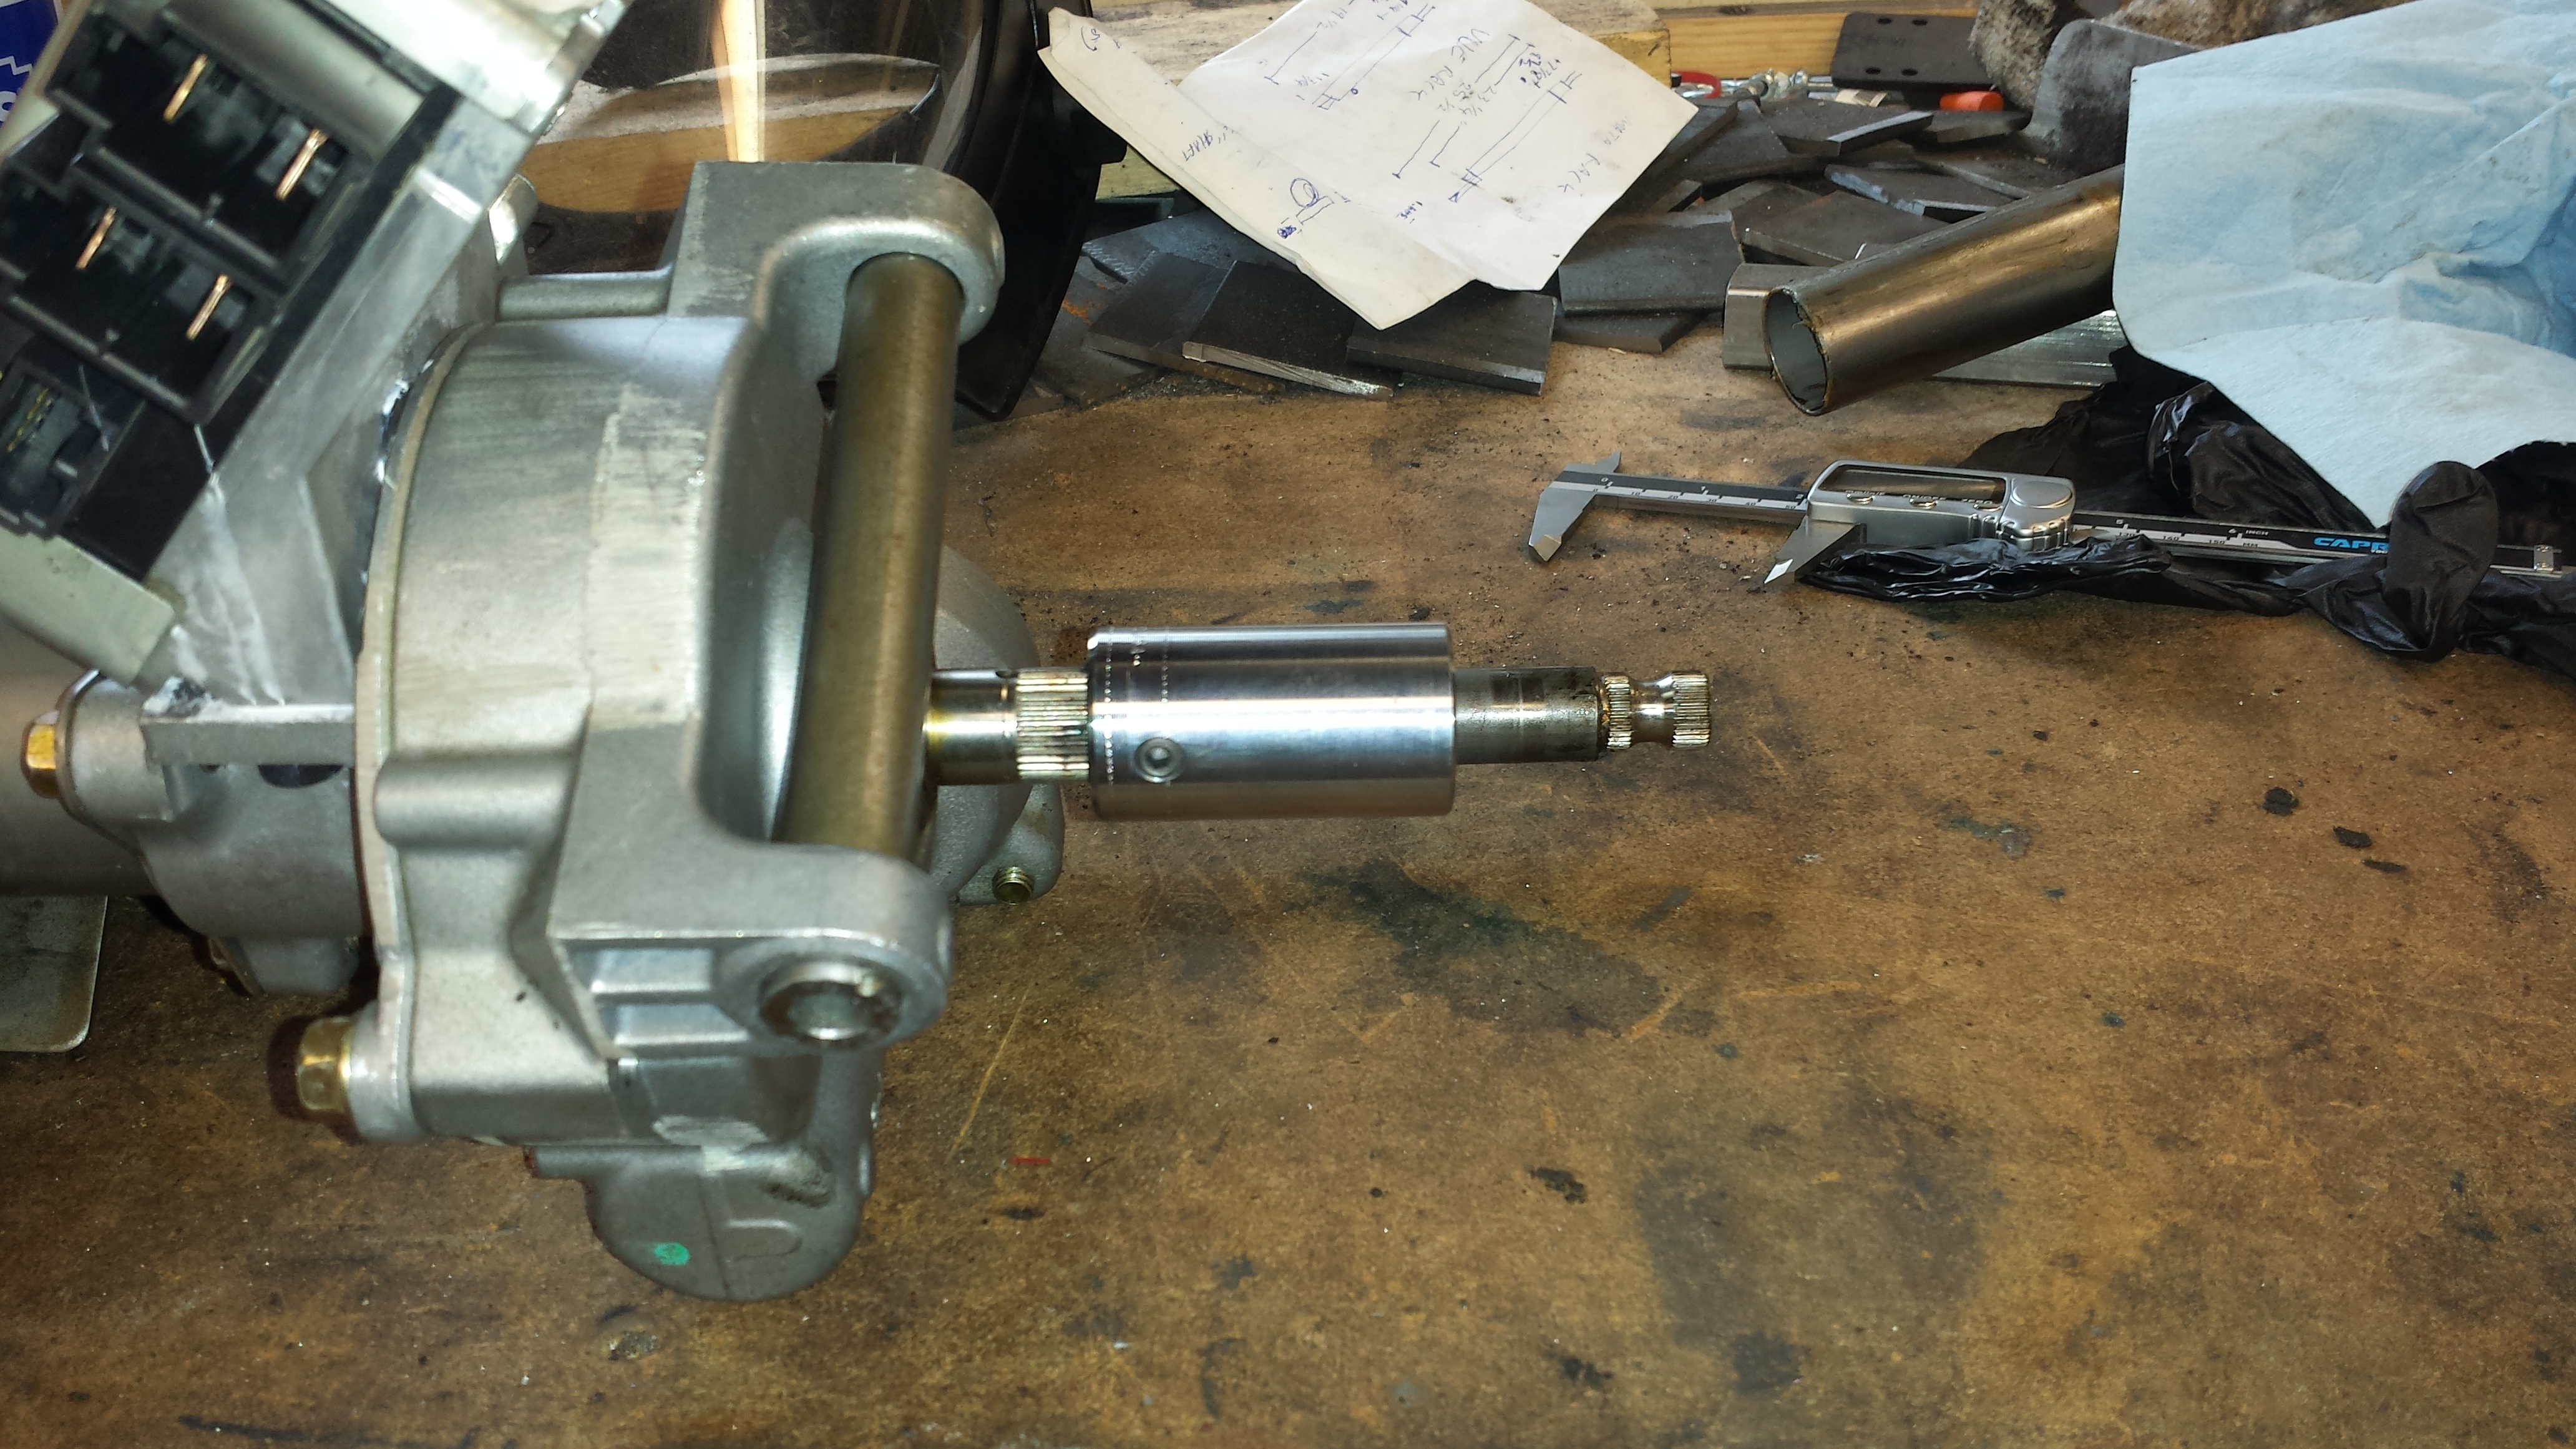
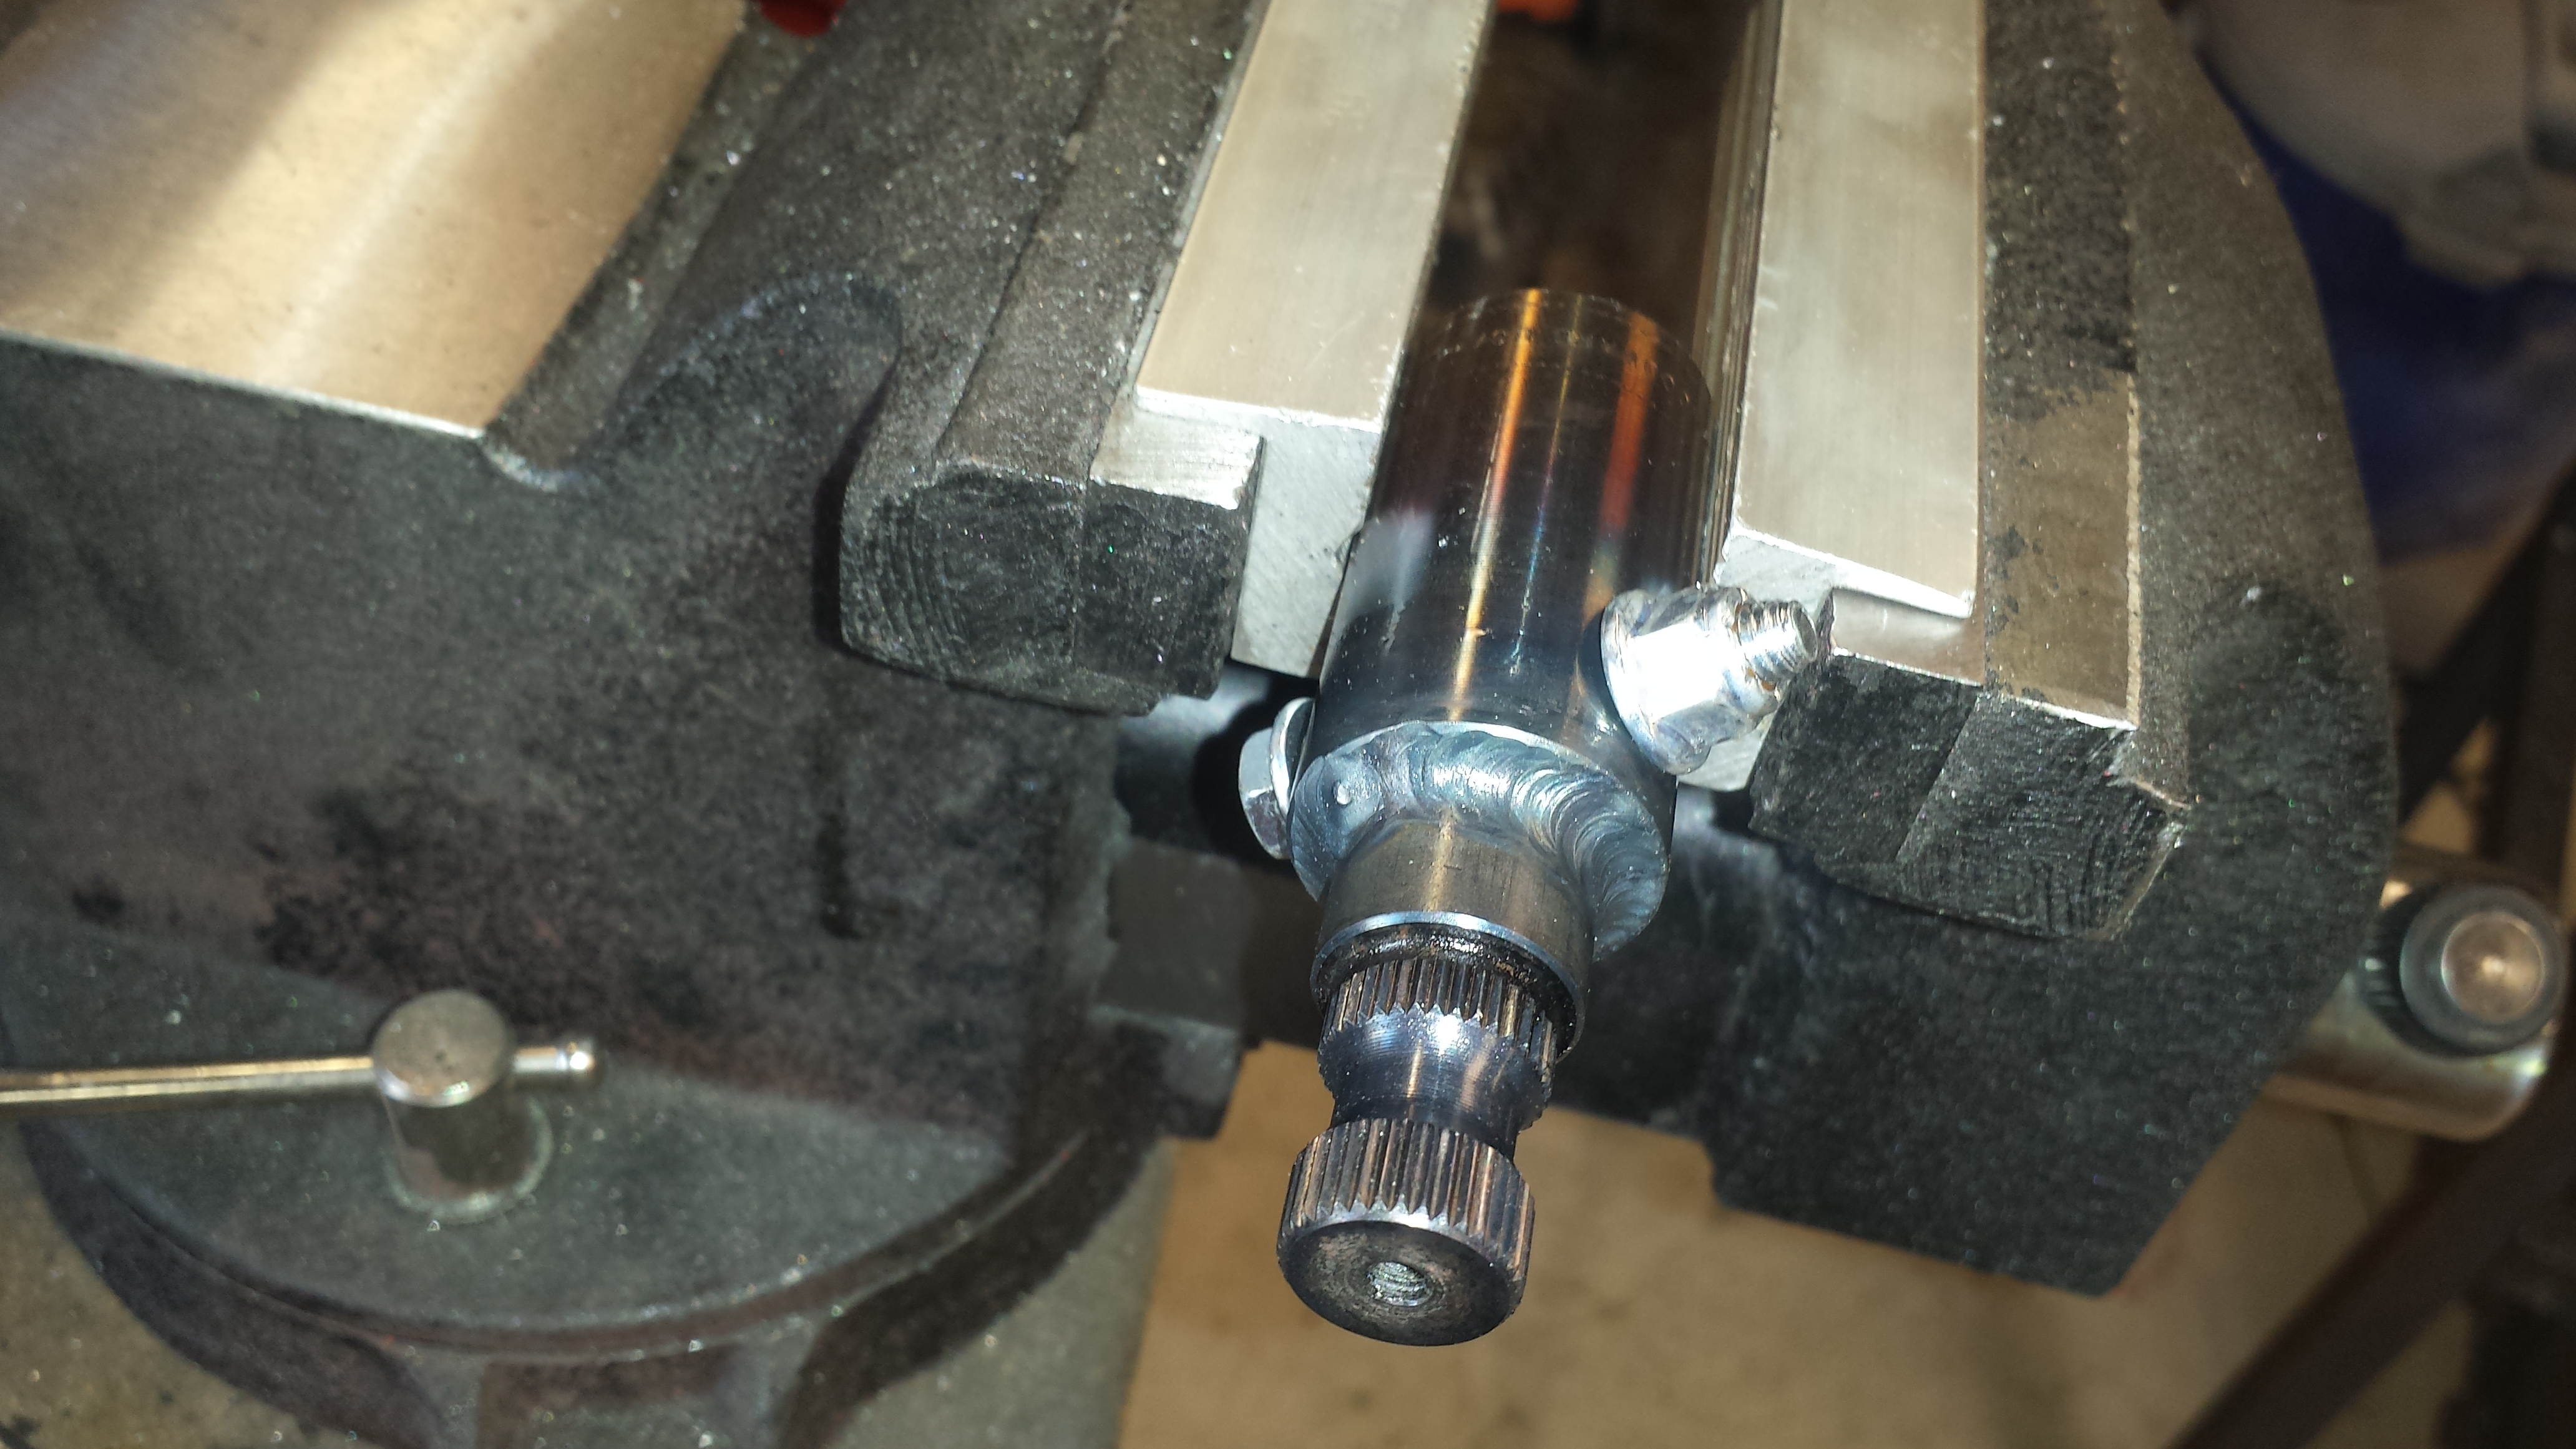
Drilled / tapped the steering column adapter so that the weld isn't a possible single point of failure.
Center drills are freakin' awesome for this stuff. I don't have a mill, but with the right tools and a little creativity, you can do a lot of stuff with a wobbly ol' drill press
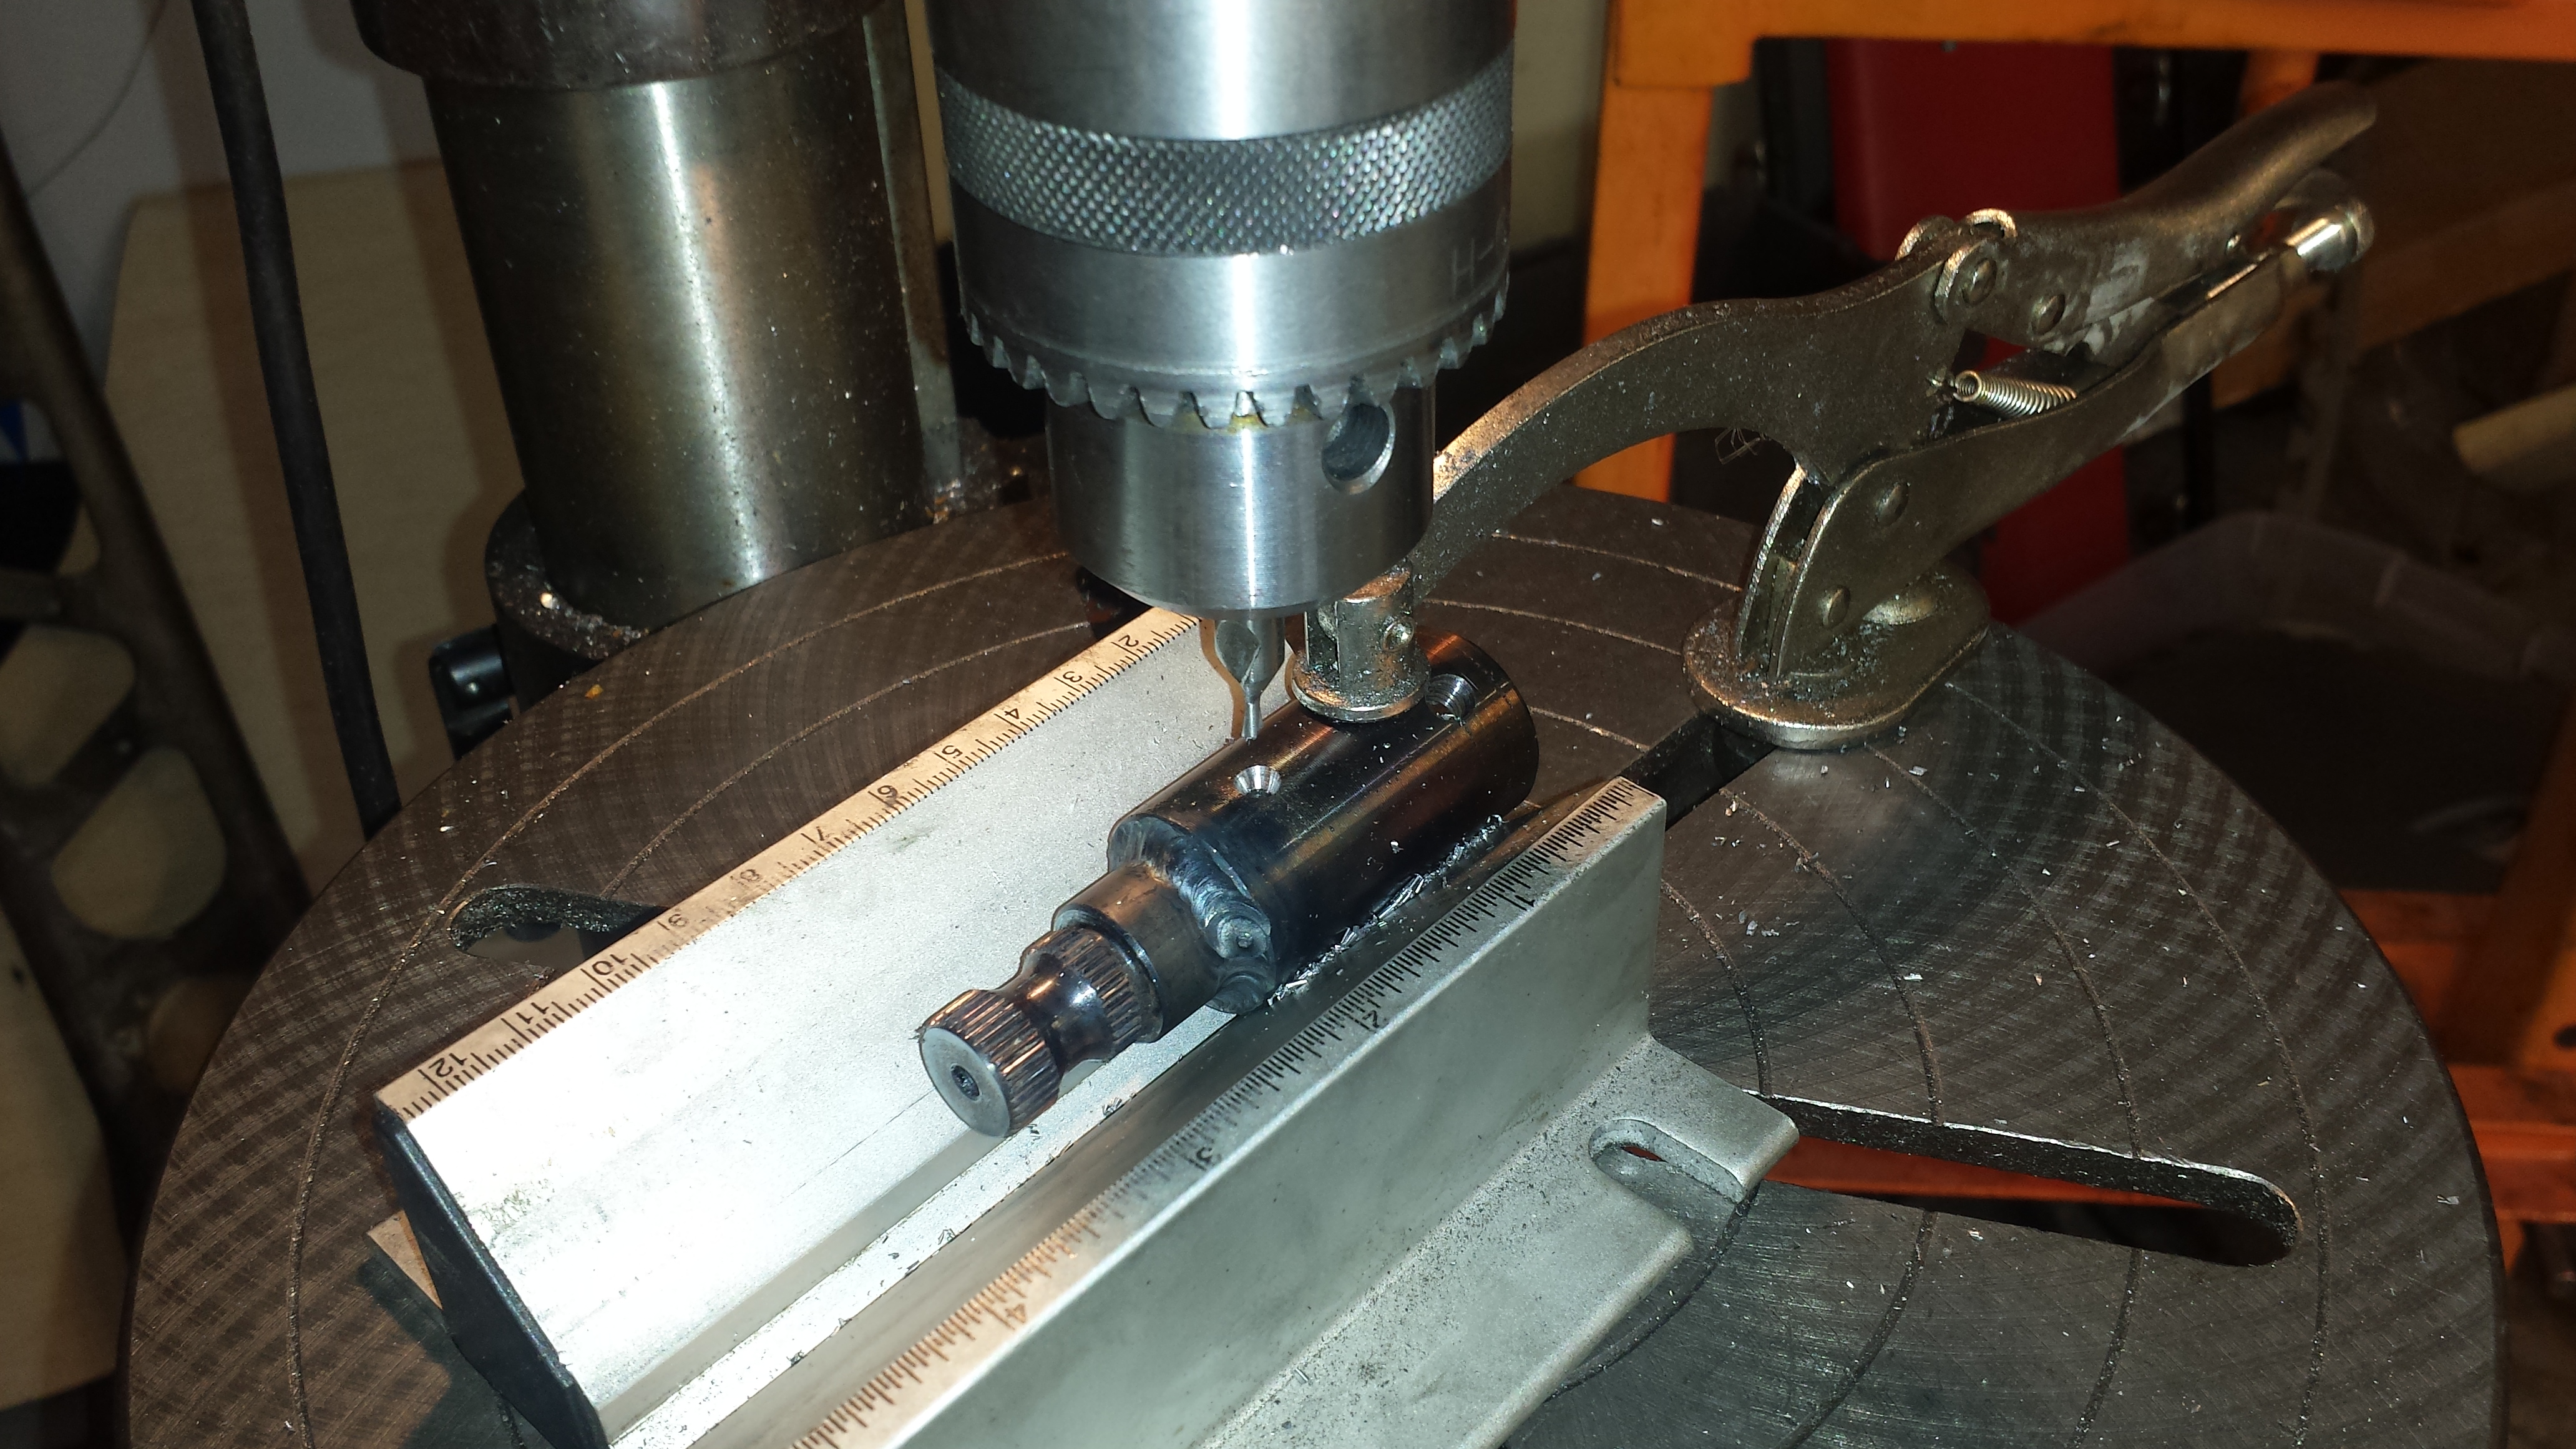
The bolt is half solid, half threaded, so I drilled it through to the thread tap size, then counter-bored the hold for the non-threaded shank. My drill press has a crap *** depth gauge & stop, so a little measuring and tape makes a good marker for where to stop drilling.
Countersink to clean up the burr and make starting the tap easier.

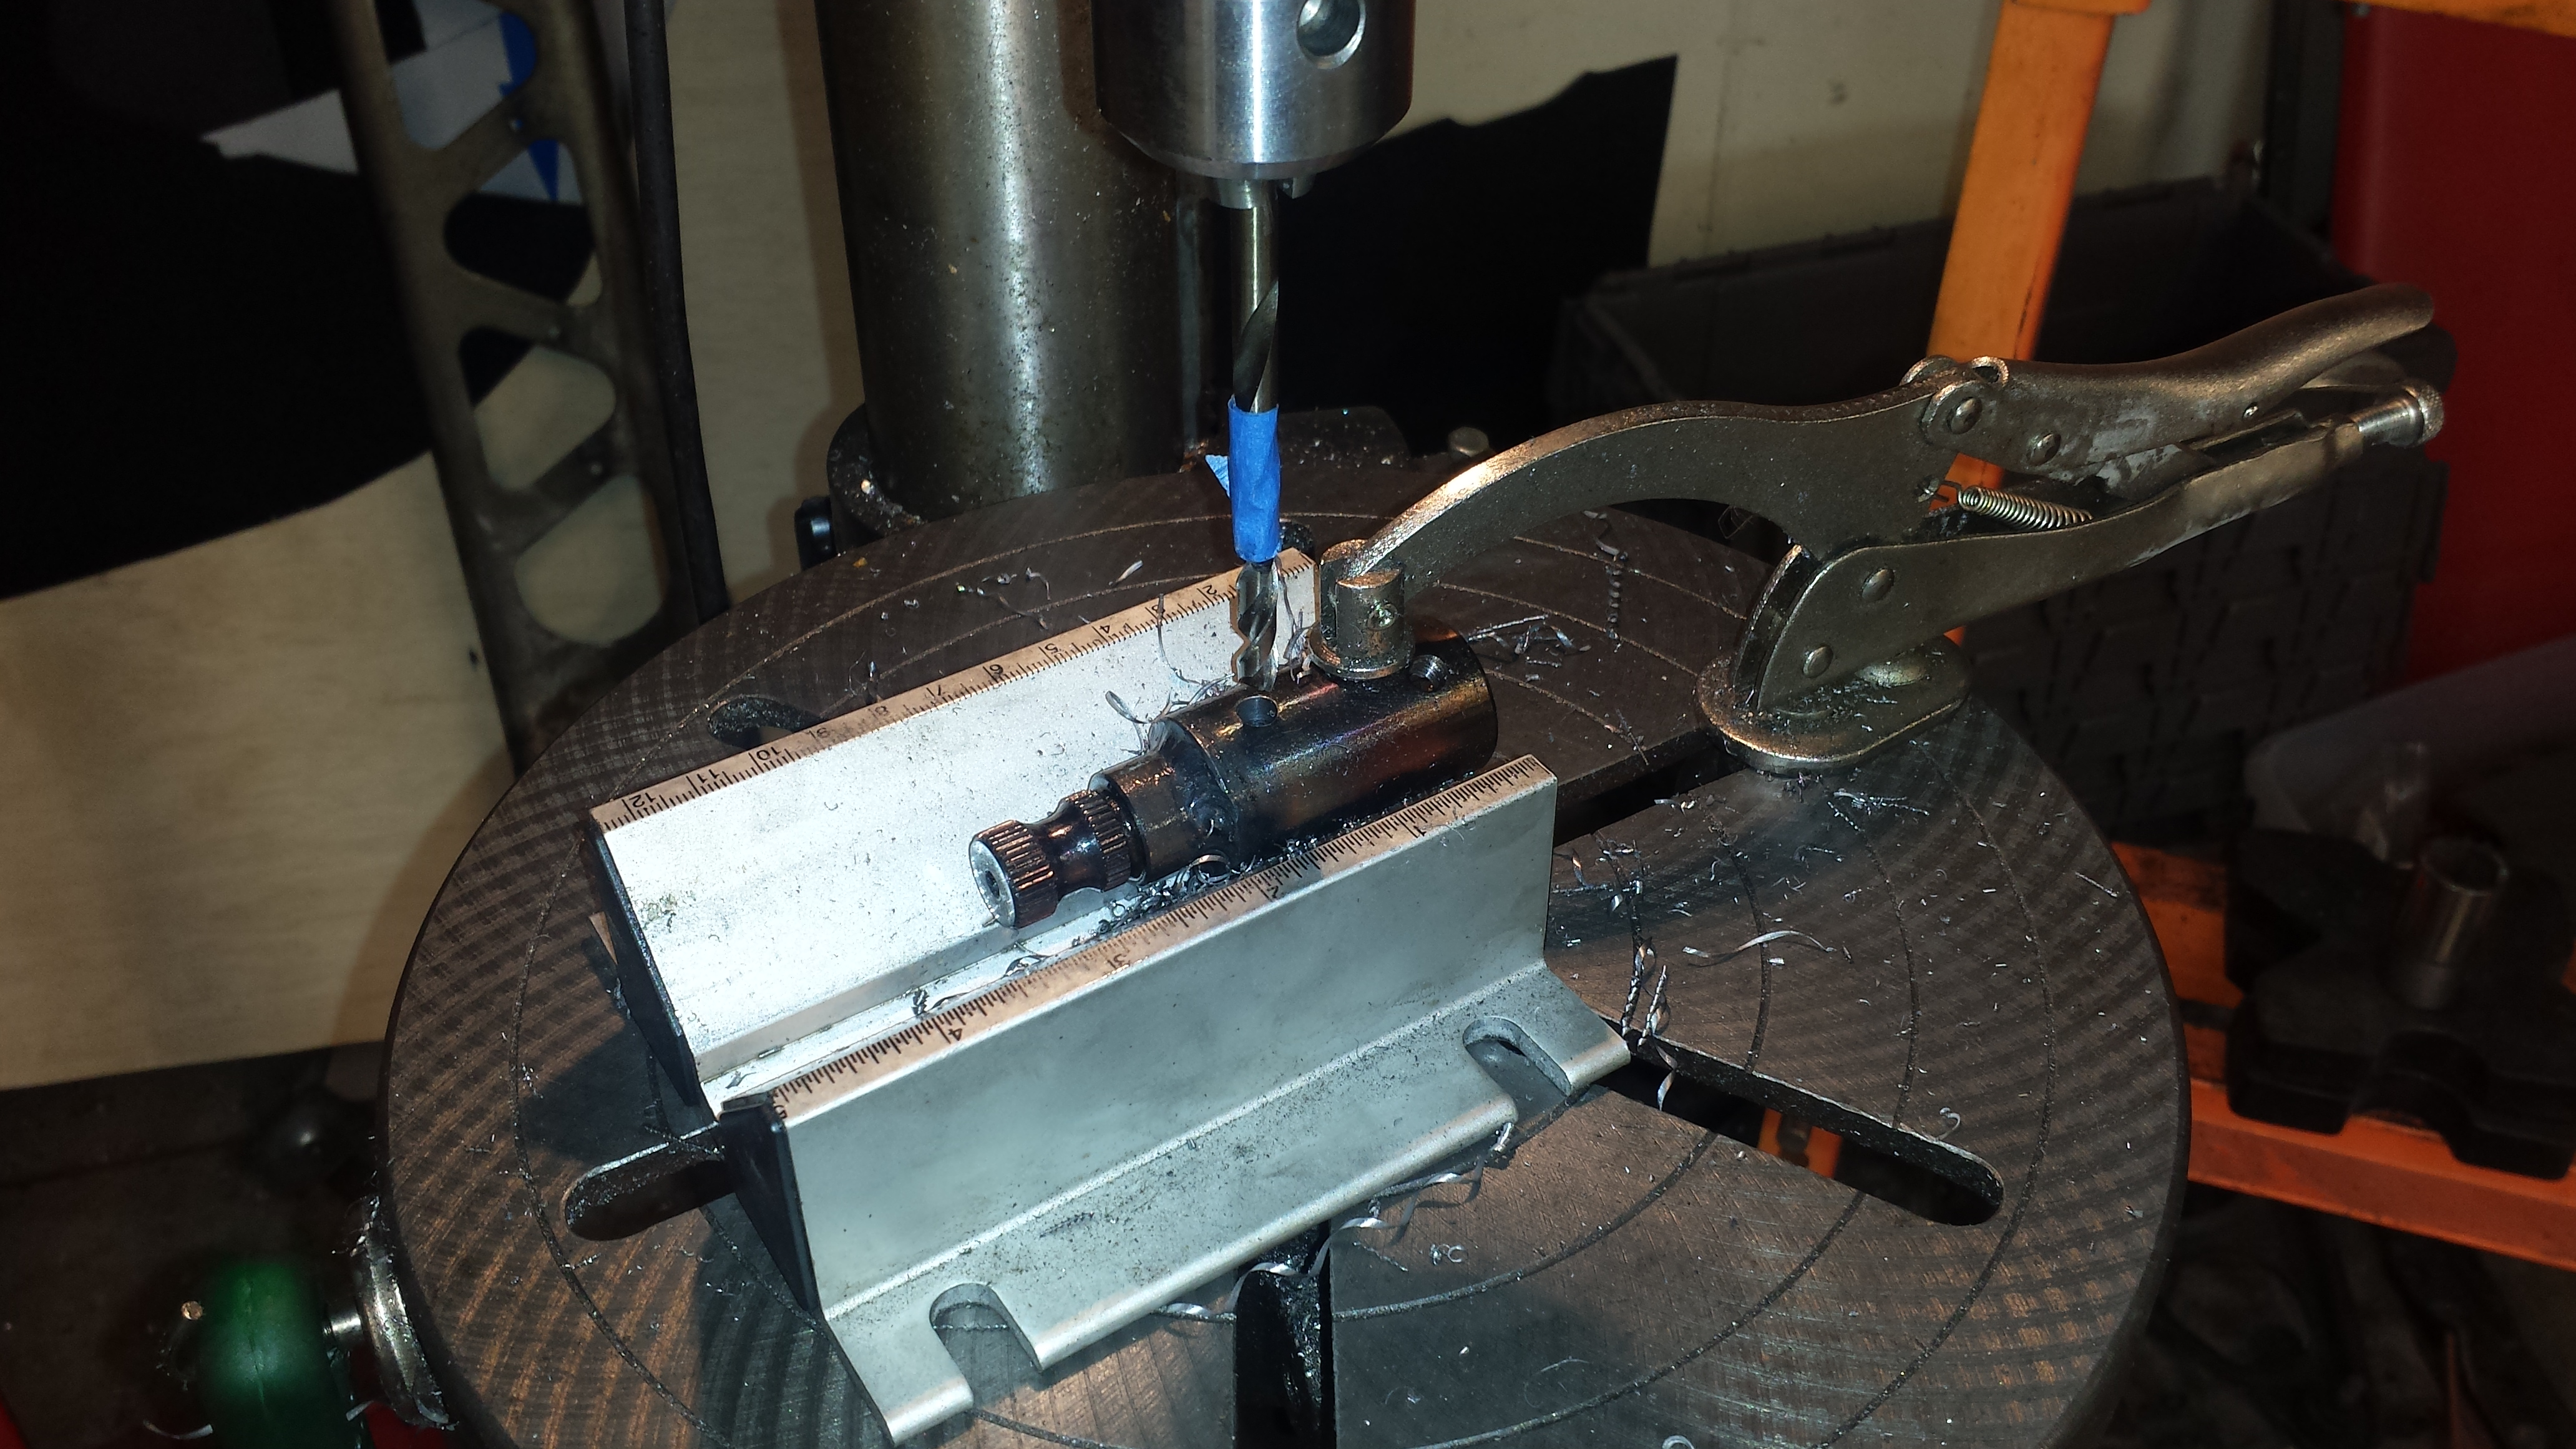
Tapped it. The tap goes through 1 side of the collar and a portion of the splined shaft. This is one more way the bolt will take some strain off the weld and serve as a backup should something break.
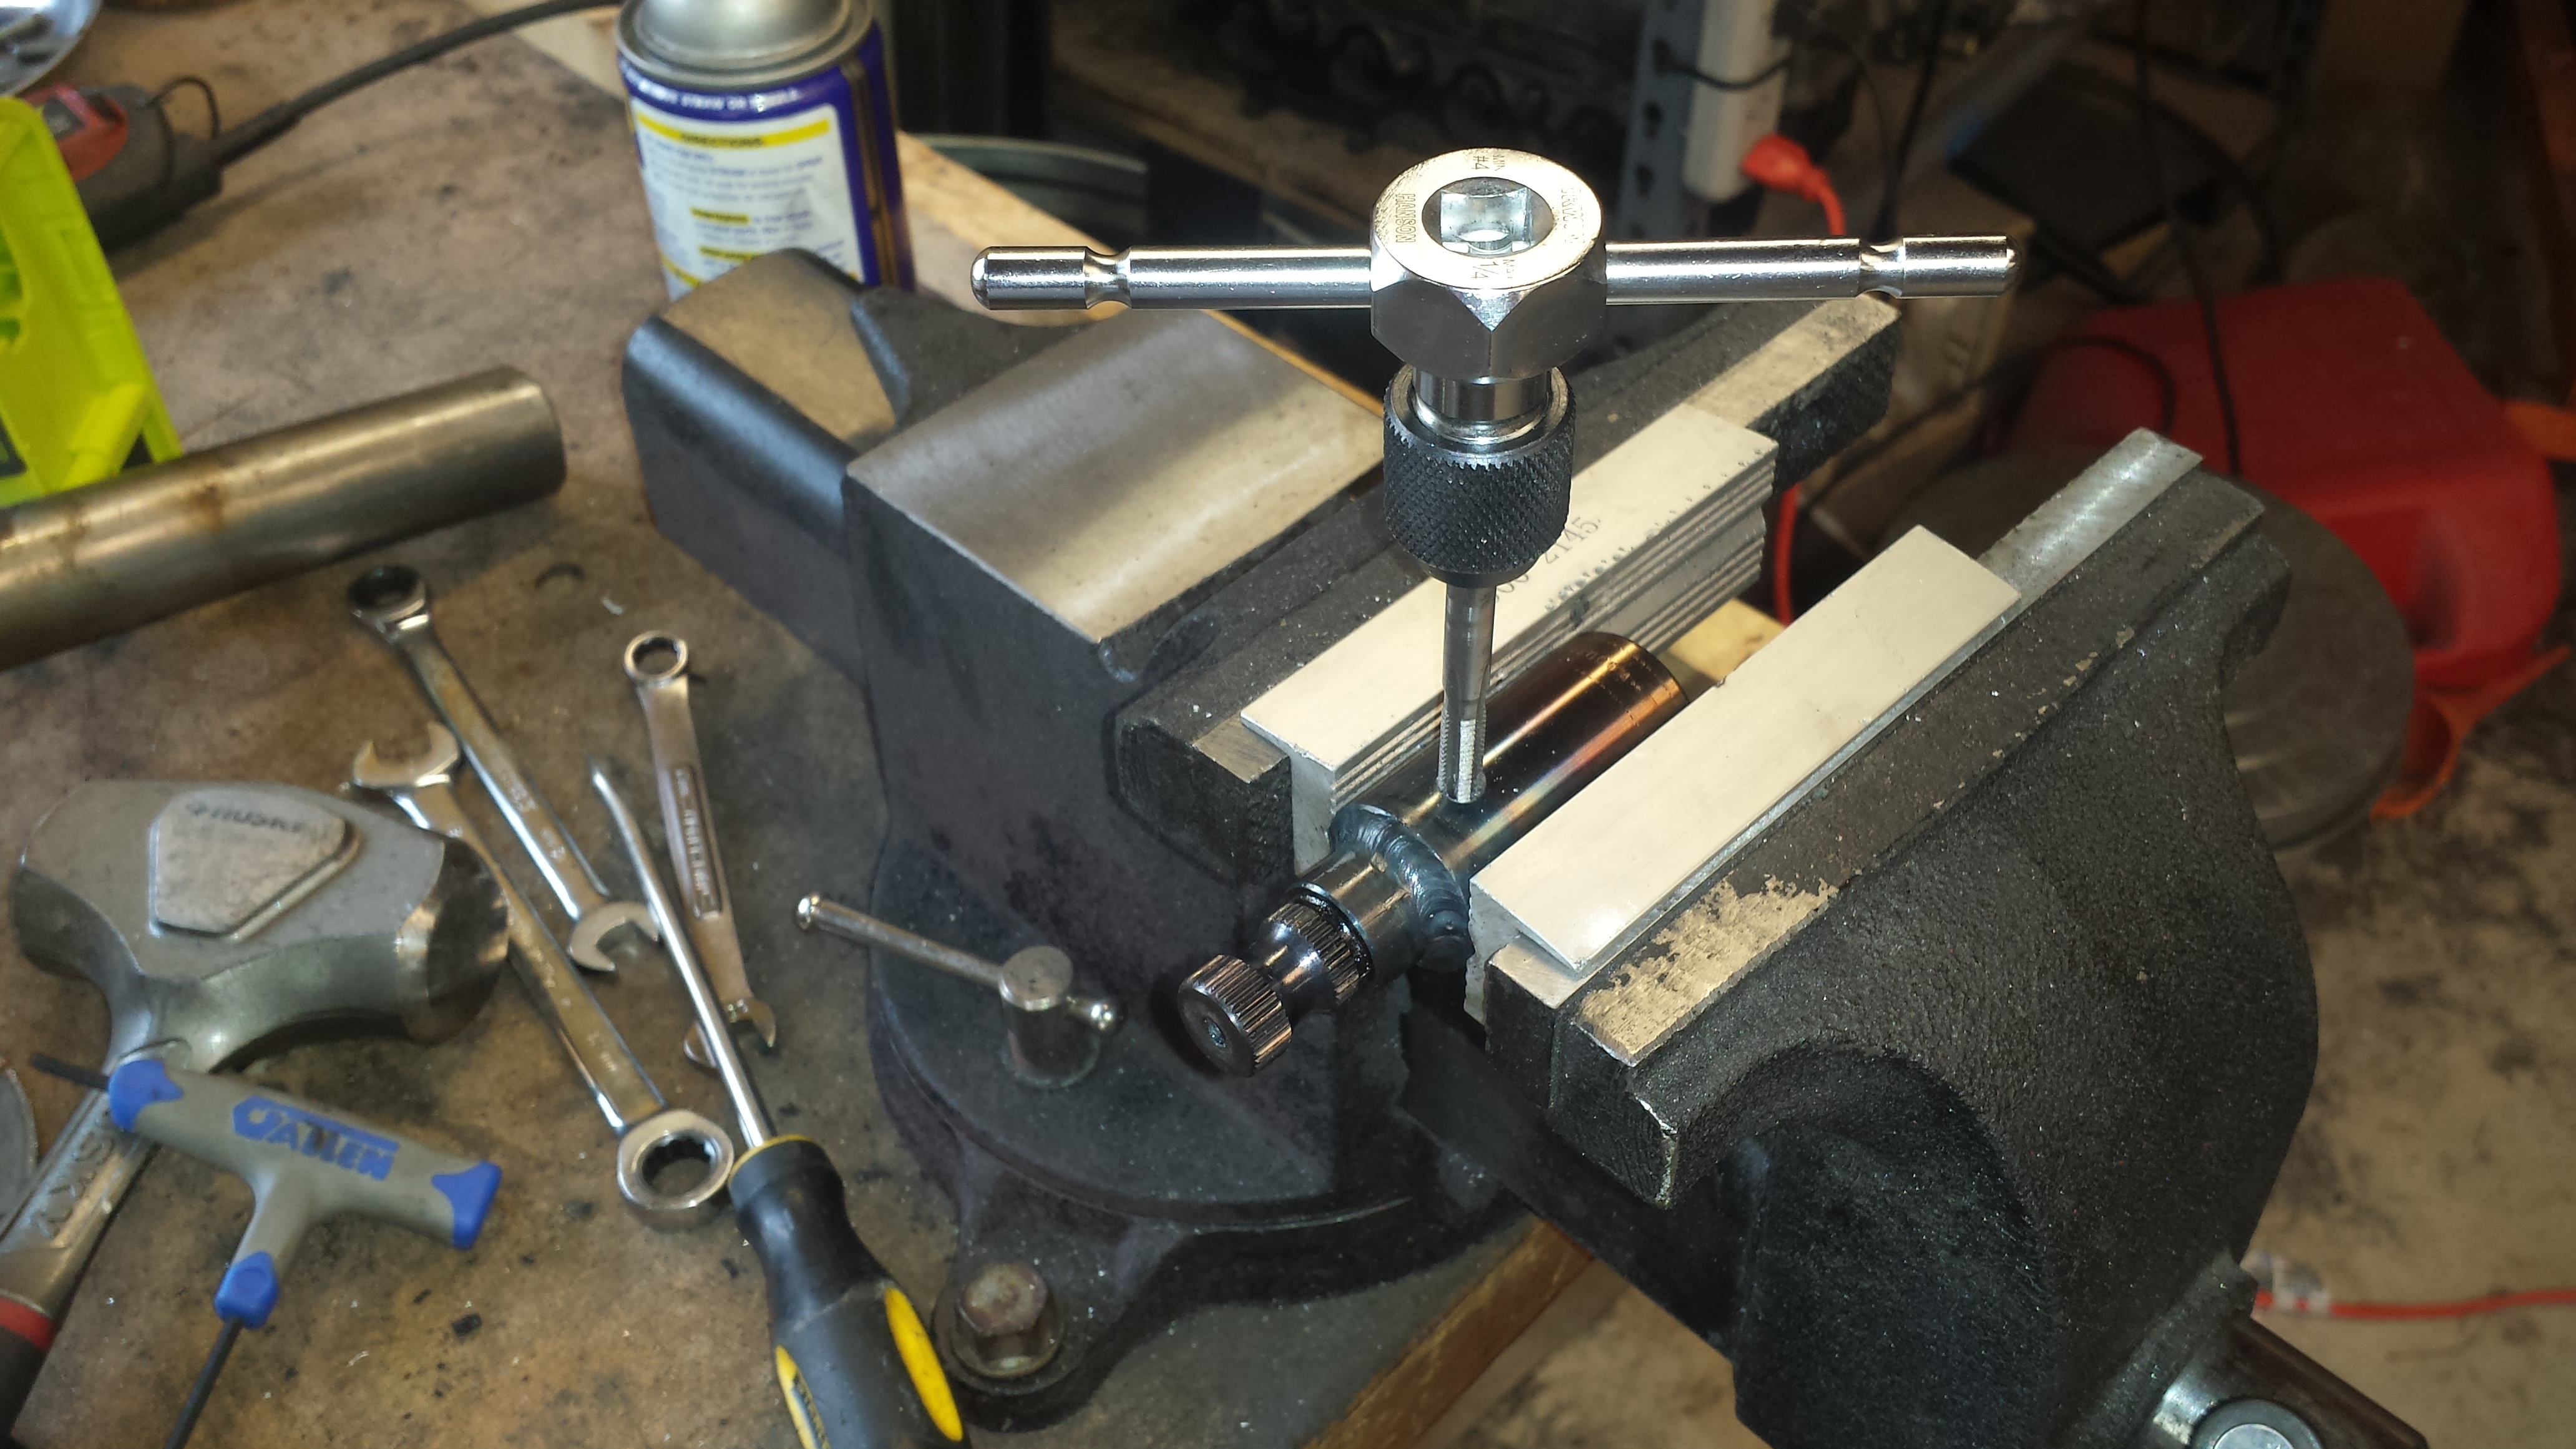
A little thread lock on the set-screws and the shank of the bolt for the internal threads, and a nylock nut as 1 final backup to the backup of the backup for the steering system.
Center drills are freakin' awesome for this stuff. I don't have a mill, but with the right tools and a little creativity, you can do a lot of stuff with a wobbly ol' drill press
The bolt is half solid, half threaded, so I drilled it through to the thread tap size, then counter-bored the hold for the non-threaded shank. My drill press has a crap *** depth gauge & stop, so a little measuring and tape makes a good marker for where to stop drilling.
Countersink to clean up the burr and make starting the tap easier.
Tapped it. The tap goes through 1 side of the collar and a portion of the splined shaft. This is one more way the bolt will take some strain off the weld and serve as a backup should something break.
A little thread lock on the set-screws and the shank of the bolt for the internal threads, and a nylock nut as 1 final backup to the backup of the backup for the steering system.
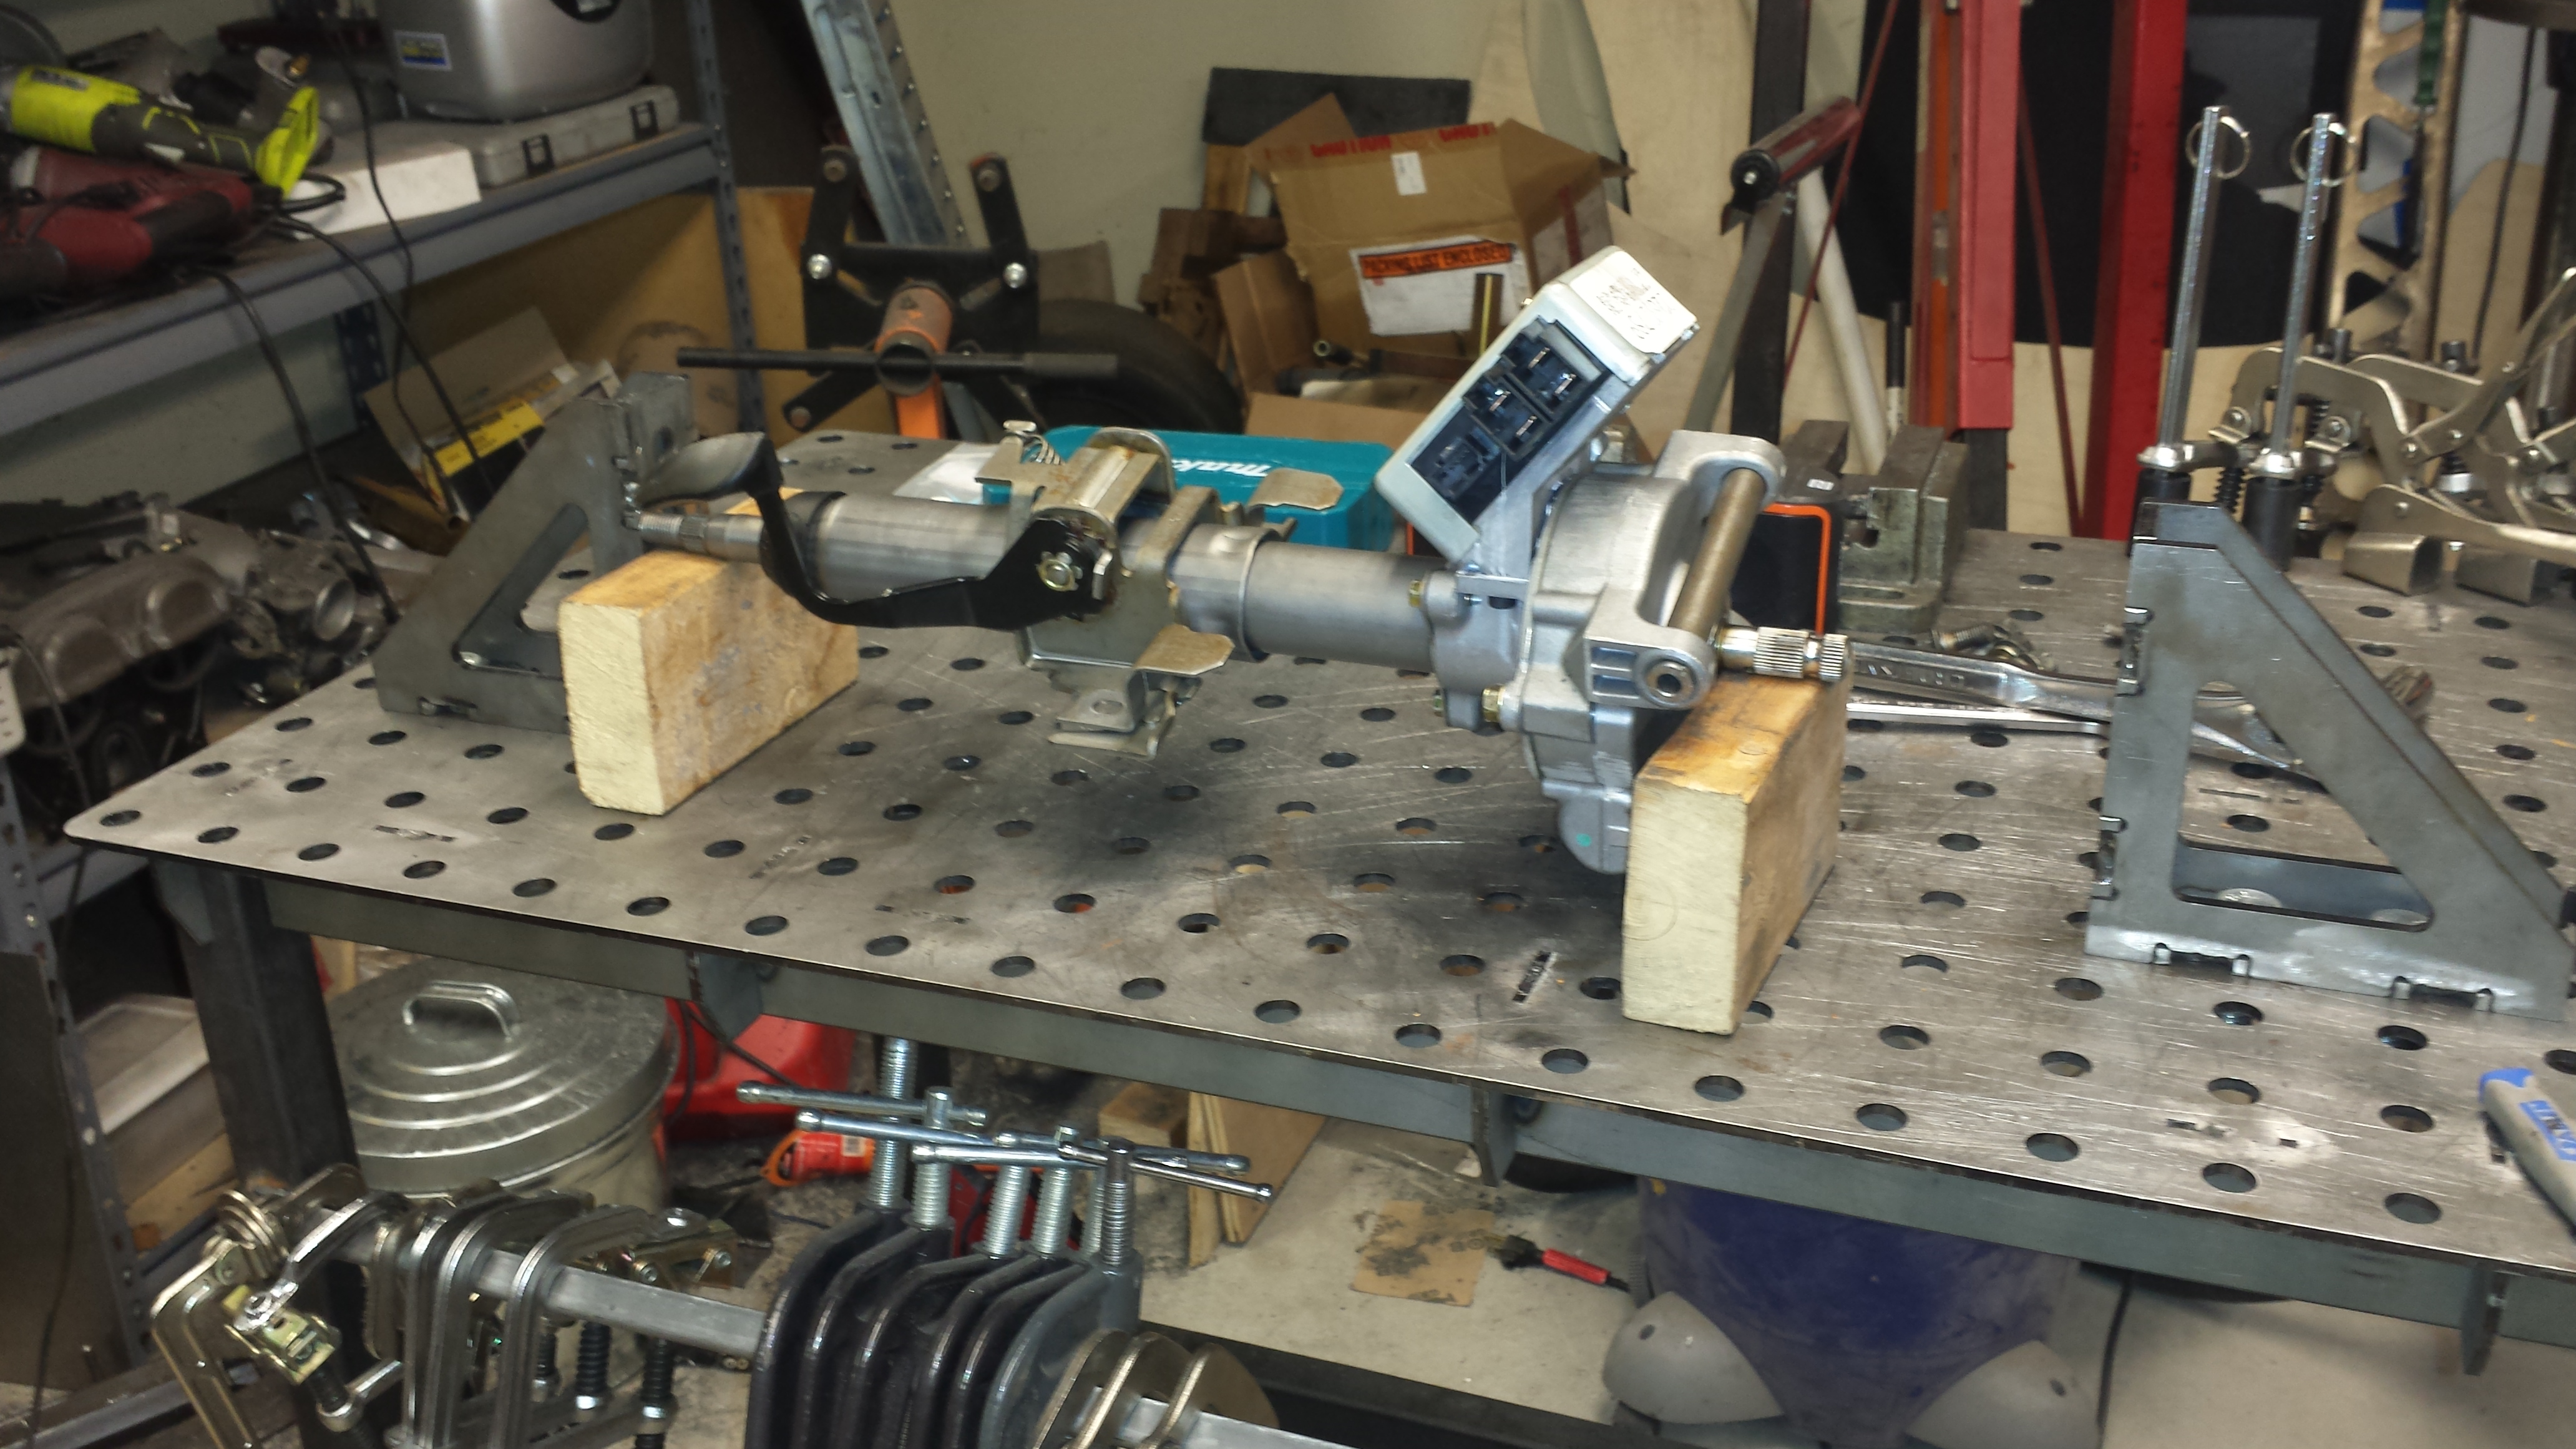
With the length finally set, I can start looking at the mounting arrangement. The only one that is basically "fixed" is the upper mount near the steering wheel. The bottom can end up wherever. It took some tweaking of the various parts to get everything to fit and line up properly in the space above the pedal box, but I think I've got it where I want it.
The motor isn't currently installed (because it's heavy and I was wrestling the whole thing in and out to work on it on the bench), but it'll be up top, pointed towards the trans tunnel.
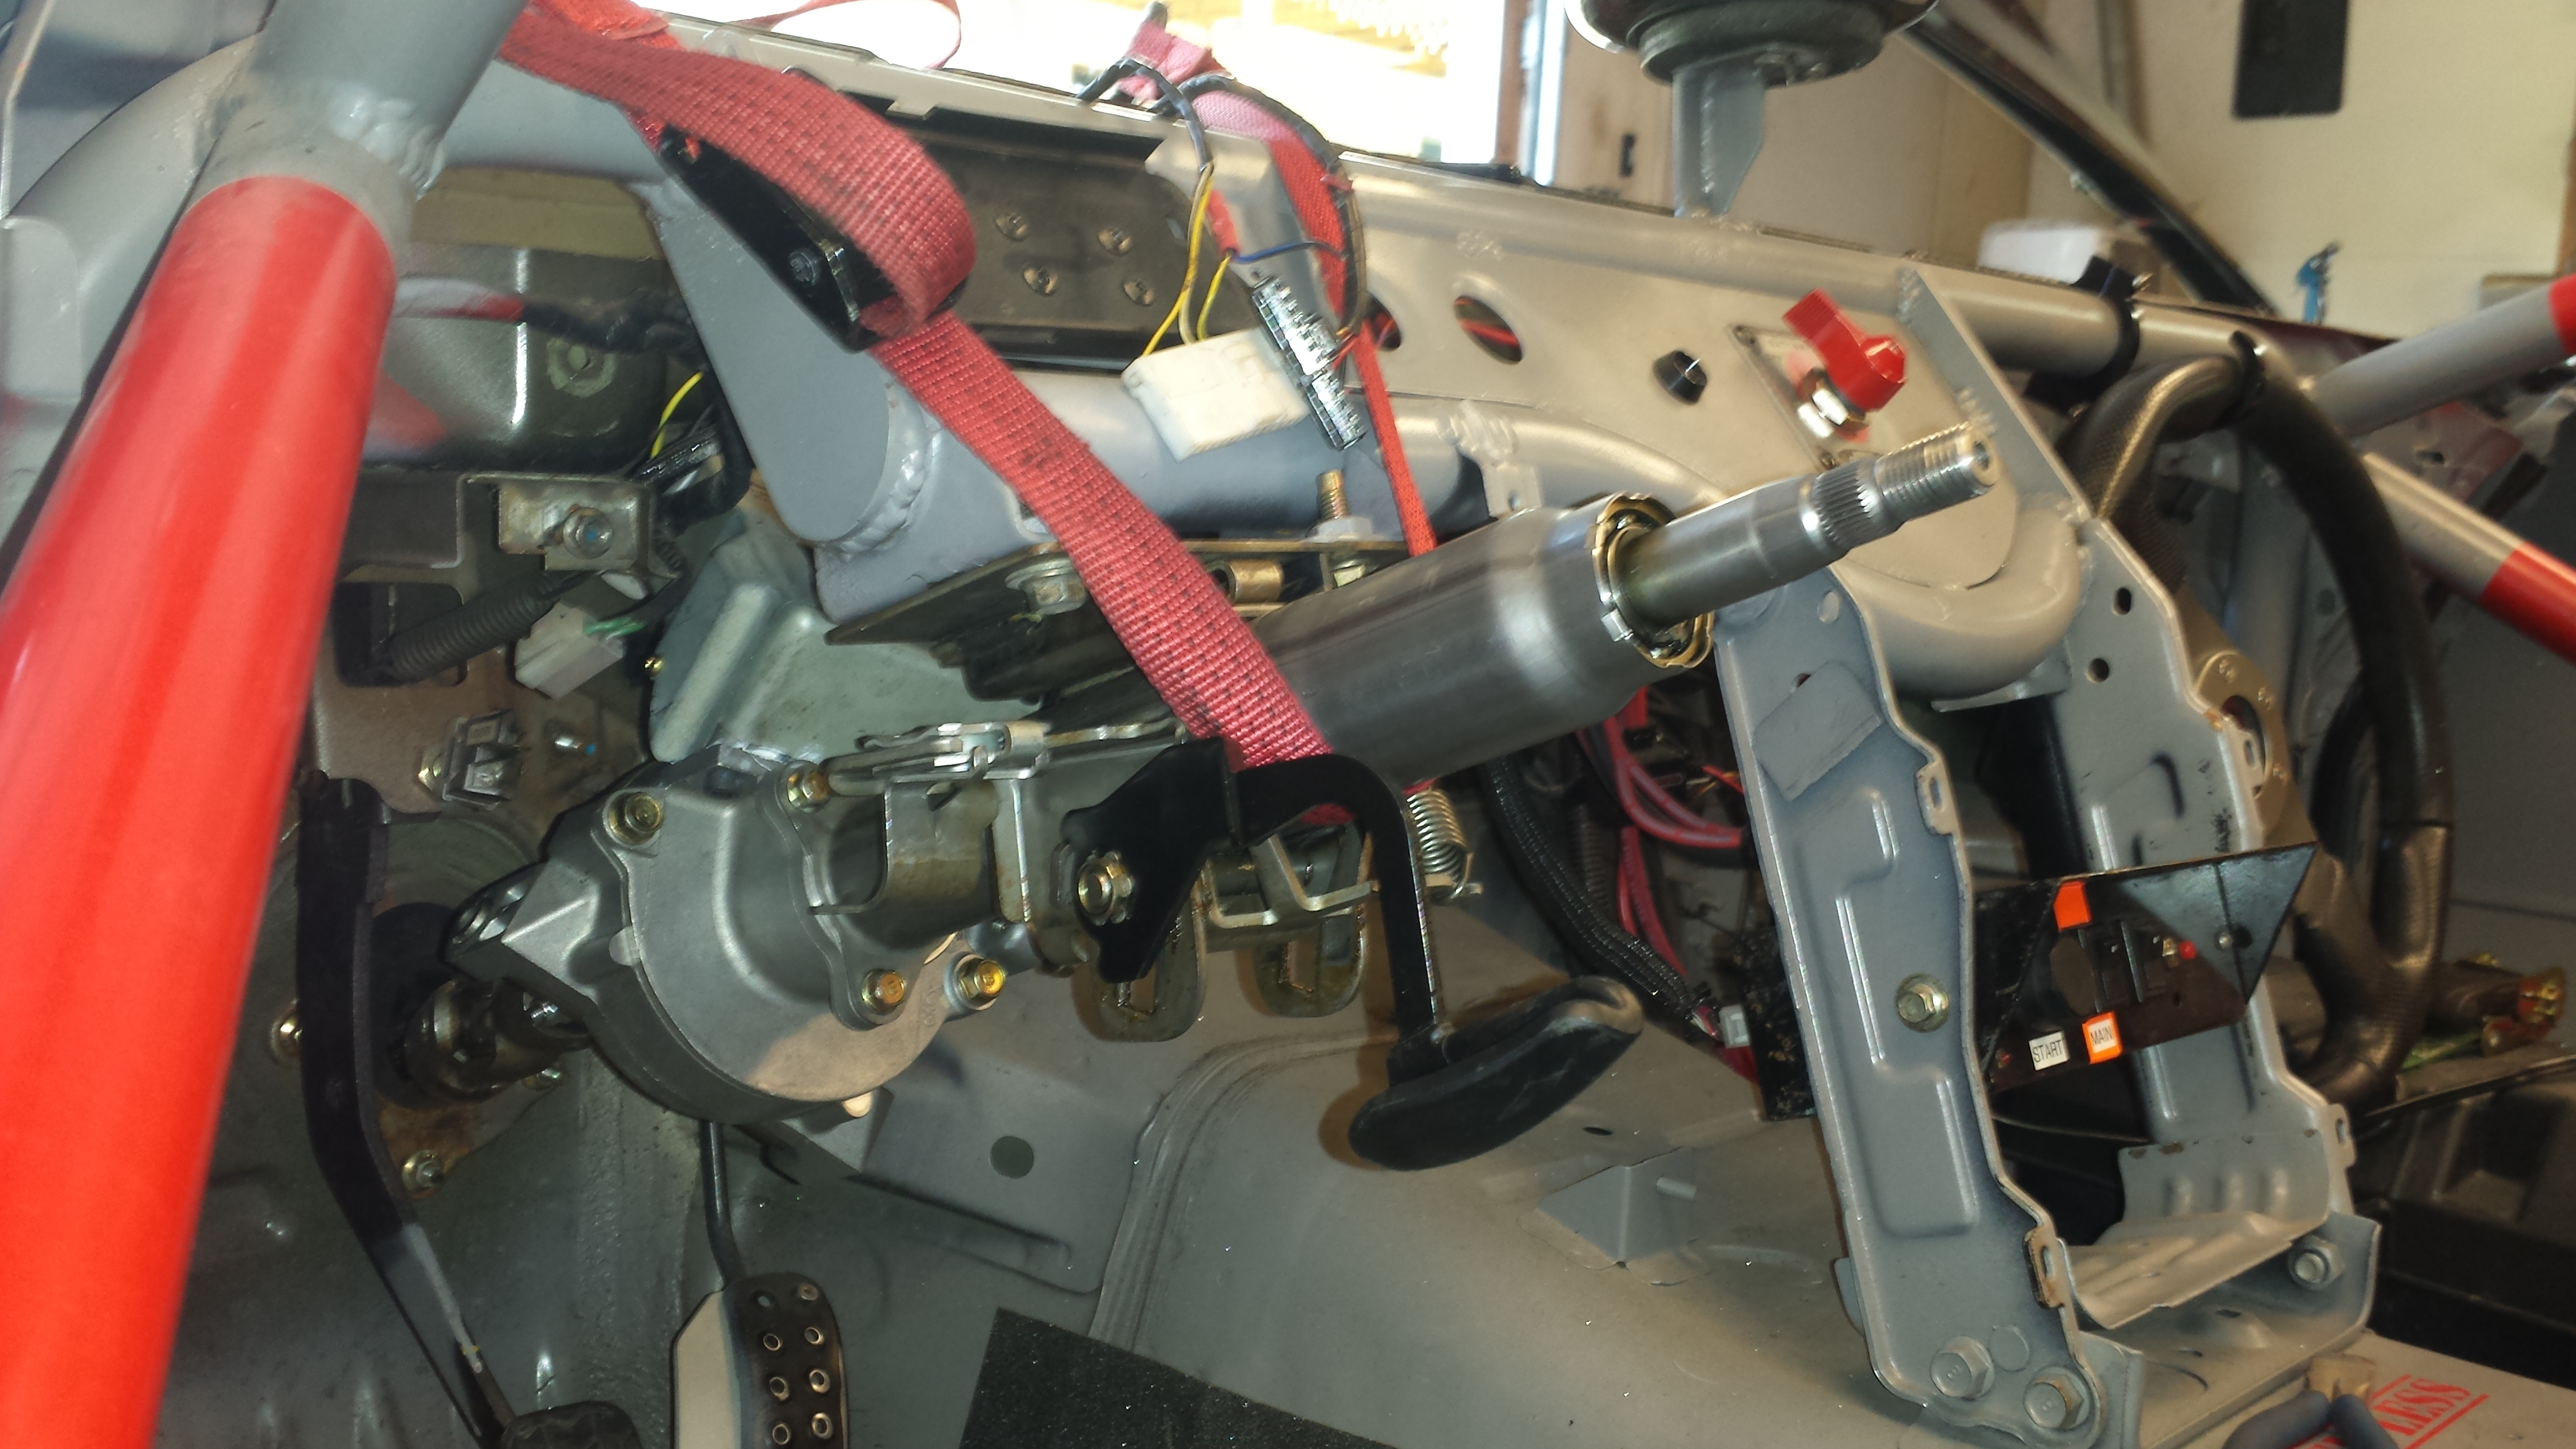
Incredibly, the Miata spline size for the steering wheel is the same as at least this GM... Seriously, I took the quick release off of the stock column, and slid it right on to this one. The only difference is the threaded shank is larger, but it's still a 21mm nut (like the Miata) so nothing really changes there.

The motor isn't currently installed (because it's heavy and I was wrestling the whole thing in and out to work on it on the bench), but it'll be up top, pointed towards the trans tunnel.
Incredibly, the Miata spline size for the steering wheel is the same as at least this GM... Seriously, I took the quick release off of the stock column, and slid it right on to this one. The only difference is the threaded shank is larger, but it's still a 21mm nut (like the Miata) so nothing really changes there.
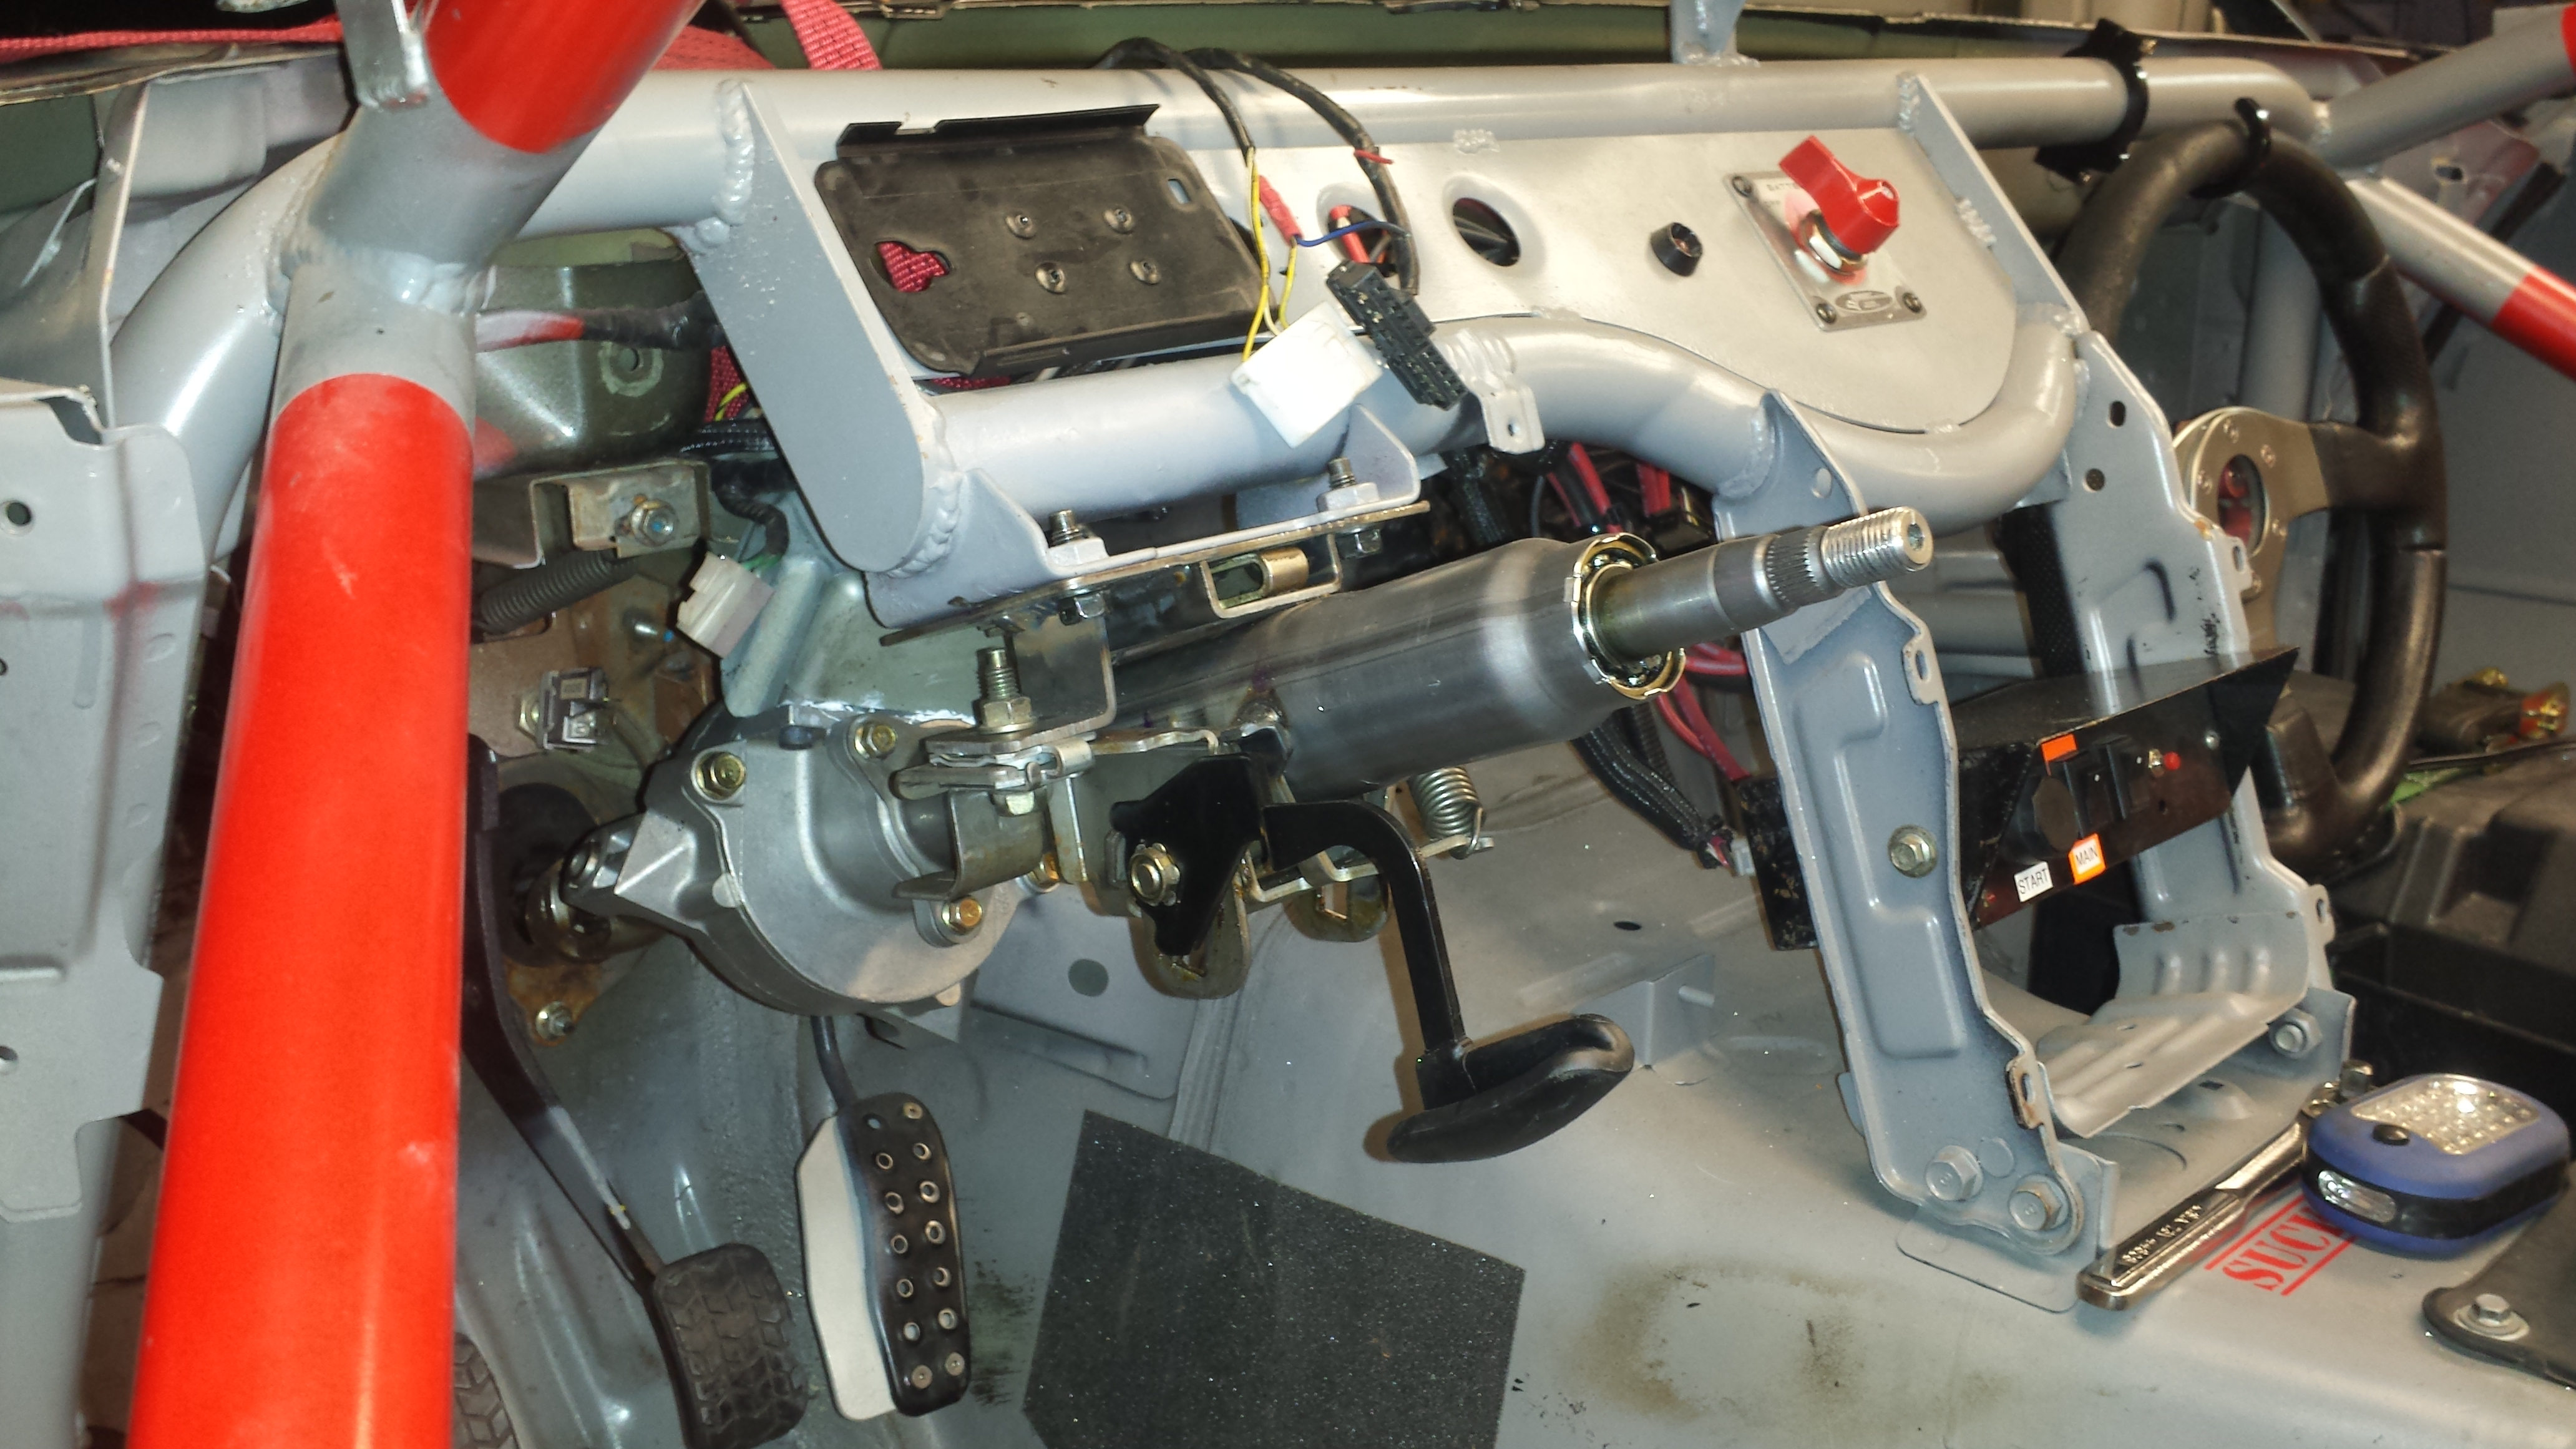
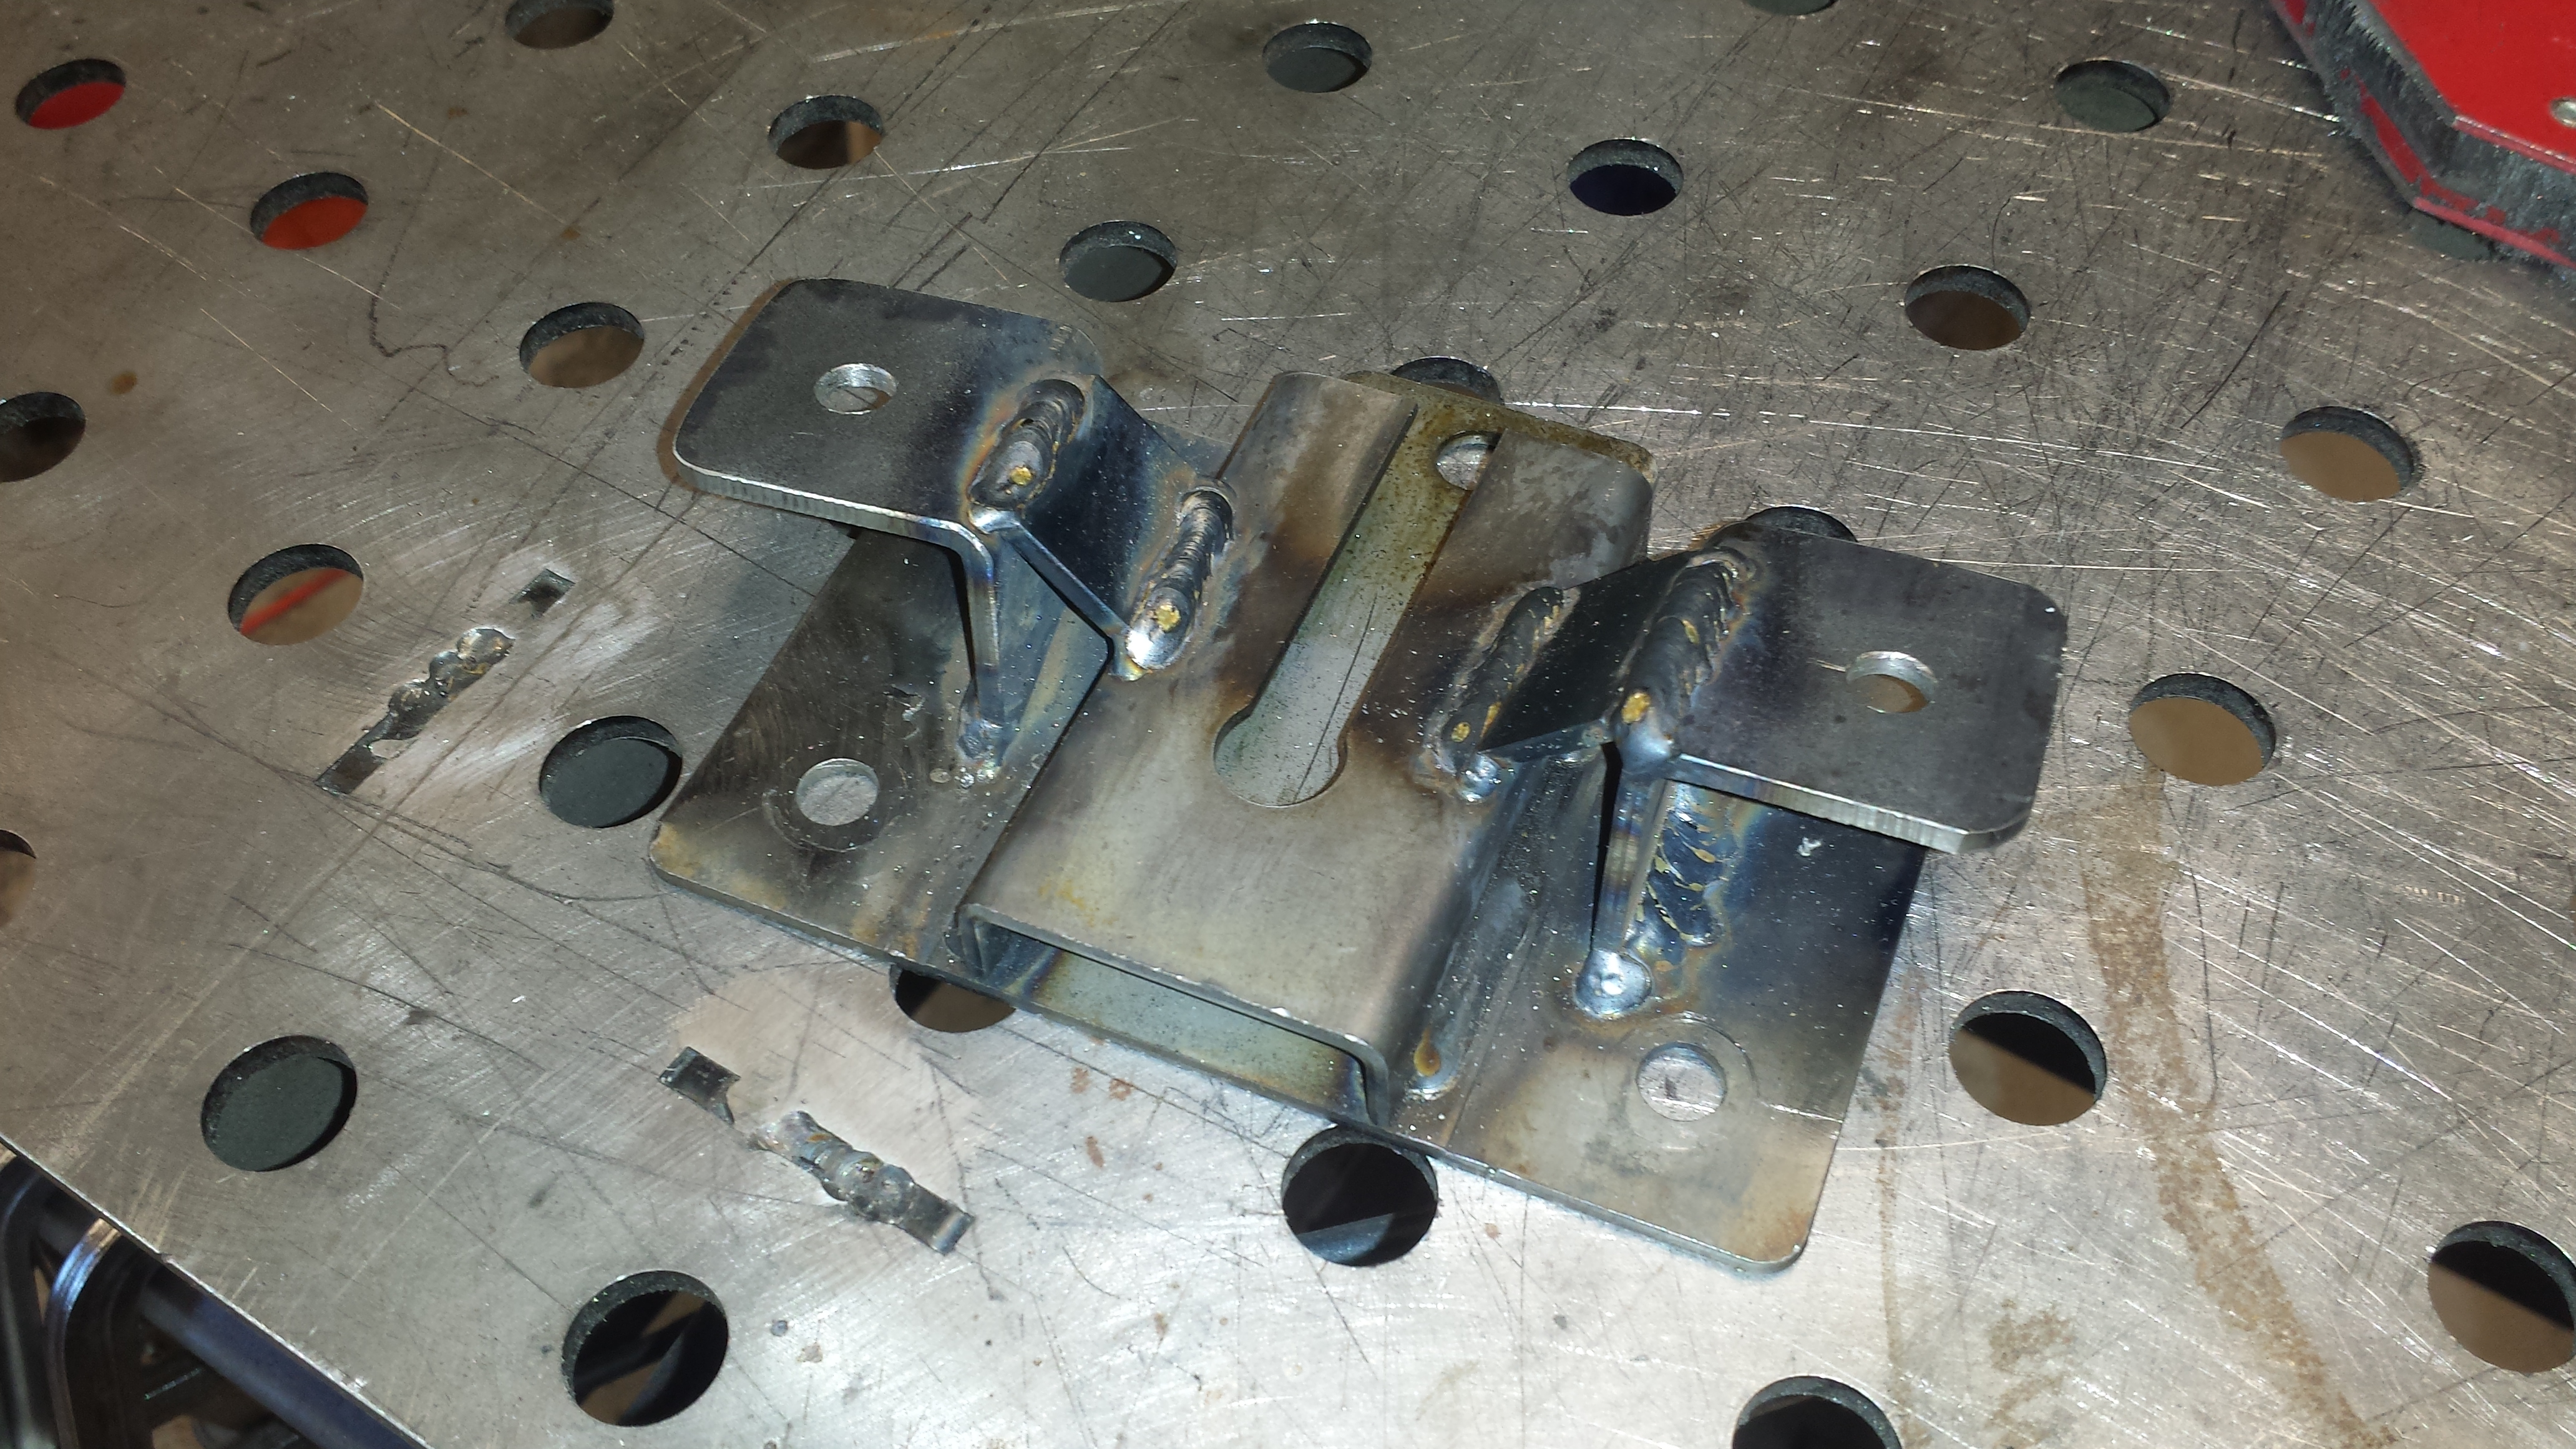
Finished up the upper mount. I added gussetts because the twisting load while being driven in anger, I imagine, will be a significant, and it makes me feel better.
This is obviously upside down. I used the stock plate for the Miata so it bolts up, and the brackets pick up the GM column's break-away mounts so the safety features built into the column work as designed should something go horribly wrong.
This is obviously upside down. I used the stock plate for the Miata so it bolts up, and the brackets pick up the GM column's break-away mounts so the safety features built into the column work as designed should something go horribly wrong.
Similar threads
- Replies
- 5
- Views
- 713