It isn't too hard to install an AC gauge. I went with the big autometer to fill the space. I had to wident the opening for it to fit but it looks sooooooo good. It's actually for sale because I got a Lotek pod and 3 Defi gauges (hence the sign. I just never got around to posting in the FS section). +1 on using copper tube instead of that nylon s*** they give you. If anyone is interested in this gauge with the modified AC vent included (so you don't have to wreck yours), shoot me a PM.

You are using an out of date browser. It may not display this or other websites correctly.
You should upgrade or use an alternative browser.
You should upgrade or use an alternative browser.
Boost Gauge Install
- Thread starter onedeath
- Start date
RevLimitLaunch
Member
- :
- 06 MS6/03.5 MSP
were you able to route the lines and what not from just taking out, say, the center console? i don't see it being too hard to re-do i guess if that's the case. and you used a 60mm (2 5/8) gauge (guess cuz you said the big autometer).
RevLimitLaunch said:were you able to route the lines and what not from just taking out, say, the center console? i don't see it being too hard to re-do i guess if that's the case. and you used a 60mm (2 5/8) gauge (guess cuz you said the big autometer).
Yeah, all I had to do was run the line to the back of the AC vents. You just take the radio out and then you can remove the triple ac vent set-up to work on it. You will have to ruin your stock ac vents to get the big gauge (2 5/8) to fit so that is why I'm selling mine as a package (I'm buying the new AC vents). I think with a small gauge you just have to remove the parts and then make an adapter plate. That method can be reversed.
RevLimitLaunch
Member
- :
- 06 MS6/03.5 MSP
yeah i might just have to make something to fit the 52mm gauge i have. when it comes to the center console i can get it out no problem. but how to get the radio out of there with ease? and the a/c vent cluster too. thanks
RevLimitLaunch said:yeah i might just have to make something to fit the 52mm gauge i have. when it comes to the center console i can get it out no problem. but how to get the radio out of there with ease? and the a/c vent cluster too. thanks
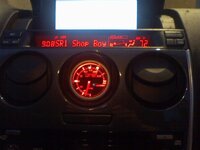
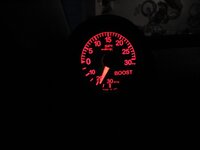
i just installed my boost gauge yesterday. wasn't to hard. i put a 52mm prosport in the center vent. i just took the doors off the vent and glued it so it wouldn't rotate then put the gauge in the housing and put them in and secured them. i will post pictures when its all hooked up. i still have to run the vacuum line and wire the sensor to the gauge. i have one pic i took with my phone but its dark with it lit up.
Attachments
SuperStretch18
Member
- :
- '07 CX-7 Sport, Black on Black; '04 Mazda3s
Just a quick question; are there any issues with using the heat or A/C with a vent installed unit? I'm thinking blasting the gauge with heat in the winter or A/C condensation in the summer might be an issue (more this one since I'm in FL). I have a prosport gauge on the way and will need to finalize a location, so thoughts are appreciated. Aside from this one concern, the vent installs are tight...
SuperStretch18 said:Just a quick question; are there any issues with using the heat or A/C with a vent installed unit? I'm thinking blasting the gauge with heat in the winter or A/C condensation in the summer might be an issue (more this one since I'm in FL). I have a prosport gauge on the way and will need to finalize a location, so thoughts are appreciated. Aside from this one concern, the vent installs are tight...
i put foam in where the air would come out so it blocks that vent.
SuperStretch18
Member
- :
- '07 CX-7 Sport, Black on Black; '04 Mazda3s
LOL!kurfgator said:I used good old duct tape over the center opening. How do you like that? I used duct tape, ON A DUCT!!
dont have the time unfortunately to rip everythin off to do it thorough...bova80 said:yes please do a write up
and if im not mistaken... someone from the six forum already tackled this..
im willin to answer any questions you may have though...
fordracing89
Member
- :
- 06MS6
temp gauge install
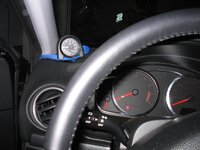
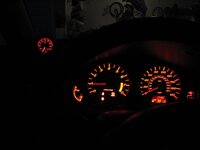
Anyway had like two paragraphs. this is temporary til I take mine to mold one that will sit atop that vent still allowing air to pass through. the svo has the boost gauge on the pillar the boost gauge was actually stolen from my SVO for this temporary fix.. yes the blue doesn't match just some high heat tubing I had while working on the SVO. couldn't find the black.. Anyway doesn't look too bad the way it is. People look in the car to see wtf it is.
Anyway had like two paragraphs. this is temporary til I take mine to mold one that will sit atop that vent still allowing air to pass through. the svo has the boost gauge on the pillar the boost gauge was actually stolen from my SVO for this temporary fix.. yes the blue doesn't match just some high heat tubing I had while working on the SVO. couldn't find the black.. Anyway doesn't look too bad the way it is. People look in the car to see wtf it is.
Attachments
Can't find the article on 6tech and beleve we still aren't alowed to link to the sister 6 site. Basicly searech for headunit/speaker installs and you should find pictures to what I say below. I'm not anywhere near my car (deployed) so I can't verify if the info is still accurate. Current mods can edit my topic if need be(I don't mind)CUB60 said:Anyone know how to take the center console off???
1.) Assuming you already pulled the negative battery cable, put parking brake on and car in neutral (for automatic vehicles, the key will not come out till you put it back in park).
2.) Open cup holders and pull up on both ends. The ends I refer to is the one from cup holder to arm rest and from cup holder to shifter bezel.
3.) 2 philips screws secure the shifter bezel to the floor iirc. Remove the 2 screws. Unscrew shifter knob before trying to remove shifter bezel. (automatic users, you have 2 leds on the bottom lighting up prndm+- so rotate them and set them aside. Careful as the red covers may come loose and fall into the cracks and crevices fingers can't fit.)
4.) After you rotated the bezel up from the cupholder end twards the ashtray end it should come off. Remember automatic vechicles should already be in neutral by this time. Disconnect the cigarette lighter.
5.) 2 philips screws 4 tabs and A HIDEDN 10MM BOLT hold the a/c and headunit piece in. Hidden 10MM bolt can me accesed by removing the glove box. 2 tabs that prevent the glovebox from fully opening can be pulled inward to release it. Then disconnect the bungee cord. (while you are already there check your a/c filter) when you look left you can find the 10 mm bolt. Use 3 inch extention to reach it.
6.)After the 10mm bolt removal and 2 philips screws you have 4 tabs ( 2 driver and 2 pass side) holding you back. Use a flathead to remove them but be carefull to not warp the plastic or scratch the console. Before pulling, if you have manual a/c pull the knobs off.
7.) The display unit also has 2 philips screws to remove.
Most people leave the radio screws and bezel screws out for quick access in the event the had issues with wiring.
Last edited:
Similar threads
- Replies
- 0
- Views
- 832
