- :
- 92 & 16 Meyatas
you could always dump some octane booster in too!

mspeedP5 said:Okay, so the shop that I'm taking my car to has lots of tuning experience with different applications, however, this will be the first MPI that they have worked with. Is there anything that I can provide them in advance to help with the tuning of my car? I have already forwarded the software and the illustrated wiring instructions.
I will also post a link to this question in the tuning/engine management thread.

Padre said:Nope, no problems here. And they use huge amounts of salt & sand on the roads here.
looks like crap..(pissed)mspeedP5 said:Well tomorrow is the big day! I'm driving the 2 1/2 hrs to ZENSPORT to get the car there for 9:00 am. I can hardly wait!
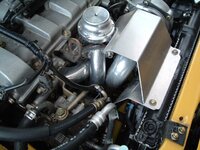
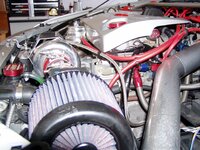
I do have another question though, regarding the heat shield. I thought I read somewhere that it is actually a two-piece shield. Is this correct? If so, does anyone have a pic of the lower section? I have the top piece.
Thanks
Padre said:You can see the lower shield here in this picture.
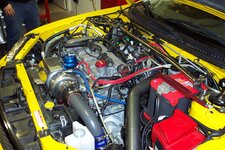
mspeedP5 said:(omg) What a blast! The kit is in! It is 95% tuned but totally driveable and I'll take it back to ZENSPORT shortly for final tweaking. But in the meantime...
WOOOOT! WHAT A DIFFERENCE! I LIKE IT!
(2thumbs)
nice ......real nice...we should have a MAM sleeper turbo meet!! haha..mspeedP5 said:The finished product... (thumb) Another satisfied MAM customer (indirectly).